SSM-CRUD整合视频教程:Spring、SpringMVC、MyBatis、bootstrap、pagehelper、JSR303后端校验
1、项目说明
1.1、业务说明
- SSM:SpringMVC+Spring+MyBatis
- CRUD:
- Create(创建)
- Retrieve(查询)
- Update(更新)
- Delete(删除)
- 总结:通过SSM框架来完成一个CRUD的操作。
1.2、功能点
- 1、分页
- 2、数据校验
- jquery前端校验+JSR303后端校验
- 3、ajax
- 4、Rest风格的URI;使用HTTP协议请求方式的动词,来表示对资源的操作(GET(查询),POST(新增),PUT(修改),DELETE(删除))
1.3、技术点
- 基础框架-ssm(SpringMVC+Spring+MyBatis)
- 数据库-MySQL
- 前端框架-bootstrap快速搭建简洁美观的界面
- 项目的依赖管理-Maven
- 分页-pagehelper
- 逆向工程-MyBatis Generator
2、基础环境搭建
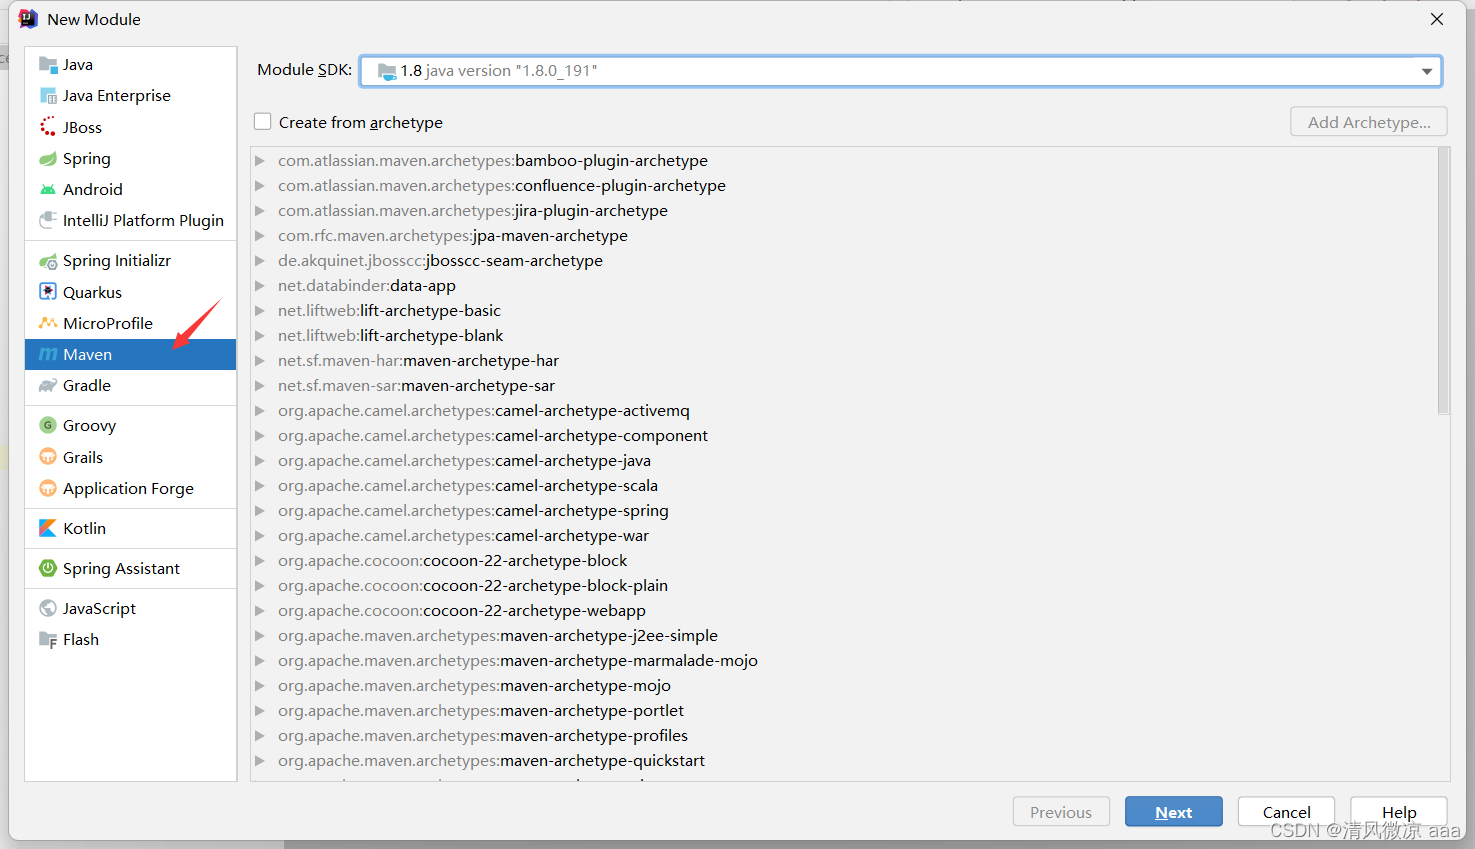
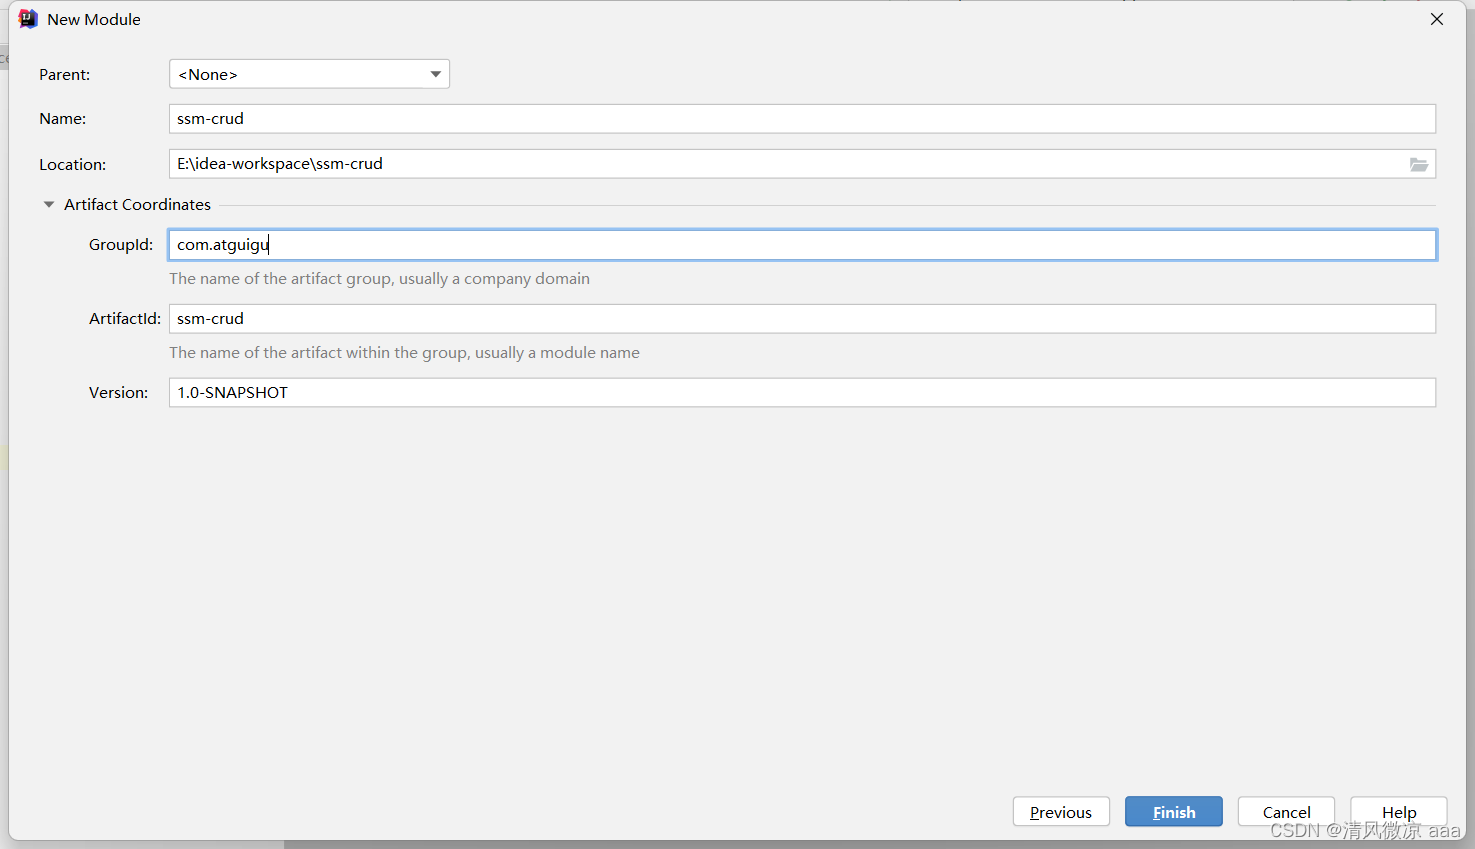
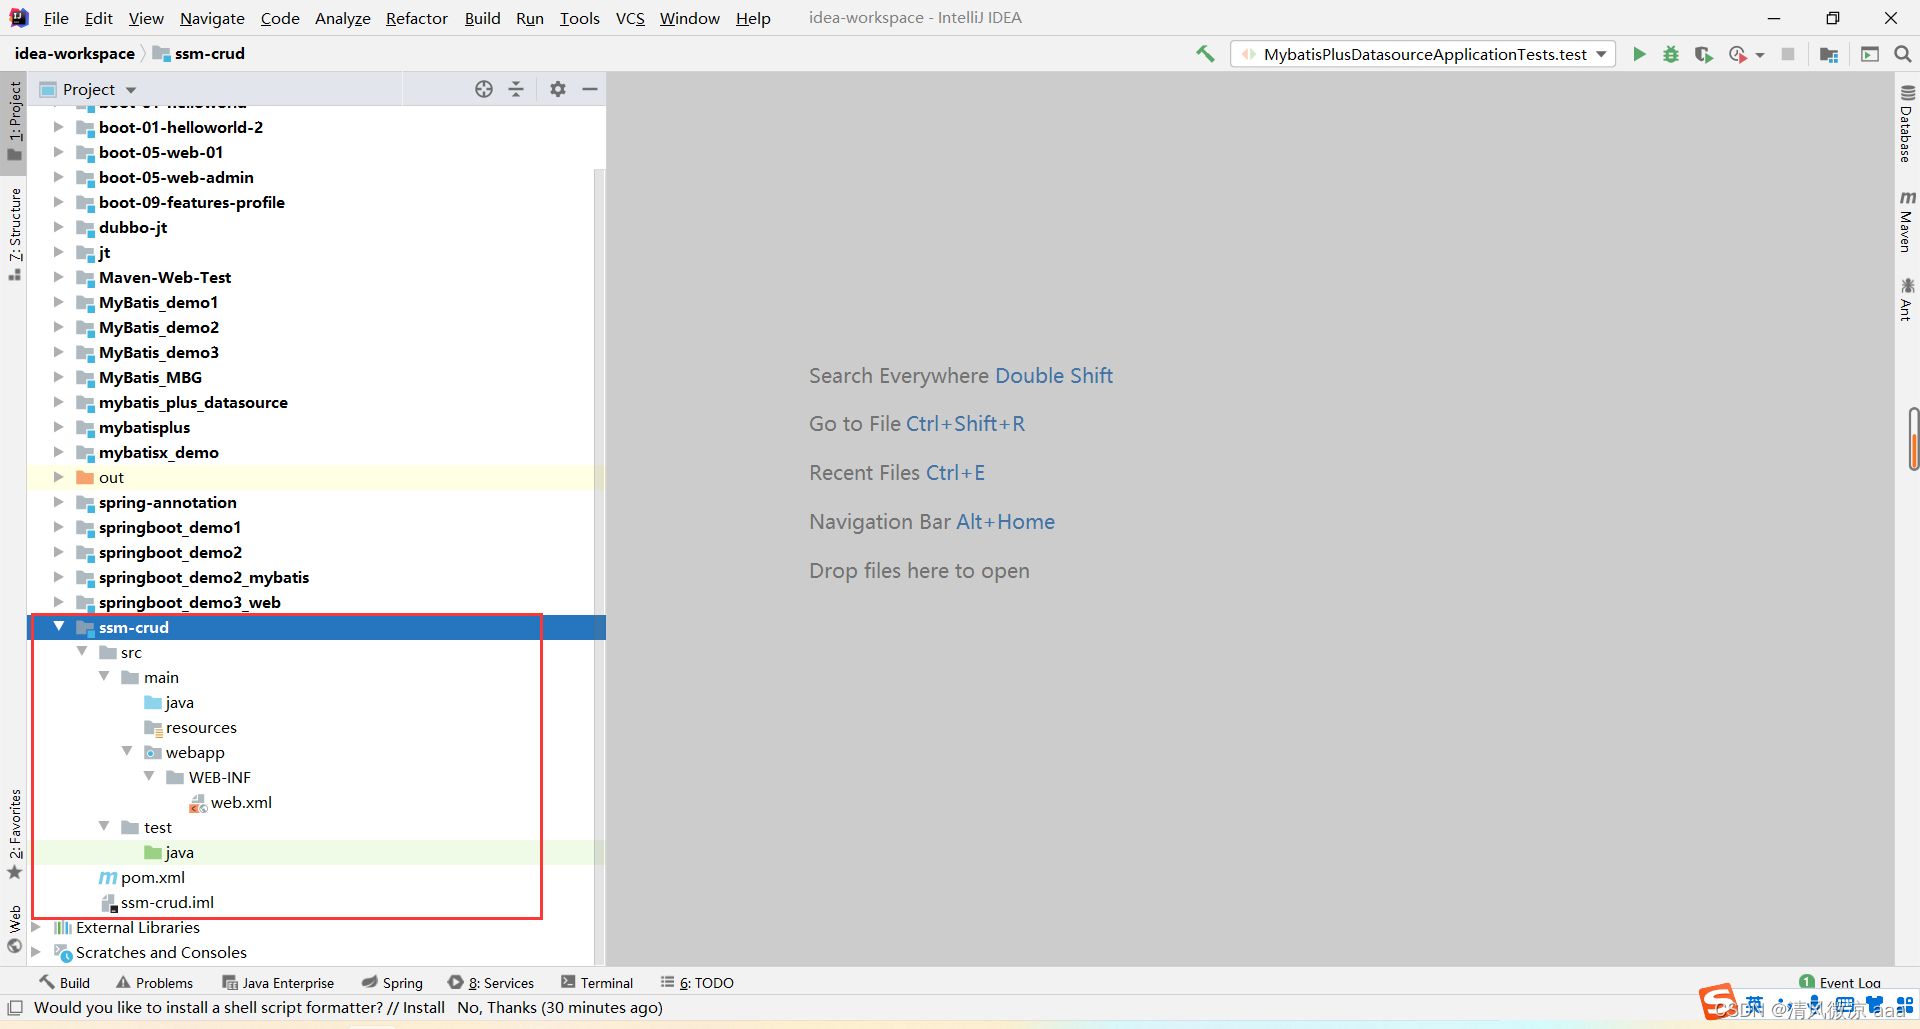
2.1、创建一个maven工程
2.2、引入项目依赖的jar包
• spring
• springmvc
• mybatis
• 数据库连接池,驱动包
• 其它(jstl,servlet-api,junit)
4.0.0 com.atguigu ssm-crud 1.0-SNAPSHOT war org.springframework spring-webmvc 4.3.7.RELEASE org.springframework spring-jdbc 4.3.7.RELEASE org.springframework spring-aspects 4.3.7.RELEASE org.mybatis mybatis 3.4.2 org.mybatis mybatis-spring 1.3.1 c3p0 c3p0 0.9.1 mysql mysql-connector-java 5.1.41 jstl jstl 1.2 javax.servlet javax.servlet-api 3.0.1 provided junit junit 4.12 2.3、引入bootstrap前端框架
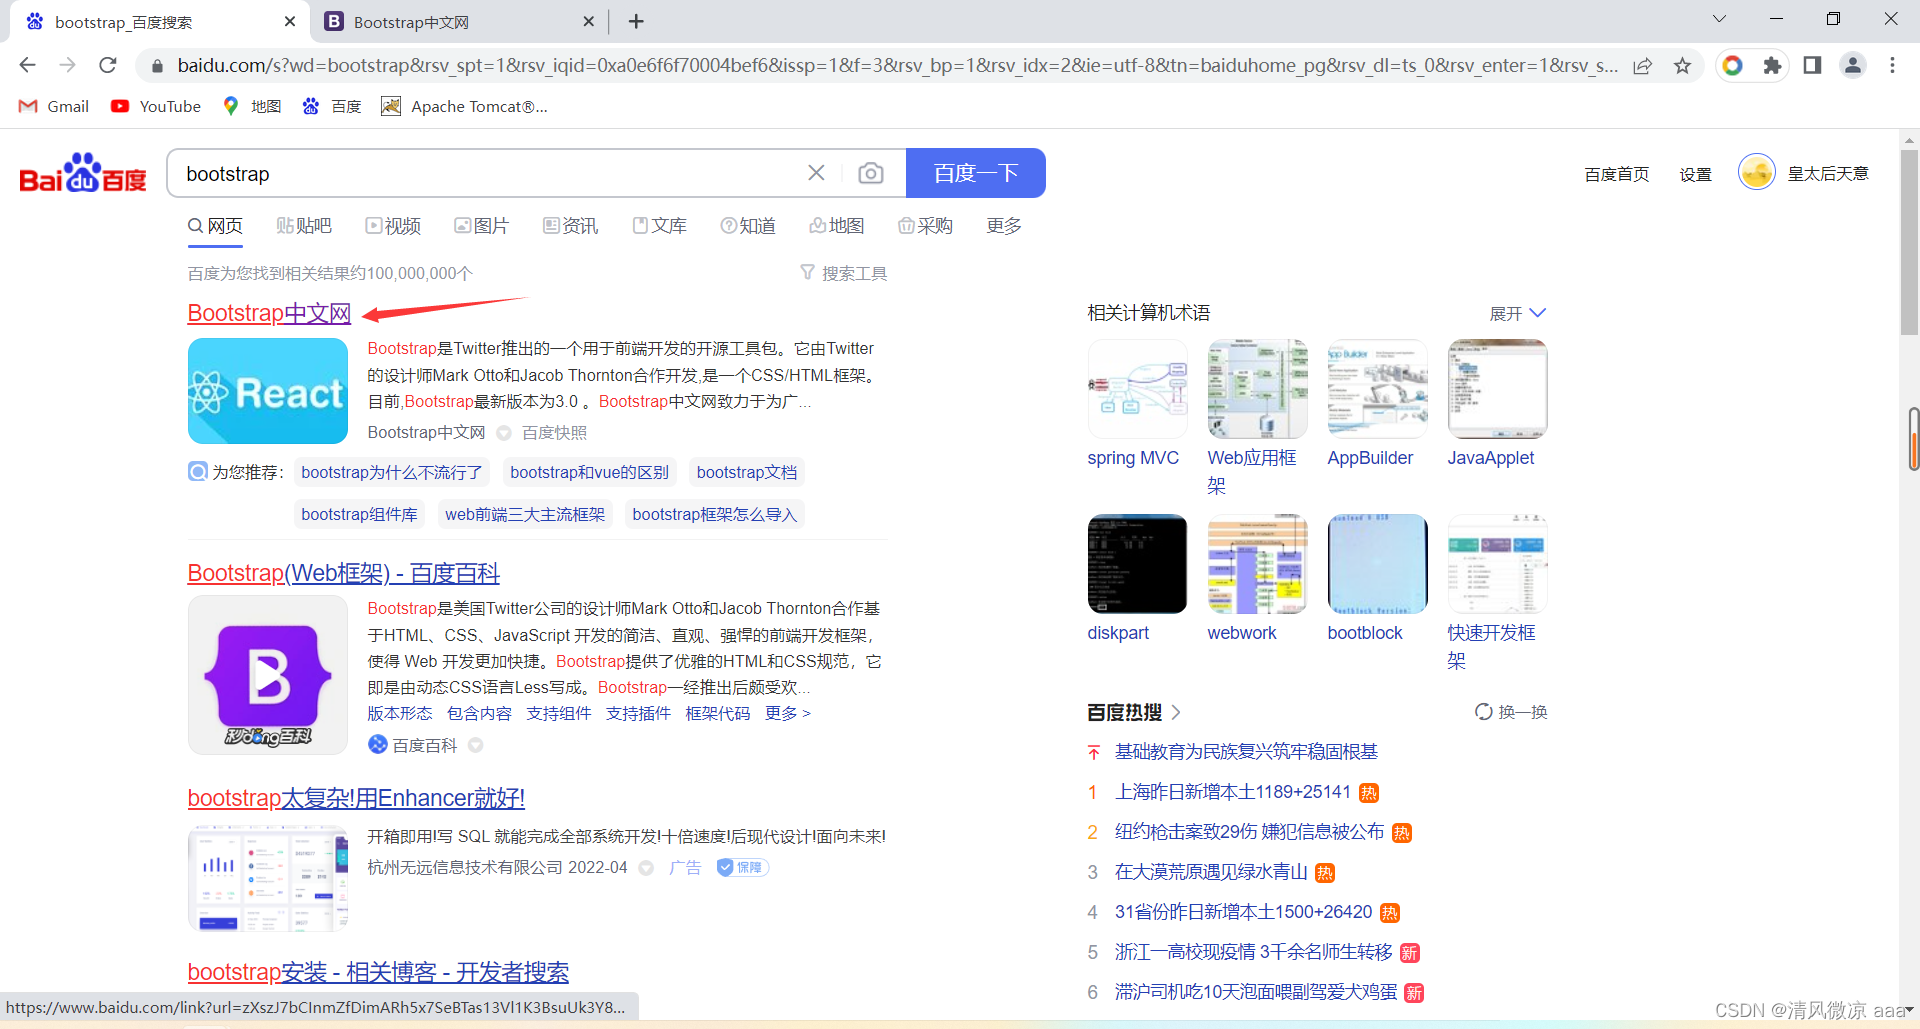
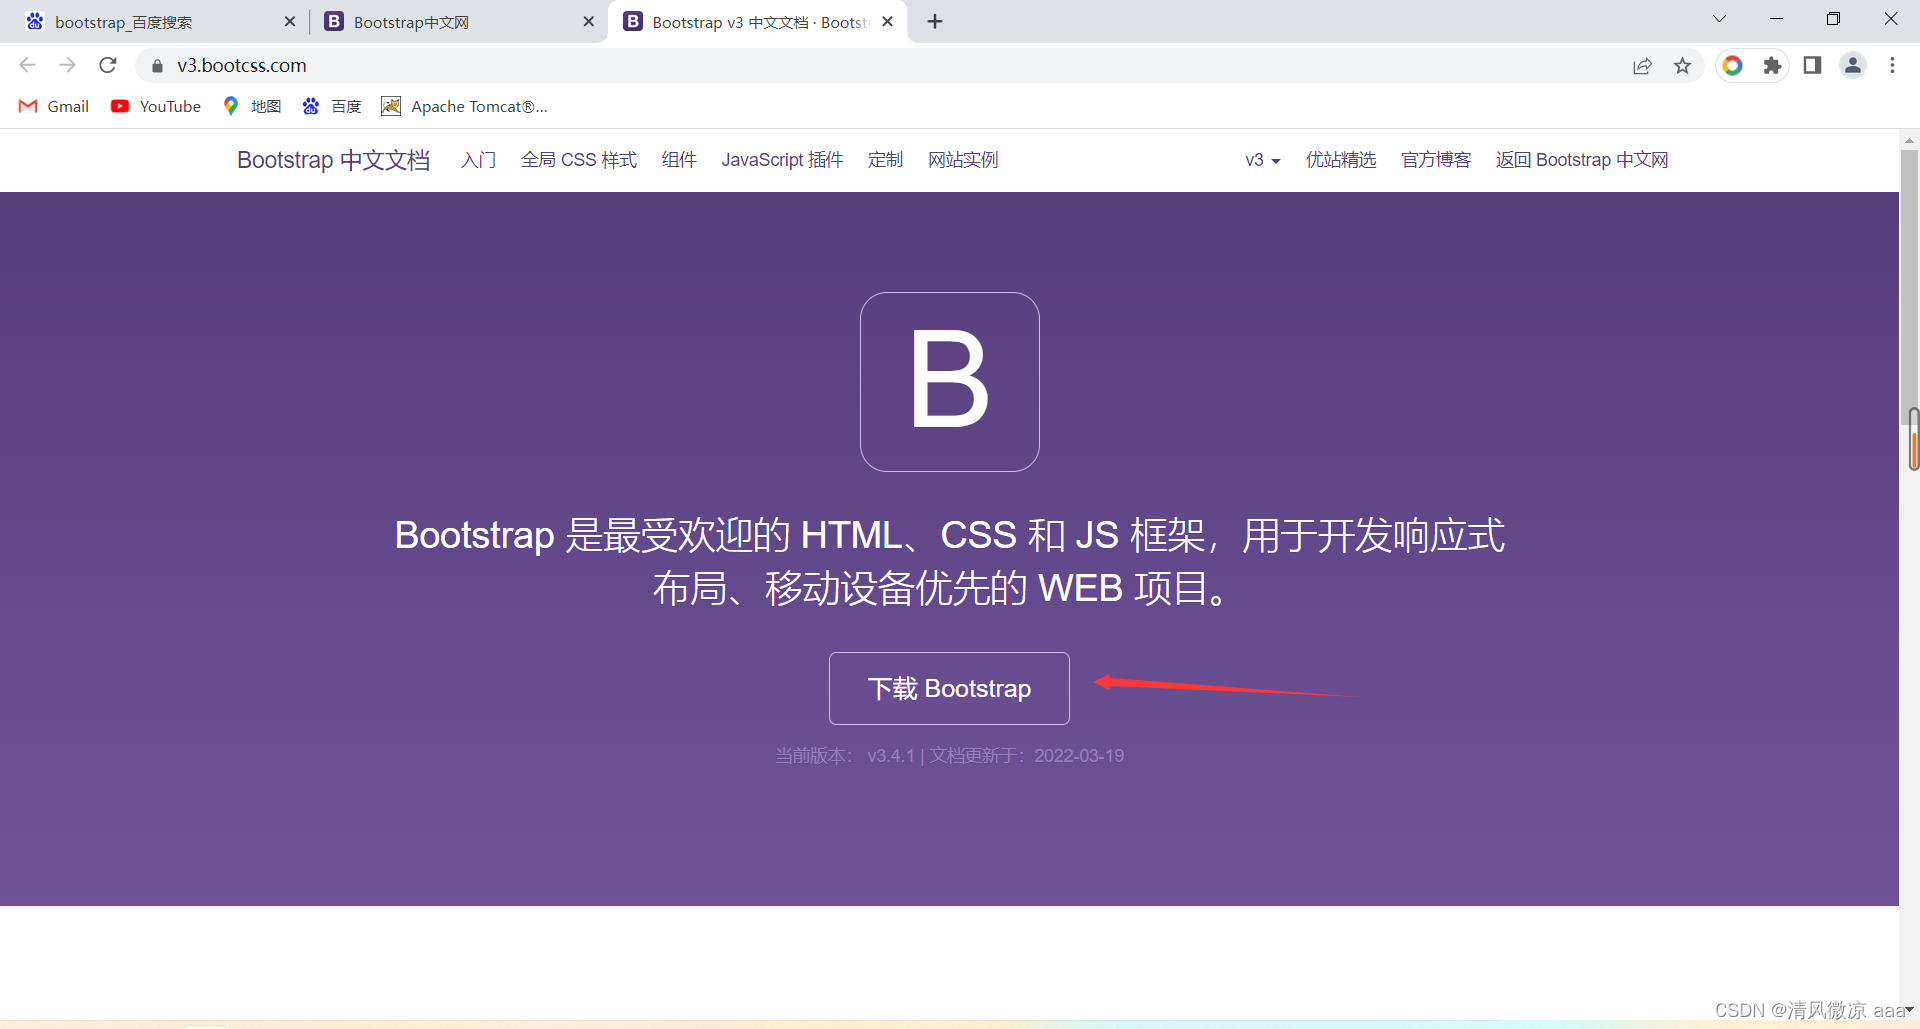
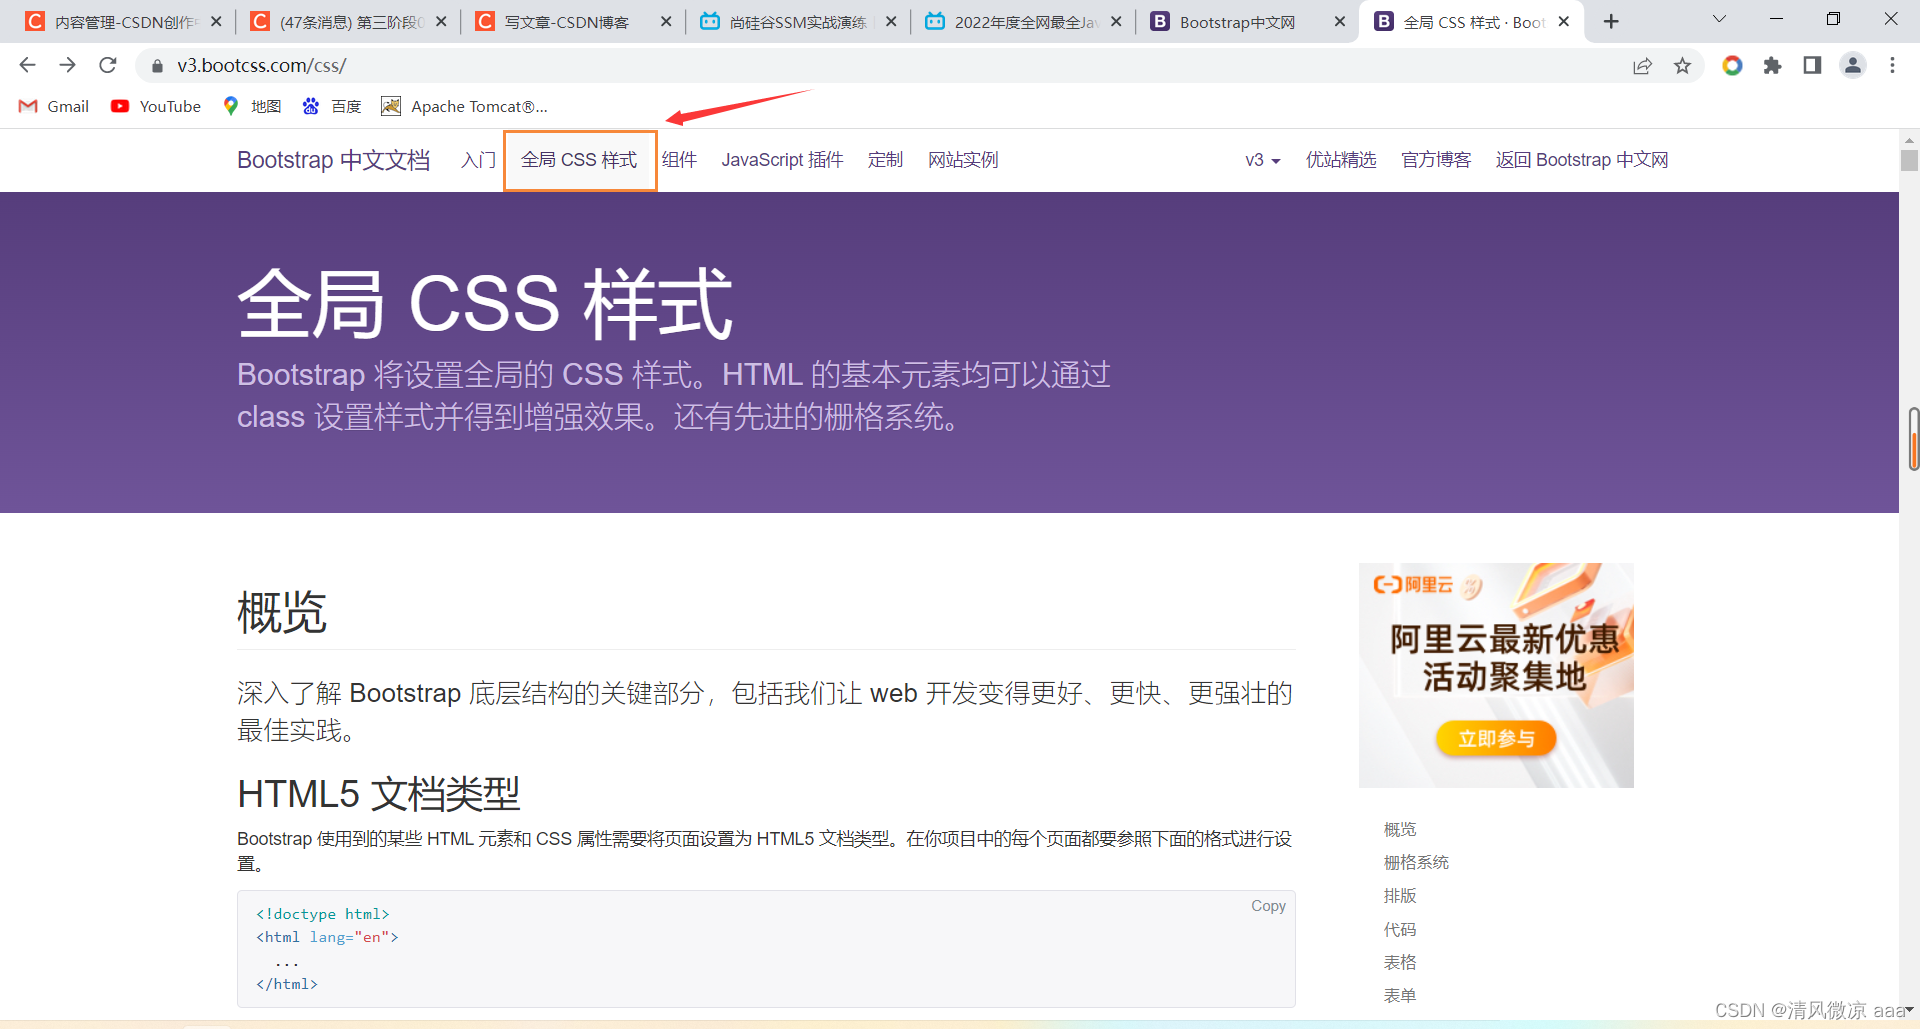
2.3.1、官网下载


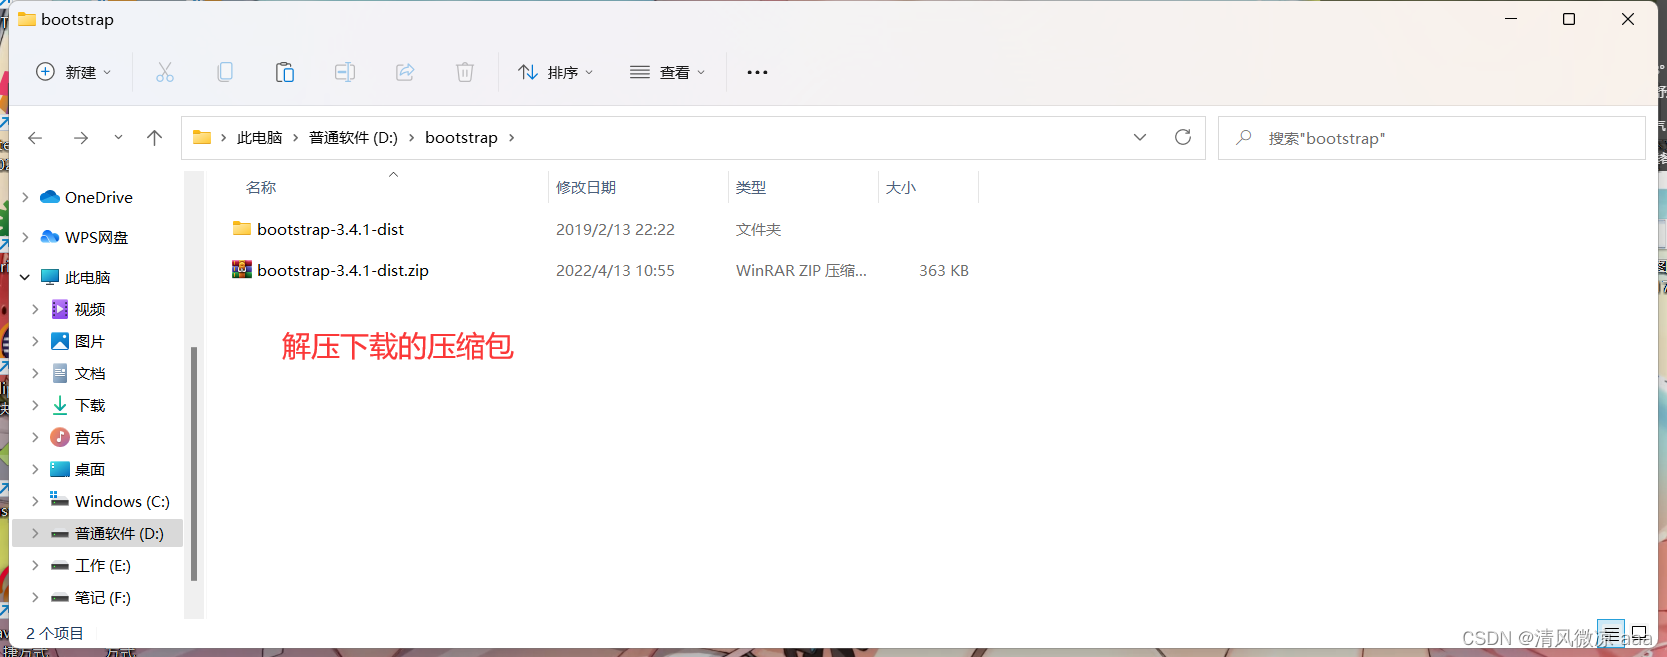
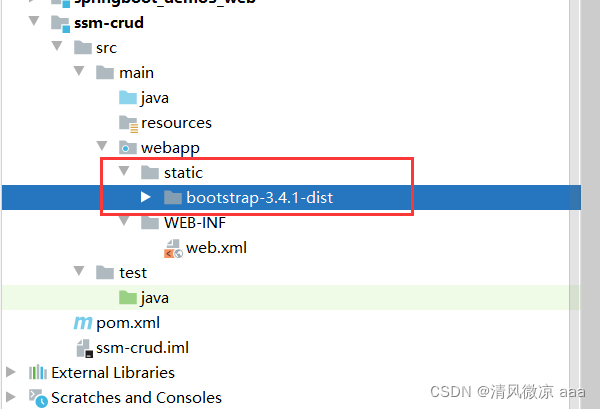
2.3.2、引入boostrap
步骤1:创建static目录保存解压后的boostrap文件。
步骤2:需要在创建好的index.jsp文件中引入:Bootstrap 核心 CSS 文件、Bootstrap 核心 JavaScript 文件 。
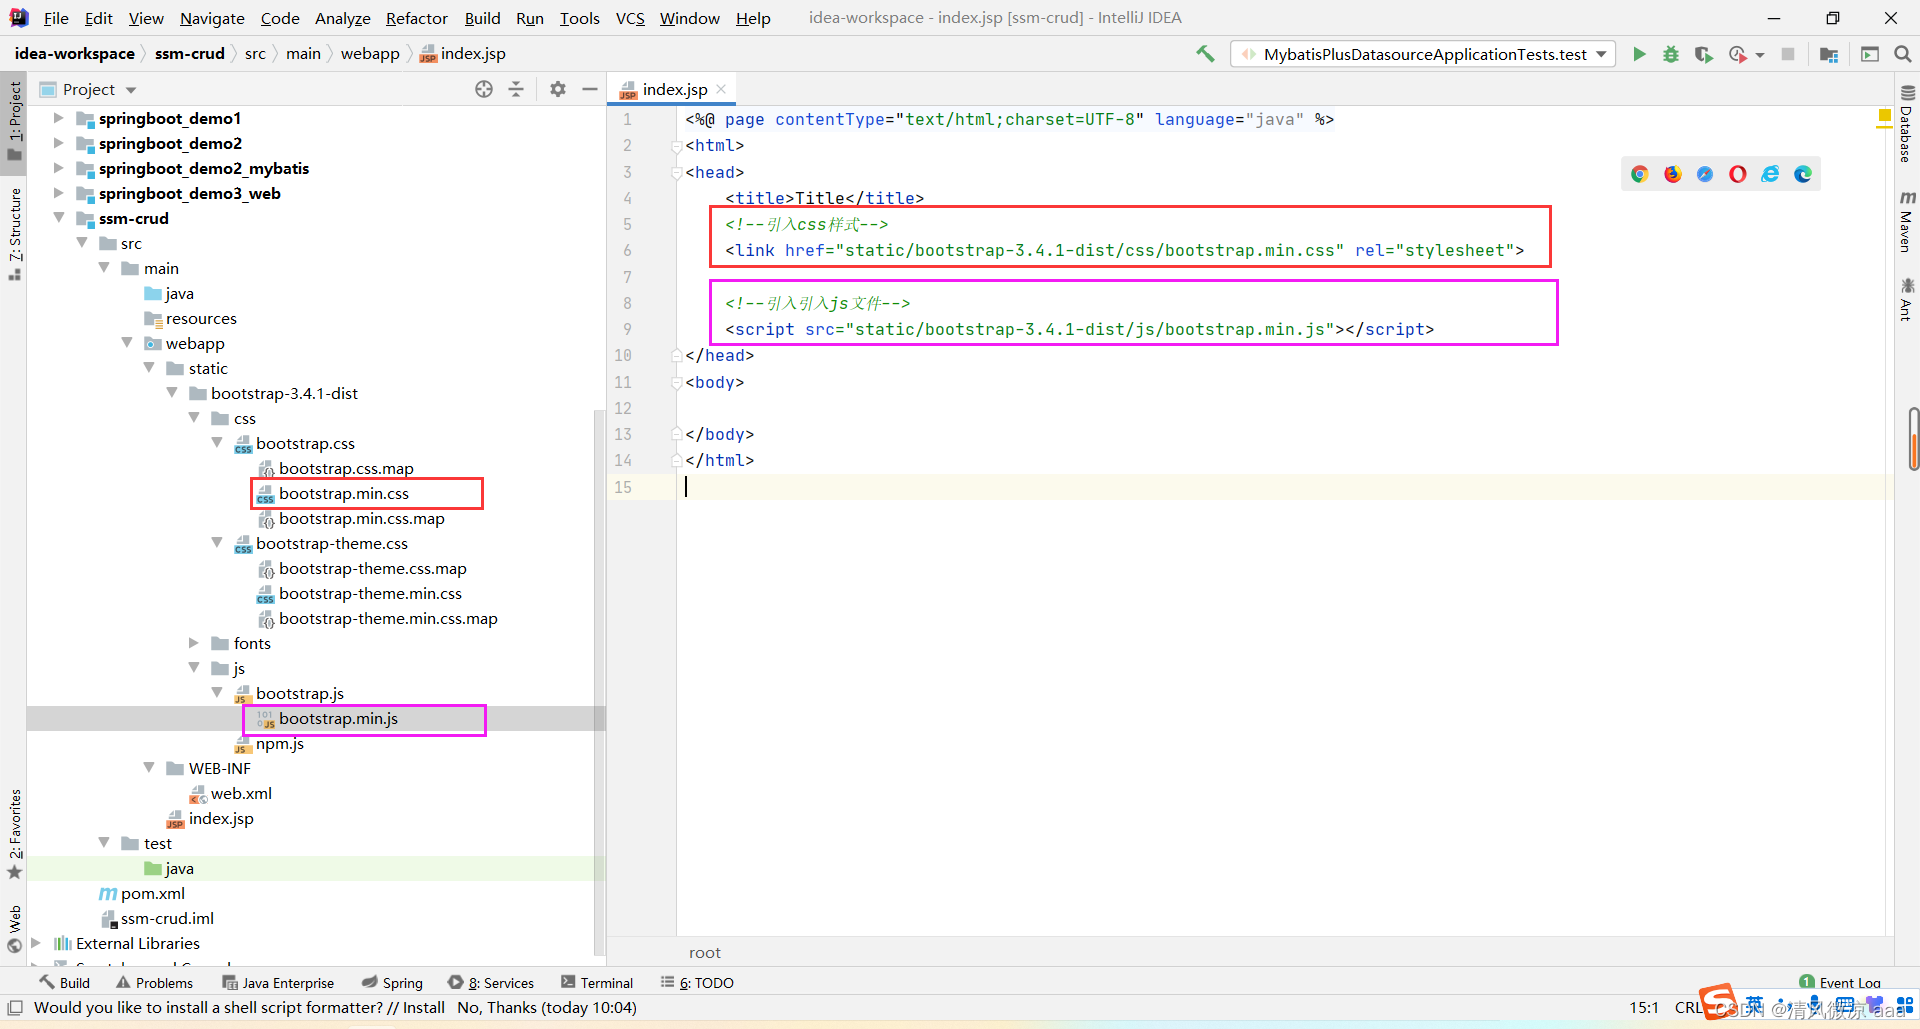
步骤3:引入jquery。
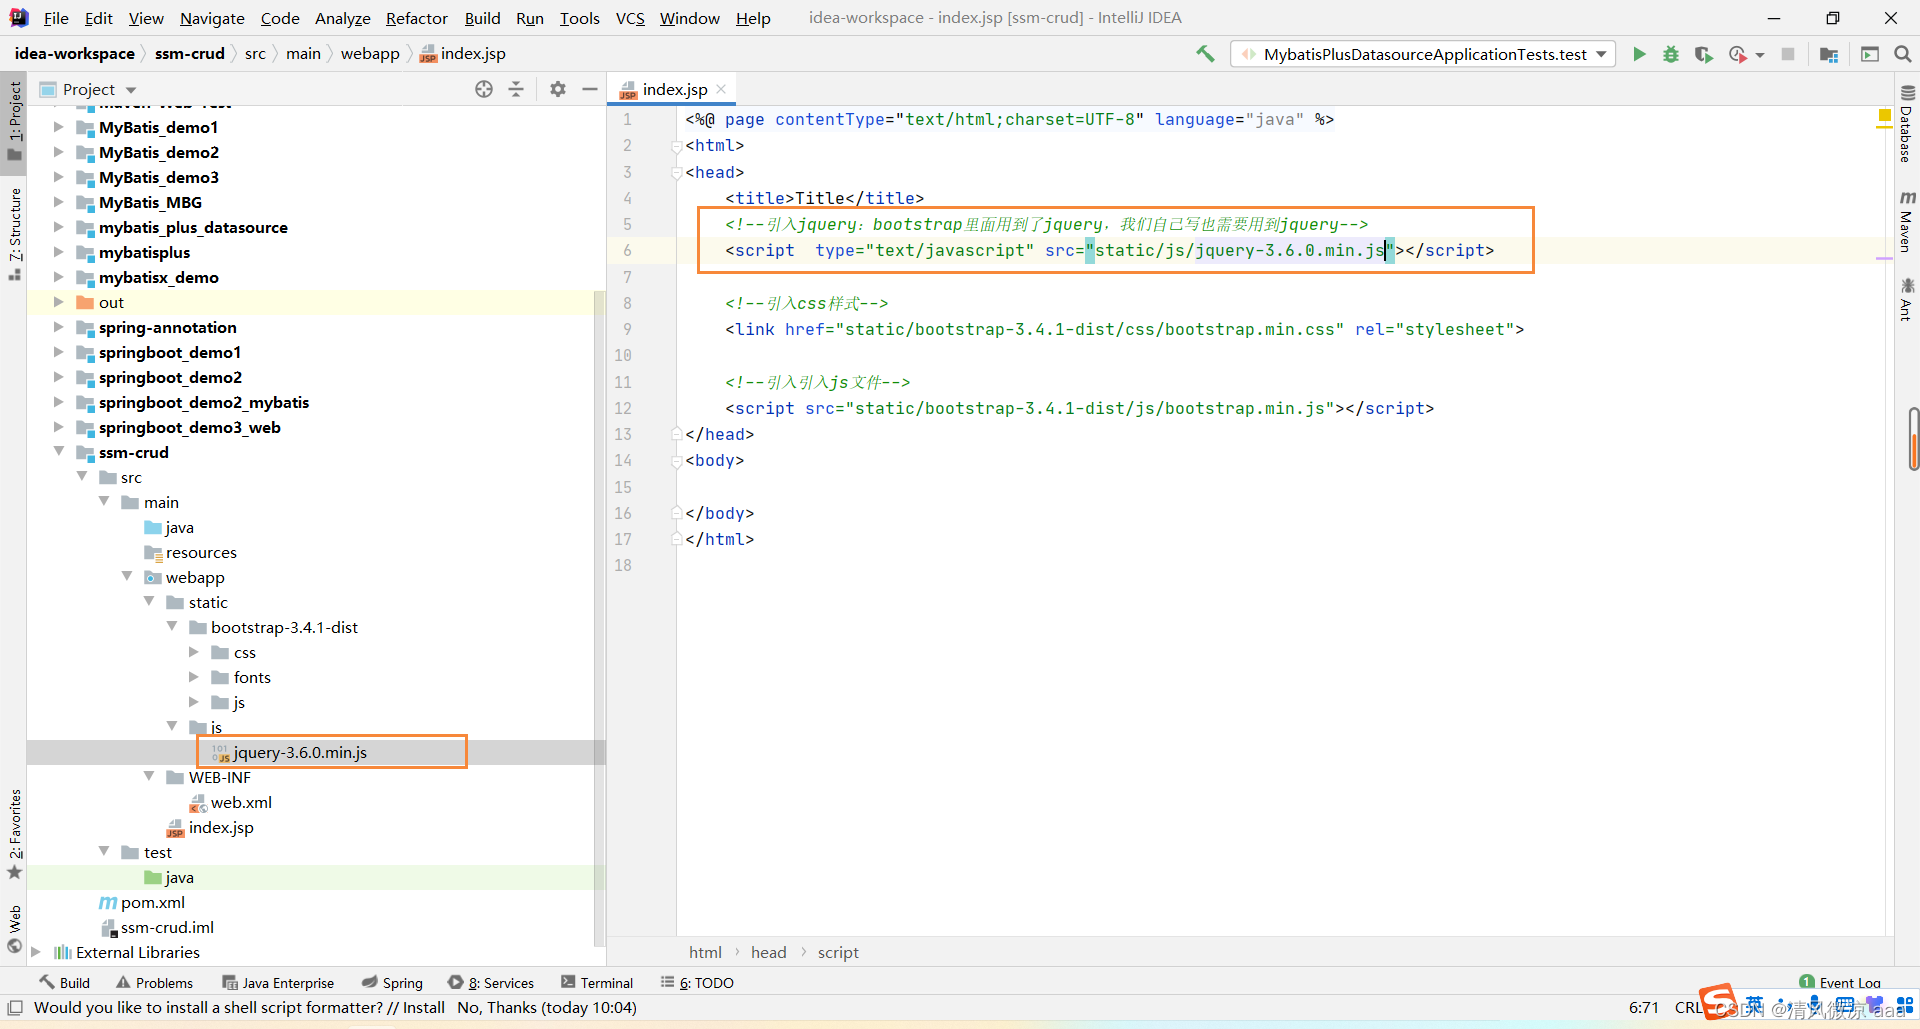
<%@ page contentType="text/html;charset=UTF-8" language="java" %>

Title
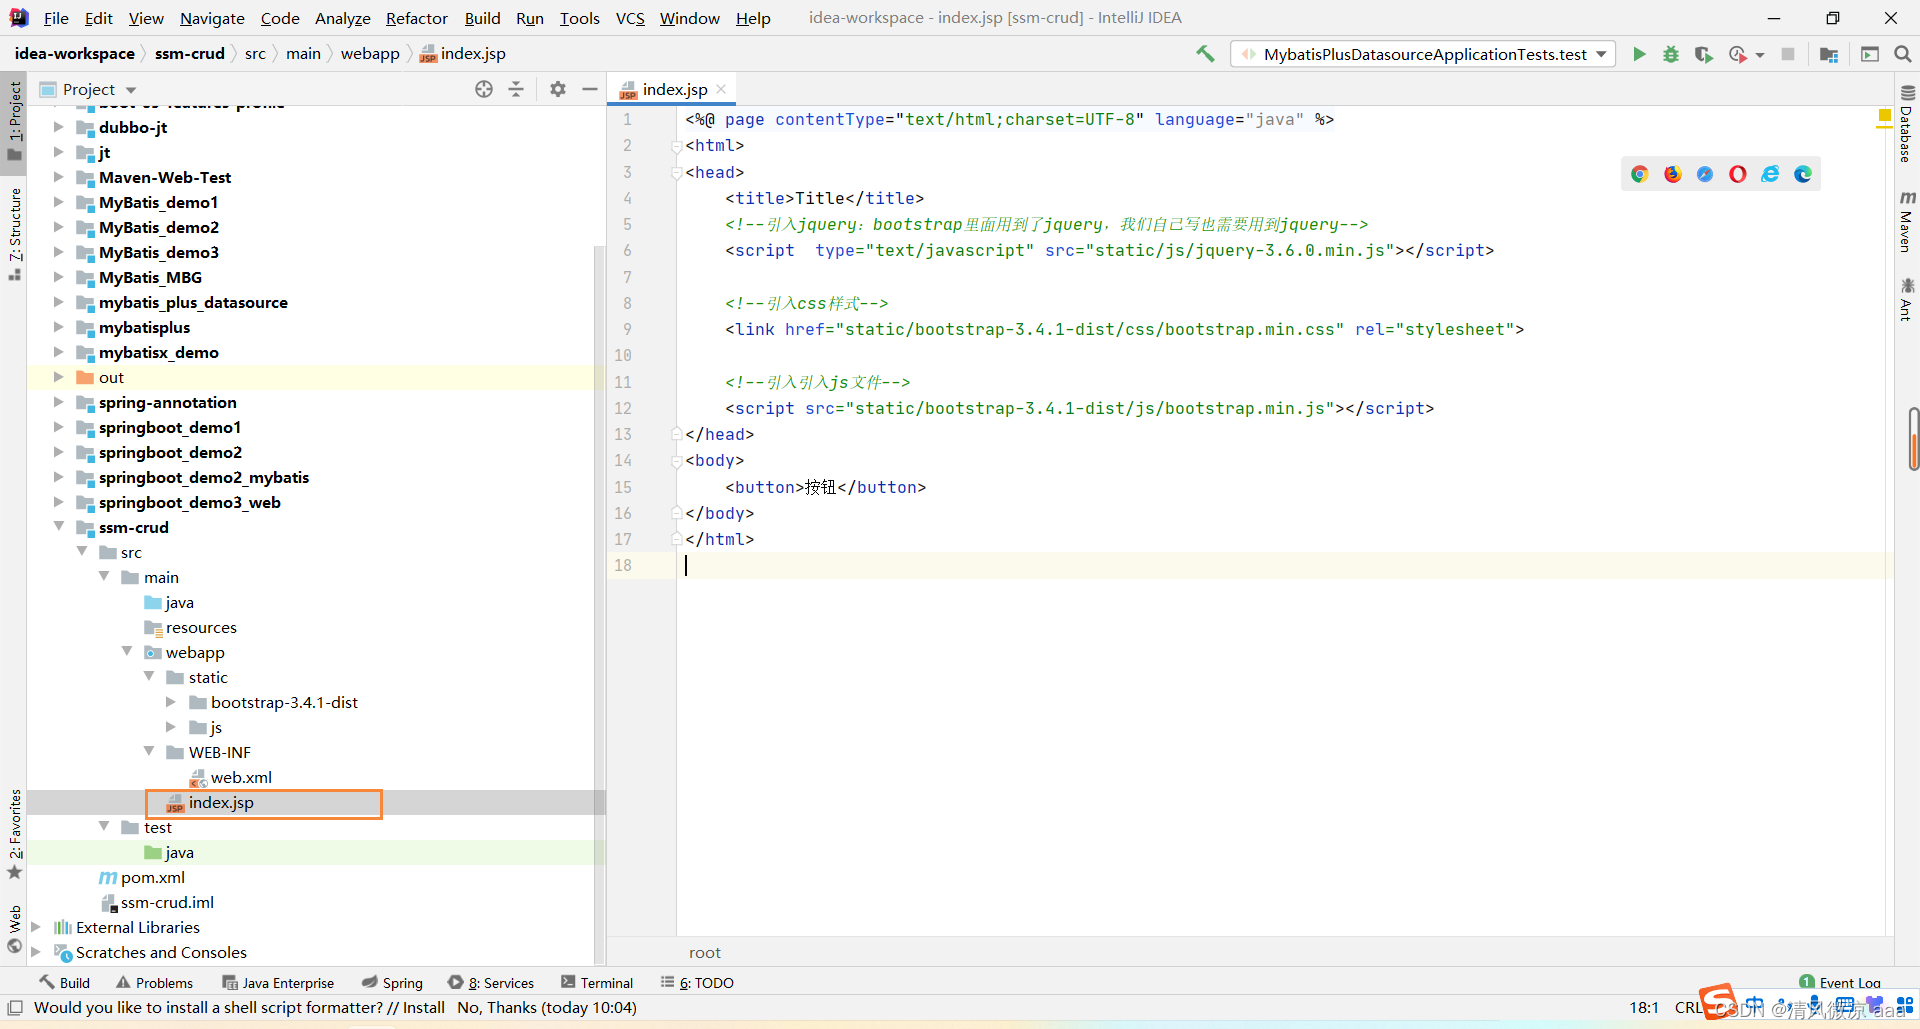
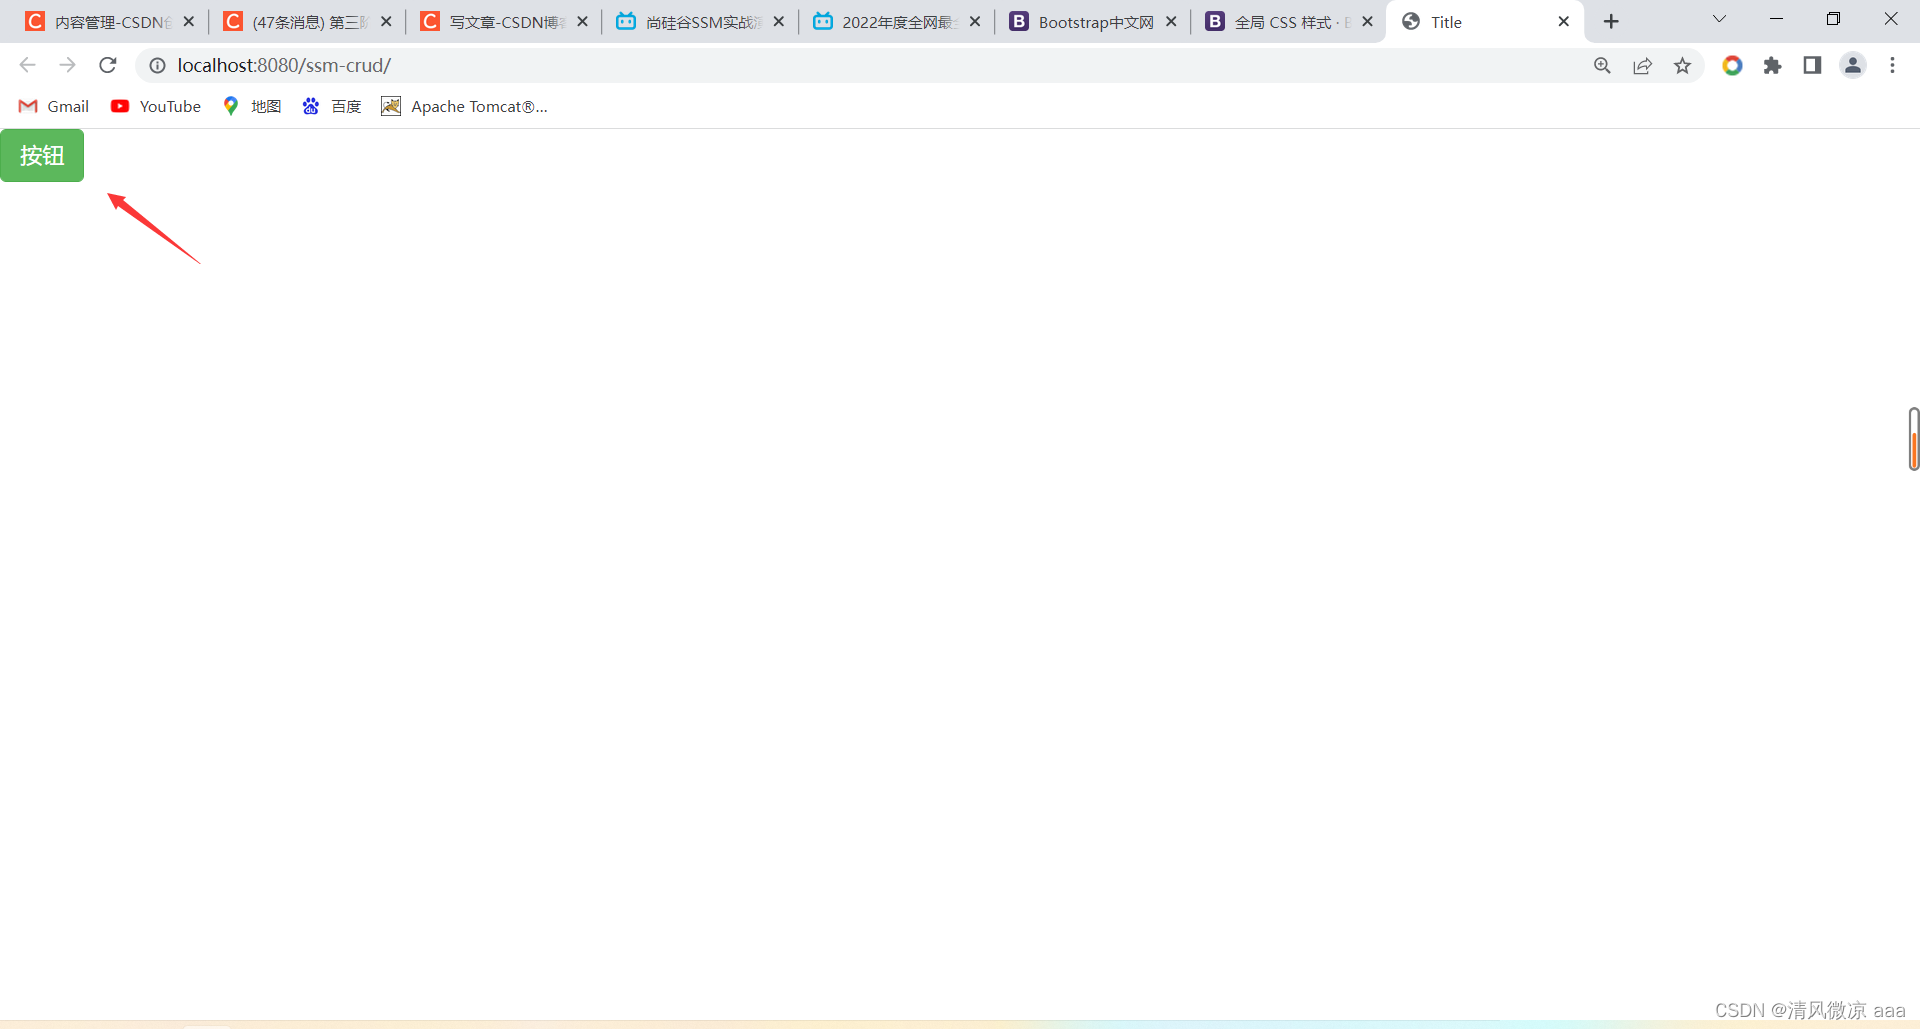
2.3.3、测试:按钮使用bootstrap风格
步骤1:配置tomact实例,详情查看sping-mvc.
步骤2:原来的方式添加按钮。
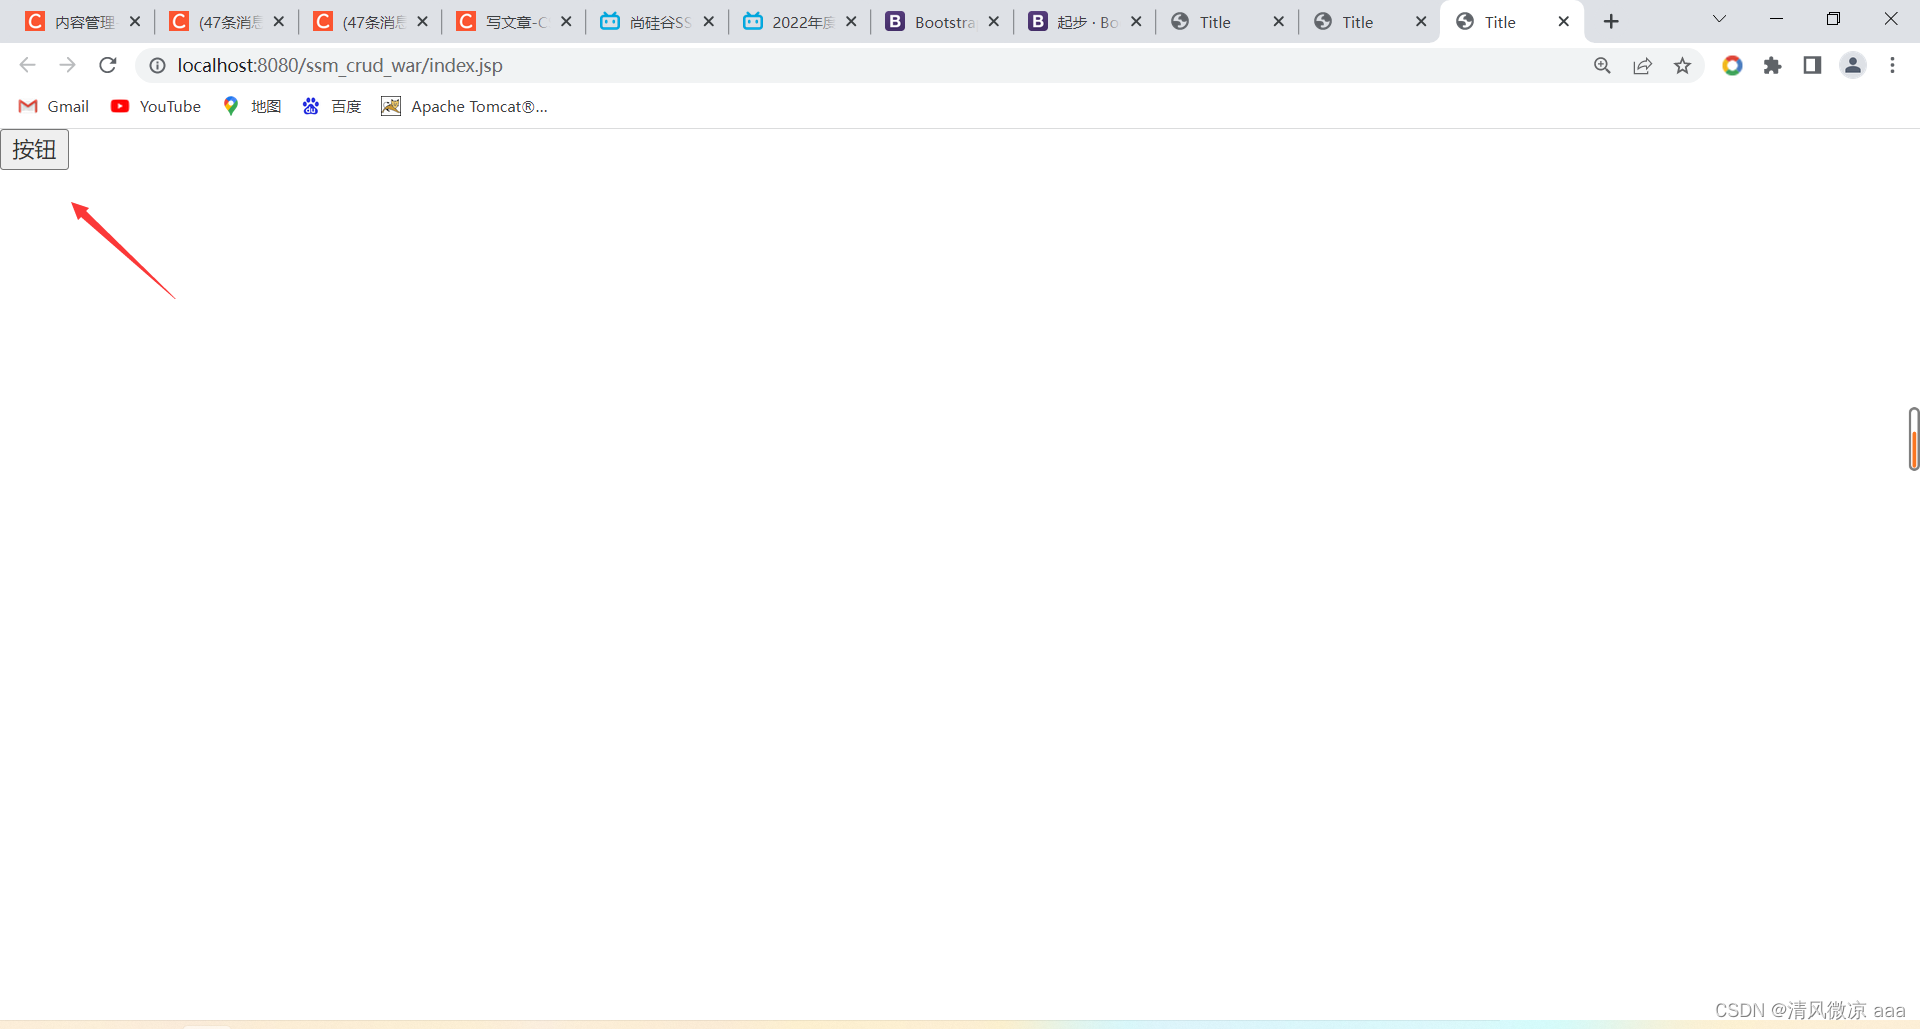
步骤3:使用boostrap风格的按钮。
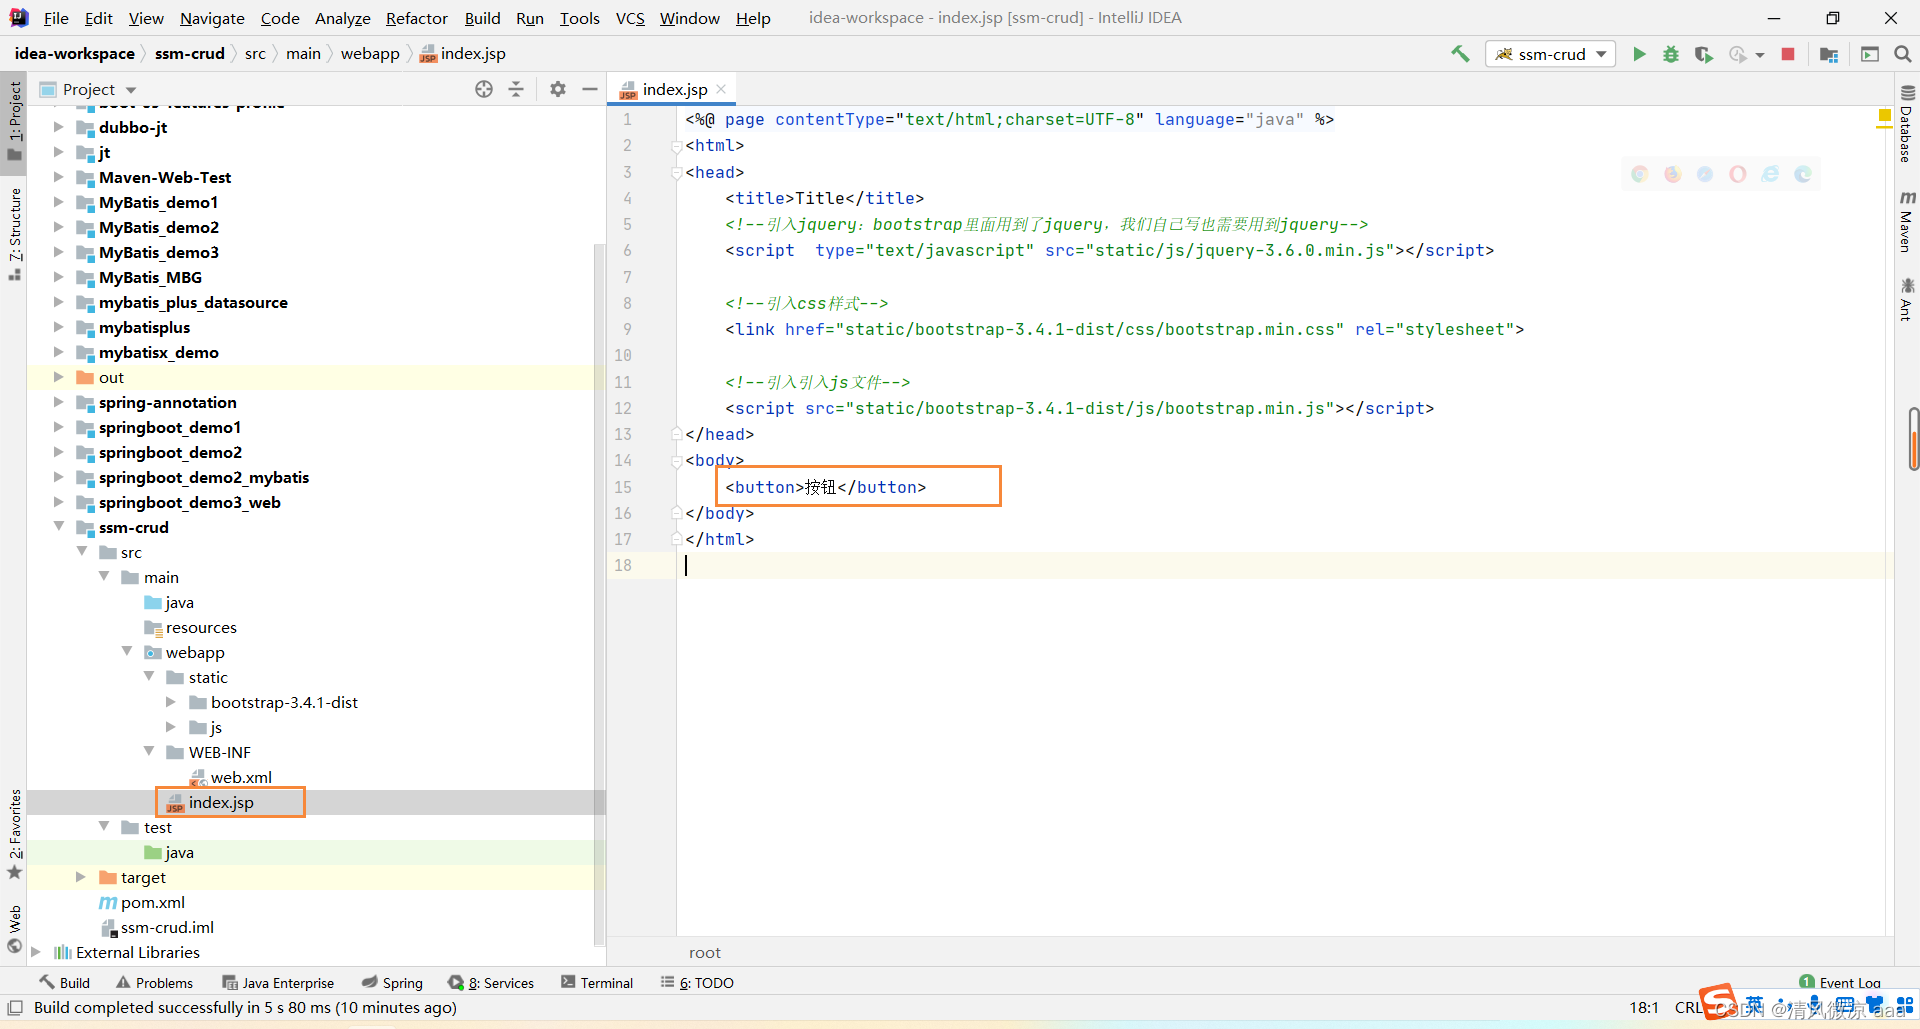
找到官网案例:
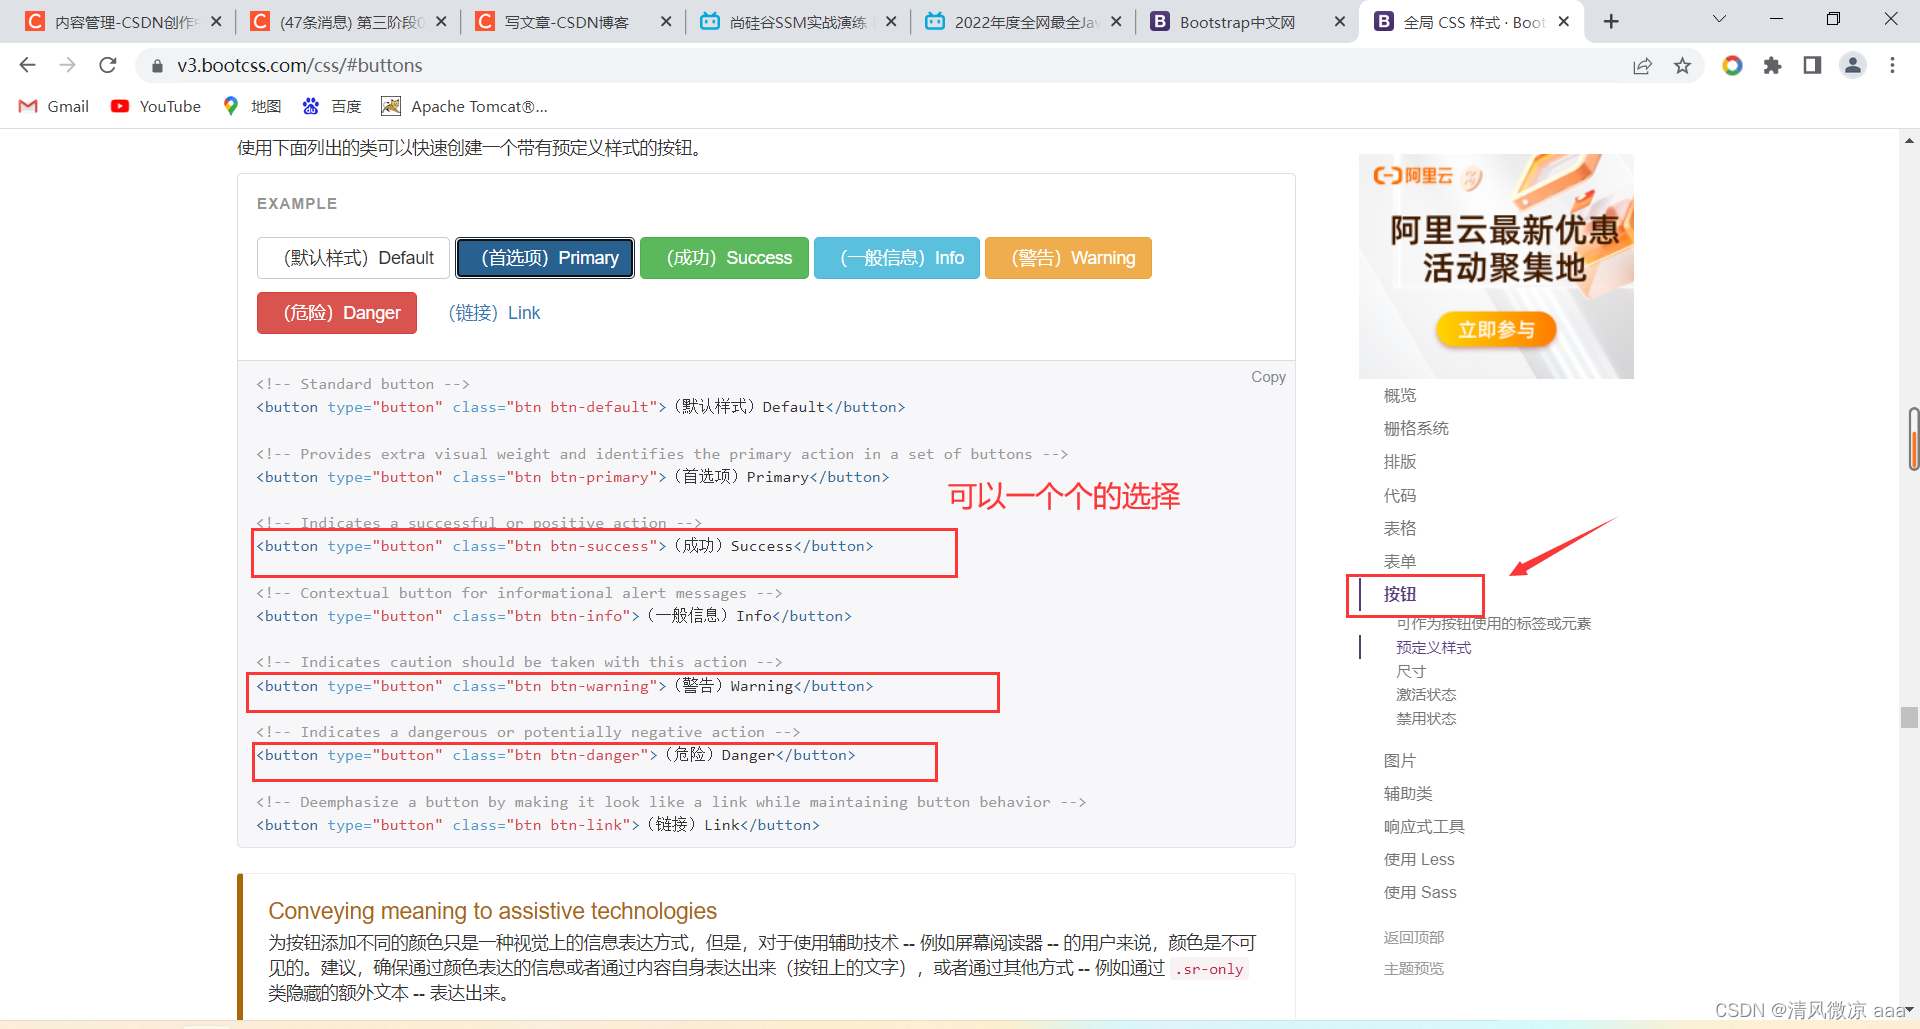
之后在自己写的按钮标签上添加不同的属性来改变样式:
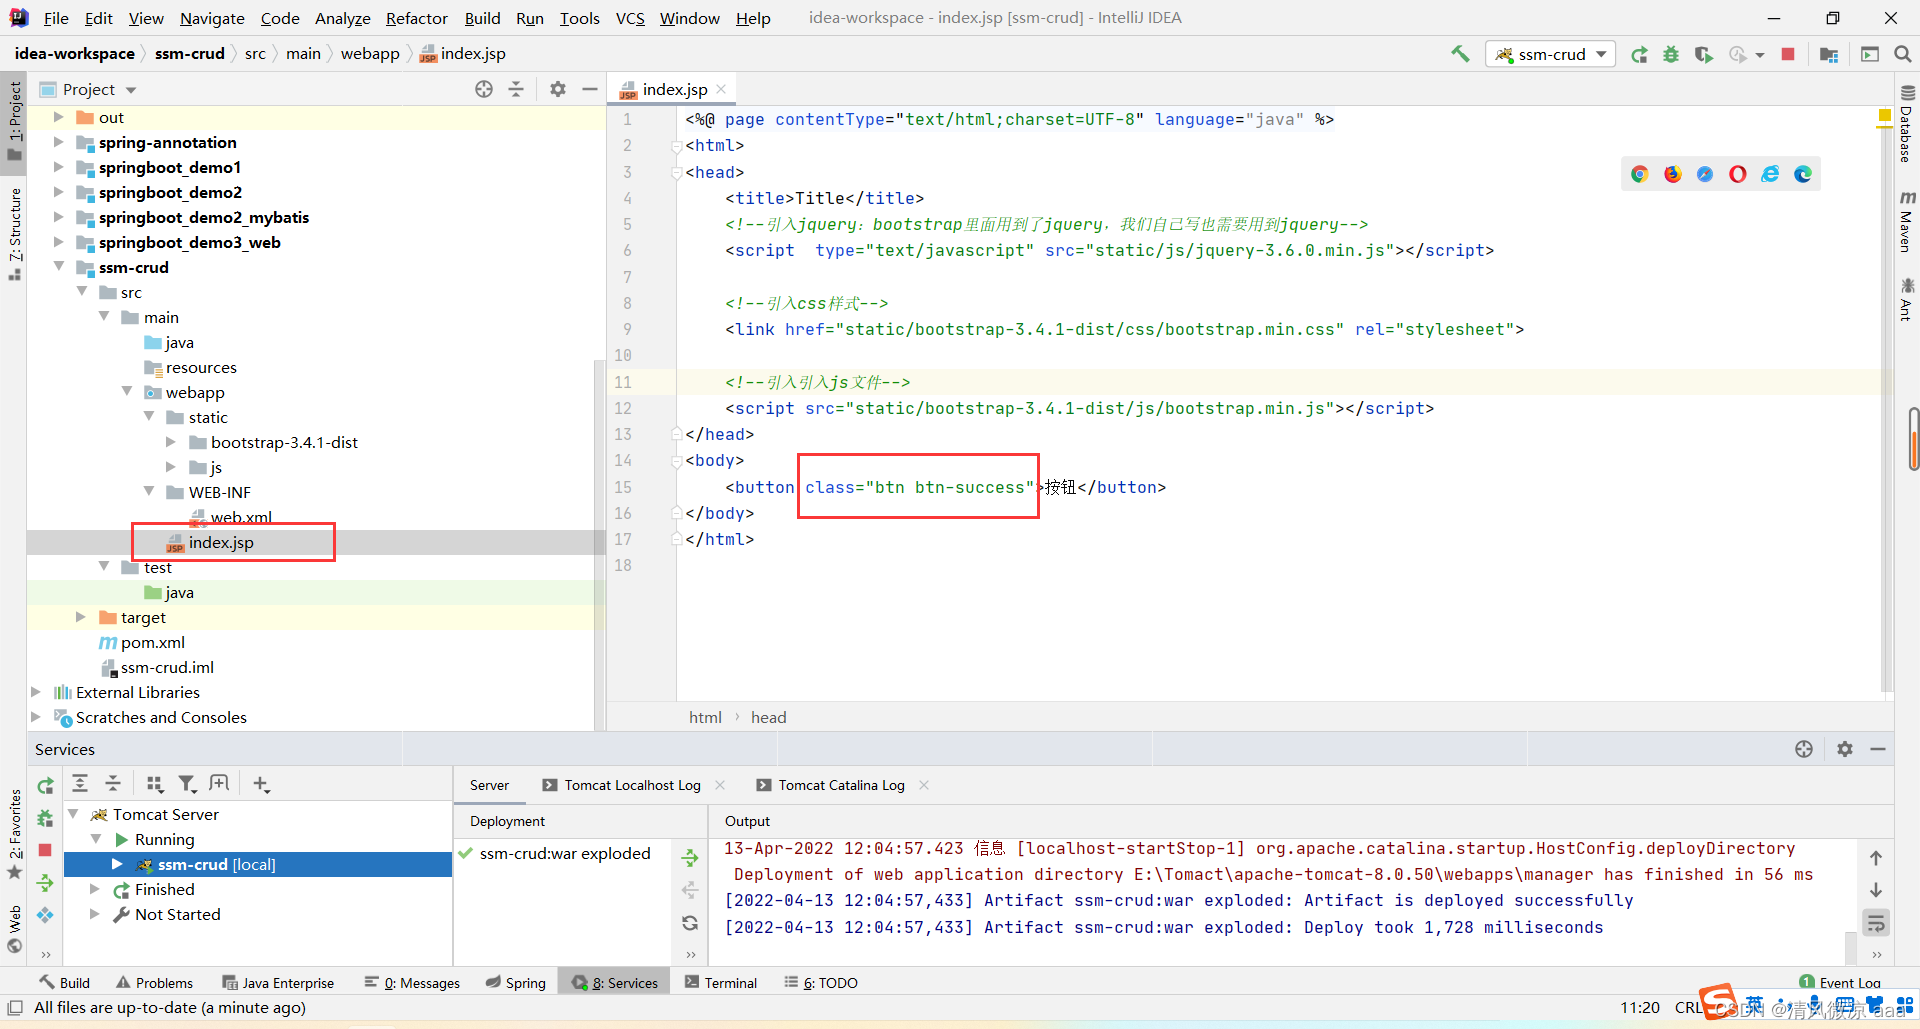
启动tomact服务器再次访问测试,发现按钮样式发生变化。
2.4、编写ssm整合的关键配置文件
• web.xml,spring,springmvc,mybatis,使用mybatis的逆向工程生成对应的bean以及mapper
2.4.1、配置web.xml
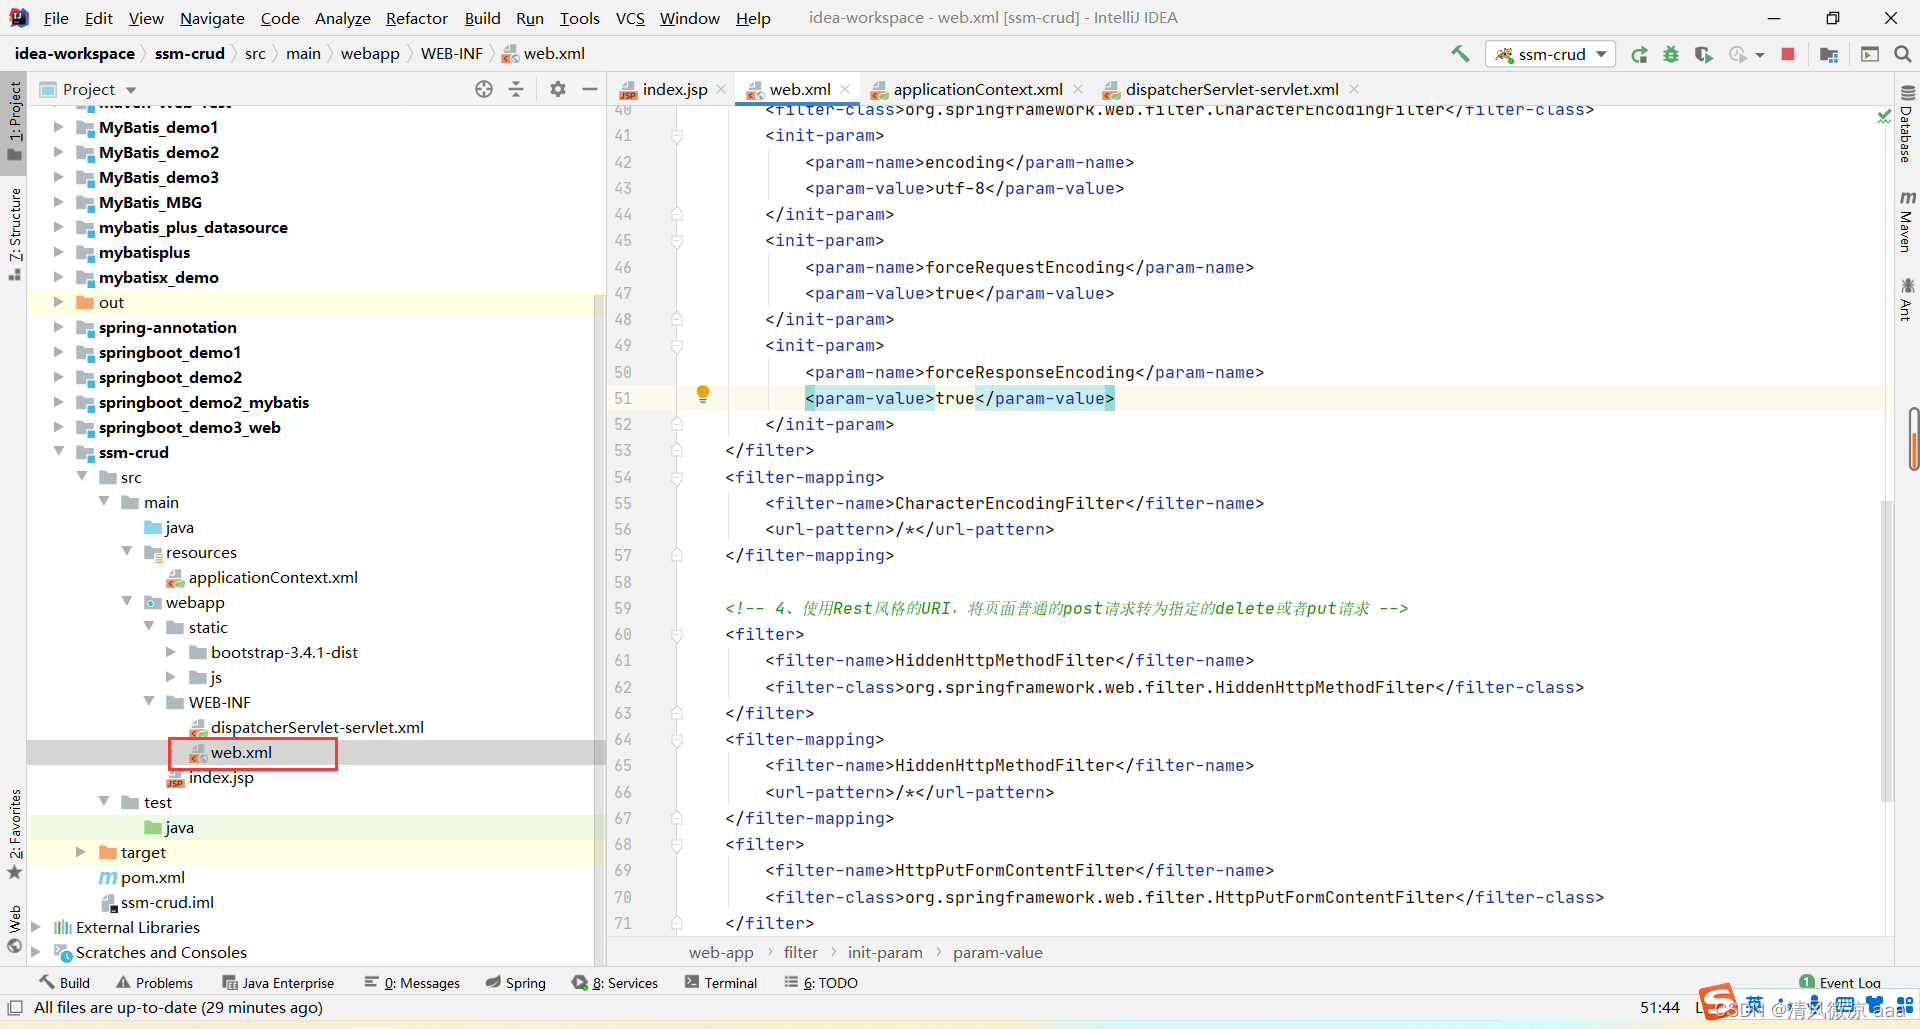
contextConfigLocation classpath:applicationContext.xml org.springframework.web.context.ContextLoaderListener dispatcherServlet org.springframework.web.servlet.DispatcherServlet 1 dispatcherServlet / CharacterEncodingFilter org.springframework.web.filter.CharacterEncodingFilter encoding utf-8 forceRequestEncoding true forceResponseEncoding true CharacterEncodingFilter /* HiddenHttpMethodFilter org.springframework.web.filter.HiddenHttpMethodFilter HiddenHttpMethodFilter /* HttpPutFormContentFilter org.springframework.web.filter.HttpPutFormContentFilter HttpPutFormContentFilter /* 2.4.2、配置SpringMVC的配置文件:dispatcherServlet-servlet.xml
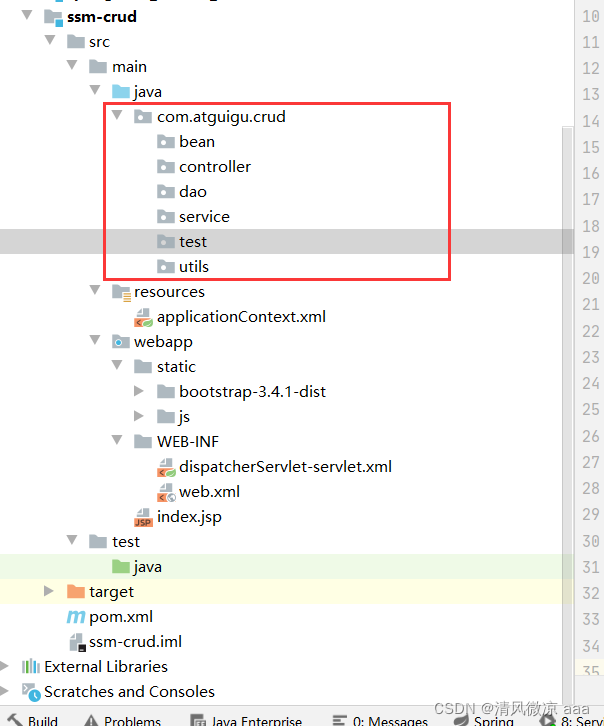
创建包结构:
创建存放jsp页面的目录:
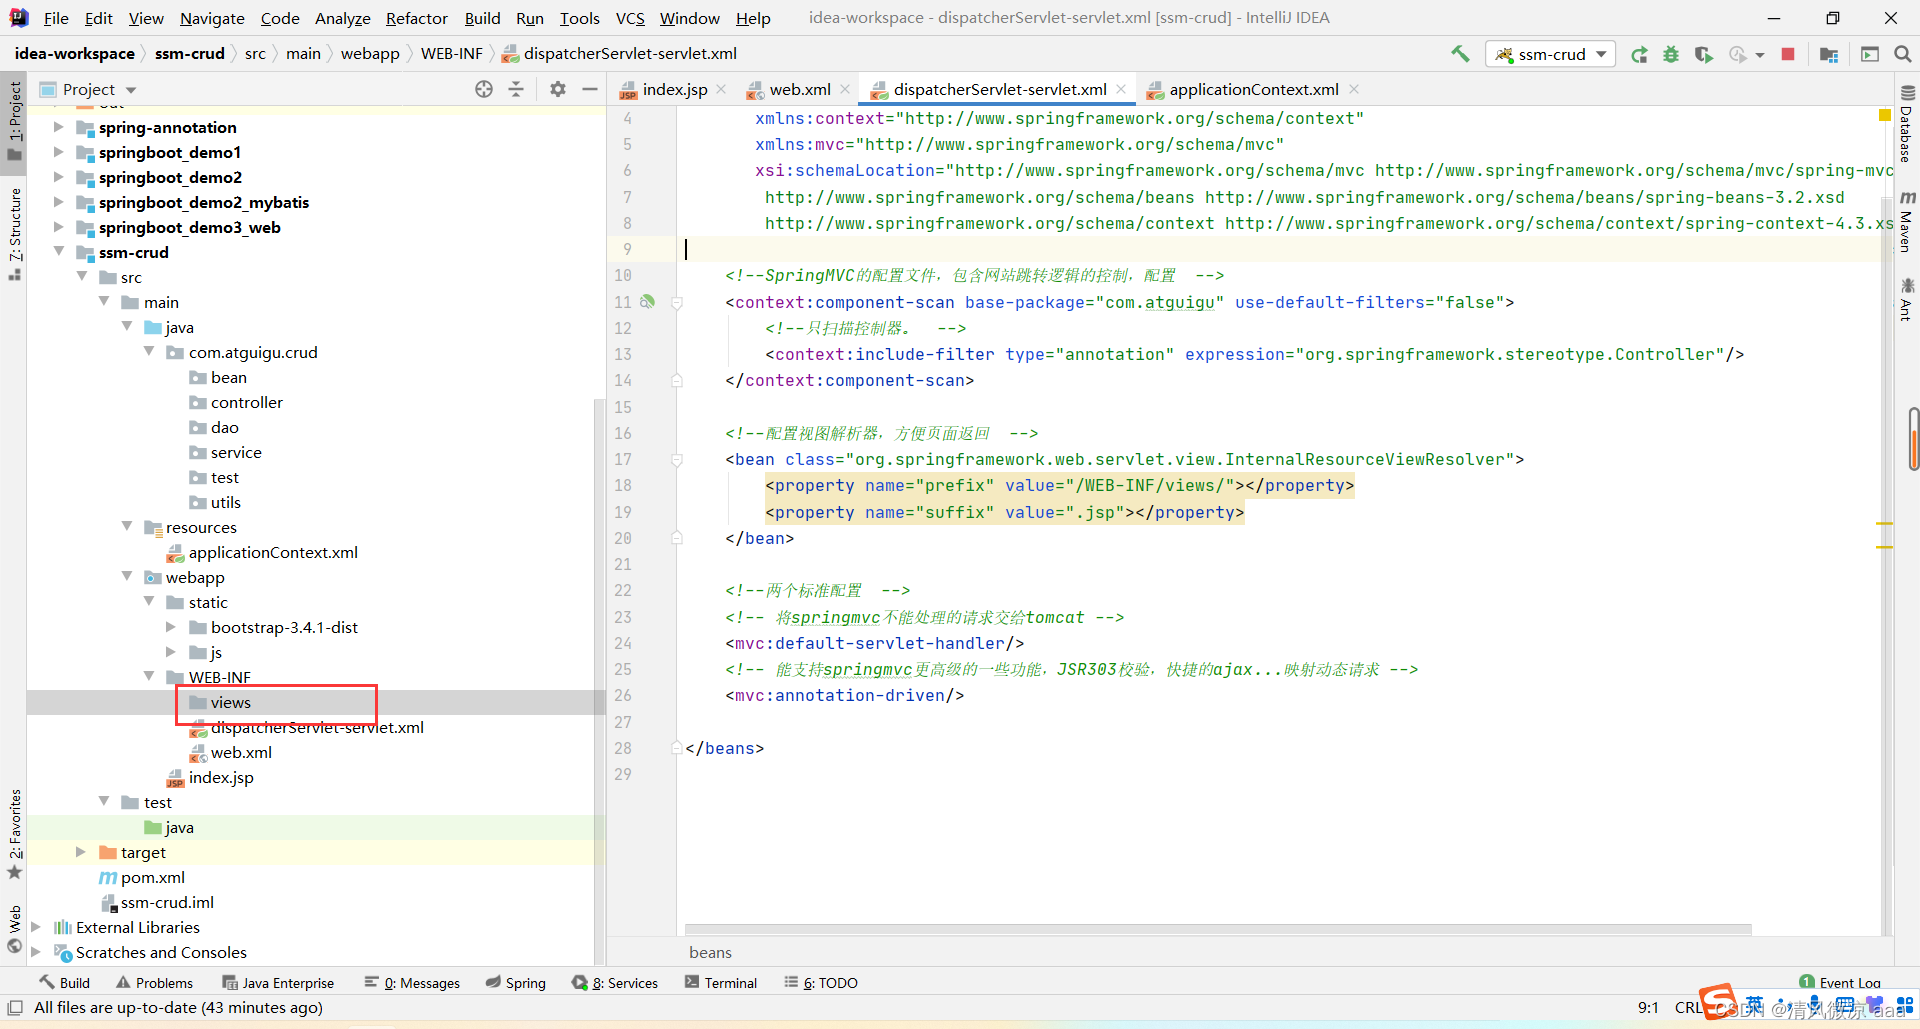
创建:SpringMVC的配置文件:dispatcherServlet-servlet.xml
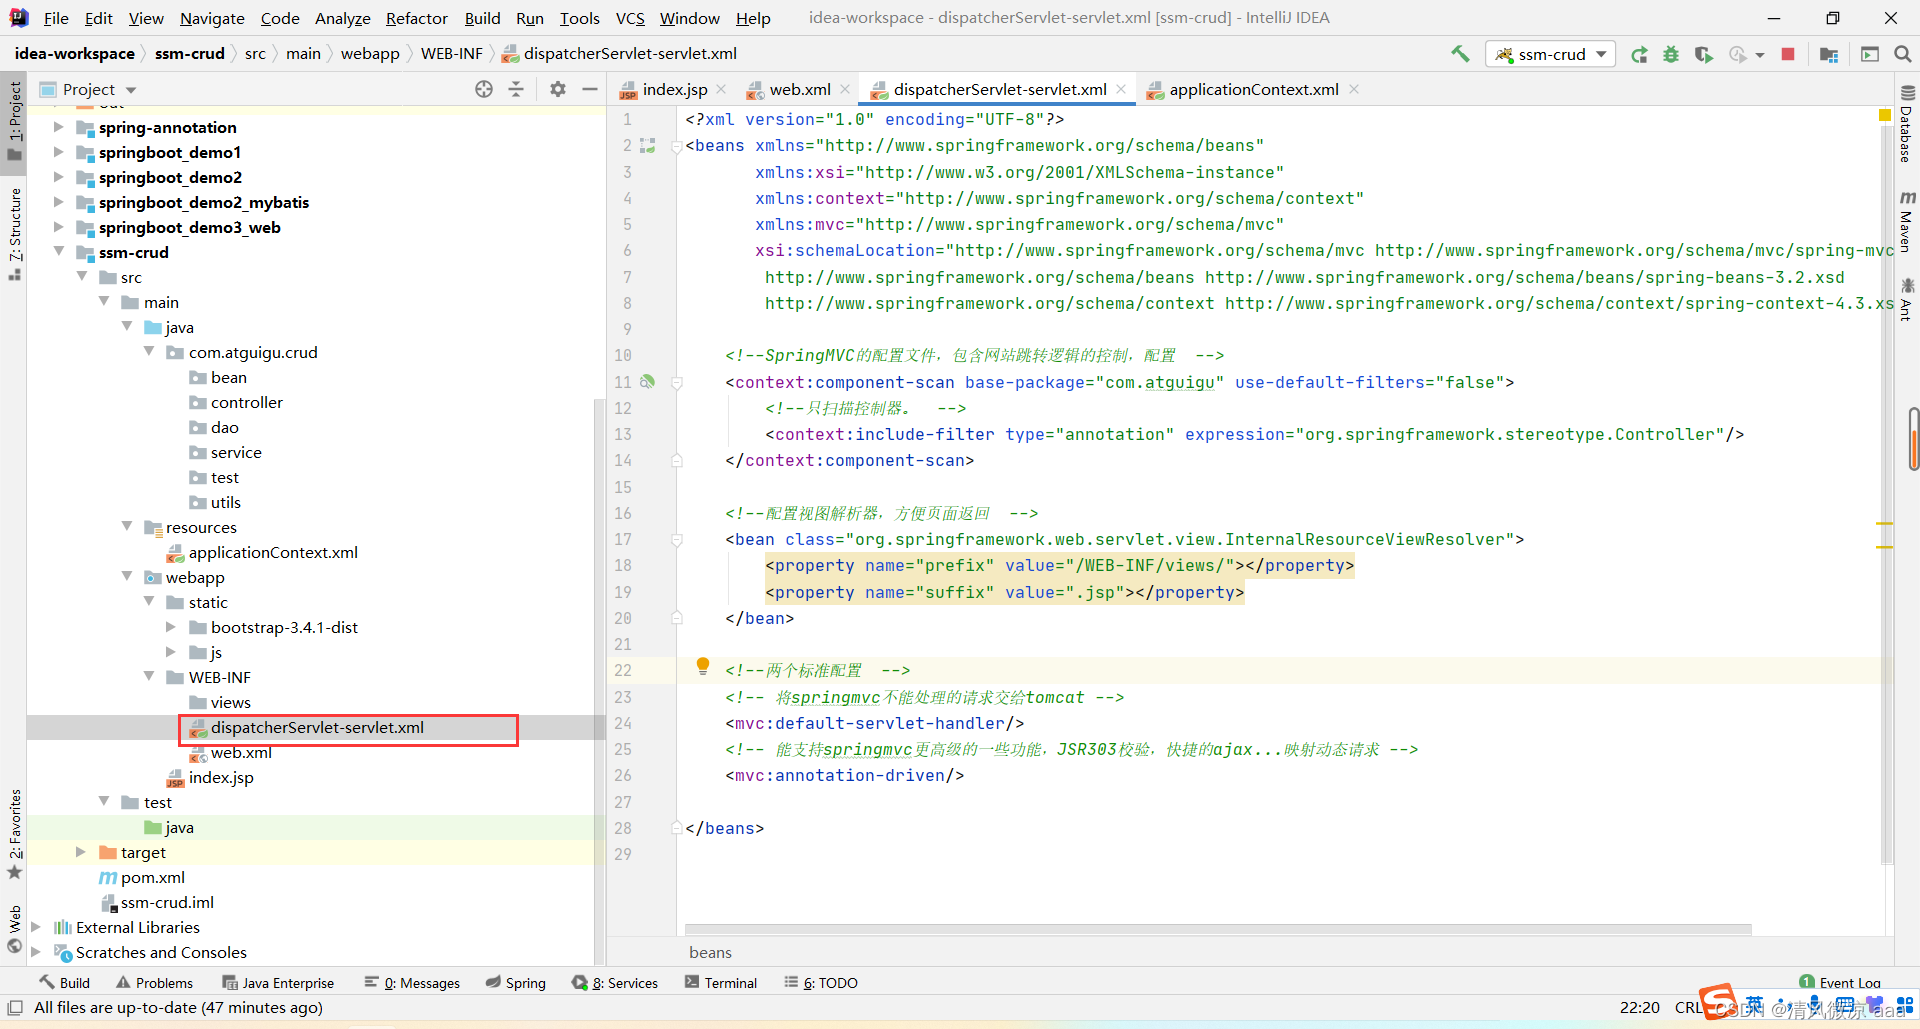
2.4.3、配置Spring的配置文件:applicationContext.xml
创建dbconfig.properties配置文件:
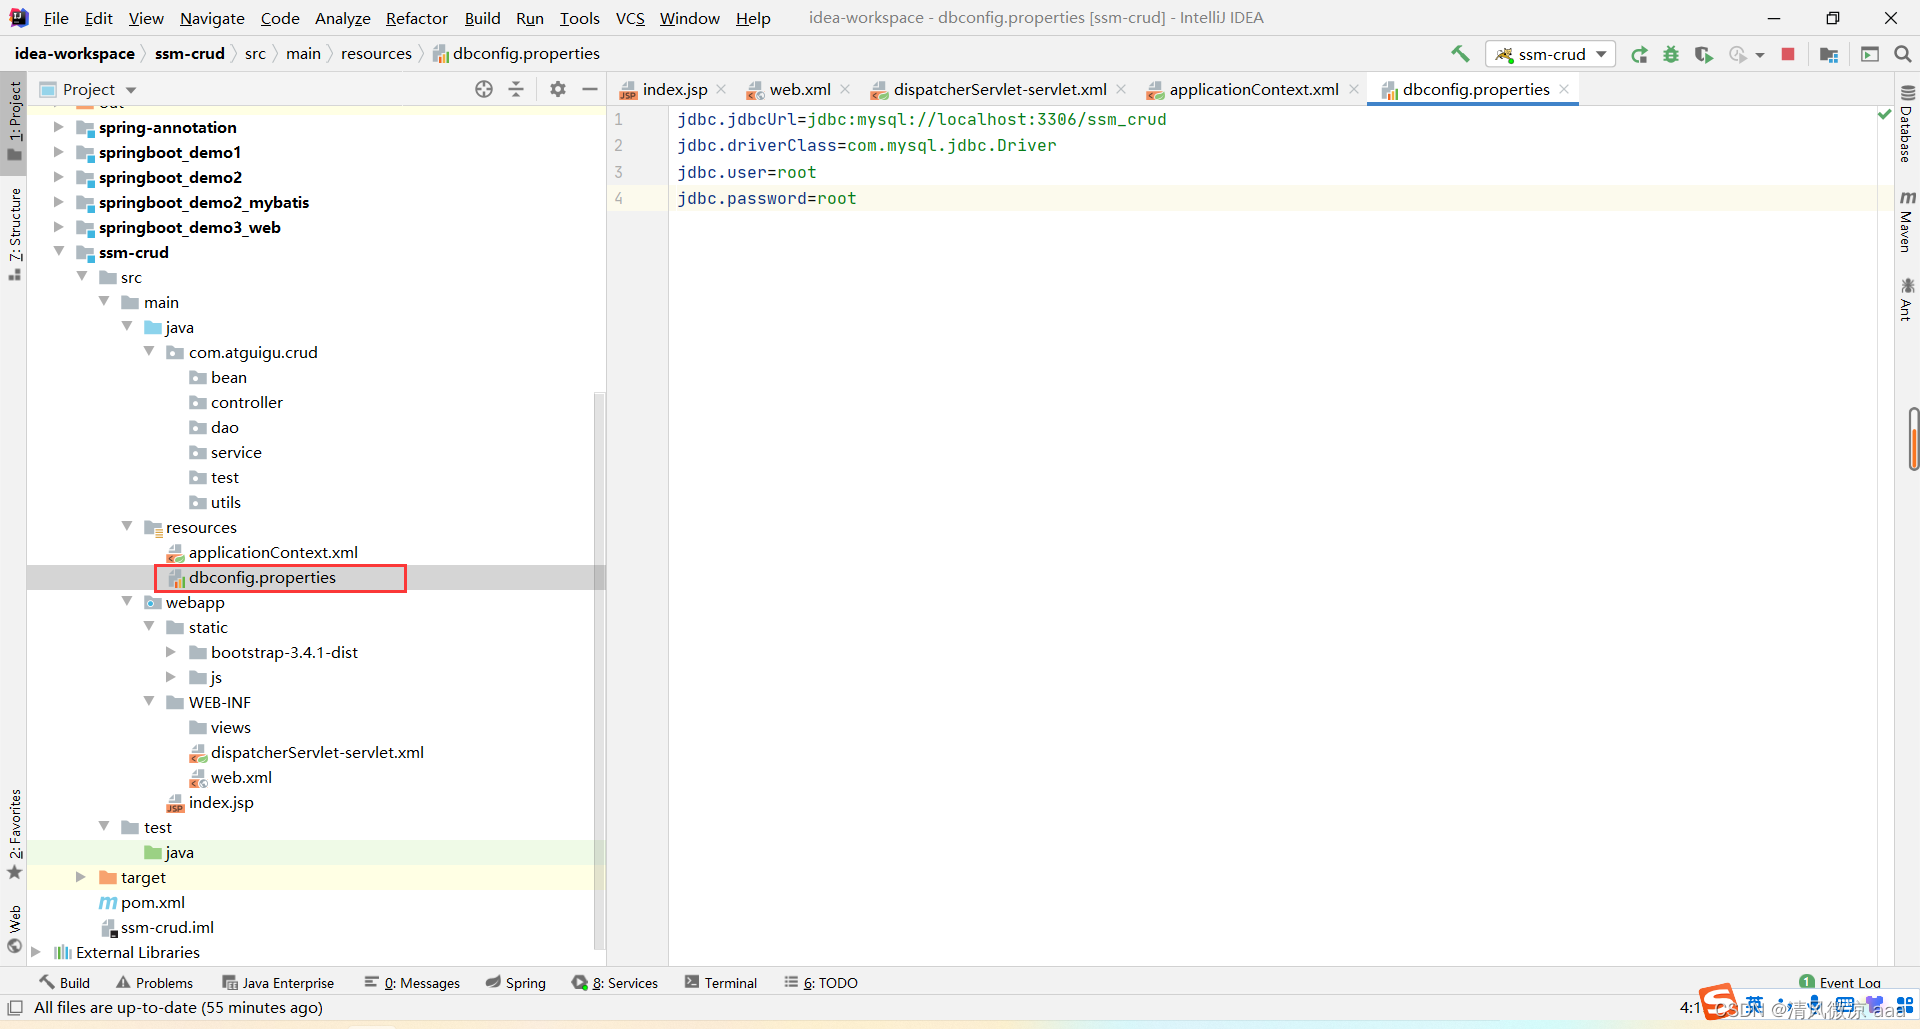
jdbc.jdbcUrl=jdbc:mysql://localhost:3306/ssm_crud
jdbc.driverClass=com.mysql.jdbc.Driver
jdbc.user=root
jdbc.password=root
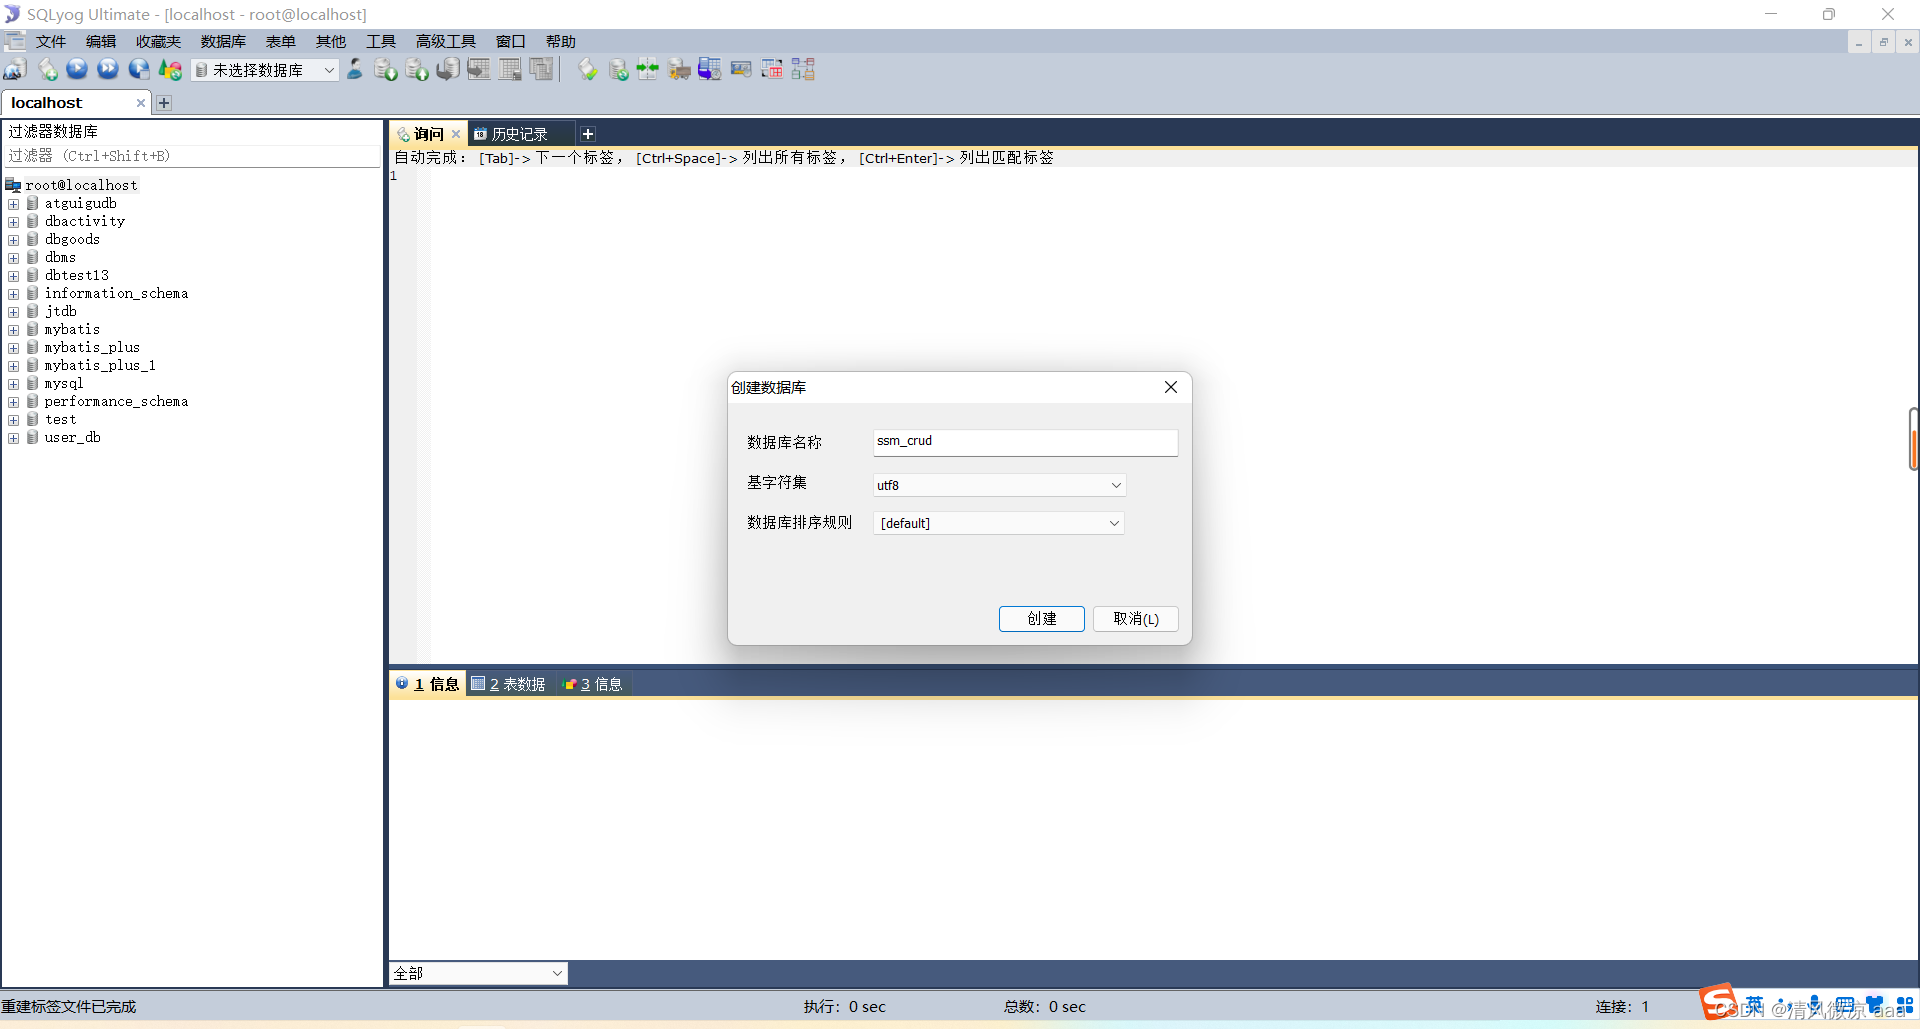
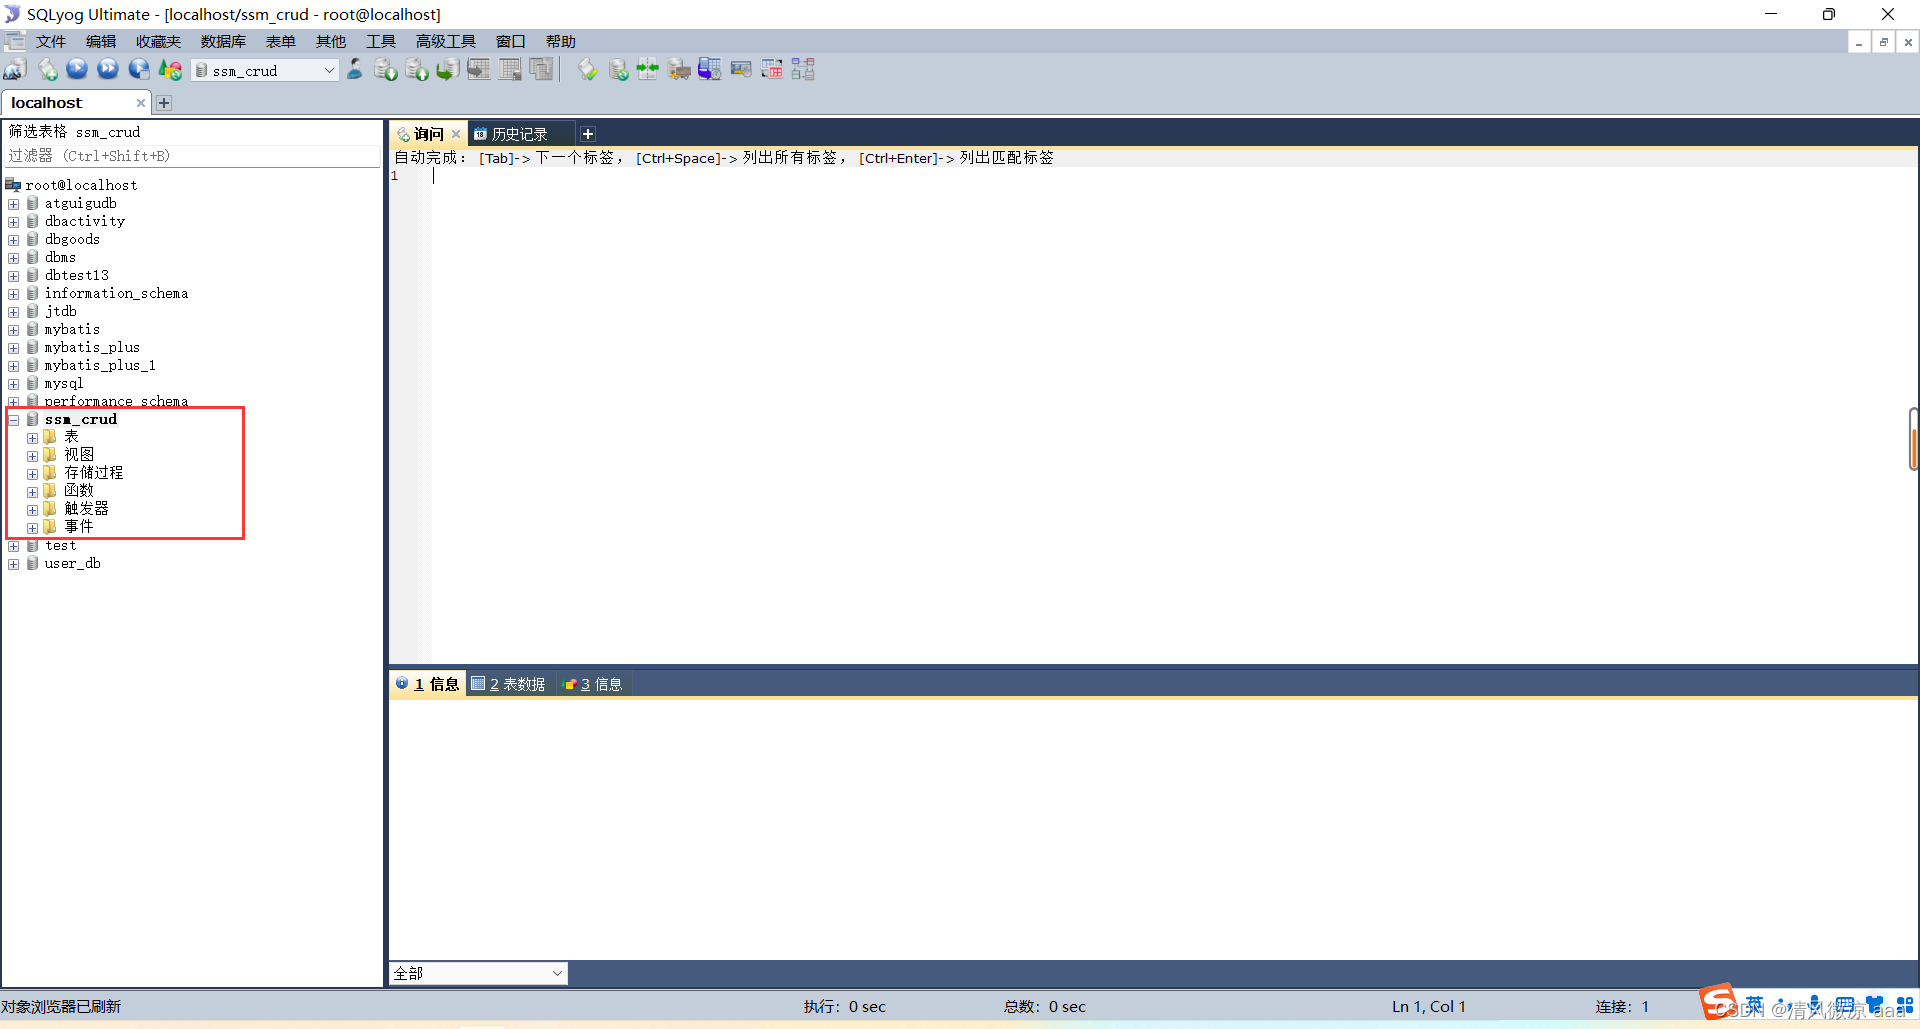
创建数据库:
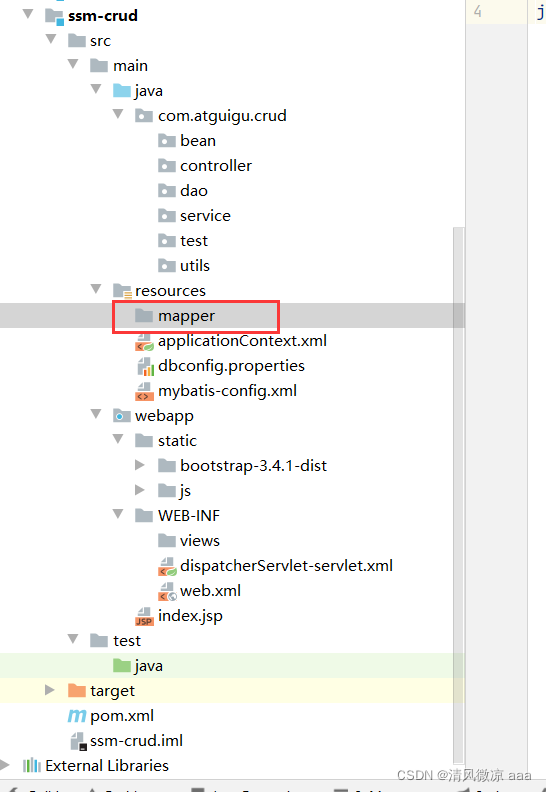
创建存放mapper映射文件的目录:
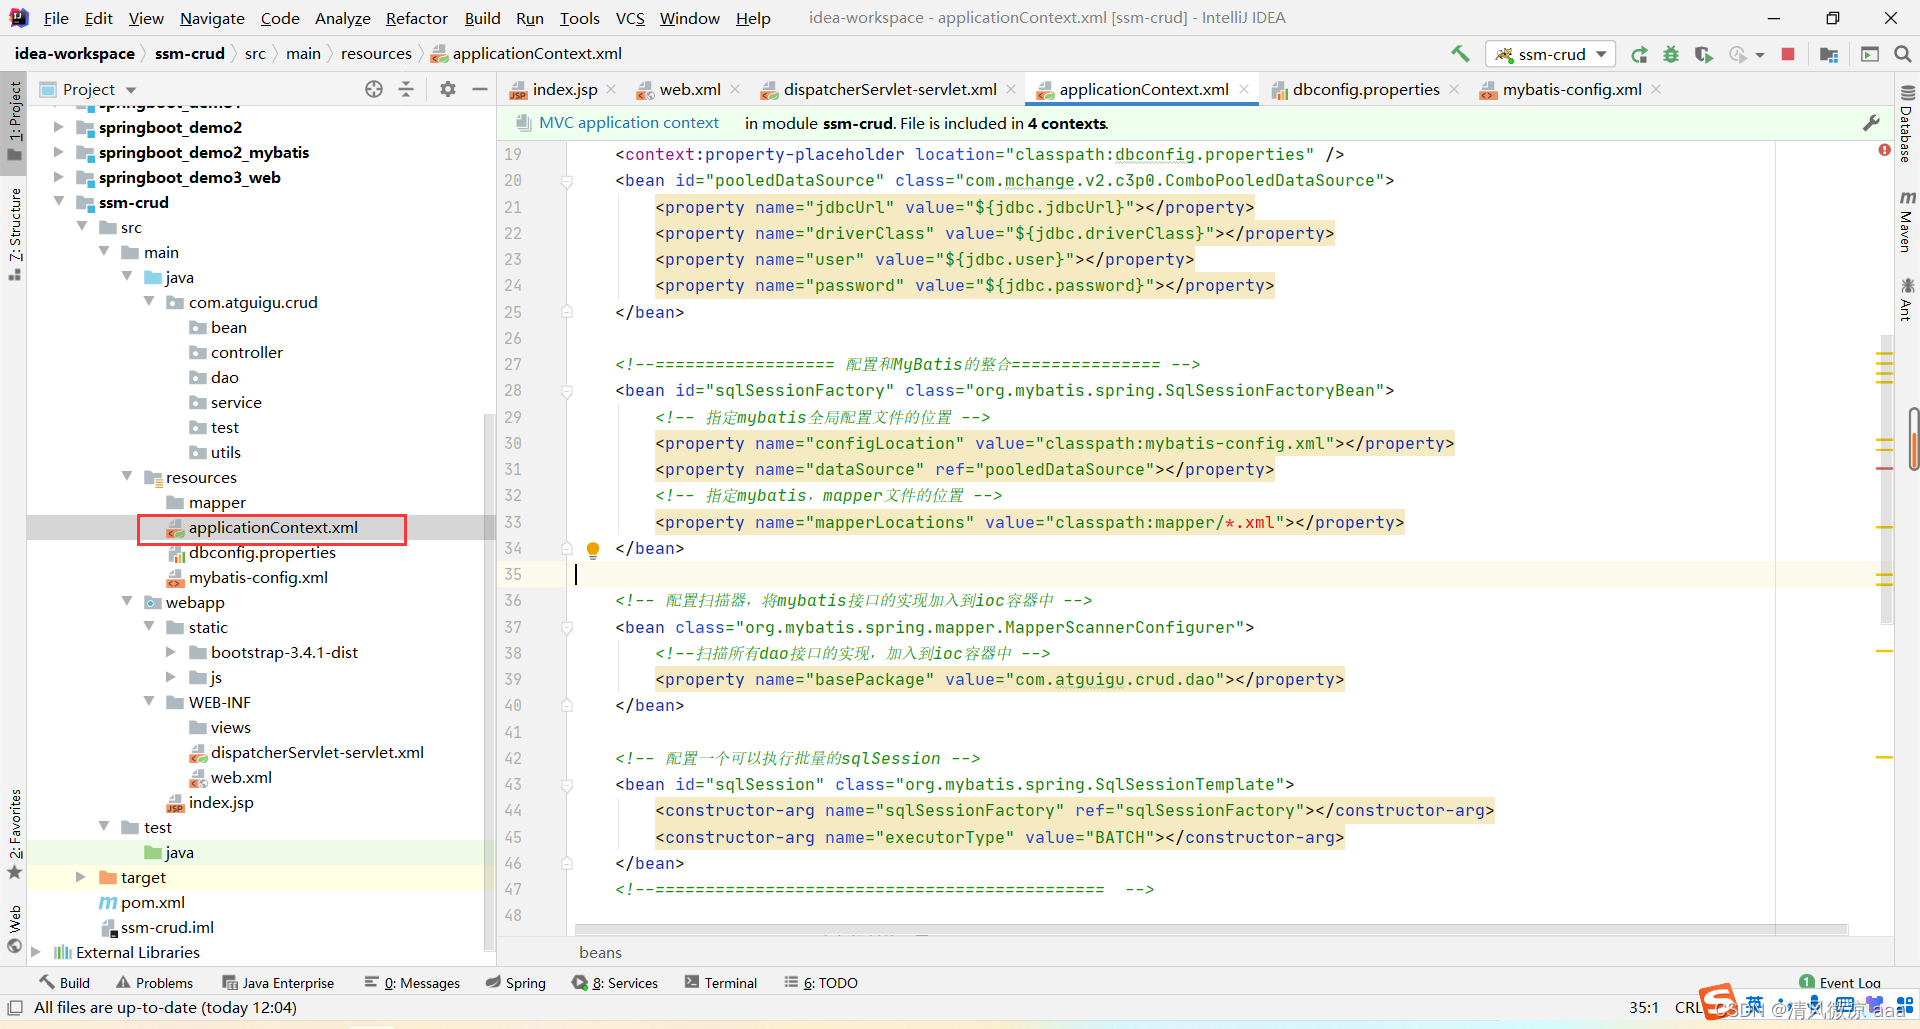
创建:Spring的配置文件:applicationContext.xml
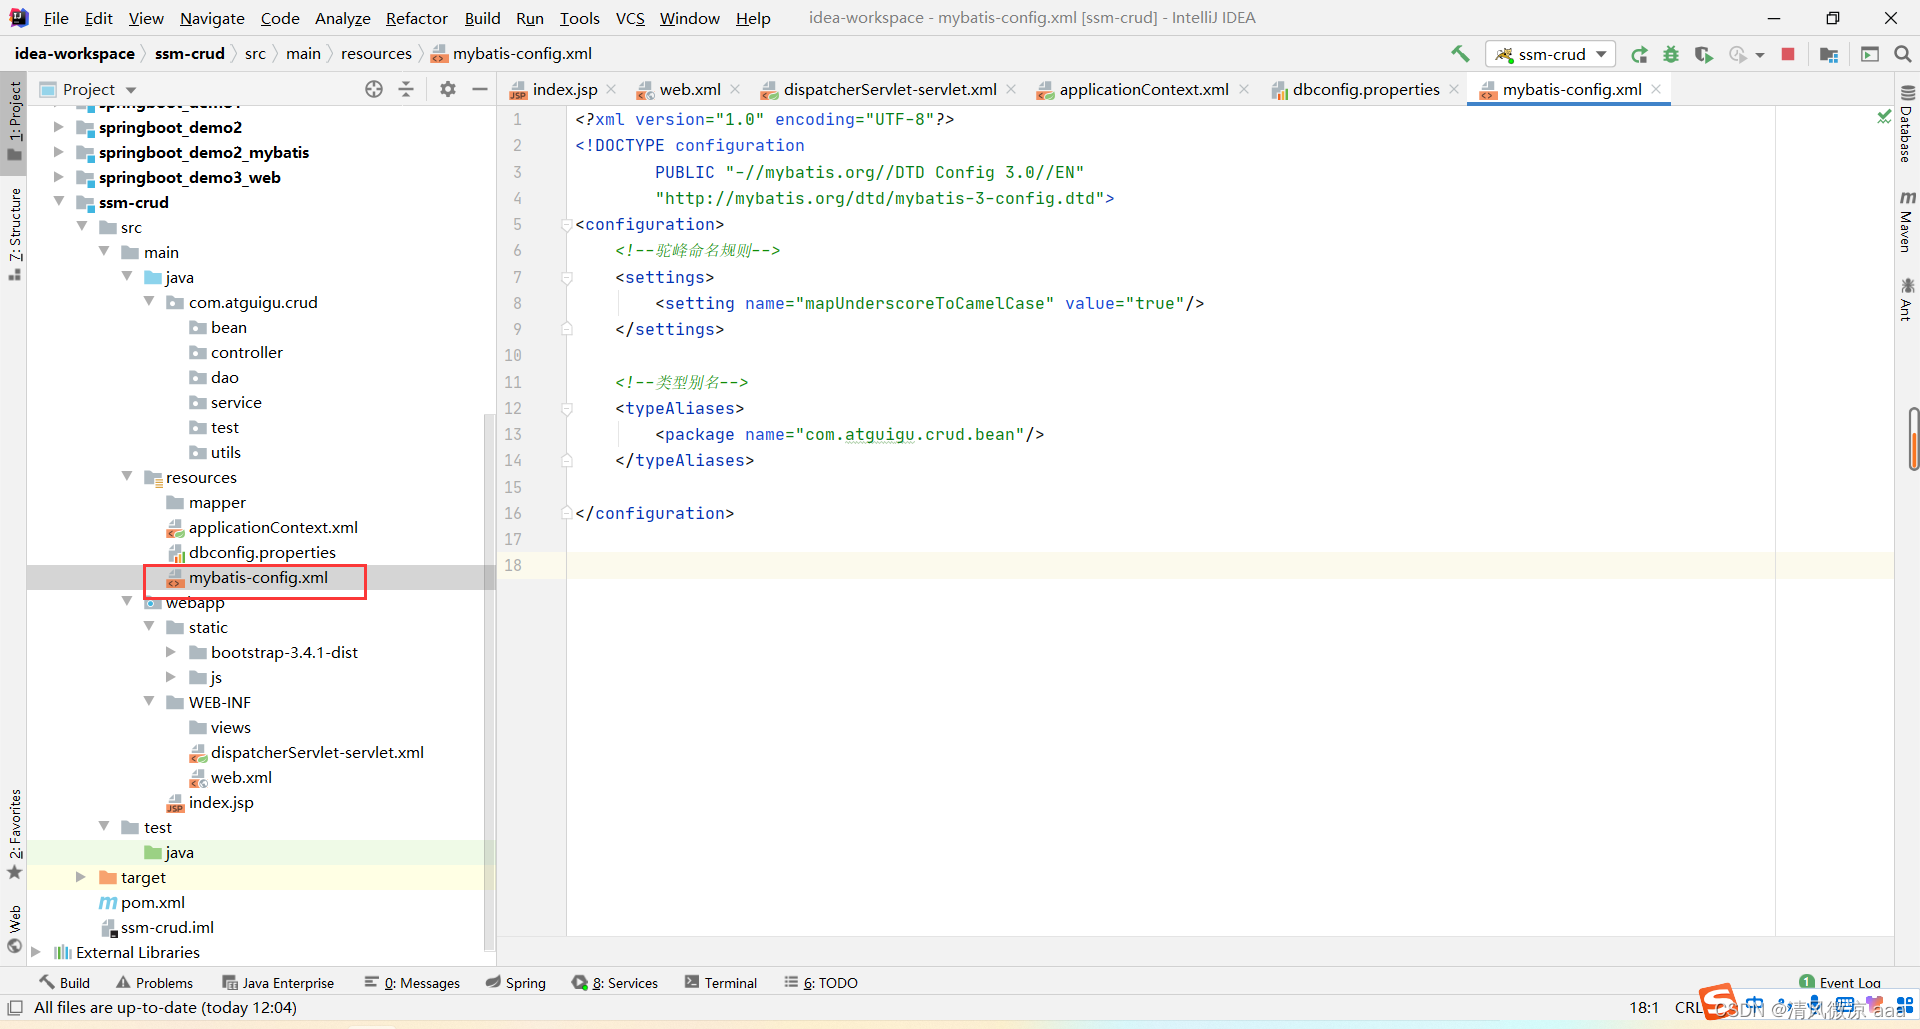
2.4.4、配置mybatis的全局配置文件
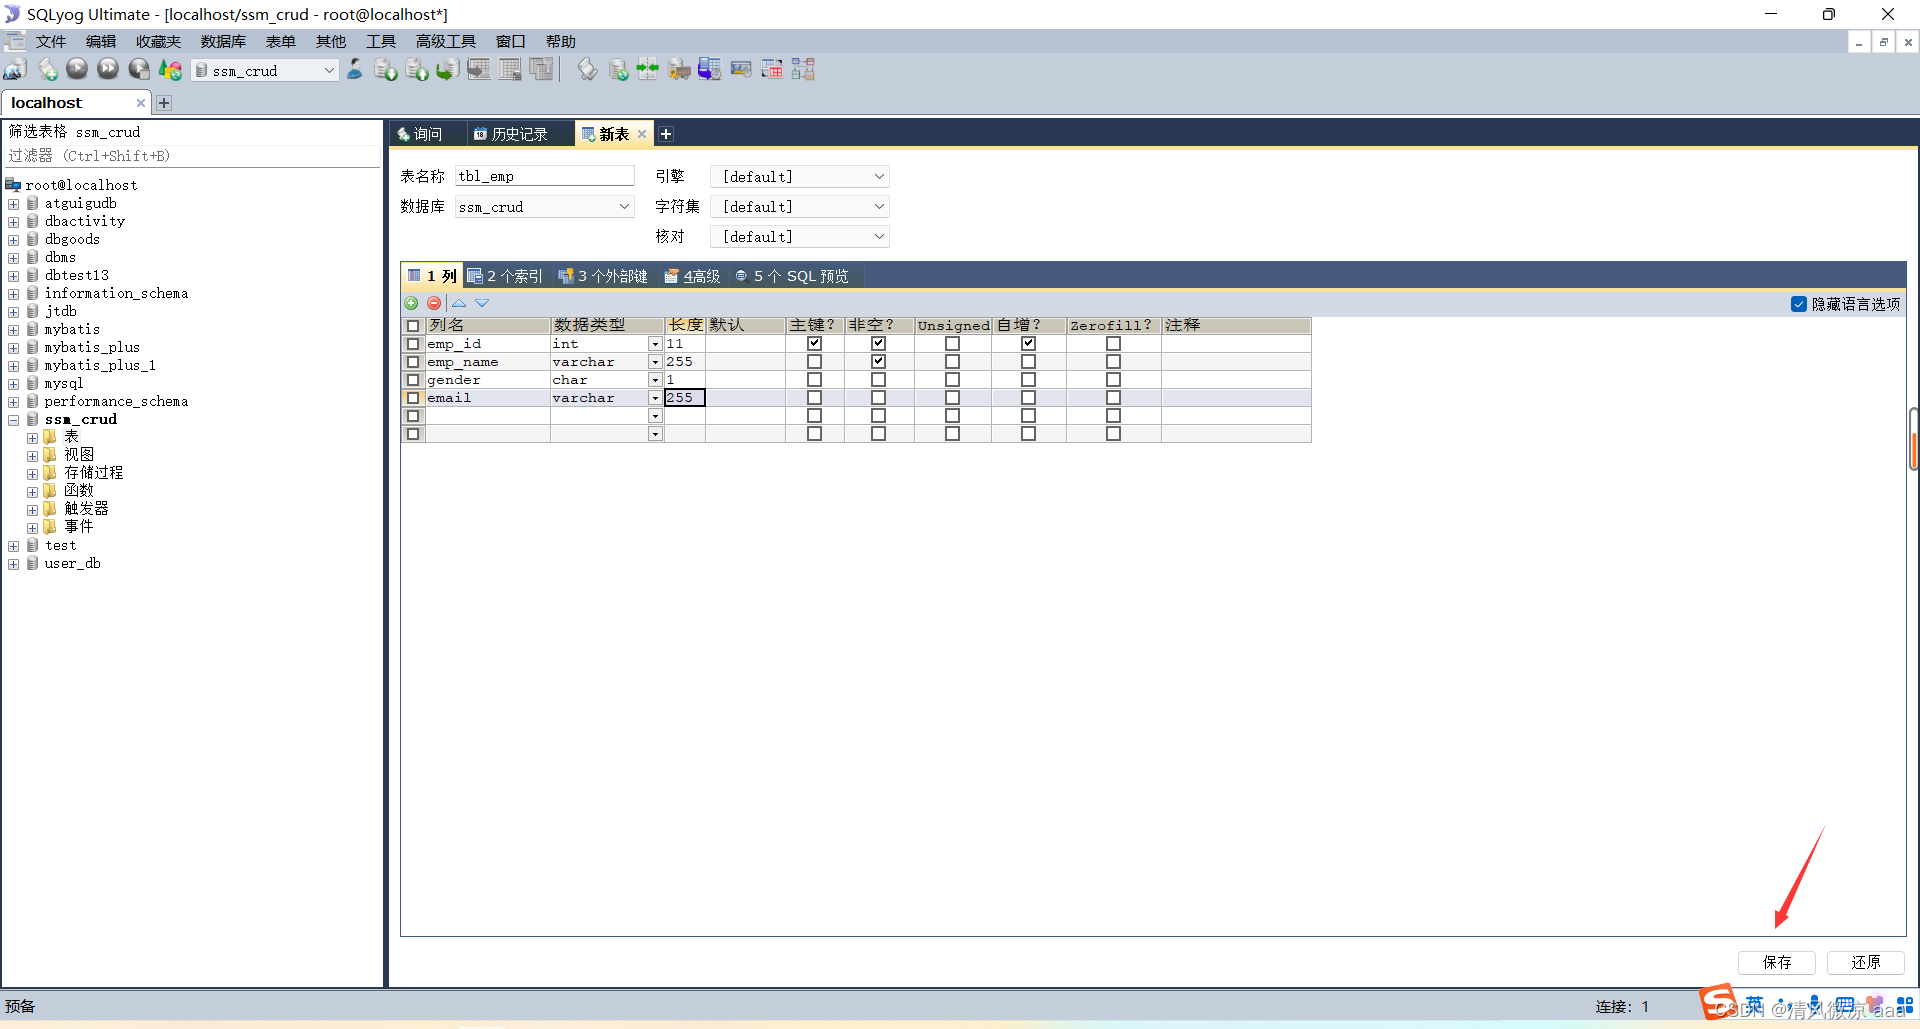
2.4.5、创建数据库中的表
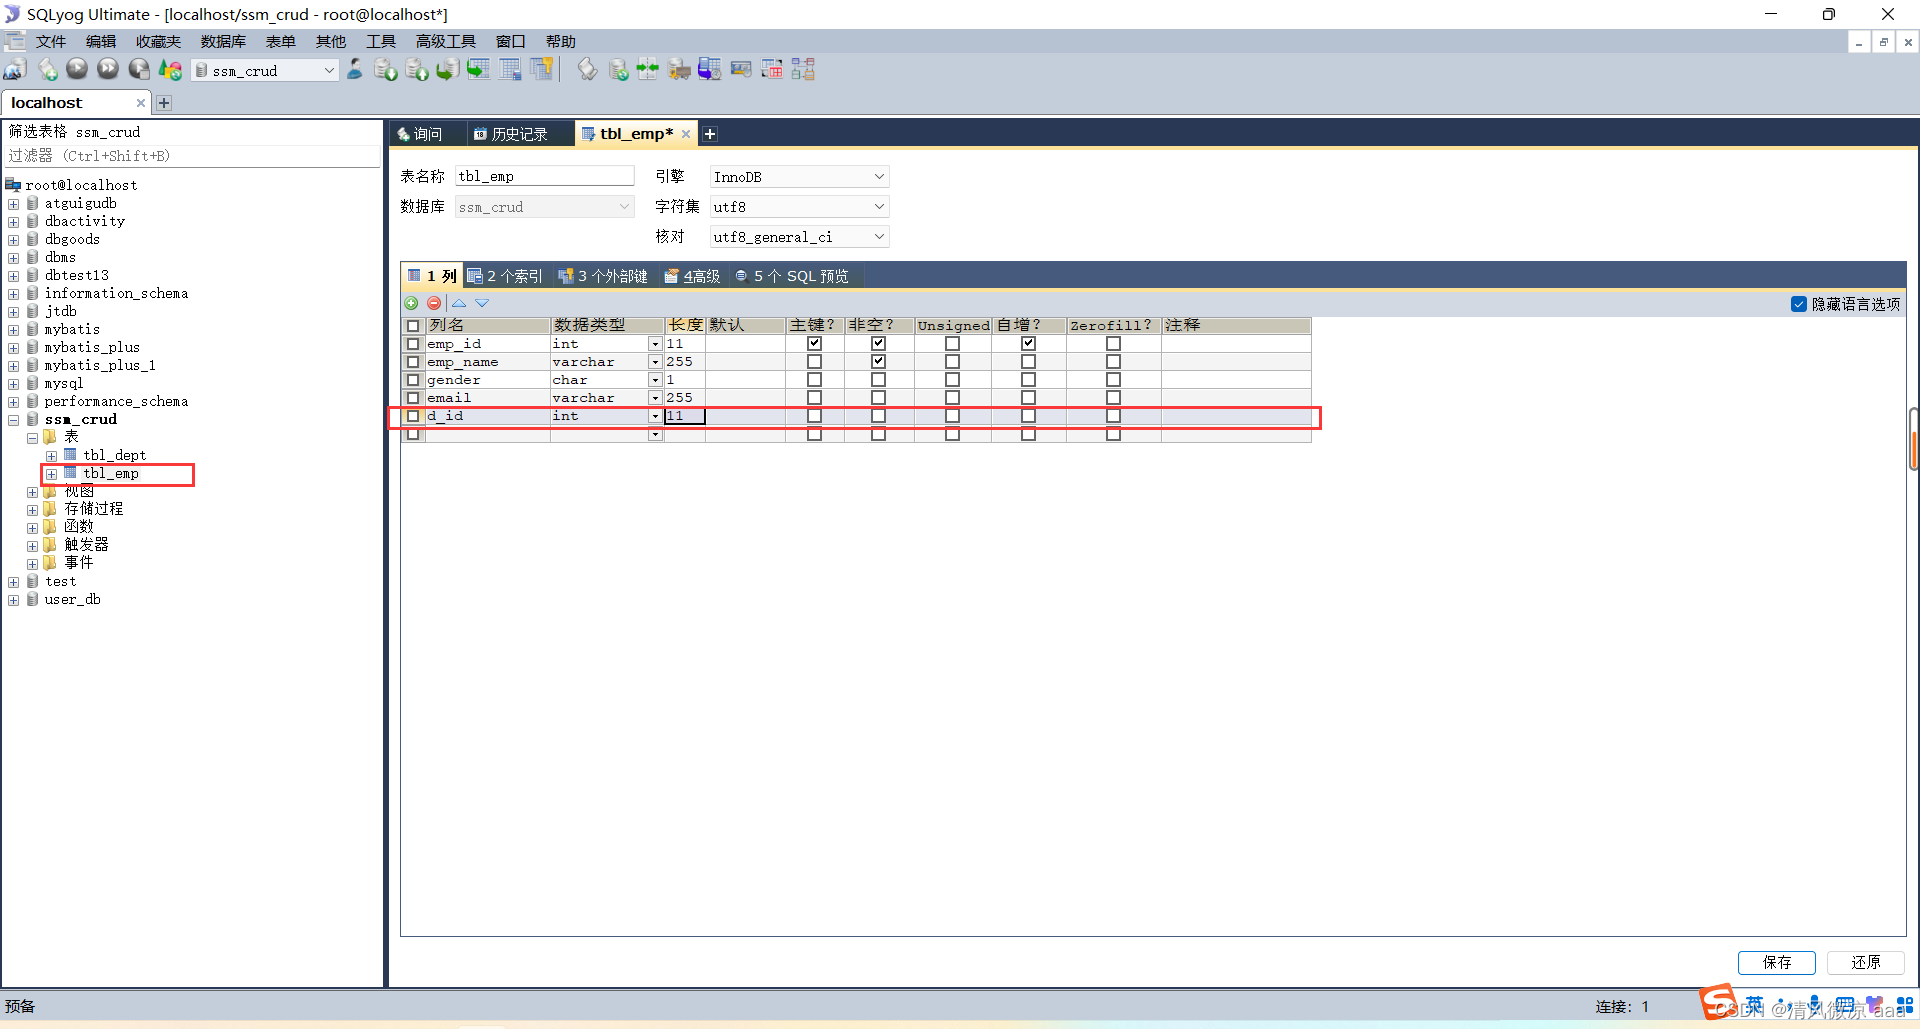
创建员工表:tbl_emp.
创建部门表:tbl_dept.
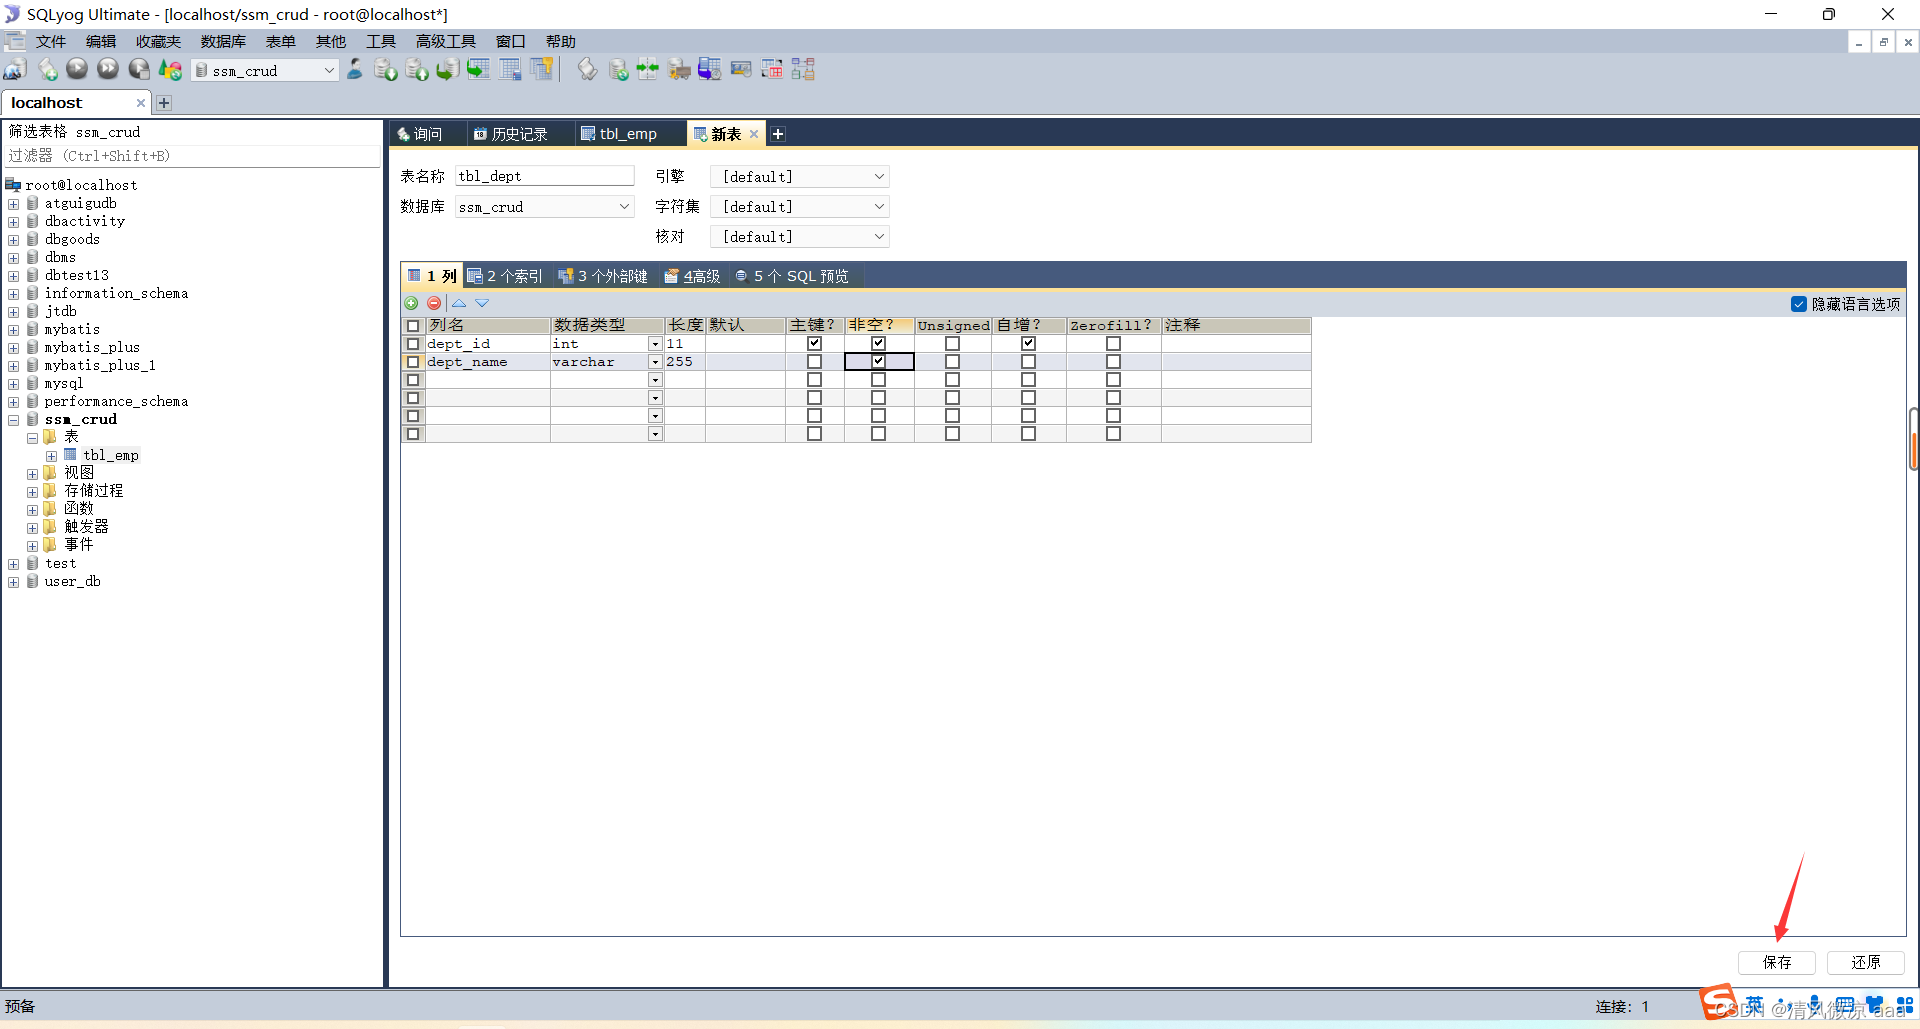
在员工表添加一列来保存部门表的主键,用来表示表关系。
说明:也可以建立外键关联,数据的安全会有保证,但是效率会降低,这里就不在添加外键了。
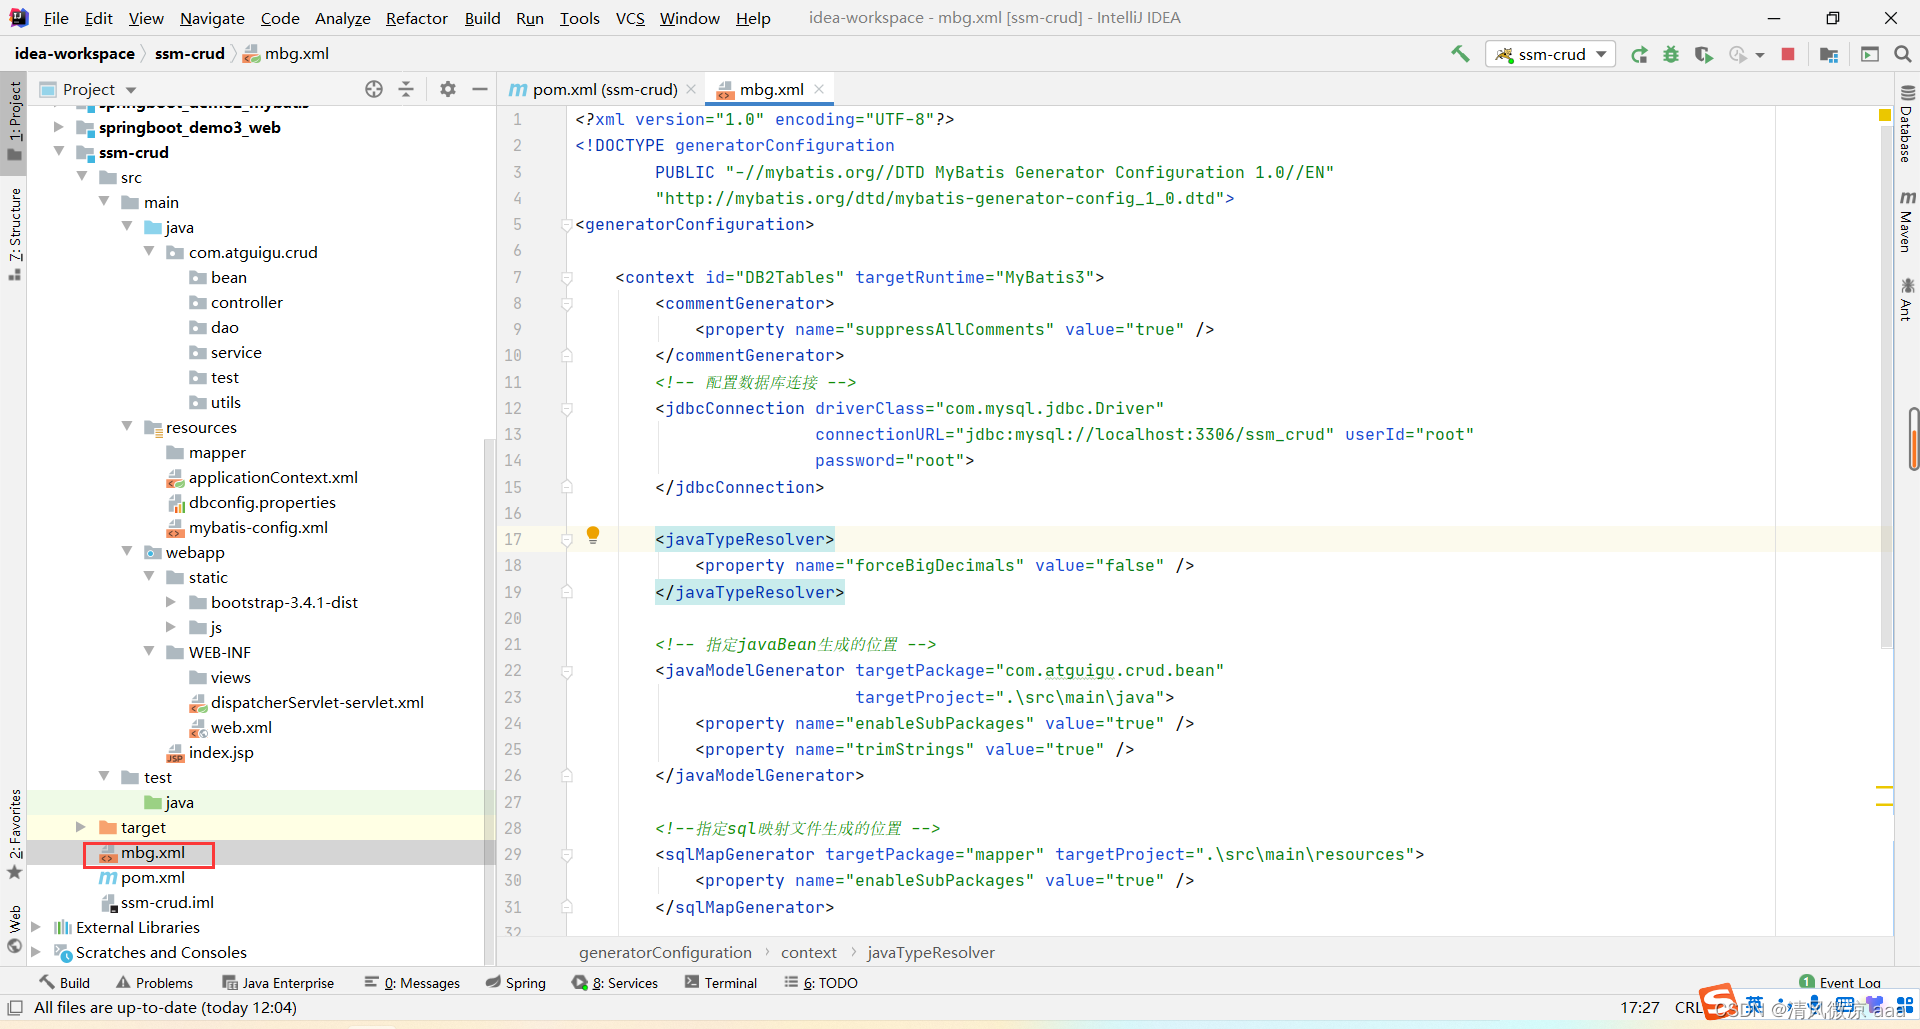
2.4.6、使用mybatis的逆向工程生成对应的bean以及mapper
说明:当然也可以自己写,不过太麻烦。
步骤1:引入jar包:
org.mybatis.generator mybatis-generator-core 1.3.5 步骤2:在当前工程下创建mbg.xml文件:
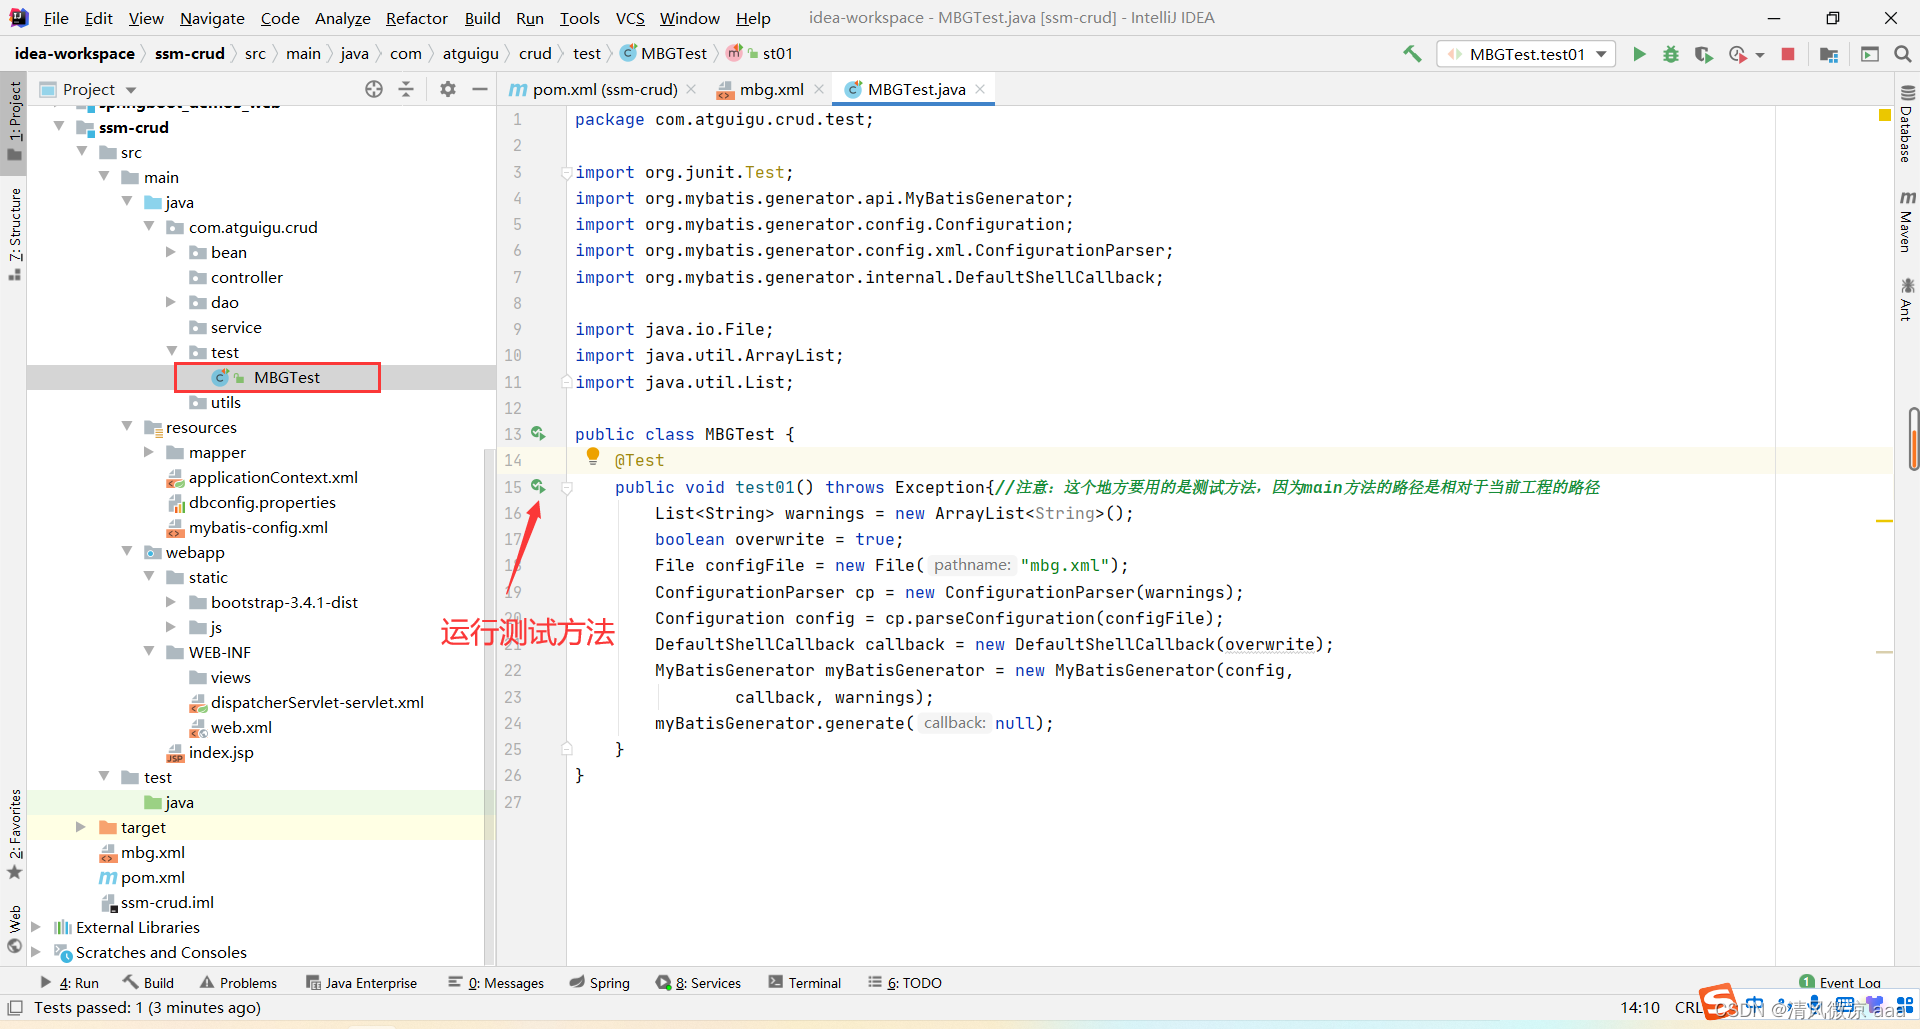
步骤3:创建测试类:
package com.atguigu.crud.test;import org.junit.Test;
import org.mybatis.generator.api.MyBatisGenerator;
import org.mybatis.generator.config.Configuration;
import org.mybatis.generator.config.xml.ConfigurationParser;
import org.mybatis.generator.internal.DefaultShellCallback;import java.io.File;
import java.util.ArrayList;
import java.util.List;public class MBGTest {@Testpublic void test01() throws Exception{//注意:这个地方要用的是测试方法,因为main方法的路径是相对于当前工程的路径List warnings = new ArrayList();boolean overwrite = true;File configFile = new File("mbg.xml");ConfigurationParser cp = new ConfigurationParser(warnings);Configuration config = cp.parseConfiguration(configFile);DefaultShellCallback callback = new DefaultShellCallback(overwrite);MyBatisGenerator myBatisGenerator = new MyBatisGenerator(config,callback, warnings);myBatisGenerator.generate(null);}
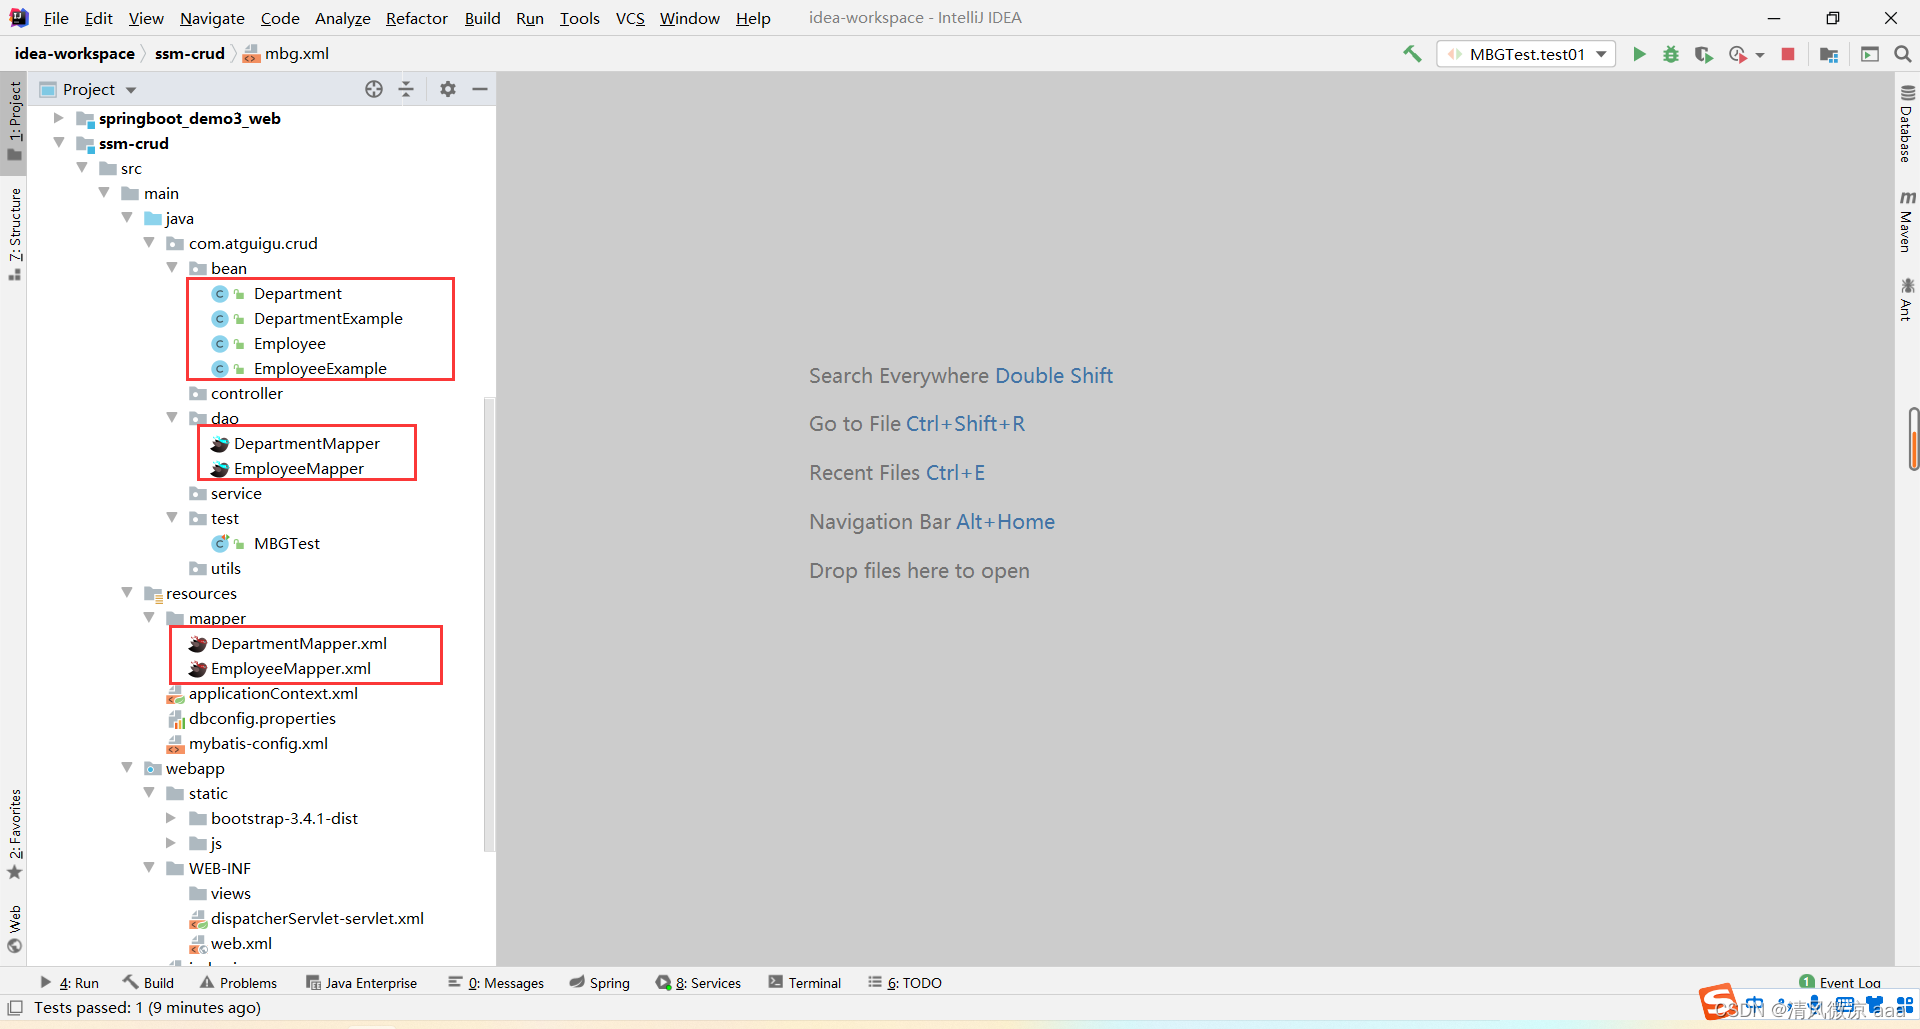
} 生成的文件结构:
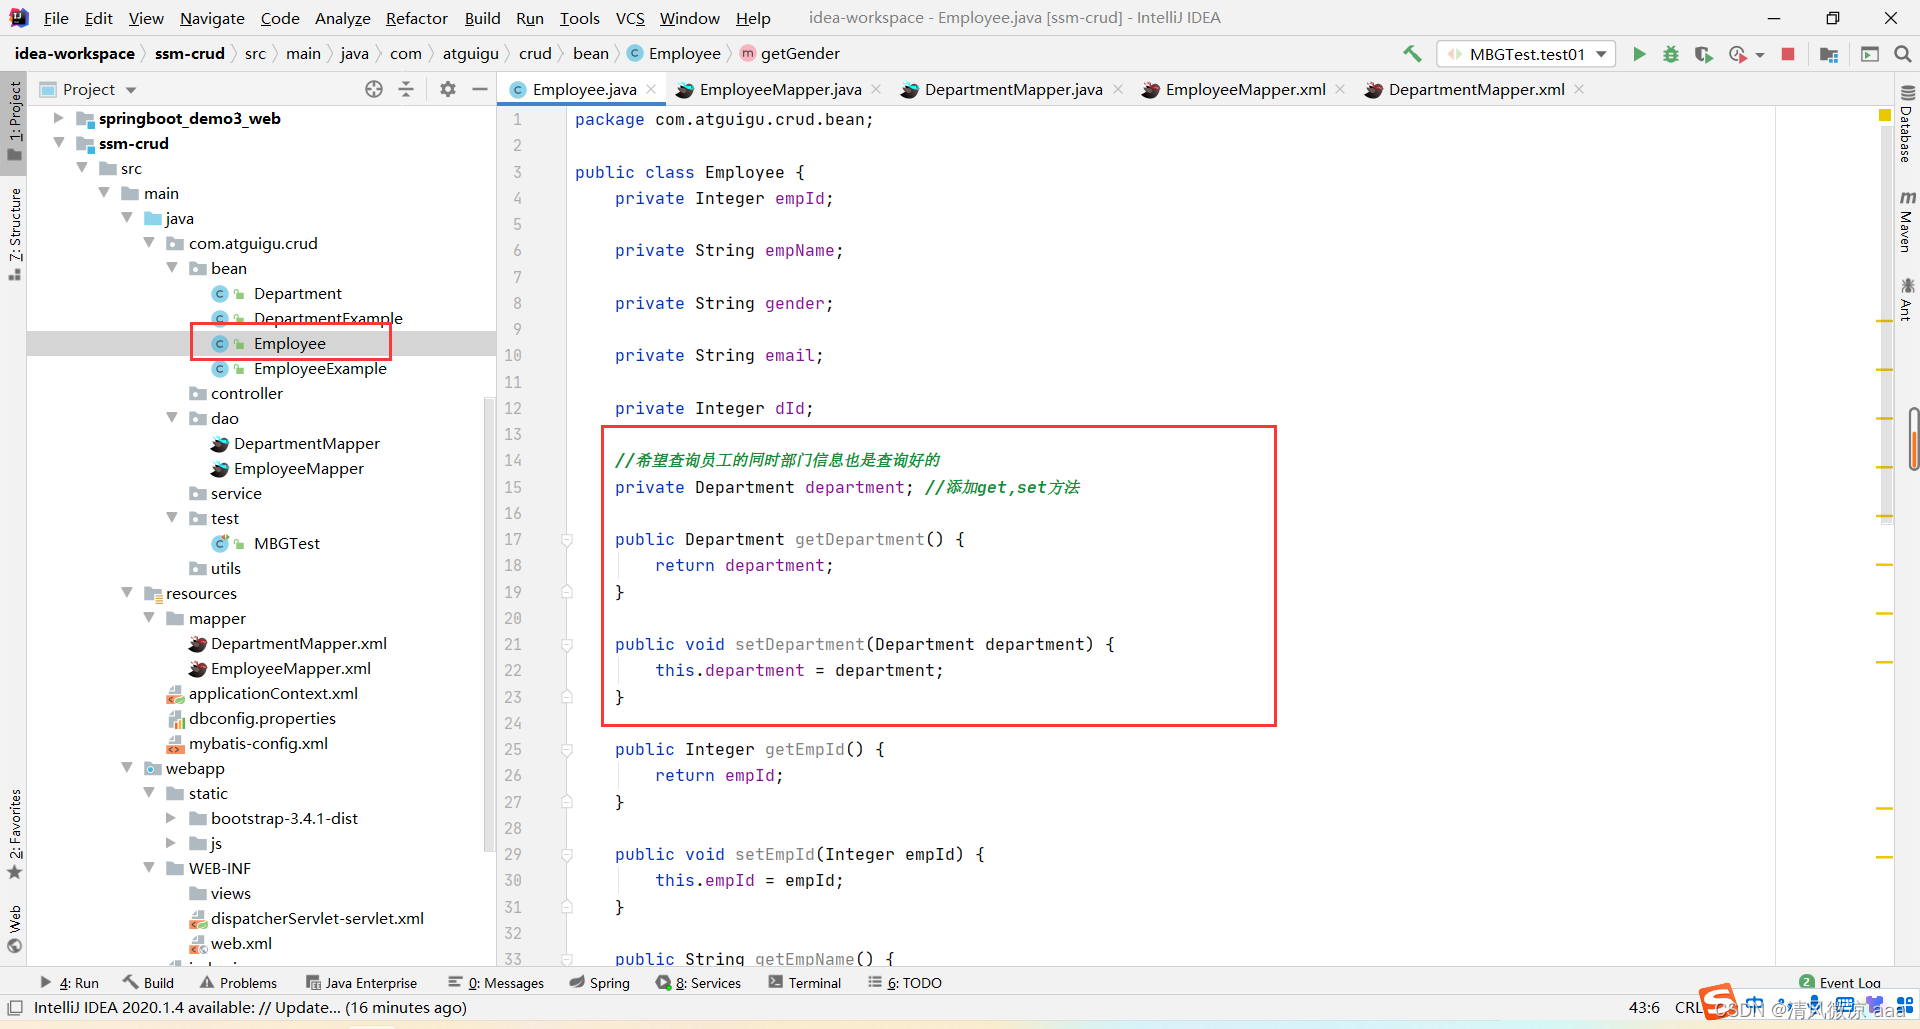
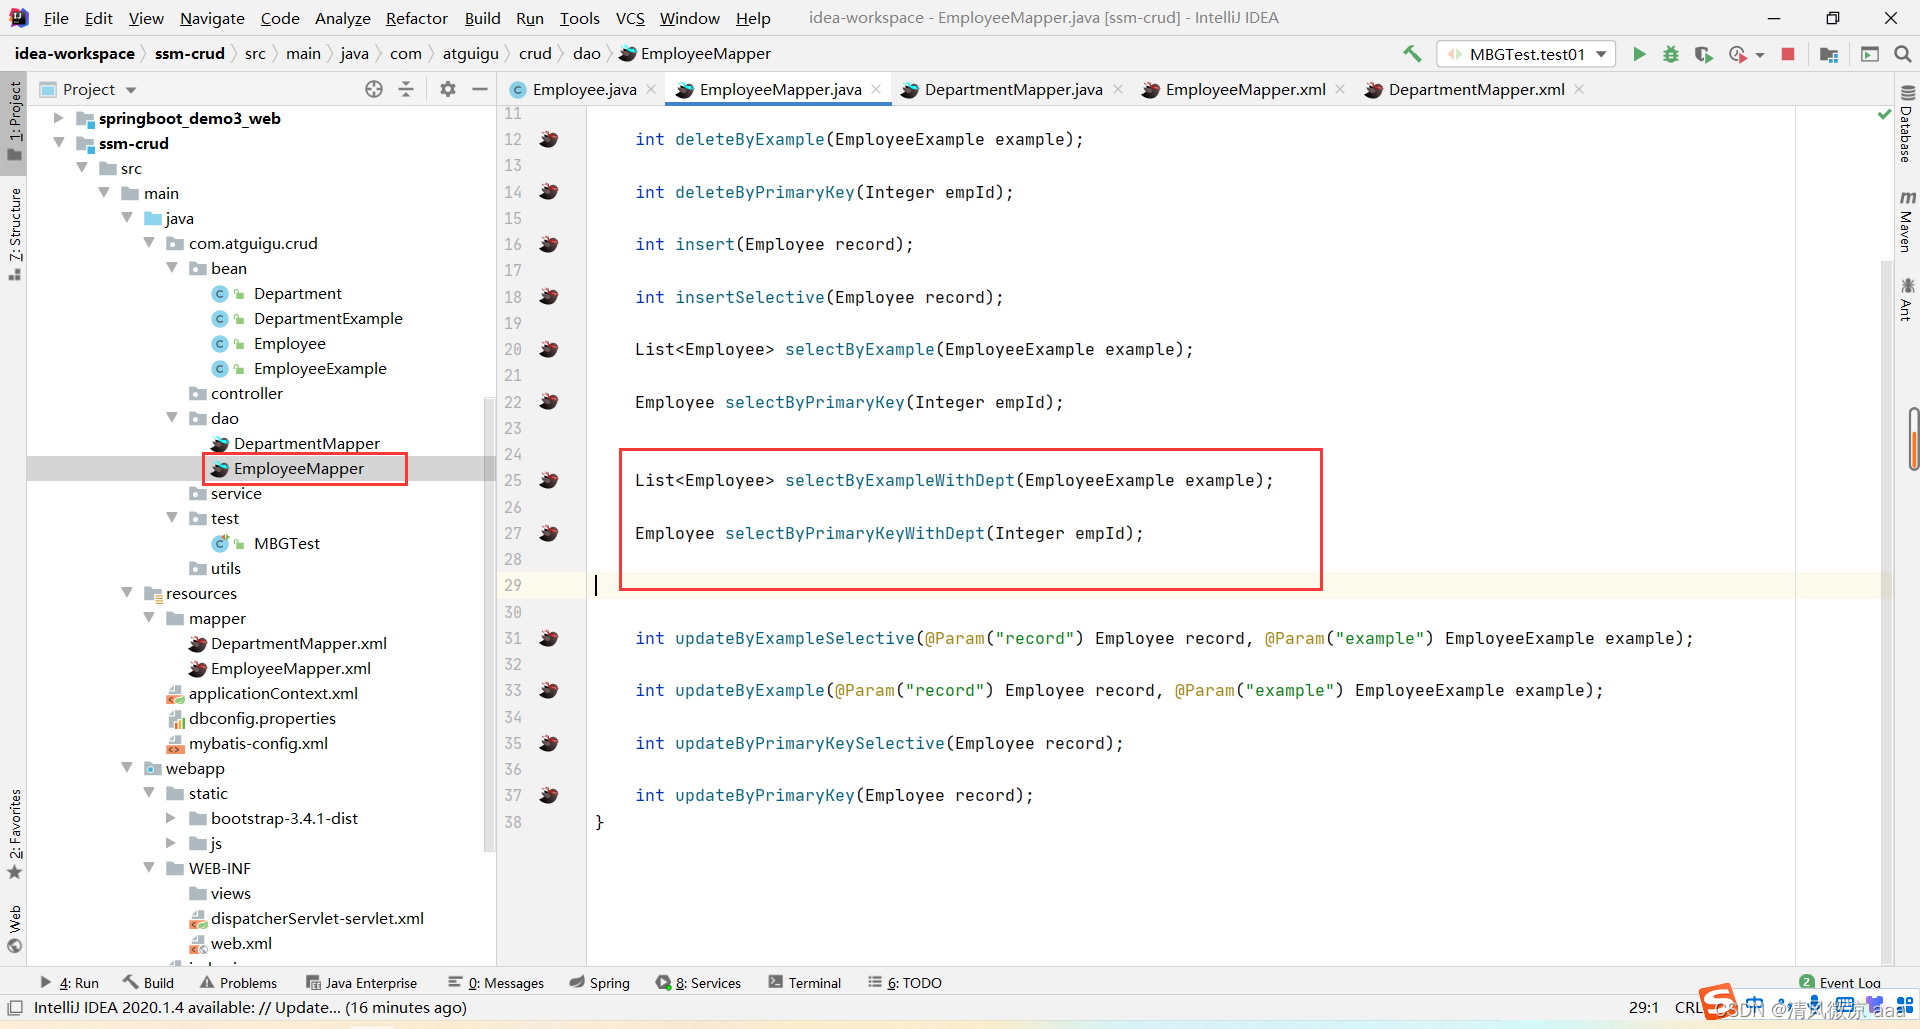
2.4.7、修改mapper文件
说明:生成的mapper文件里面有些不符合业务逻辑,所以要进行修改。
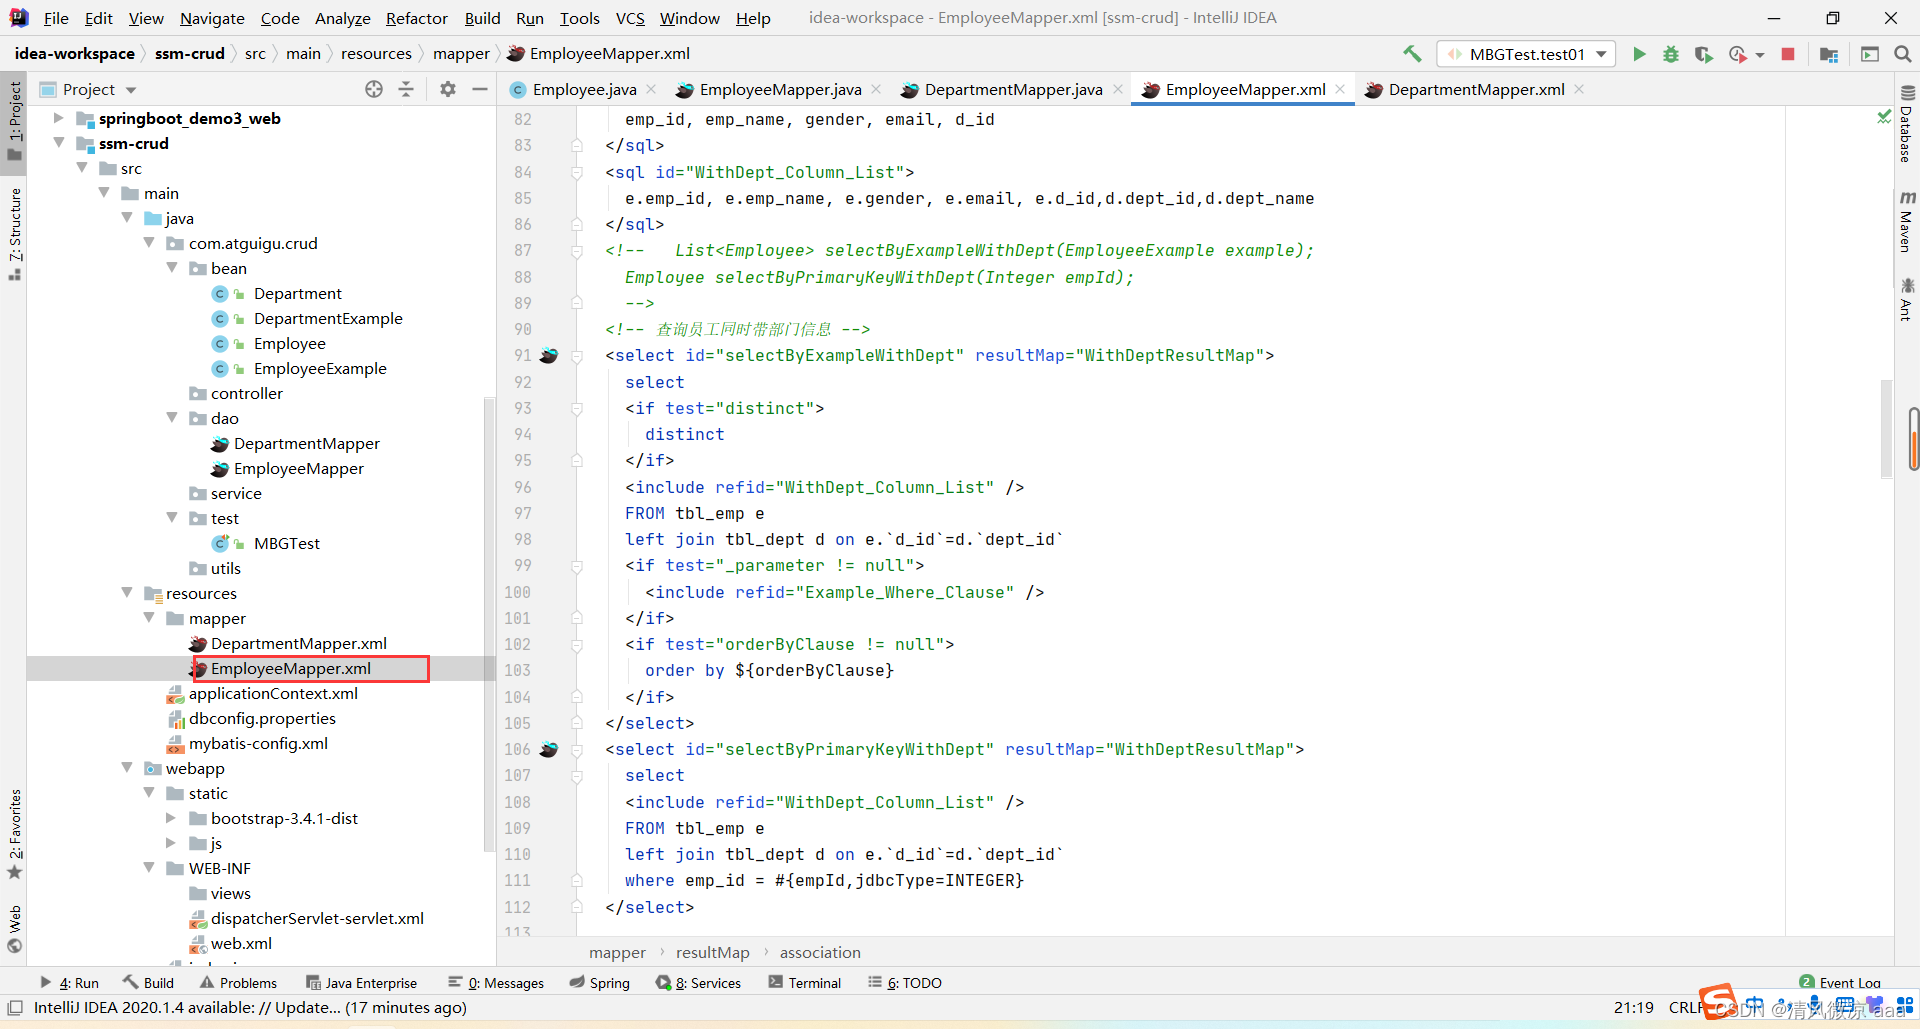
and ${criterion.condition} and ${criterion.condition} #{criterion.value} and ${criterion.condition} #{criterion.value} and #{criterion.secondValue} and ${criterion.condition}#{listItem} and ${criterion.condition} and ${criterion.condition} #{criterion.value} and ${criterion.condition} #{criterion.value} and #{criterion.secondValue} and ${criterion.condition}#{listItem} emp_id, emp_name, gender, email, d_id e.emp_id, e.emp_name, e.gender, e.email, e.d_id,d.dept_id,d.dept_name delete from tbl_empwhere emp_id = #{empId,jdbcType=INTEGER} delete from tbl_emp insert into tbl_emp (emp_id, emp_name, gender, email, d_id)values (#{empId,jdbcType=INTEGER}, #{empName,jdbcType=VARCHAR}, #{gender,jdbcType=CHAR}, #{email,jdbcType=VARCHAR}, #{dId,jdbcType=INTEGER}) insert into tbl_empemp_id, emp_name, gender, email, d_id, #{empId,jdbcType=INTEGER}, #{empName,jdbcType=VARCHAR}, #{gender,jdbcType=CHAR}, #{email,jdbcType=VARCHAR}, #{dId,jdbcType=INTEGER}, update tbl_empemp_id = #{record.empId,jdbcType=INTEGER}, emp_name = #{record.empName,jdbcType=VARCHAR}, gender = #{record.gender,jdbcType=CHAR}, email = #{record.email,jdbcType=VARCHAR}, d_id = #{record.dId,jdbcType=INTEGER}, update tbl_empset emp_id = #{record.empId,jdbcType=INTEGER},emp_name = #{record.empName,jdbcType=VARCHAR},gender = #{record.gender,jdbcType=CHAR},email = #{record.email,jdbcType=VARCHAR},d_id = #{record.dId,jdbcType=INTEGER} update tbl_empemp_name = #{empName,jdbcType=VARCHAR}, gender = #{gender,jdbcType=CHAR}, email = #{email,jdbcType=VARCHAR}, d_id = #{dId,jdbcType=INTEGER}, update tbl_empset emp_name = #{empName,jdbcType=VARCHAR},gender = #{gender,jdbcType=CHAR},email = #{email,jdbcType=VARCHAR},d_id = #{dId,jdbcType=INTEGER}where emp_id = #{empId,jdbcType=INTEGER}
2.5、测试mapper
2.5.1、添加spring的单元测试依赖
org.springframework spring-test 4.3.7.RELEASE 2.5.2、编写单元测试类
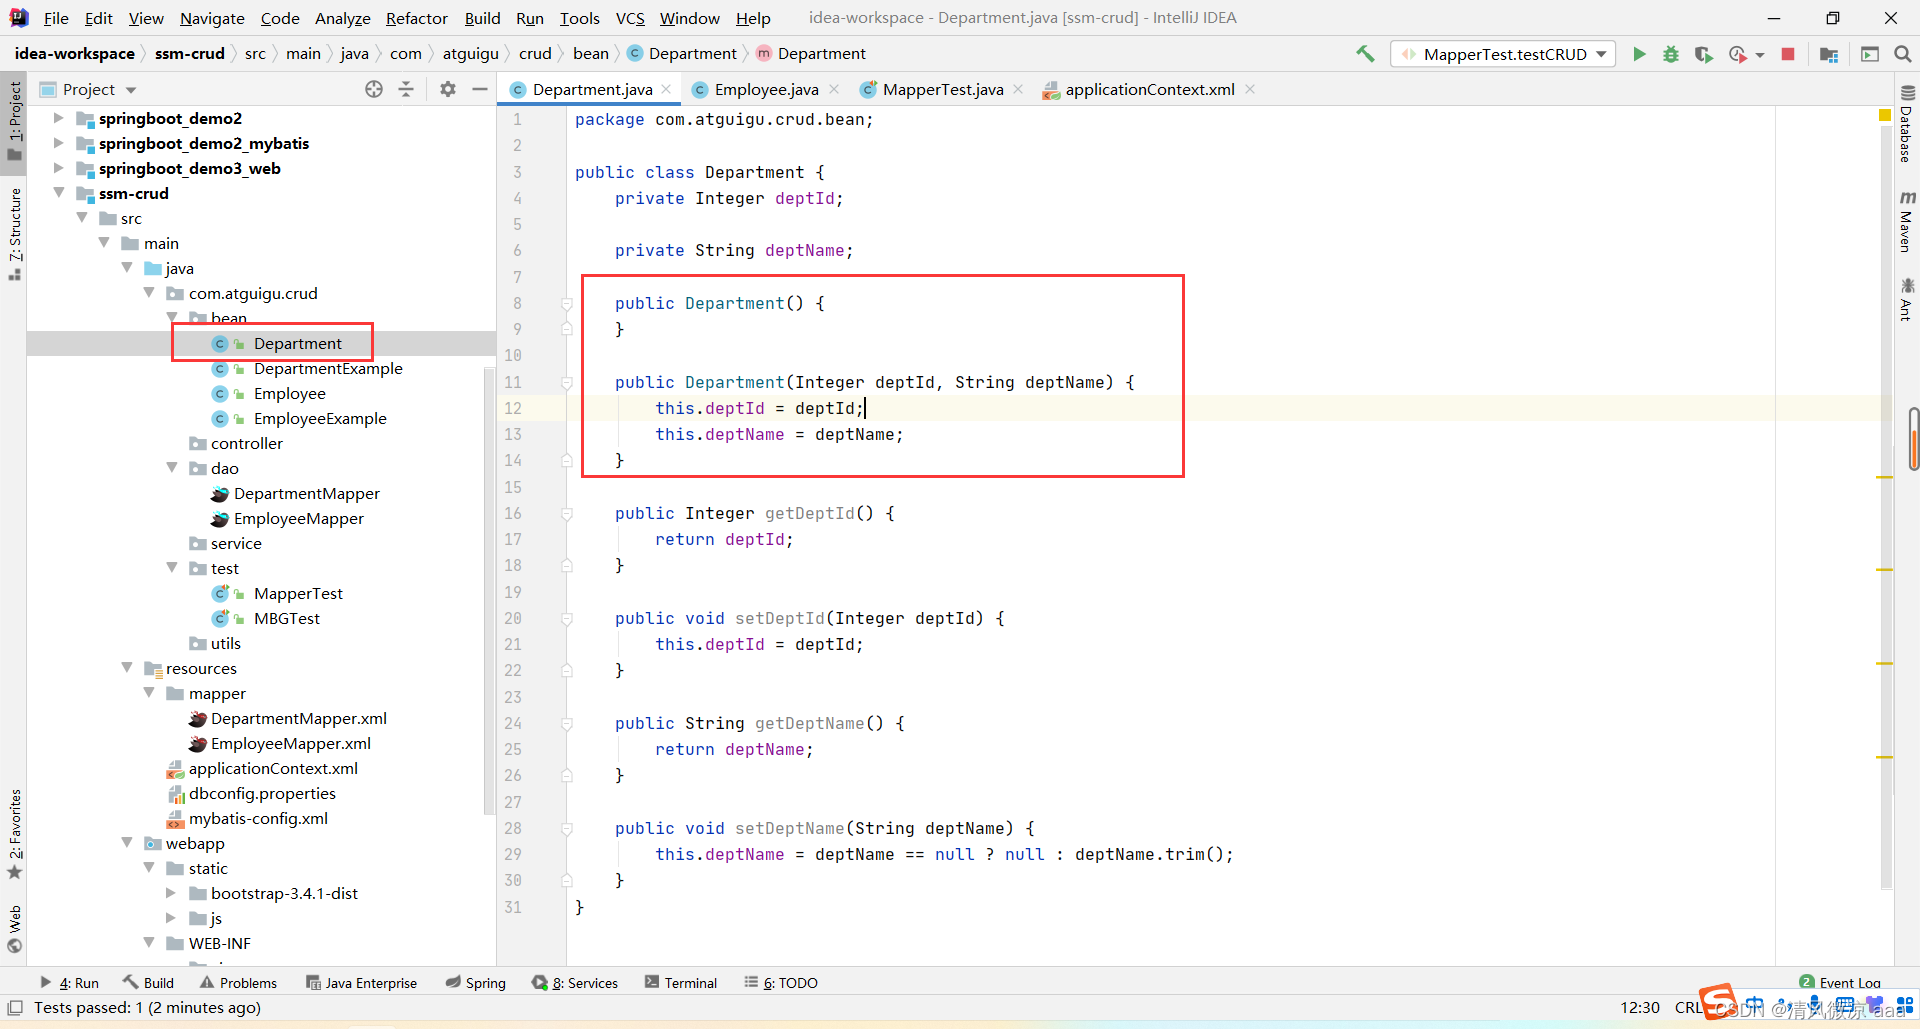
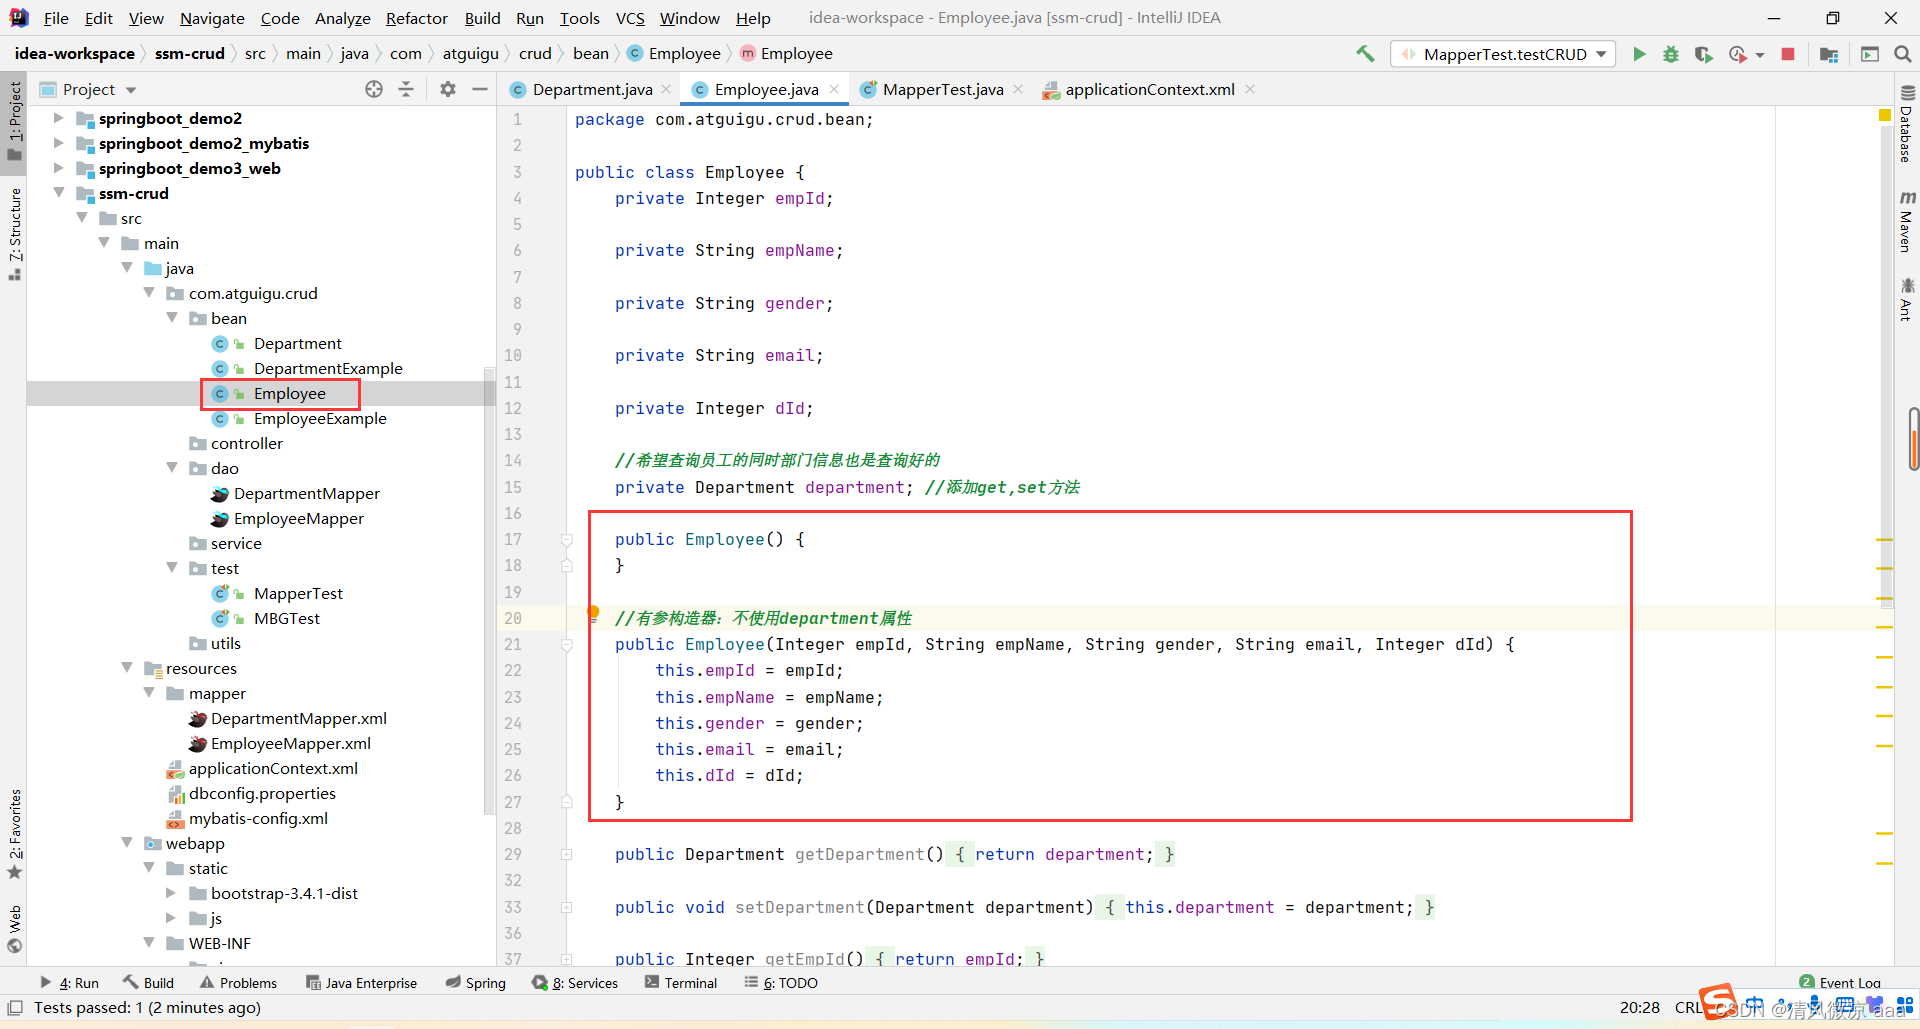
添加对应的有参无参构造器:
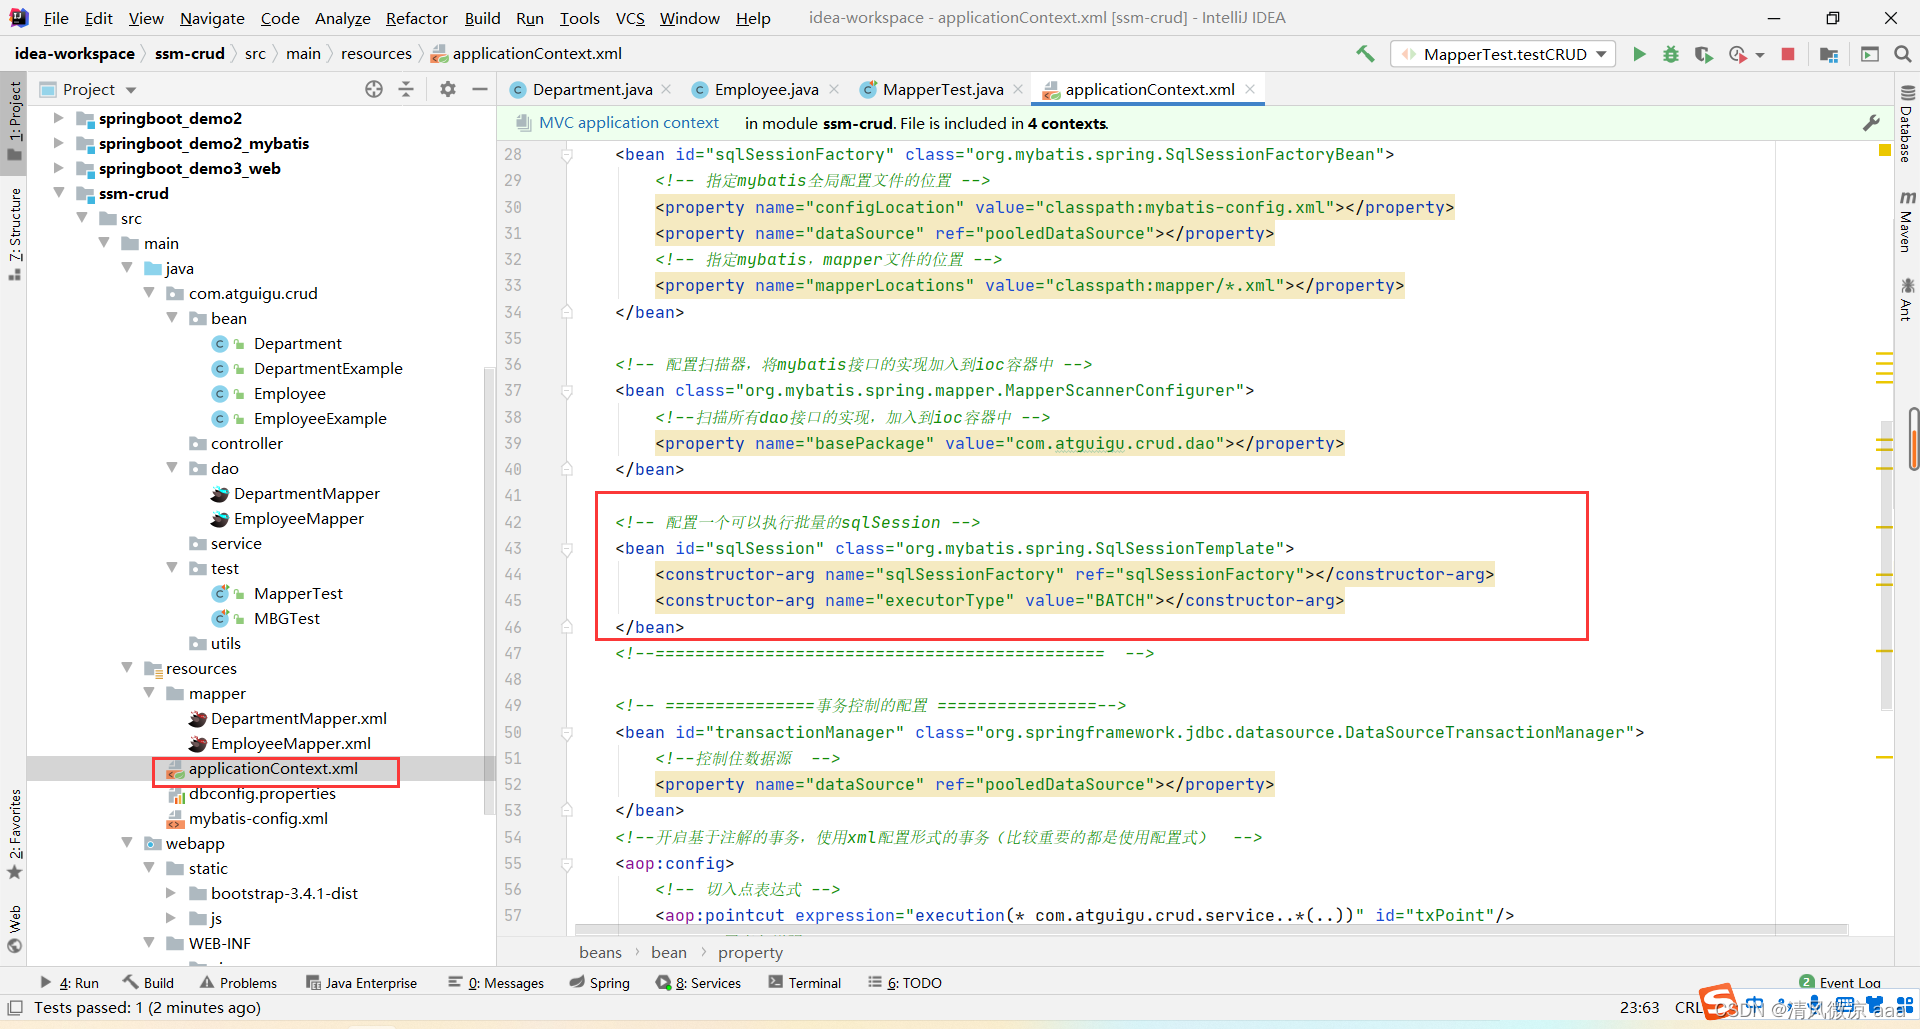
配置批量的sqlsession:
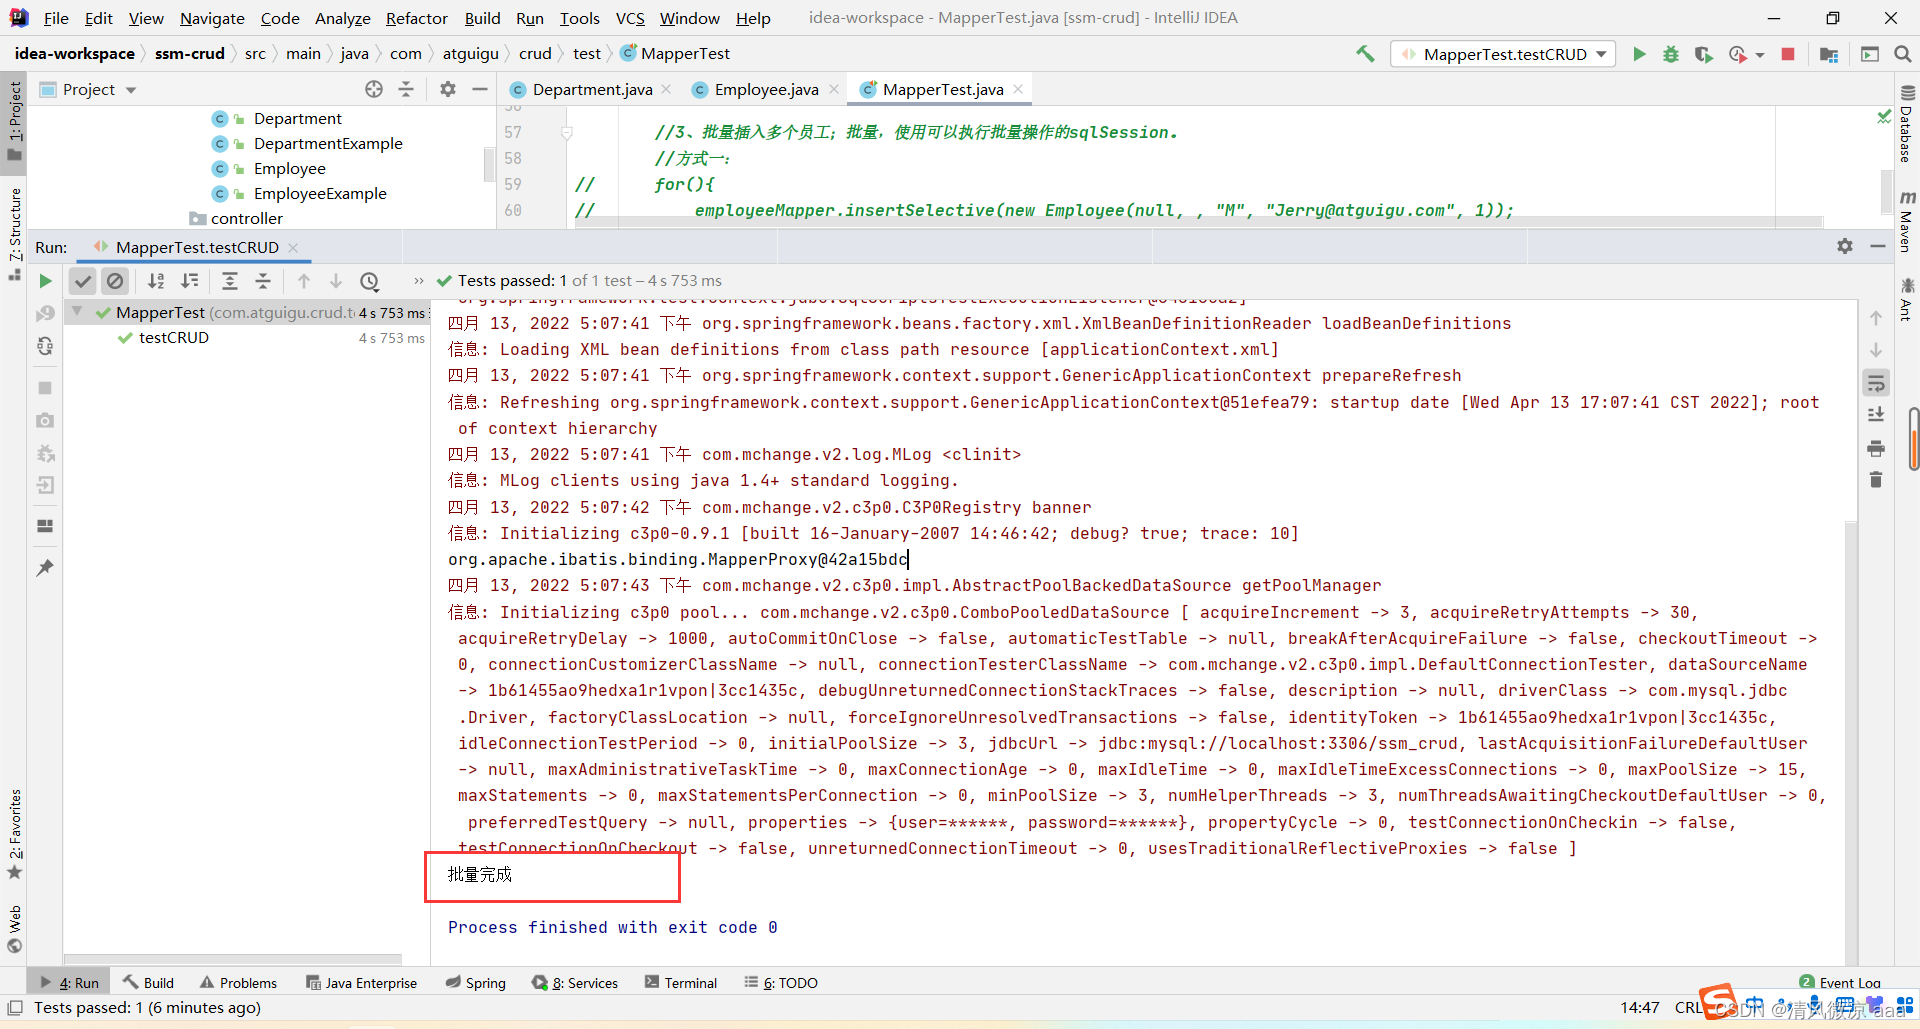
单元测试类:批量添加1000数据。
运行测试类:
package com.atguigu.crud.test;import com.atguigu.crud.bean.Employee;
import com.atguigu.crud.dao.DepartmentMapper;
import com.atguigu.crud.dao.EmployeeMapper;
import org.apache.ibatis.session.SqlSession;
import org.junit.Test;
import org.junit.runner.RunWith;
import org.springframework.beans.factory.annotation.Autowired;
import org.springframework.test.context.ContextConfiguration;
import org.springframework.test.context.junit4.SpringJUnit4ClassRunner;import java.util.UUID;/*** 测试dao层的工作* @author lfy*推荐Spring的项目就可以使用Spring的单元测试,可以自动注入我们需要的组件*1、导入SpringTest模块*2、@ContextConfiguration指定Spring配置文件的位置*3、直接autowired要使用的组件即可*/@RunWith(SpringJUnit4ClassRunner.class)
@ContextConfiguration(locations={"classpath:applicationContext.xml"})
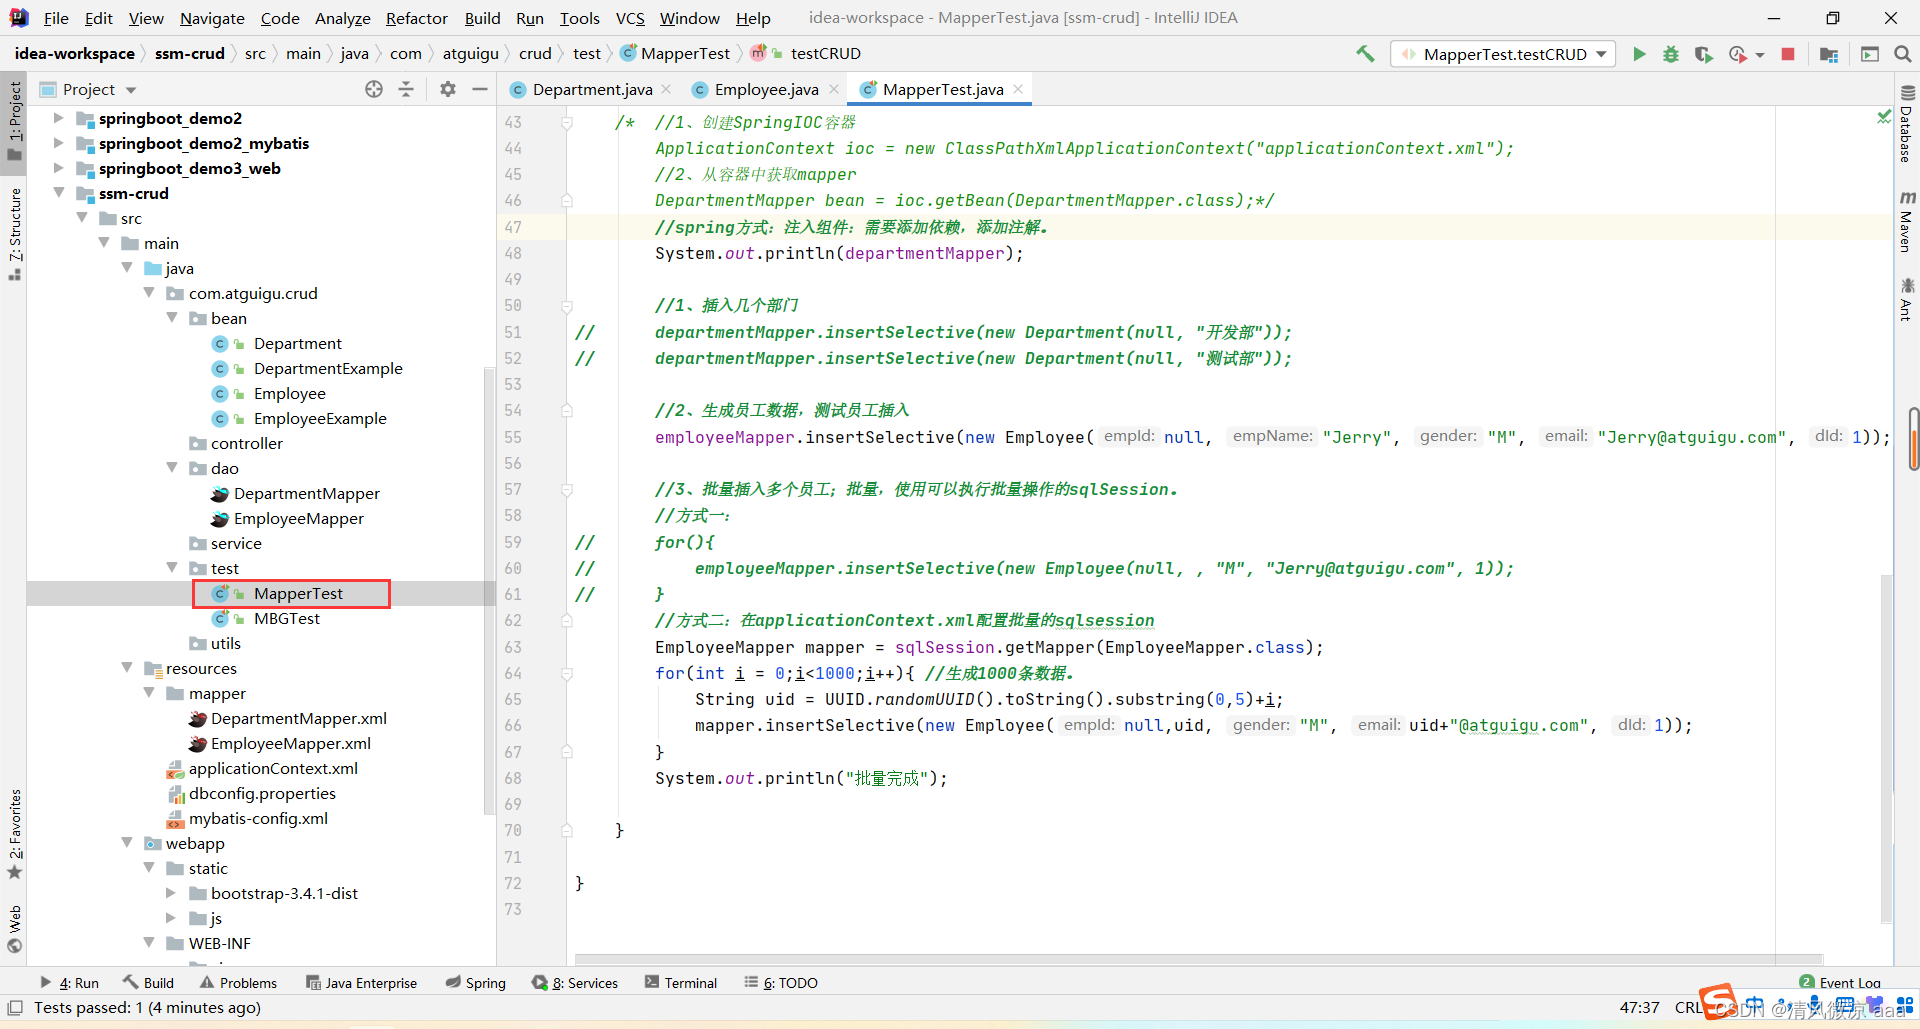
public class MapperTest {@AutowiredDepartmentMapper departmentMapper;@AutowiredEmployeeMapper employeeMapper;@AutowiredSqlSession sqlSession;/*** 测试DepartmentMapper*/@Testpublic void testCRUD(){//原生方式:/* //1、创建SpringIOC容器ApplicationContext ioc = new ClassPathXmlApplicationContext("applicationContext.xml");//2、从容器中获取mapperDepartmentMapper bean = ioc.getBean(DepartmentMapper.class);*///spring方式:注入组件:需要添加依赖,添加注解。System.out.println(departmentMapper);//1、插入几个部门
// departmentMapper.insertSelective(new Department(null, "开发部"));
// departmentMapper.insertSelective(new Department(null, "测试部"));//2、生成员工数据,测试员工插入employeeMapper.insertSelective(new Employee(null, "Jerry", "M", "Jerry@atguigu.com", 1));//3、批量插入多个员工;批量,使用可以执行批量操作的sqlSession。//方式一:
// for(){
// employeeMapper.insertSelective(new Employee(null, , "M", "Jerry@atguigu.com", 1));
// }//方式二:在applicationContext.xml配置批量的sqlsessionEmployeeMapper mapper = sqlSession.getMapper(EmployeeMapper.class);for(int i = 0;i<1000;i++){ //生成1000条数据。String uid = UUID.randomUUID().toString().substring(0,5)+i;mapper.insertSelective(new Employee(null,uid, "M", uid+"@atguigu.com", 1));}System.out.println("批量完成");}}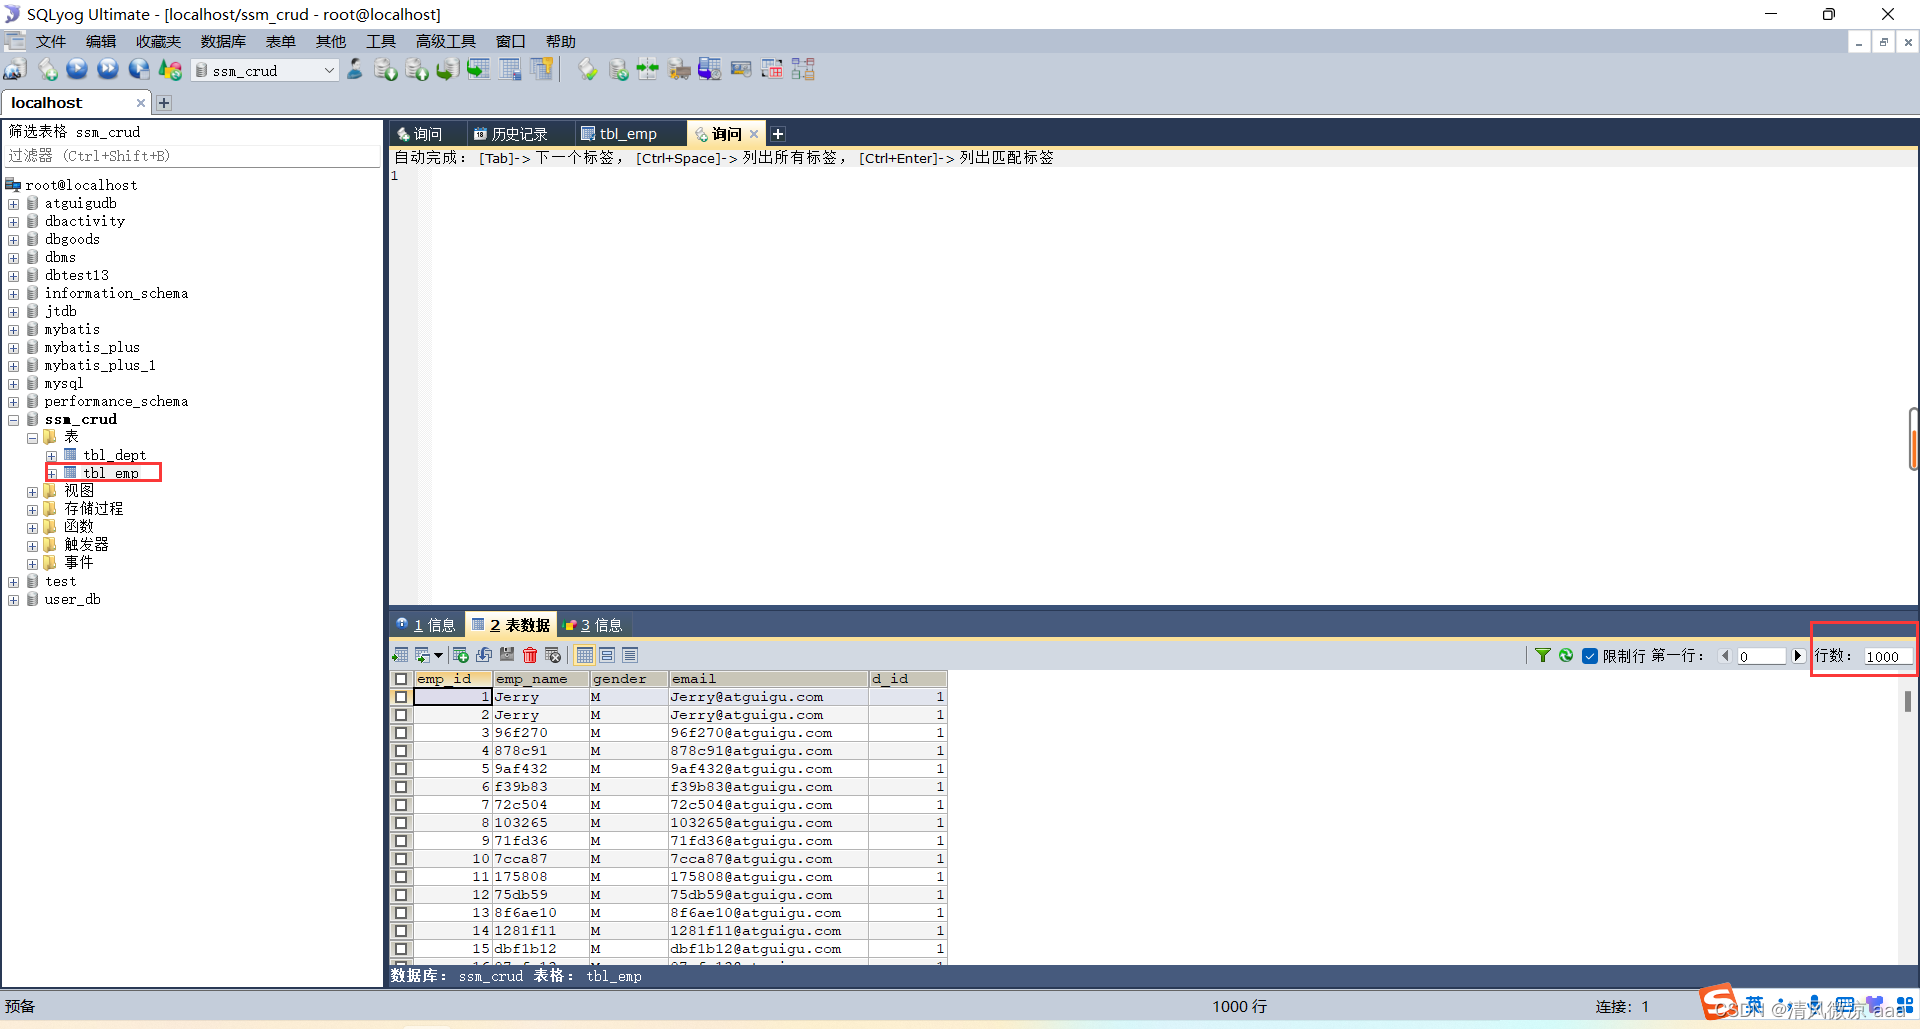
3、查询功能实现
3.1、查询:分页后台代码的完成
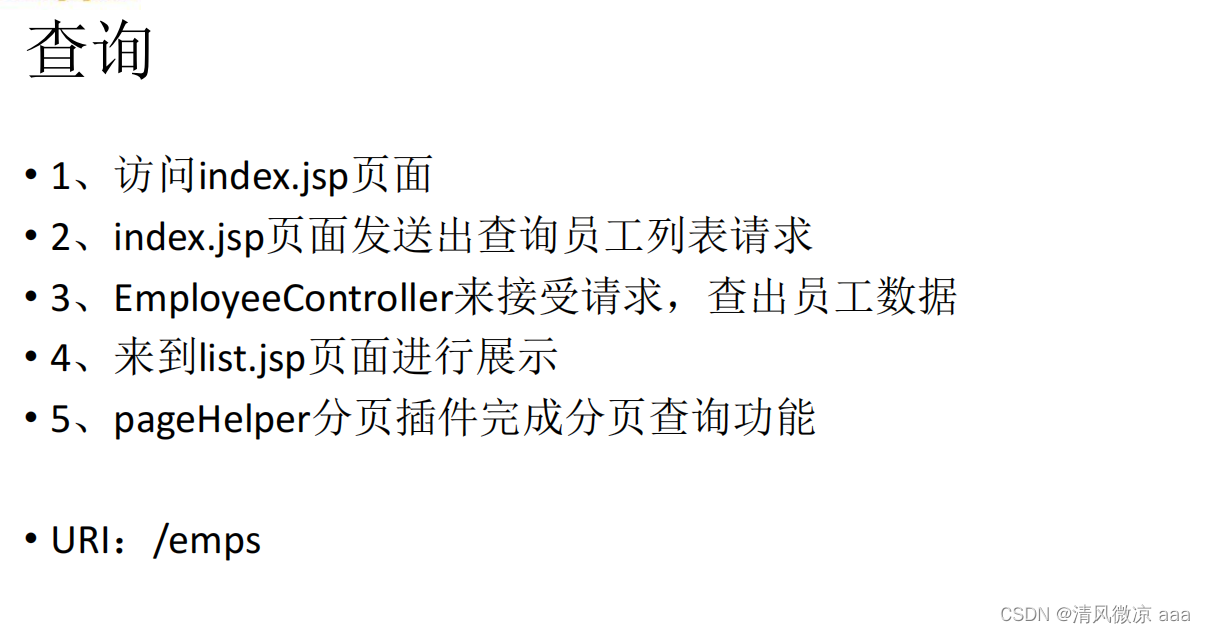
3.1.1、功能分析
说明:项目一启动,来到首页直接展示员工列表数据。
3.1.2、业务逻辑分析
3.1.3、使用MyBatis–分页插件相关配置
步骤1:引入依赖:
com.github.pagehelper pagehelper 5.0.0
步骤2:在mybatis-config.xml核心配置文件中添加分页的配置:

3.1.4、index.jsp页面添加请求
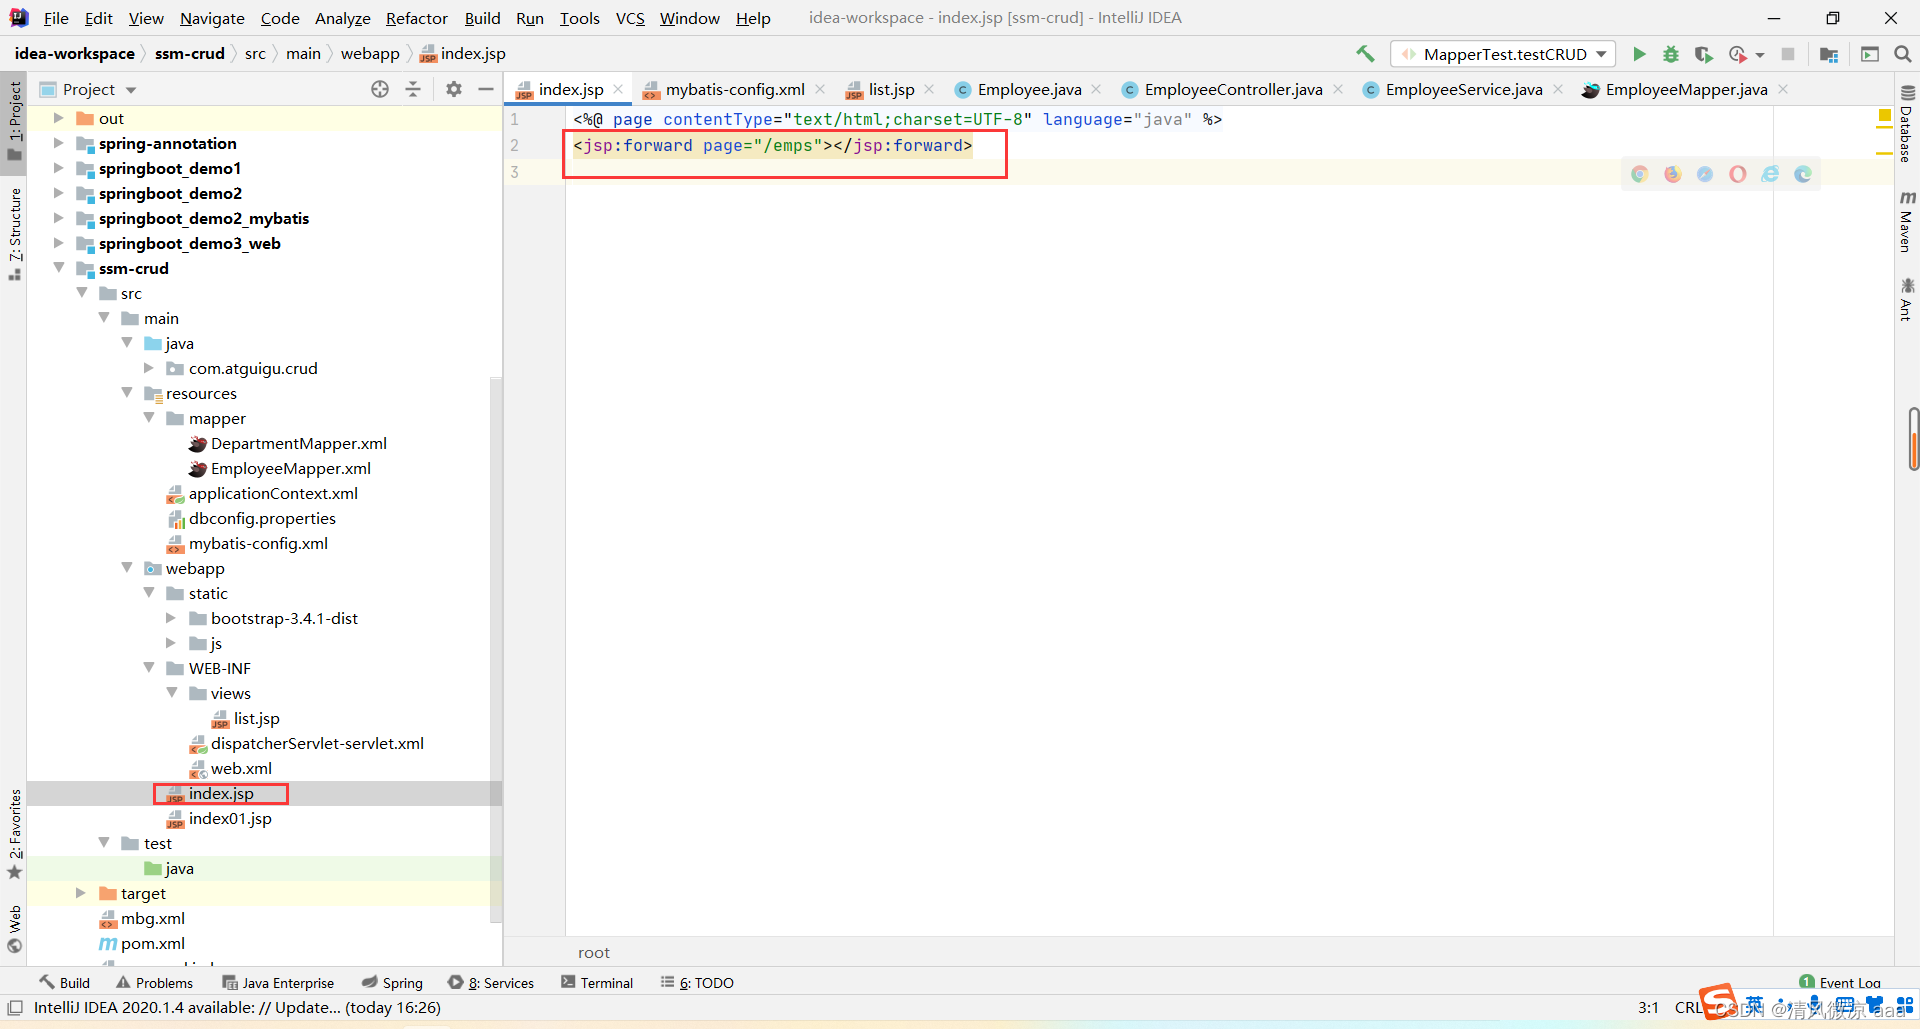
<%@ page contentType="text/html;charset=UTF-8" language="java" %>
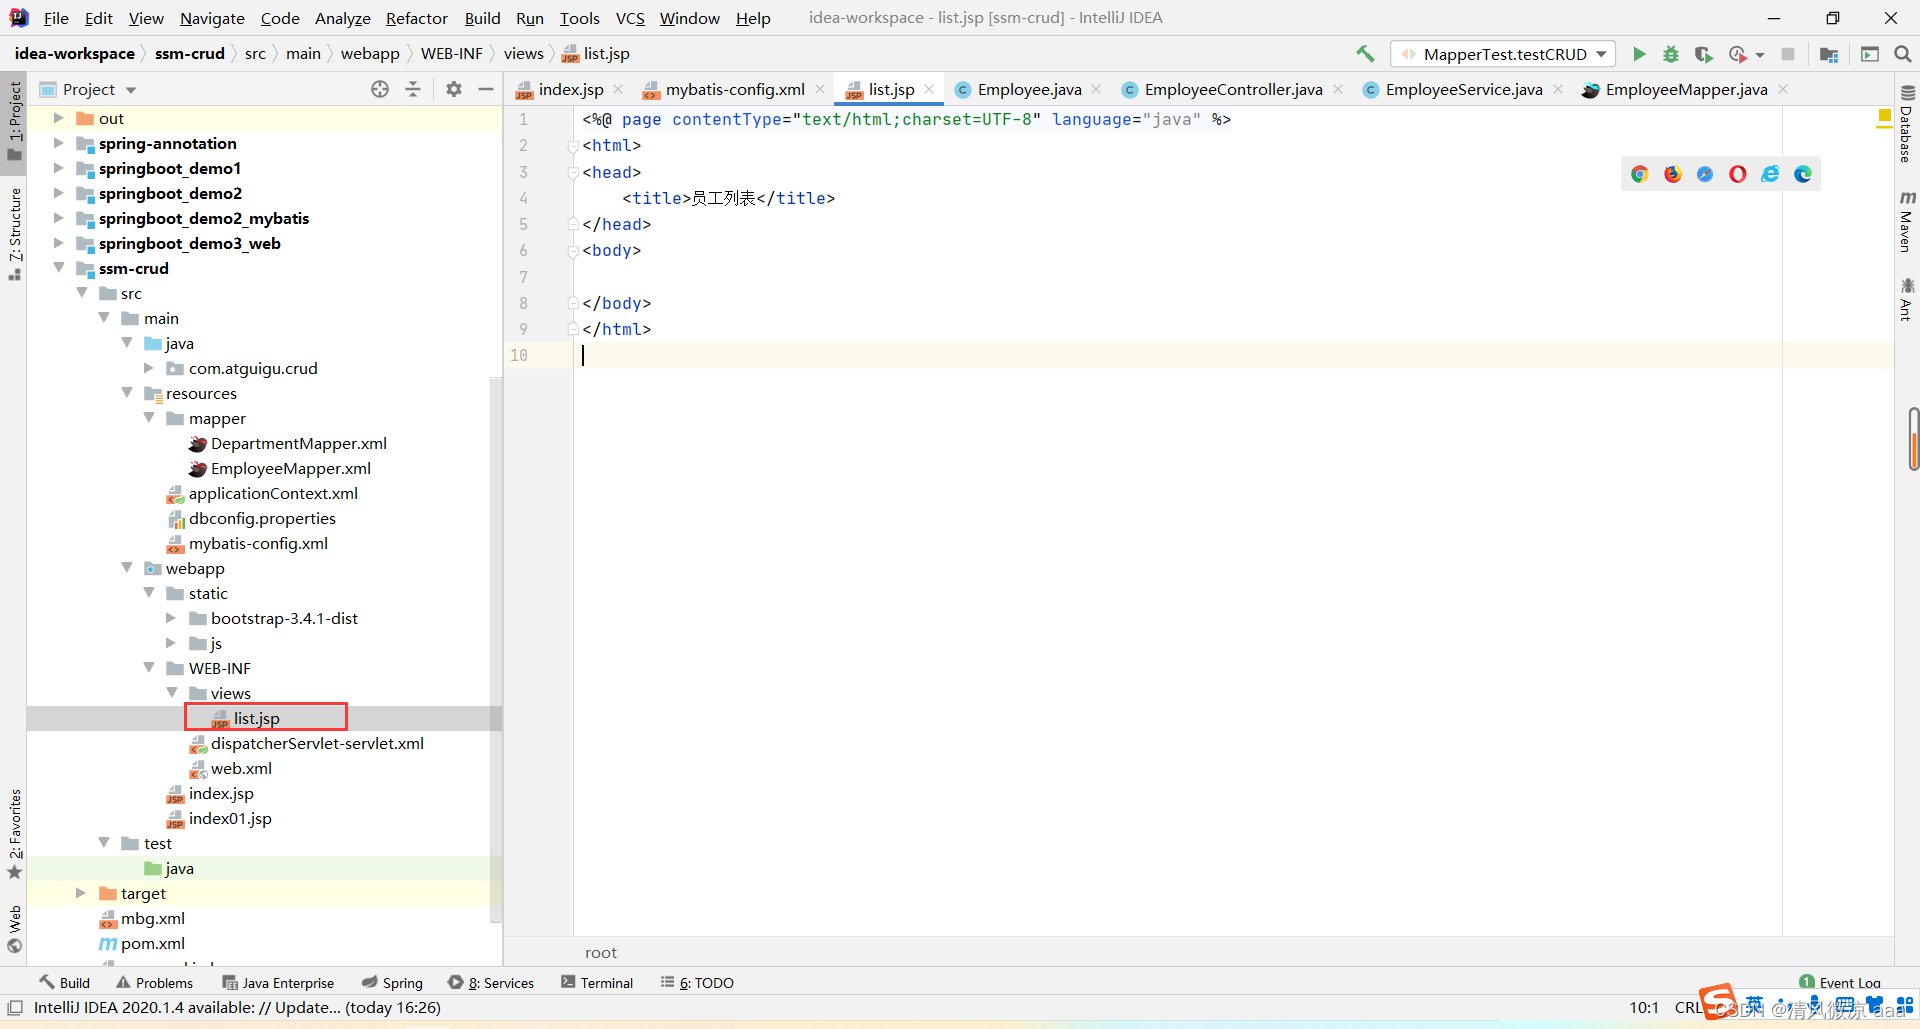
3.1.5、添加list.jsp页面
3.1.6、控制层:EmployeeController

package com.atguigu.crud.controller;import com.atguigu.crud.bean.Employee;
import com.atguigu.crud.service.EmployeeService;
import com.github.pagehelper.PageHelper;
import com.github.pagehelper.PageInfo;
import org.springframework.beans.factory.annotation.Autowired;
import org.springframework.stereotype.Controller;
import org.springframework.ui.Model;
import org.springframework.web.bind.annotation.RequestMapping;
import org.springframework.web.bind.annotation.RequestParam;import java.util.List;/*** 处理员工CRUD请求** @author lfy**/
@Controller
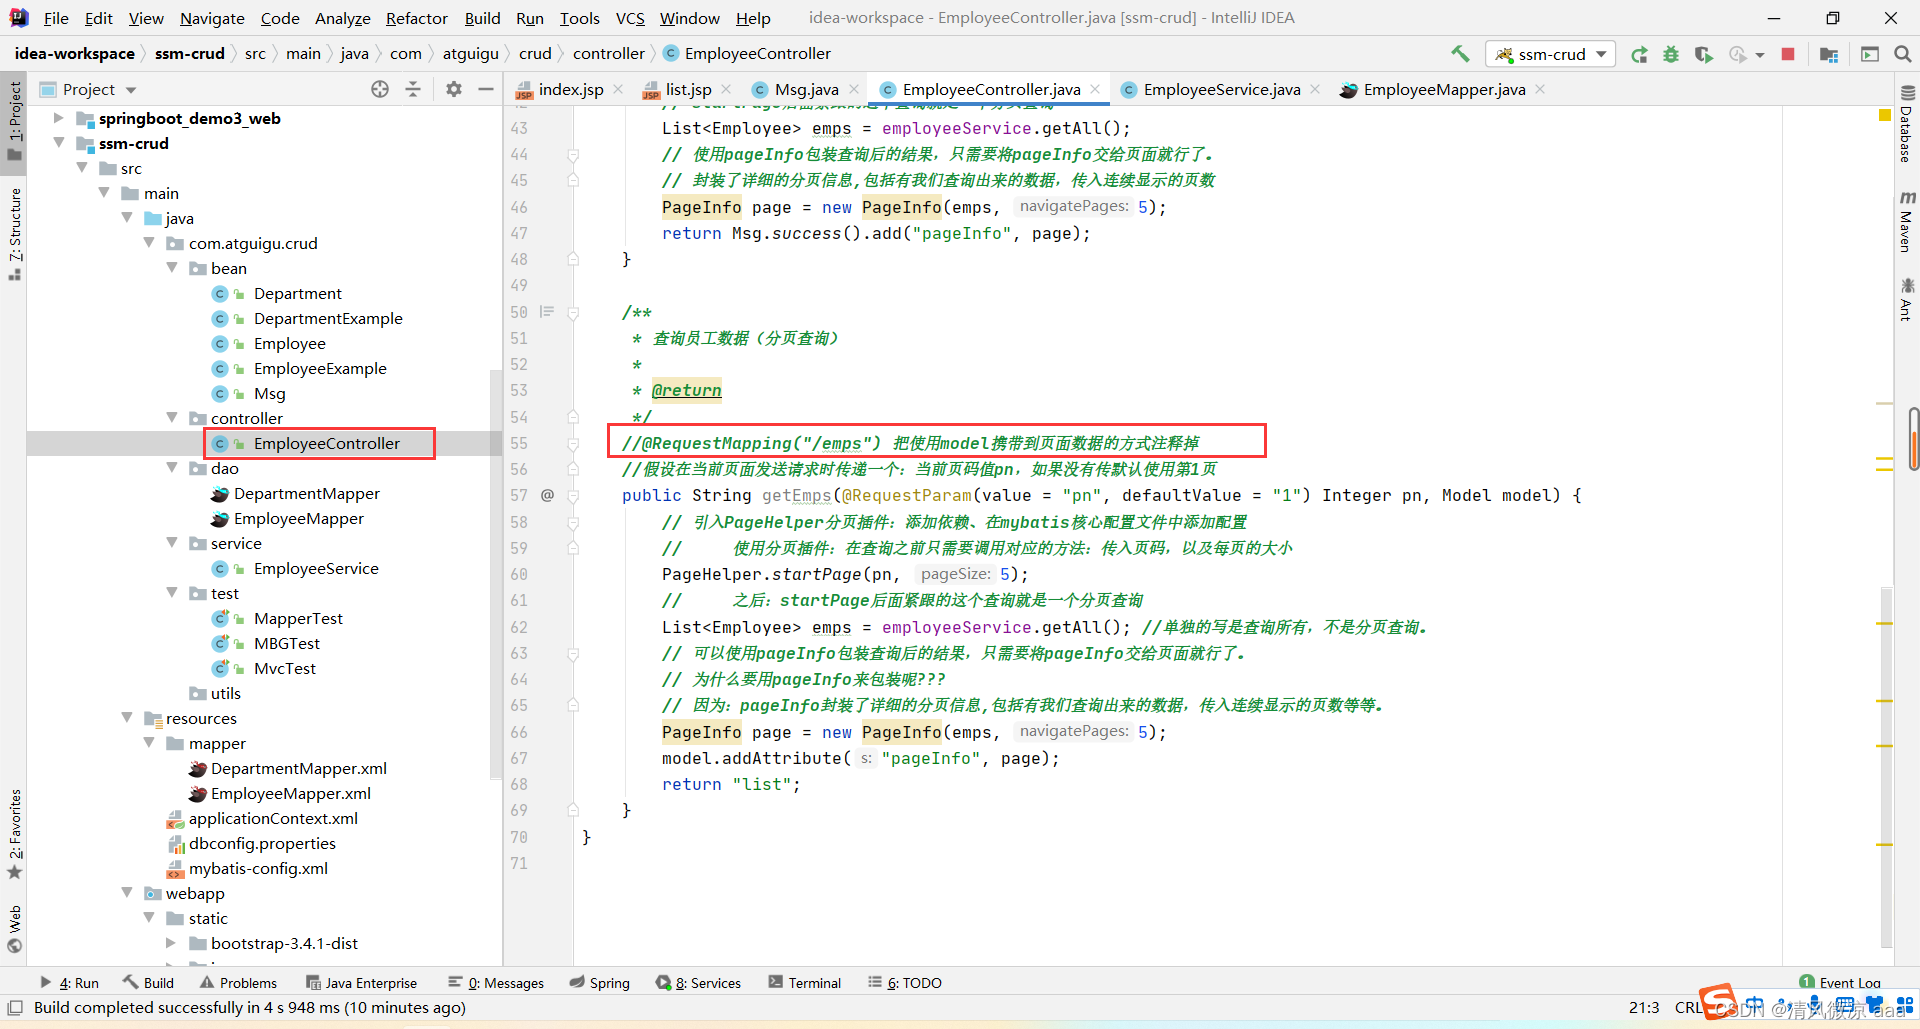
public class EmployeeController {@AutowiredEmployeeService employeeService;/*** 查询员工数据(分页查询)** @return*/@RequestMapping("/emps")//假设在当前页面发送请求时传递一个:当前页码值pn,如果没有传默认使用第1页public String getEmps(@RequestParam(value = "pn", defaultValue = "1") Integer pn, Model model) {// 引入PageHelper分页插件:添加依赖、在mybatis核心配置文件中添加配置// 使用分页插件:在查询之前只需要调用对应的方法:传入页码,以及每页的大小PageHelper.startPage(pn, 5);// 之后:startPage后面紧跟的这个查询就是一个分页查询List emps = employeeService.getAll(); //单独的写是查询所有,不是分页查询。// 可以使用pageInfo包装查询后的结果,只需要将pageInfo交给页面就行了。// 为什么要用pageInfo来包装呢???// 因为:pageInfo封装了详细的分页信息,包括有我们查询出来的数据,传入连续显示的页数等等。PageInfo page = new PageInfo(emps, 5);model.addAttribute("pageInfo", page);return "list";}
} 3.1.7、业务层:EmployeeService

package com.atguigu.crud.service;import com.atguigu.crud.bean.Employee;
import com.atguigu.crud.dao.EmployeeMapper;
import org.springframework.beans.factory.annotation.Autowired;
import org.springframework.stereotype.Service;import java.util.List;@Service
public class EmployeeService {@AutowiredEmployeeMapper employeeMapper;public List getAll() {return employeeMapper.selectByExampleWithDept(null);}
}
3.2、使用Spring单元测试,测试分页请求
3.2.1、编写测试类

package com.atguigu.crud.test;import com.atguigu.crud.bean.Employee;
import com.github.pagehelper.PageInfo;
import org.junit.Before;
import org.junit.Test;
import org.junit.runner.RunWith;
import org.springframework.beans.factory.annotation.Autowired;
import org.springframework.mock.web.MockHttpServletRequest;
import org.springframework.test.context.ContextConfiguration;
import org.springframework.test.context.junit4.SpringJUnit4ClassRunner;
import org.springframework.test.context.web.WebAppConfiguration;
import org.springframework.test.web.servlet.MockMvc;
import org.springframework.test.web.servlet.MvcResult;
import org.springframework.test.web.servlet.request.MockMvcRequestBuilders;
import org.springframework.test.web.servlet.setup.MockMvcBuilders;
import org.springframework.web.context.WebApplicationContext;import java.util.List;/*** 使用Spring测试模块提供的测试请求功能,测试curd请求的正确性* Spring4测试的时候,需要servlet3.0的支持* @author lfy**/
@RunWith(SpringJUnit4ClassRunner.class)
@WebAppConfiguration
@ContextConfiguration(locations = { "classpath:applicationContext.xml","file:src/main/webapp/WEB-INF/dispatcherServlet-servlet.xml" })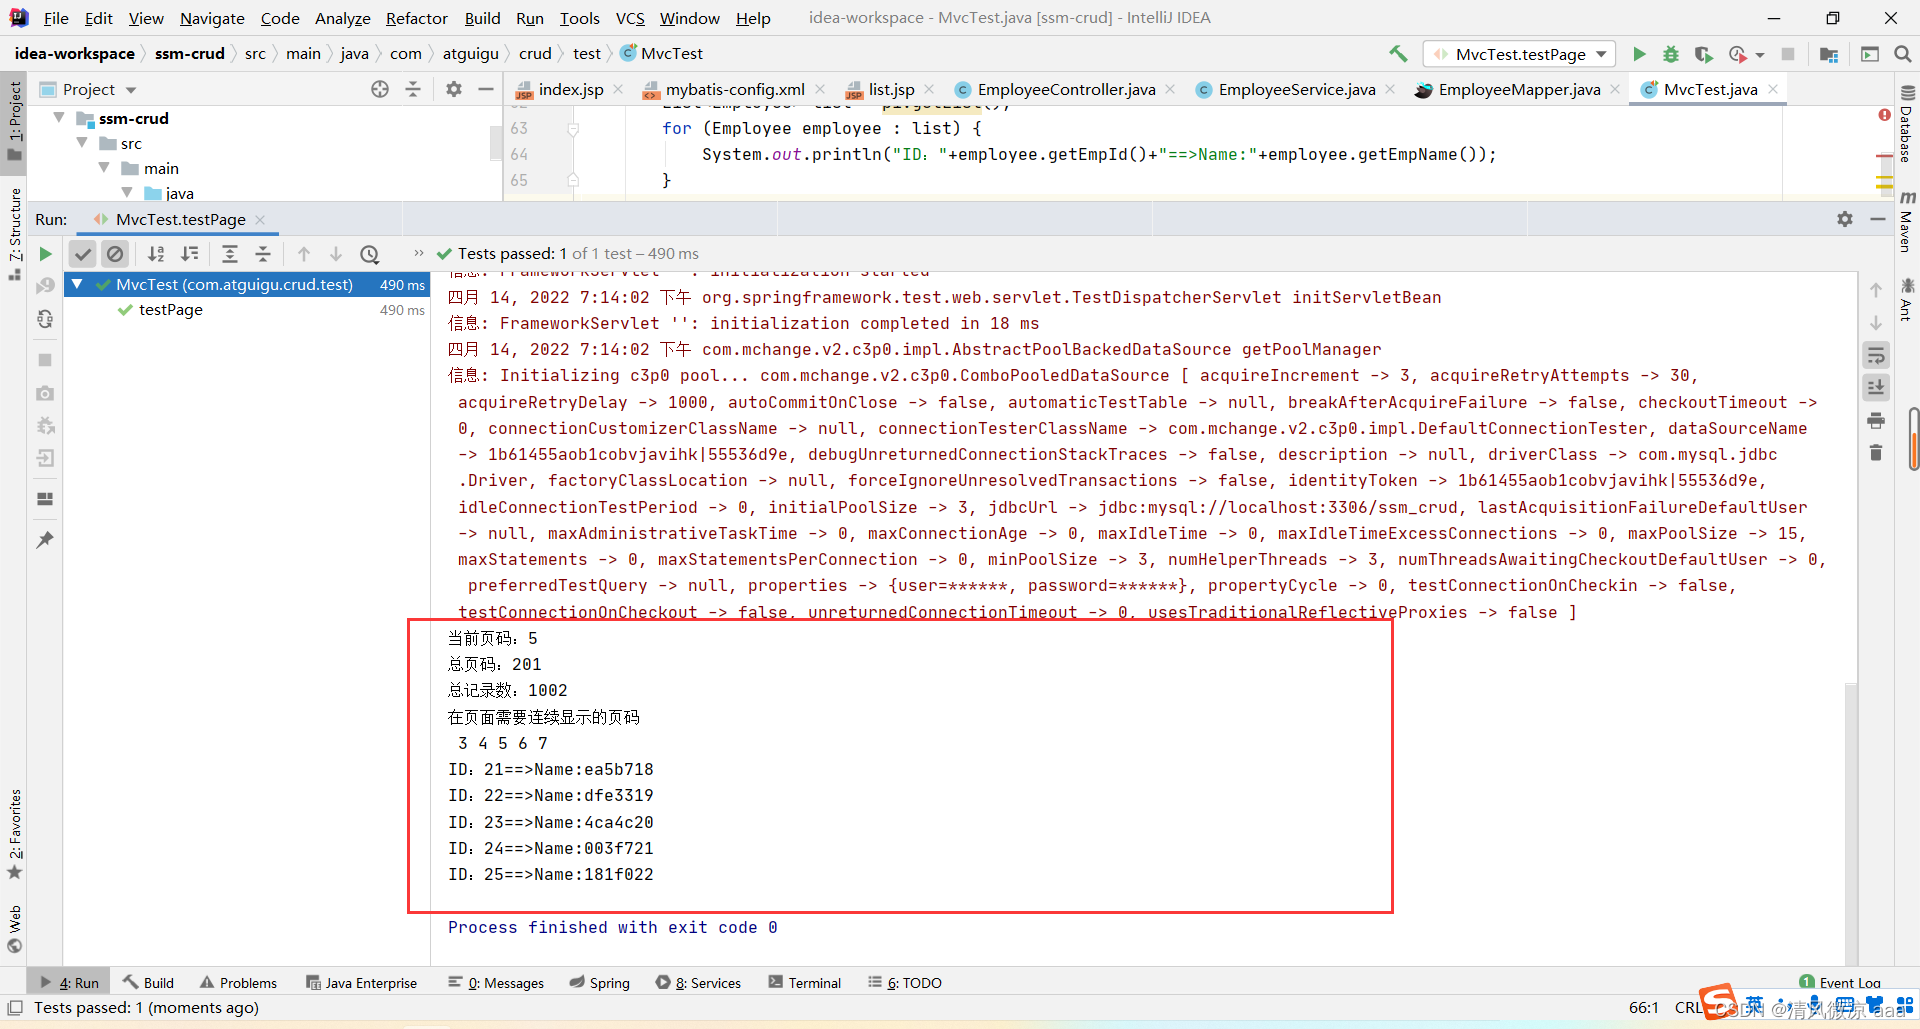
public class MvcTest {// 传入Springmvc的ioc@AutowiredWebApplicationContext context;// 虚拟mvc请求,获取到处理结果。MockMvc mockMvc;@Beforepublic void initMokcMvc() {mockMvc = MockMvcBuilders.webAppContextSetup(context).build();}@Testpublic void testPage() throws Exception {//模拟请求拿到返回值MvcResult result = mockMvc.perform(MockMvcRequestBuilders.get("/emps").param("pn", "5")).andReturn();//请求成功以后,请求域中会有pageInfo;我们可以取出pageInfo进行验证MockHttpServletRequest request = result.getRequest();PageInfo pi = (PageInfo) request.getAttribute("pageInfo");System.out.println("当前页码:"+pi.getPageNum());System.out.println("总页码:"+pi.getPages());System.out.println("总记录数:"+pi.getTotal());System.out.println("在页面需要连续显示的页码");int[] nums = pi.getNavigatepageNums();for (int i : nums) {System.out.print(" "+i);}System.out.println("");//获取员工数据List list = pi.getList();for (Employee employee : list) {System.out.println("ID:"+employee.getEmpId()+"==>Name:"+employee.getEmpName());}}} 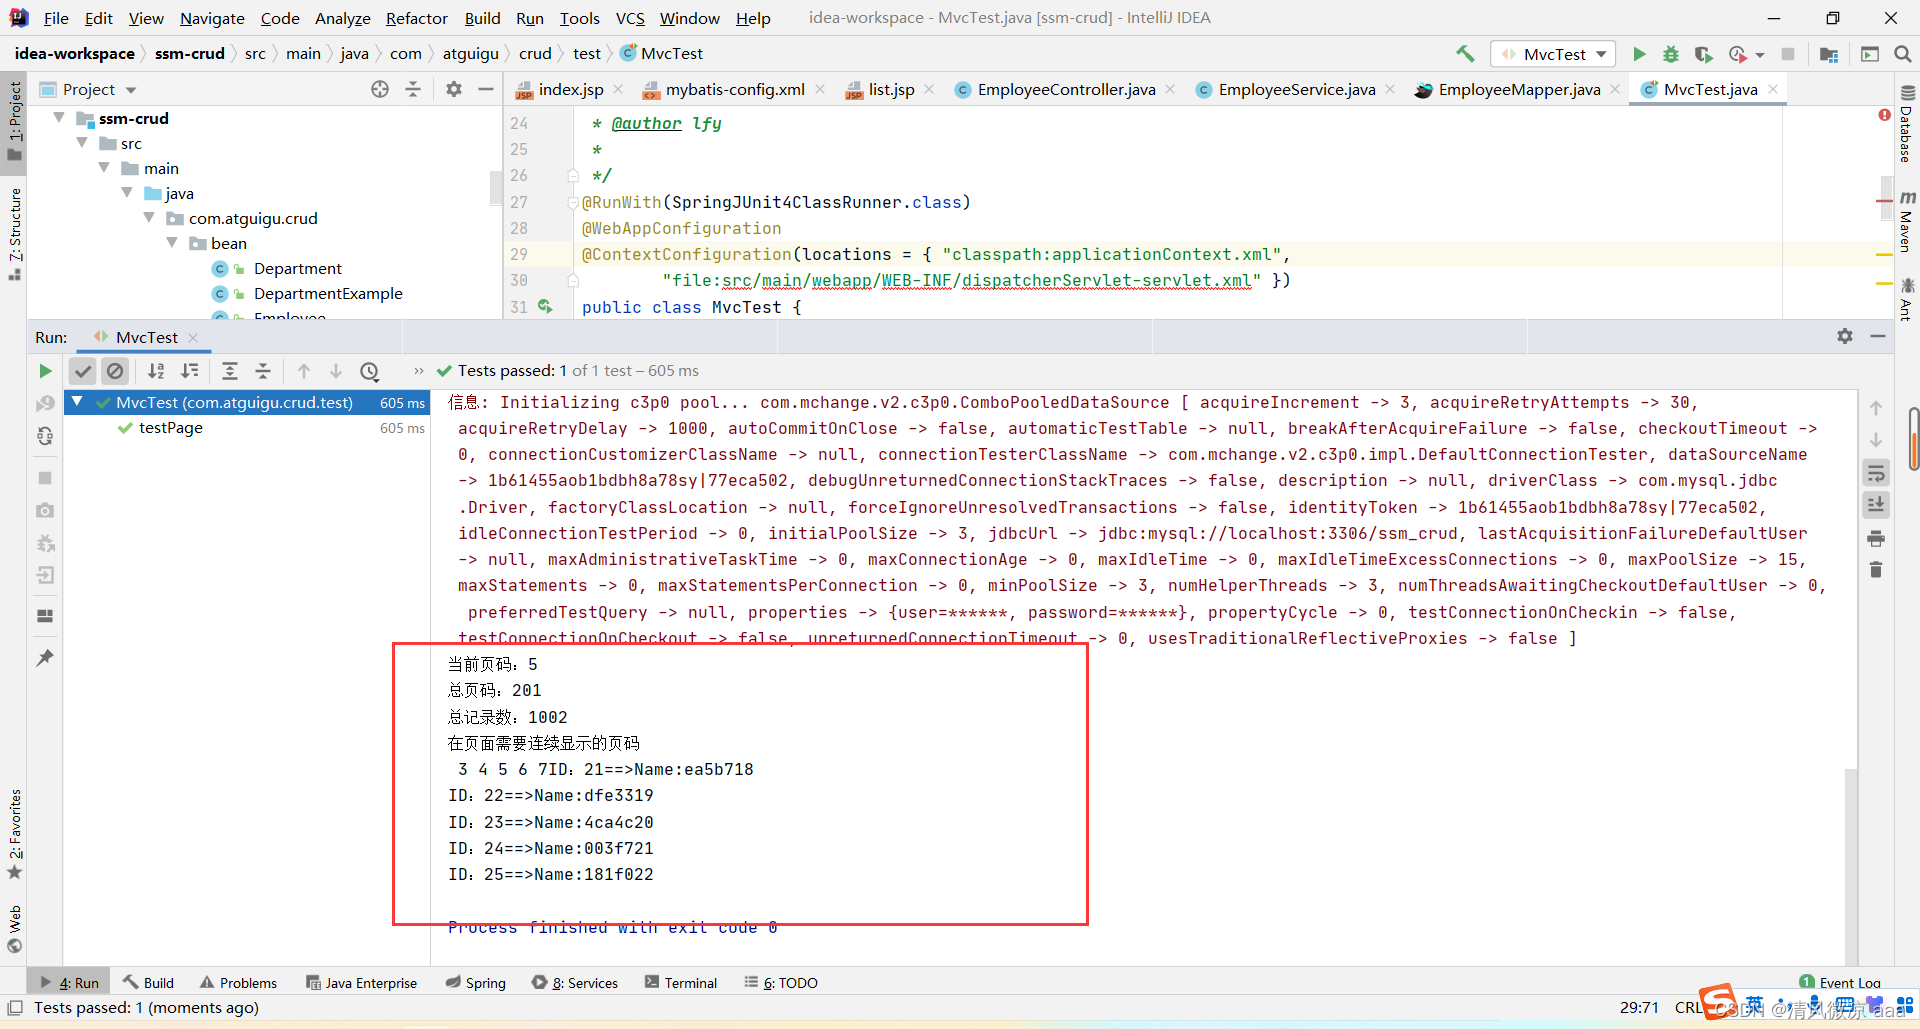
3.3.、搭建BootStrap分页页面
3.3.1、编写list.jsp
<%@ page language="java" contentType="text/html; charset=UTF-8"pageEncoding="UTF-8"%>
<%@taglib uri="http://java.sun.com/jsp/jstl/core" prefix="c"%>
员工列表 <%pageContext.setAttribute("APP_PATH", request.getContextPath());%>
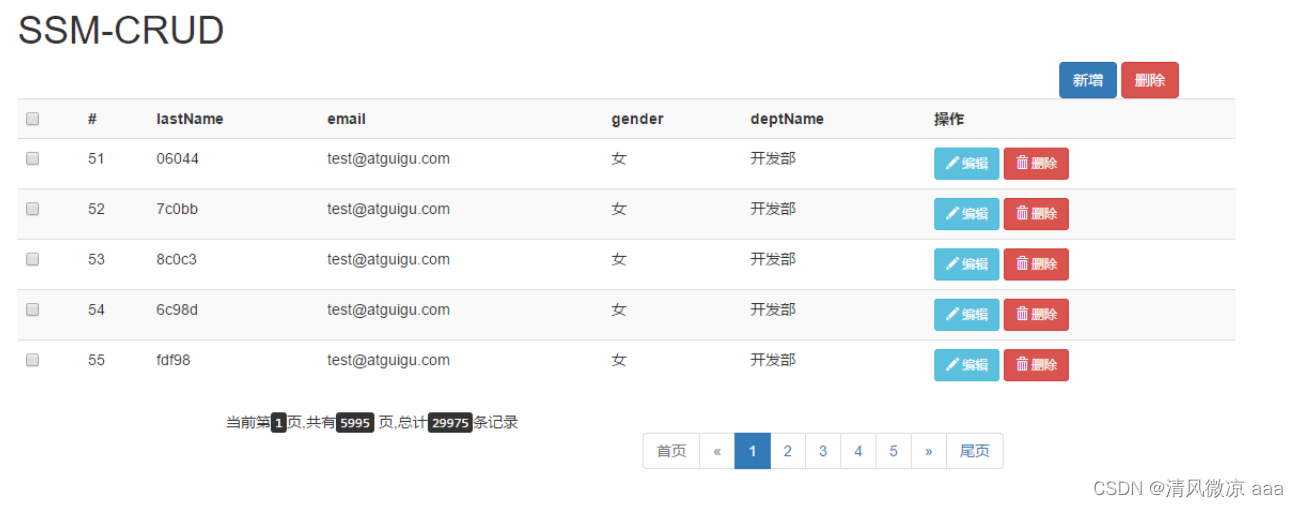
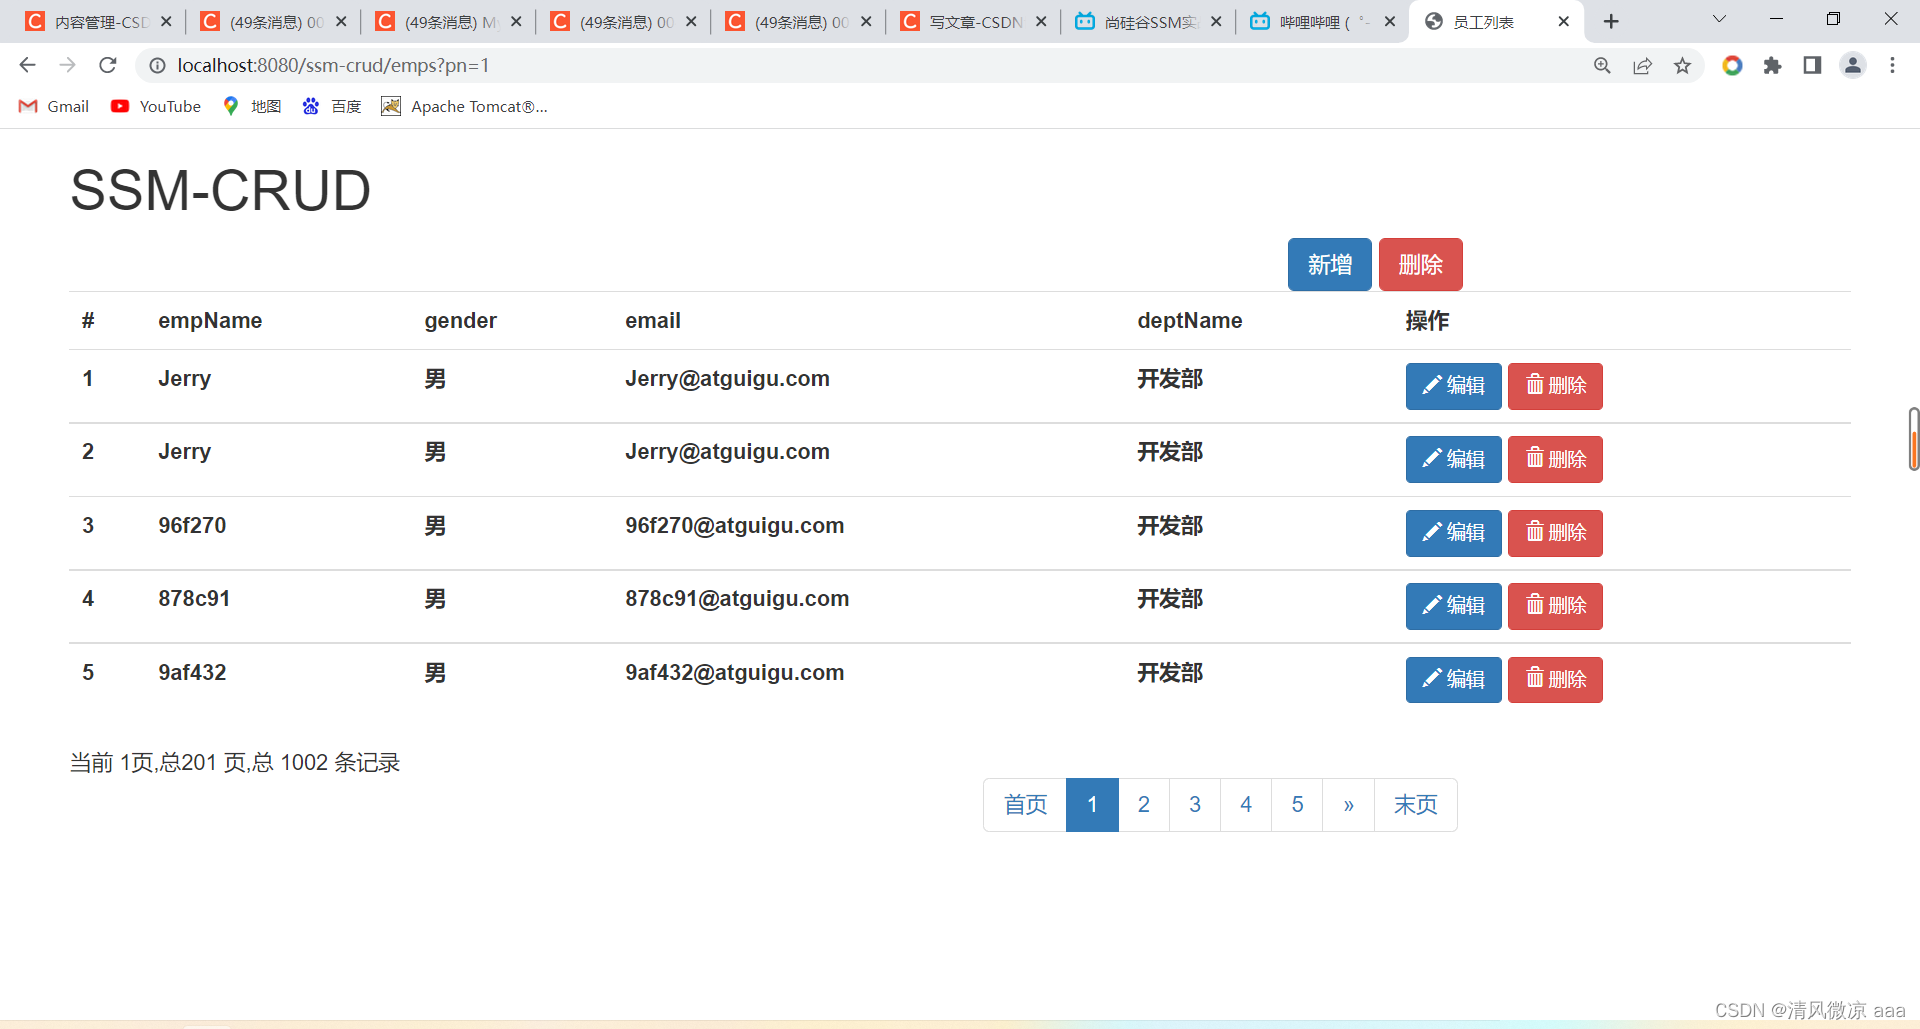
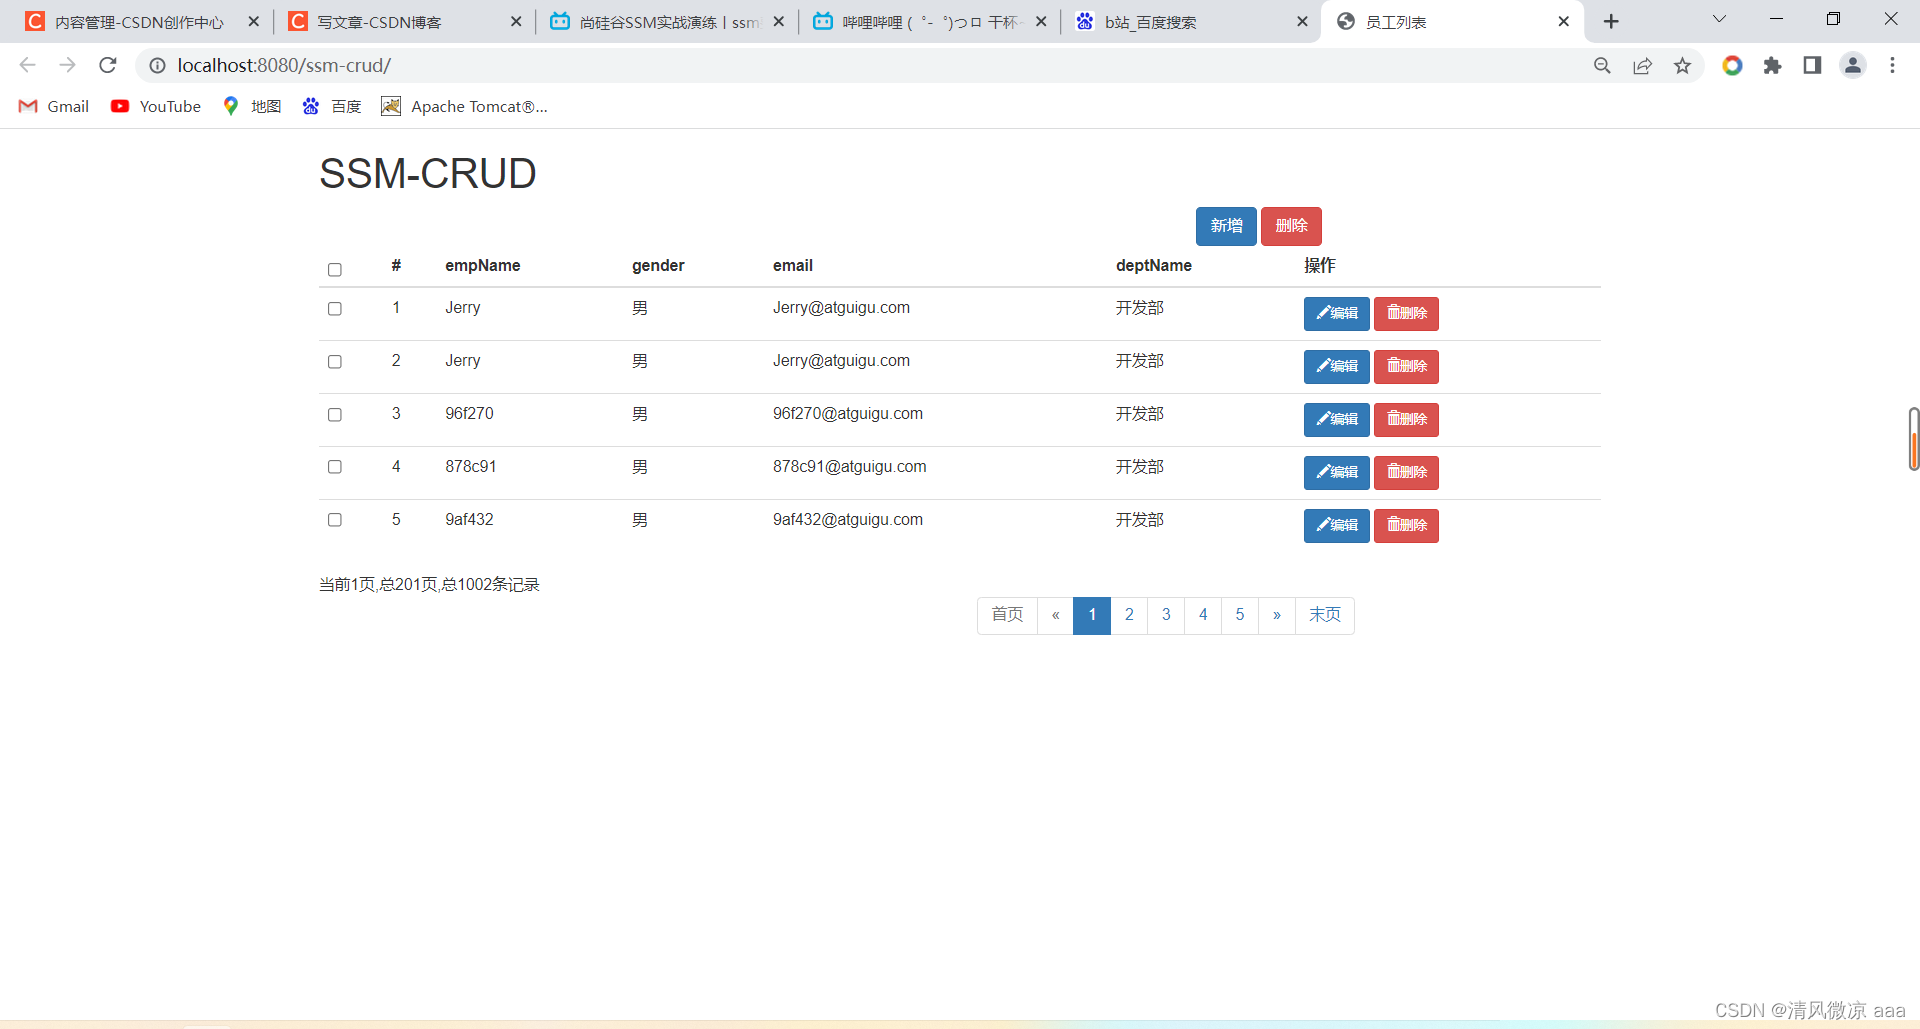
SSM-CRUD
# empName gender email deptName 操作 ${emp.empId } ${emp.empName } ${emp.gender=="M"?"男":"女" } ${emp.email } ${emp.department.deptName }
当前 ${pageInfo.pageNum }页,总${pageInfo.pages }页,总 ${pageInfo.total } 条记录
4、查询功能的优化
说明:以上的分页是通过后端代码查询到数据,之后把数据转发到list.jsp页面,在页面上通过EL表达式把页面的数据遍历后取出来。但是这种方式有缺点:只适合浏览器与服务器的交互模型,而在移动互联网时代客户端不仅仅是浏览器还有可能是安卓客户端、ios客户端,那么此时客户端在发送请求,服务端返回一个页面携带数据,这样就不合适了。正确的做法是:服务端将有效的数据以json的形式返回给客户端,这样浏览器、安卓、ios等客户端解析也比较方便。
4.1、业务逻辑分析

4.2 、改造分页查询后台代码
4.2.1、添加jackson依赖
说明:@ResponseBody注解想要生效,需要导入jackson依赖。
com.fasterxml.jackson.core jackson-databind 2.8.8 4.2.2、通用的返回类
说明:方法执行完成后直接返回给页面数据,客户端不知道服务端的代码是执行成功还是失败,所以可以设置一个通用的返回,可以返回当前请求的处理信息,状态信息等,这样客户端就知道是服务端的代码是成功还是失败。
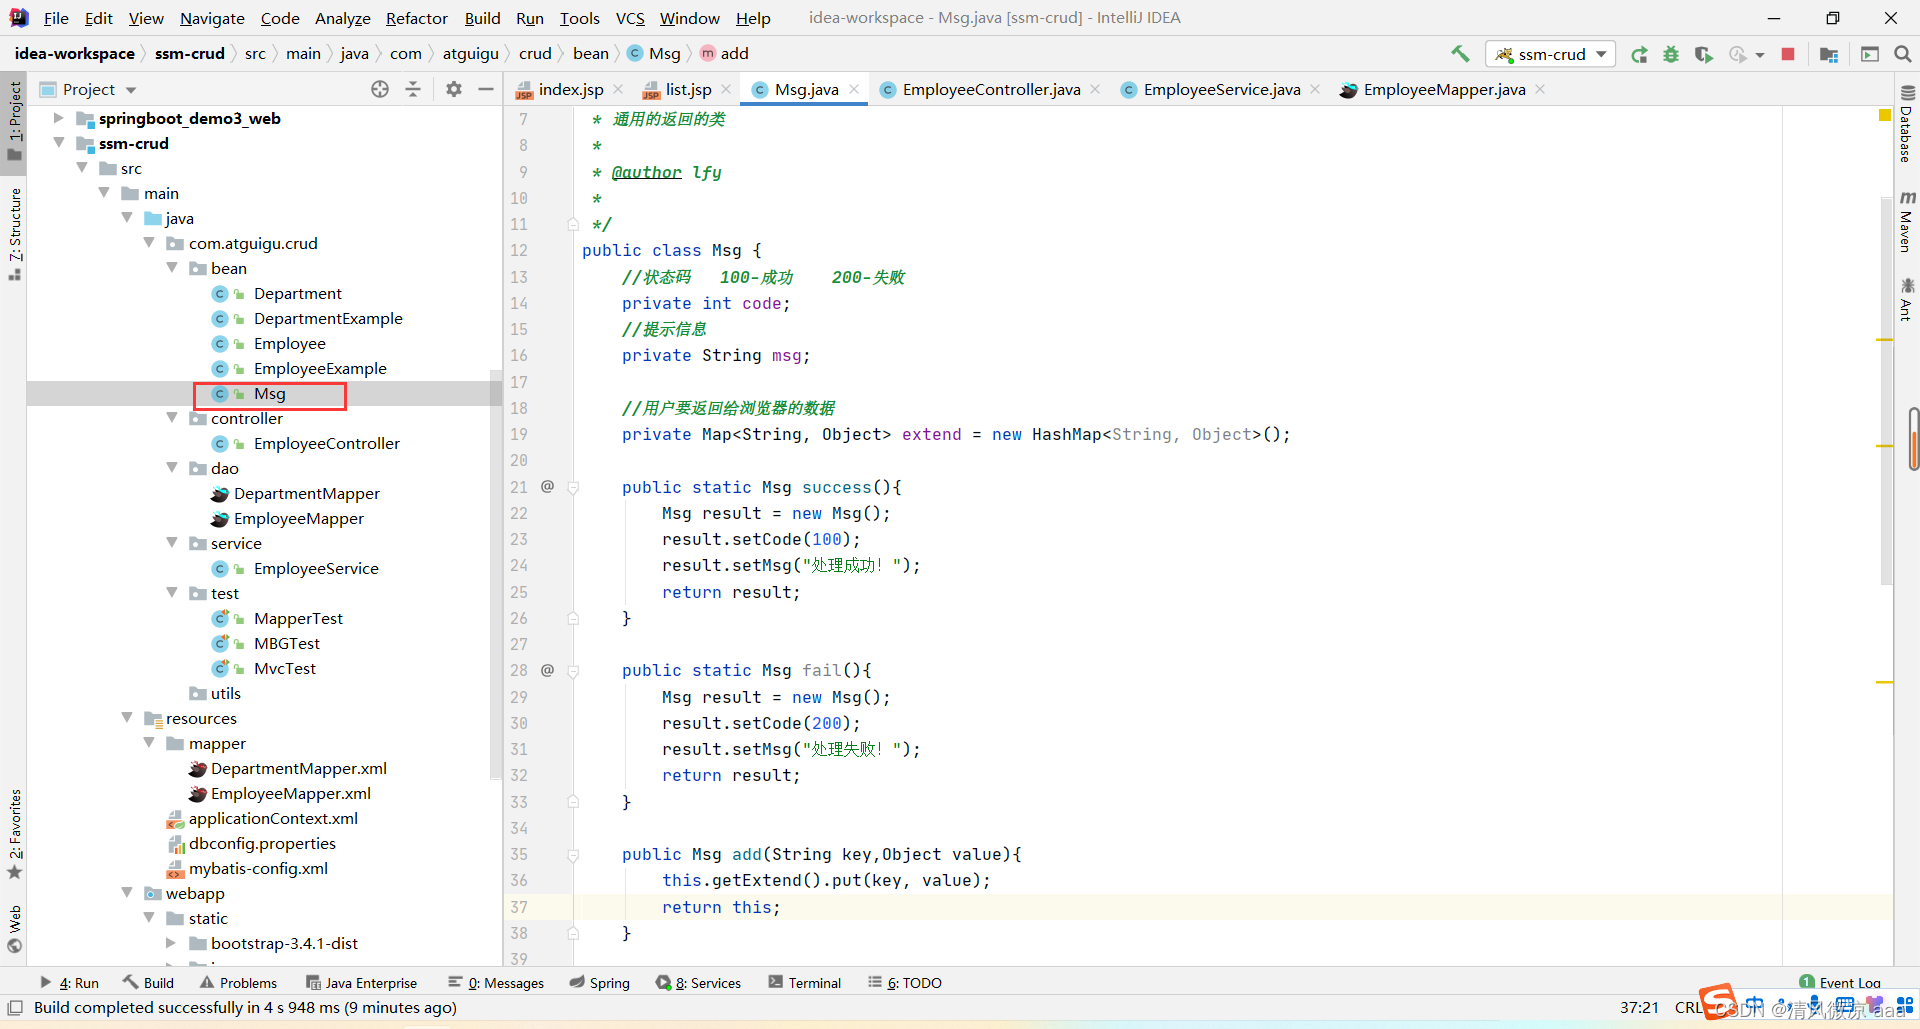
package com.atguigu.crud.bean;import java.util.HashMap;
import java.util.Map;/*** 通用的返回的类* * @author lfy* */
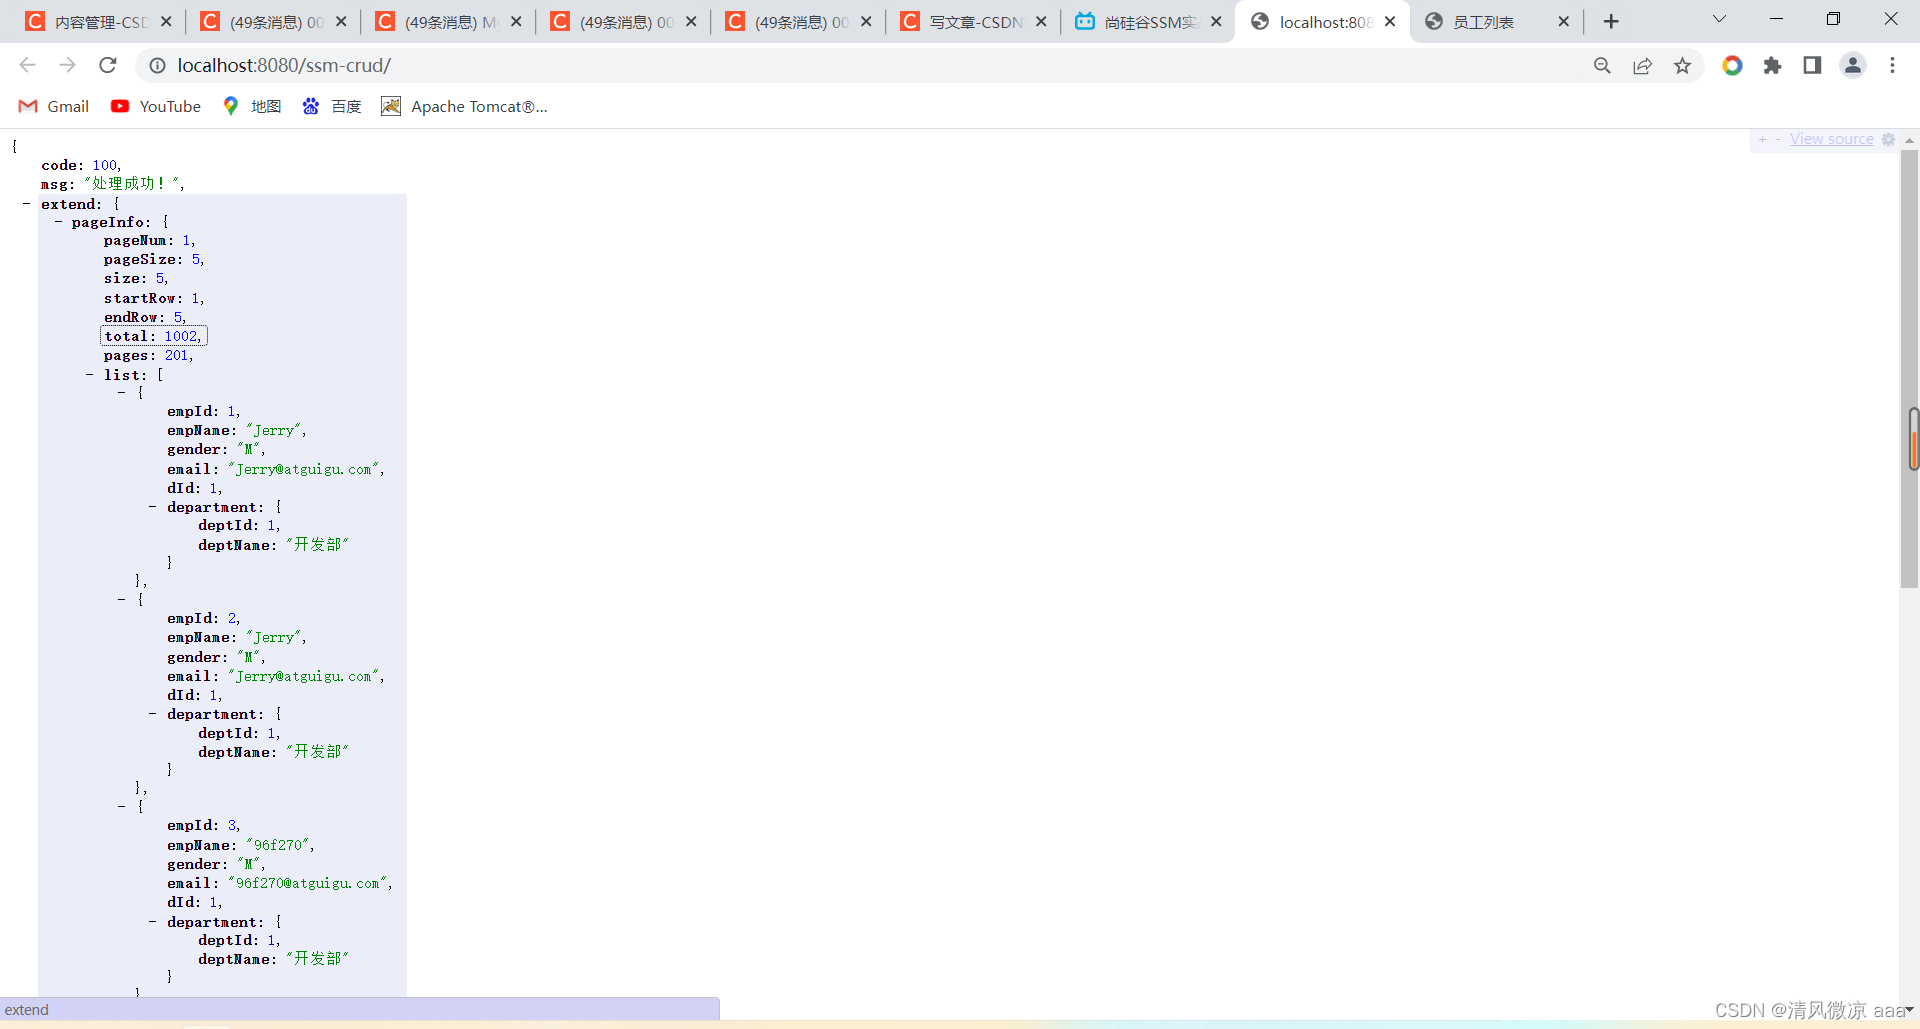
public class Msg {//状态码 100-成功 200-失败private int code;//提示信息private String msg;//用户要返回给浏览器的数据private Map extend = new HashMap();public static Msg success(){Msg result = new Msg();result.setCode(100);result.setMsg("处理成功!");return result;}public static Msg fail(){Msg result = new Msg();result.setCode(200);result.setMsg("处理失败!");return result;}public Msg add(String key,Object value){this.getExtend().put(key, value);return this;}public int getCode() {return code;}public void setCode(int code) {this.code = code;}public String getMsg() {return msg;}public void setMsg(String msg) {this.msg = msg;}public Map getExtend() {return extend;}public void setExtend(Map extend) {this.extend = extend;}} 4.2.3、修改控制层方法
把原来的方式注释掉:
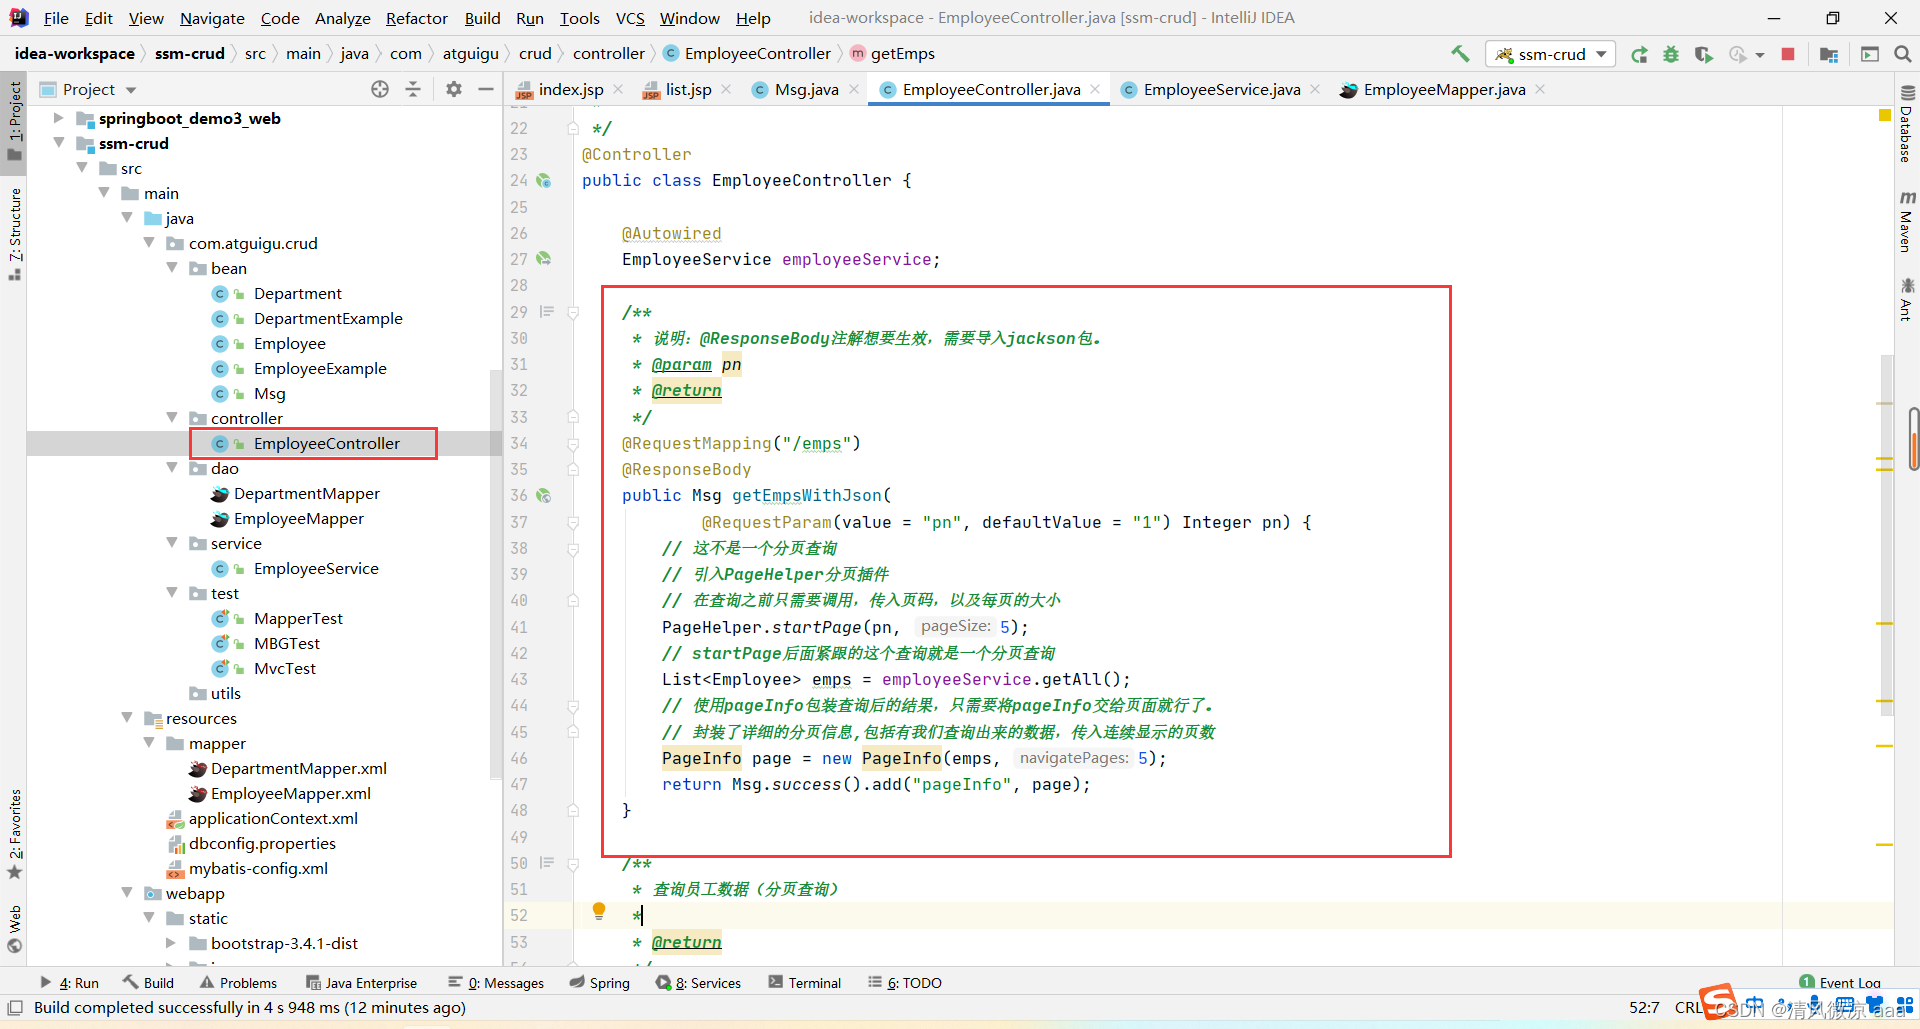
现在的方式:
package com.atguigu.crud.controller;import com.atguigu.crud.bean.Employee;
import com.atguigu.crud.bean.Msg;
import com.atguigu.crud.service.EmployeeService;
import com.github.pagehelper.PageHelper;
import com.github.pagehelper.PageInfo;
import org.springframework.beans.factory.annotation.Autowired;
import org.springframework.stereotype.Controller;
import org.springframework.ui.Model;
import org.springframework.web.bind.annotation.RequestMapping;
import org.springframework.web.bind.annotation.RequestParam;
import org.springframework.web.bind.annotation.ResponseBody;import java.util.List;/*** 处理员工CRUD请求** @author lfy**/
@Controller
public class EmployeeController {@AutowiredEmployeeService employeeService;/*** 说明:@ResponseBody注解想要生效,需要导入jackson包。* @param pn* @return*/@RequestMapping("/emps")@ResponseBodypublic Msg getEmpsWithJson(@RequestParam(value = "pn", defaultValue = "1") Integer pn) {// 这不是一个分页查询// 引入PageHelper分页插件// 在查询之前只需要调用,传入页码,以及每页的大小PageHelper.startPage(pn, 5);// startPage后面紧跟的这个查询就是一个分页查询List emps = employeeService.getAll();// 使用pageInfo包装查询后的结果,只需要将pageInfo交给页面就行了。// 封装了详细的分页信息,包括有我们查询出来的数据,传入连续显示的页数PageInfo page = new PageInfo(emps, 5);return Msg.success().add("pageInfo", page);}}
测试:
4.3 、改造index.jsp页面
说明:包含
<%@ page language="java" contentType="text/html; charset=UTF-8"pageEncoding="UTF-8"%>
<%@taglib uri="http://java.sun.com/jsp/jstl/core" prefix="c"%>
员工列表 <%pageContext.setAttribute("APP_PATH", request.getContextPath());%>
员工修改
员工添加
SSM-CRUD
# empName gender email deptName 操作
5、新增
5.1、业务逻辑
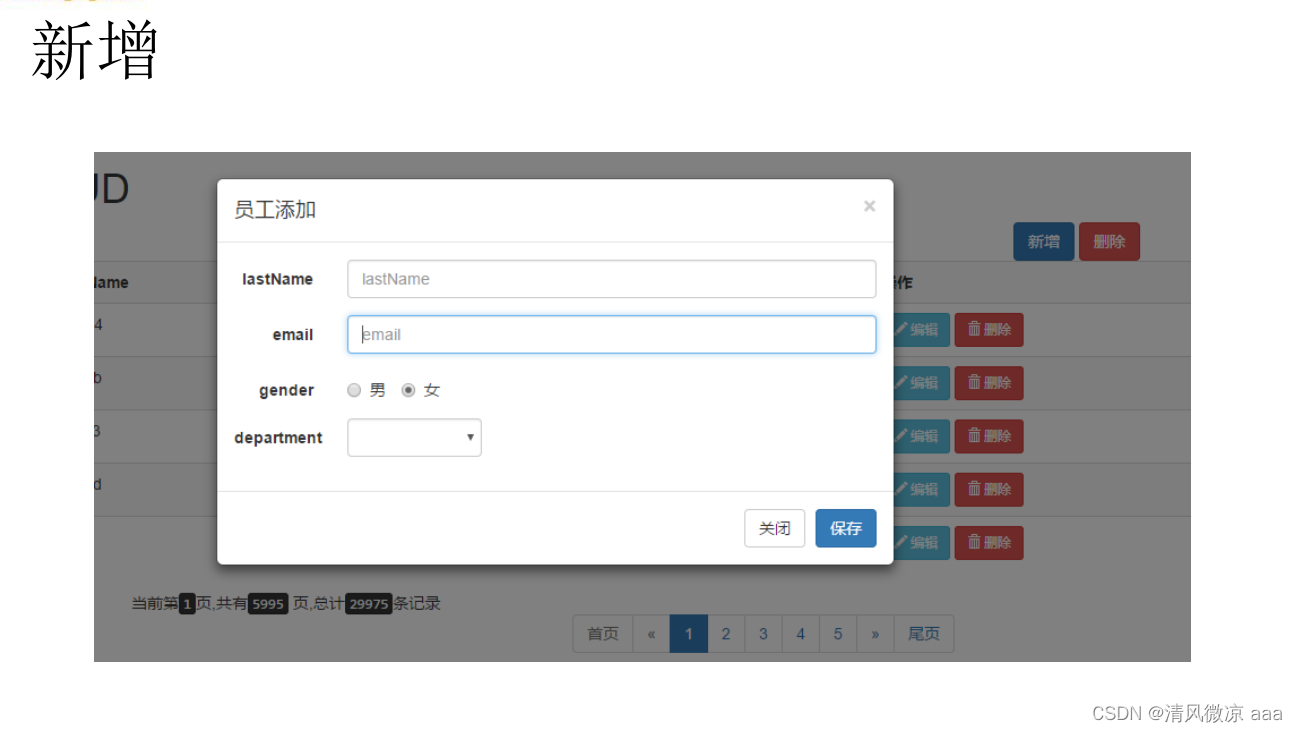

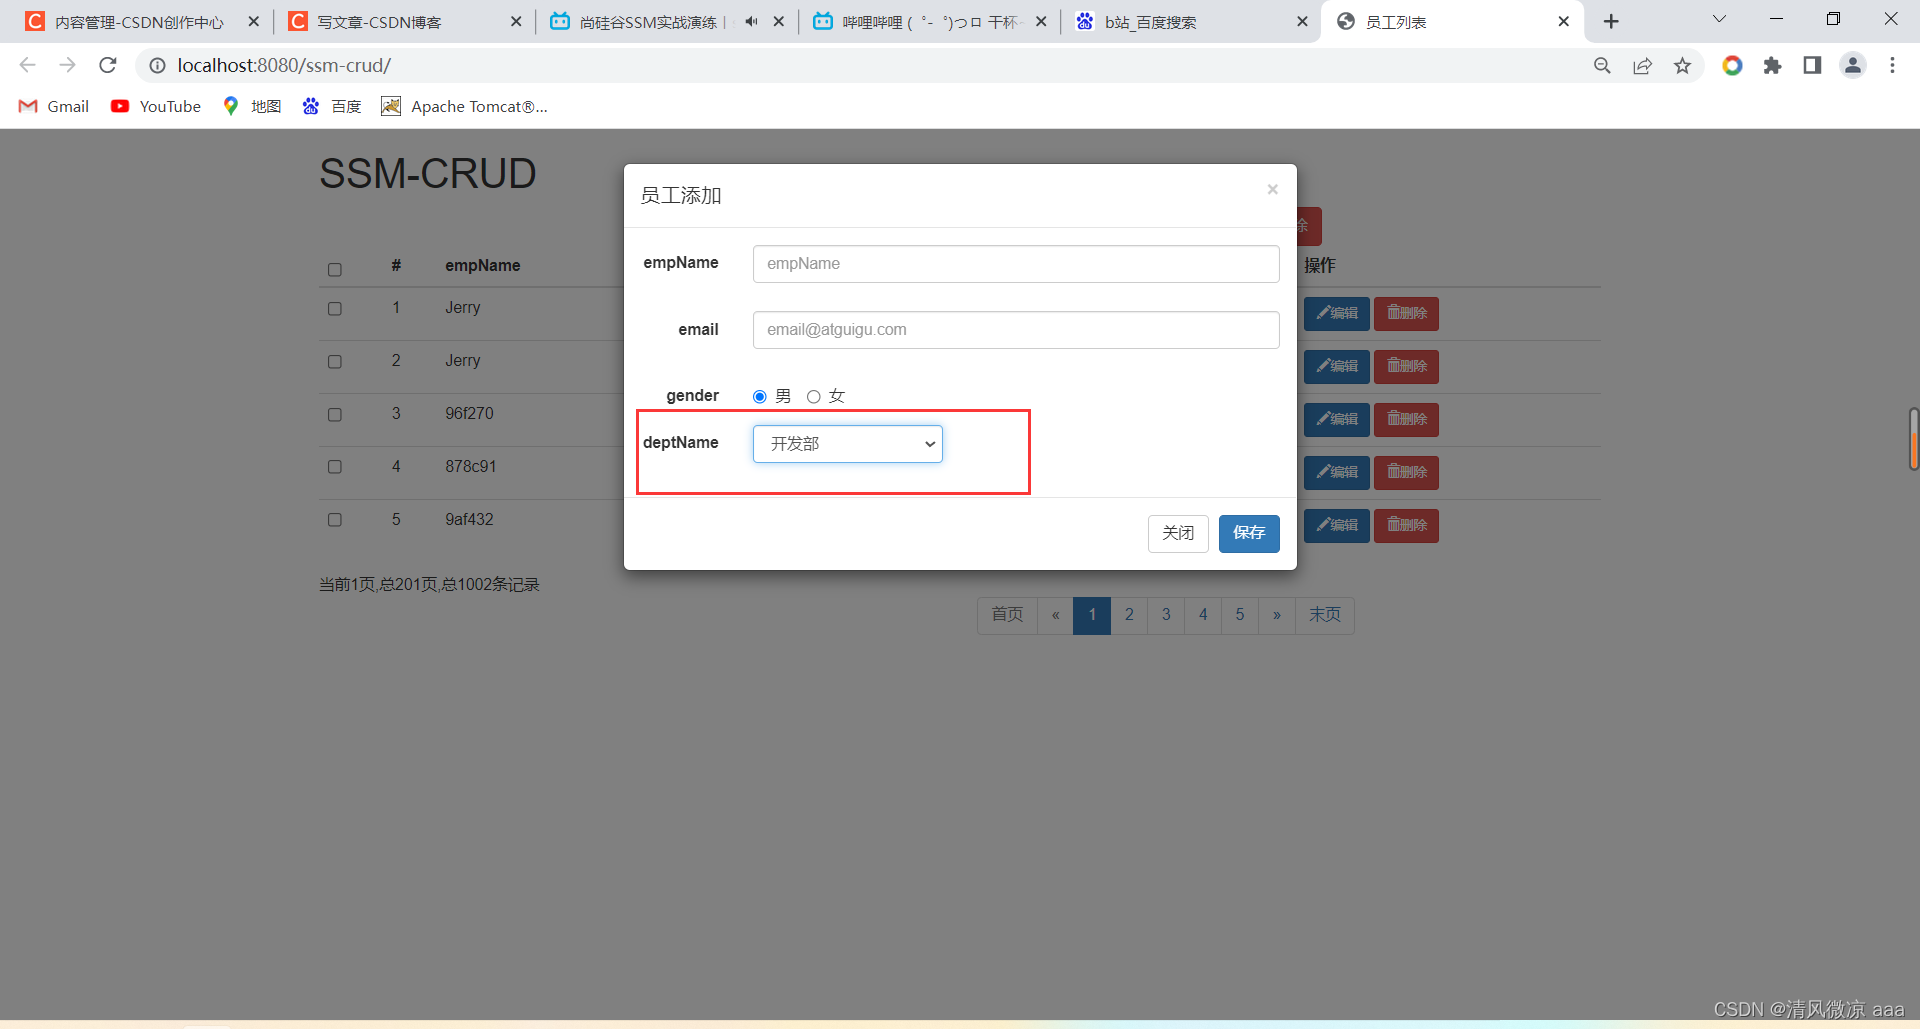
5.2、员工新增的模态框

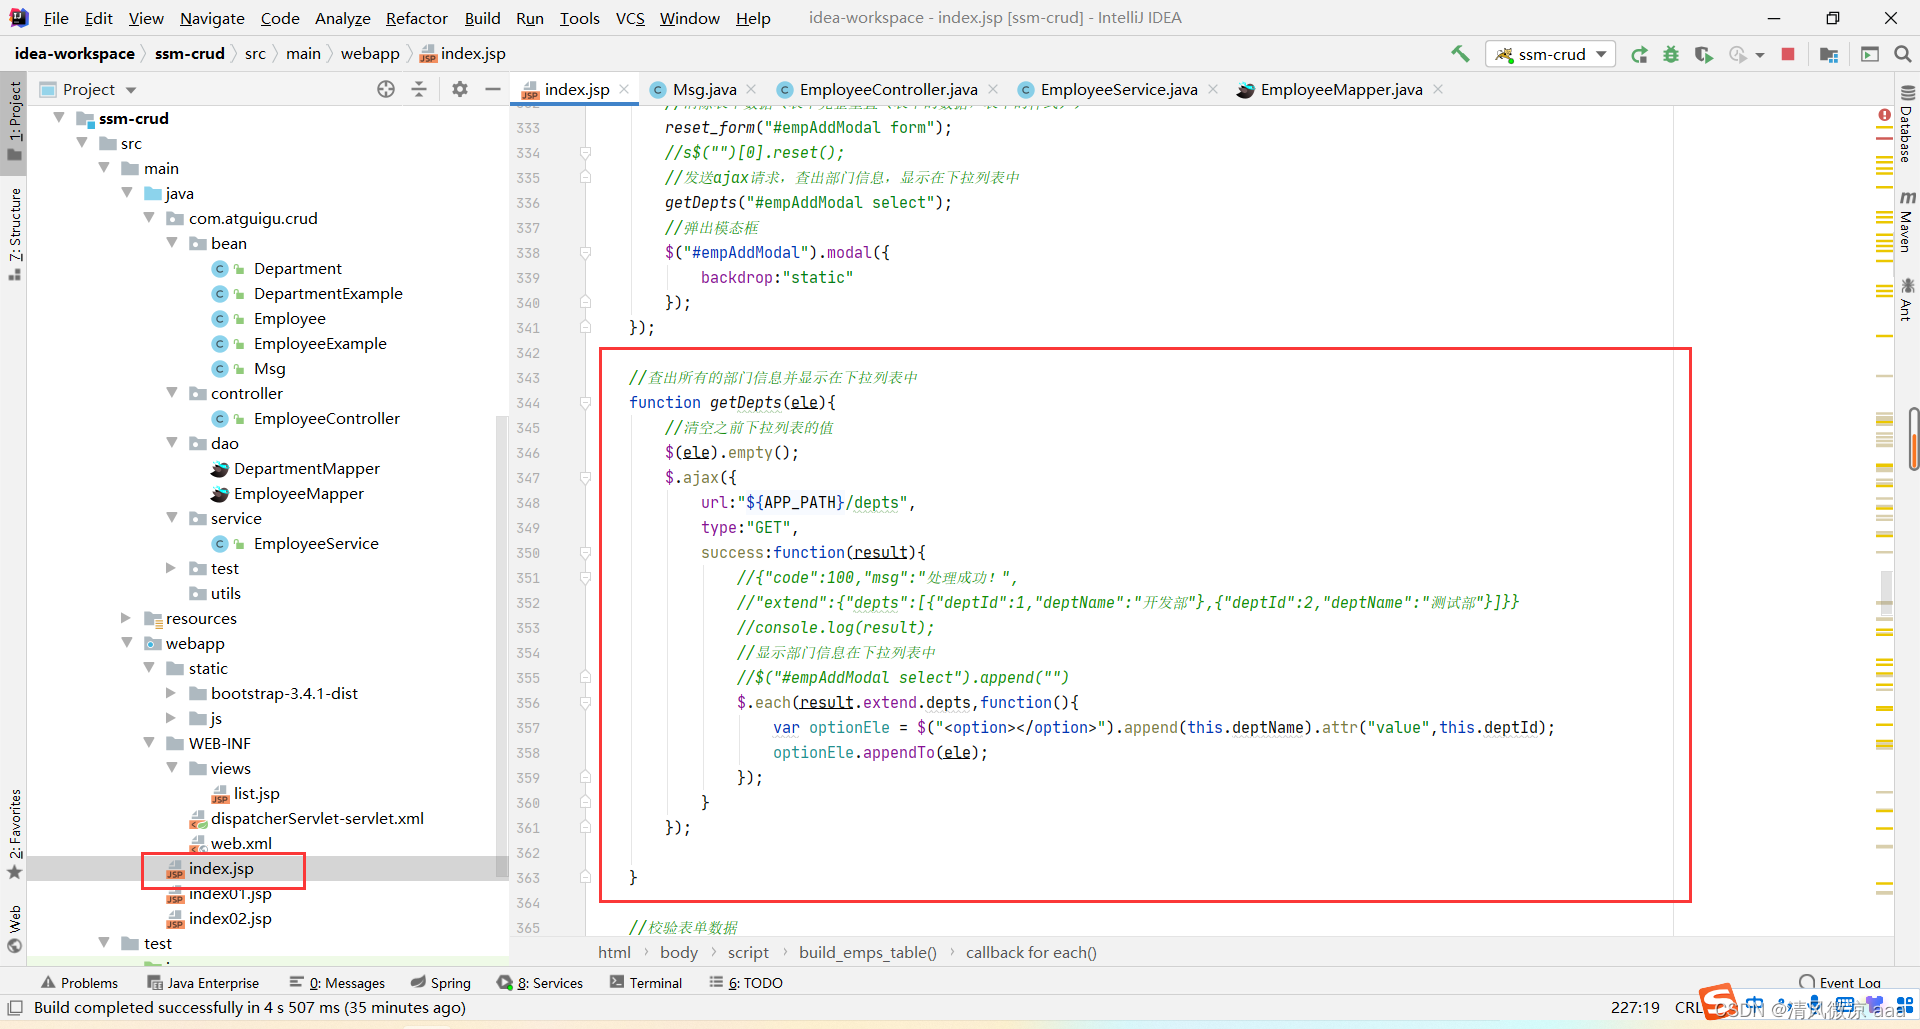
5.3、Ajax显示部门信息
5.3.1、js代码
5.3.2、查询部门信息的控制层
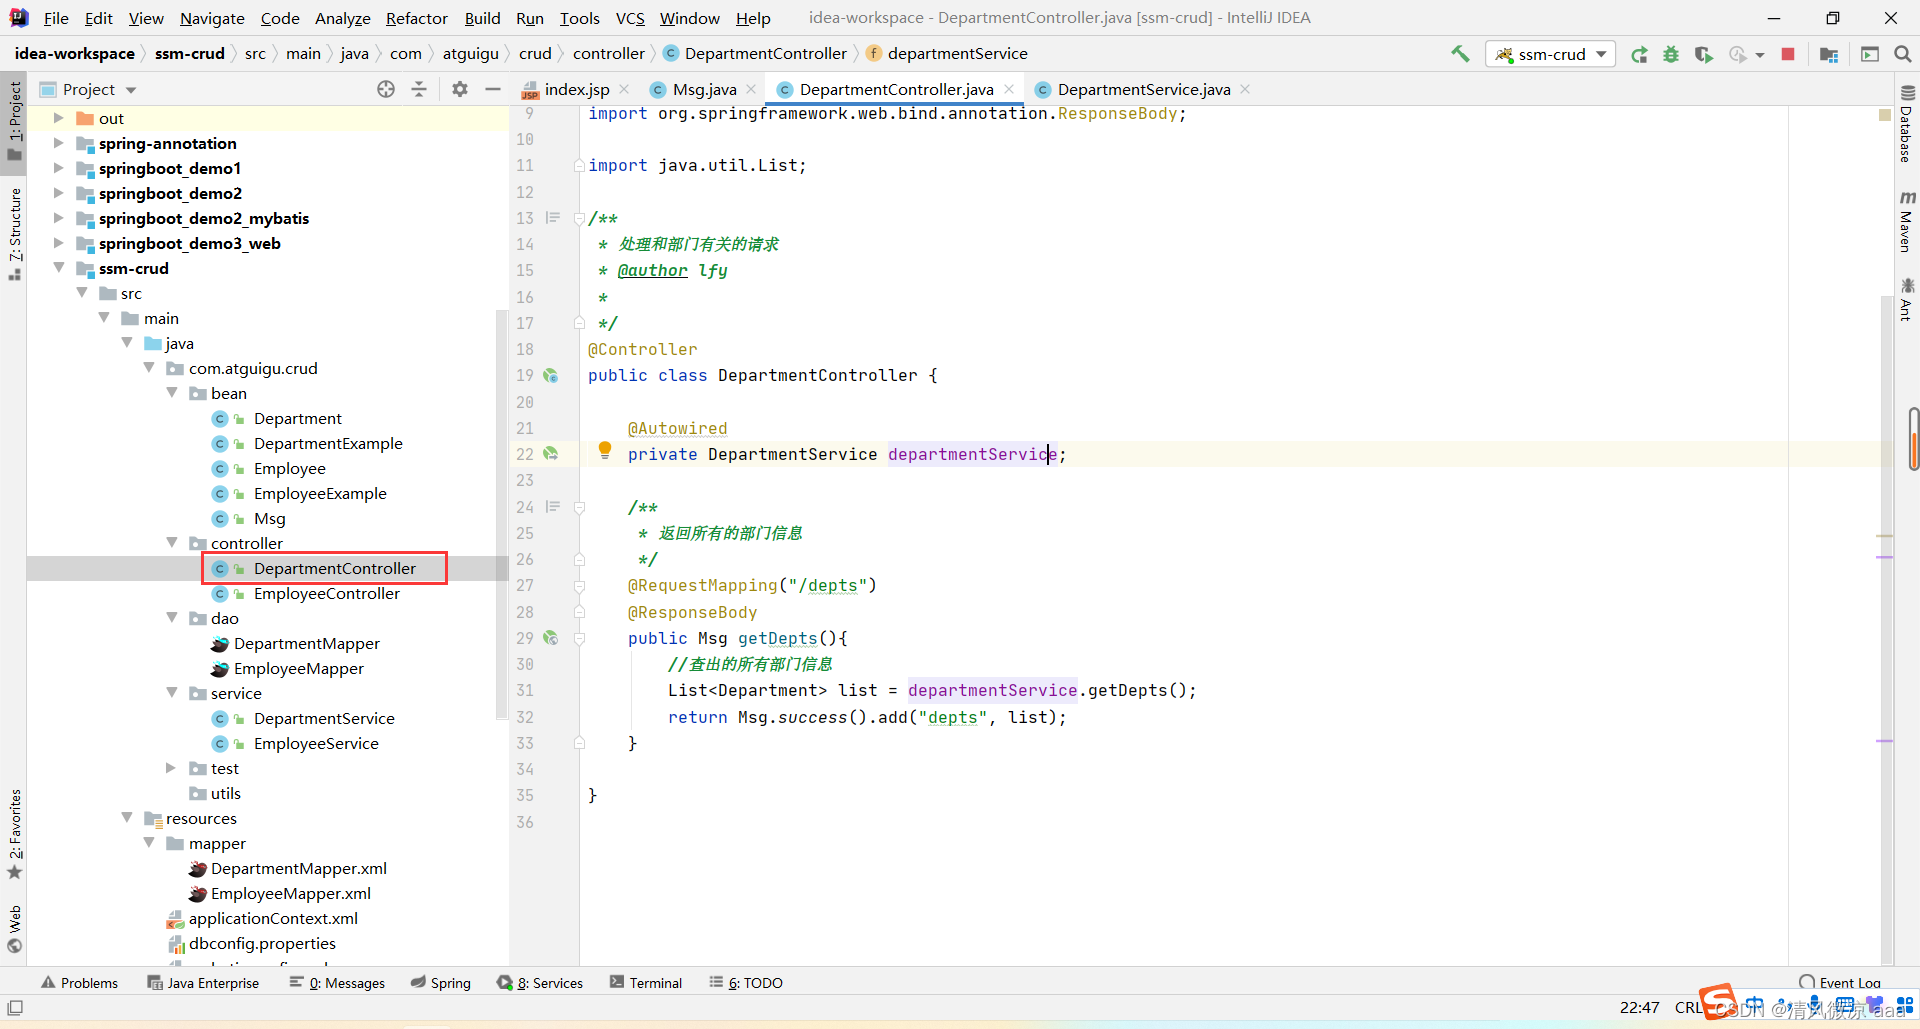
package com.atguigu.crud.controller;import com.atguigu.crud.bean.Department;
import com.atguigu.crud.bean.Msg;
import com.atguigu.crud.service.DepartmentService;
import org.springframework.beans.factory.annotation.Autowired;
import org.springframework.stereotype.Controller;
import org.springframework.web.bind.annotation.RequestMapping;
import org.springframework.web.bind.annotation.ResponseBody;import java.util.List;/*** 处理和部门有关的请求* @author lfy**/
@Controller
public class DepartmentController {@Autowiredprivate DepartmentService departmentService;/*** 返回所有的部门信息*/@RequestMapping("/depts")@ResponseBodypublic Msg getDepts(){//查出的所有部门信息List list = departmentService.getDepts();return Msg.success().add("depts", list);}}
5.3.3、查询部门信息的业务层
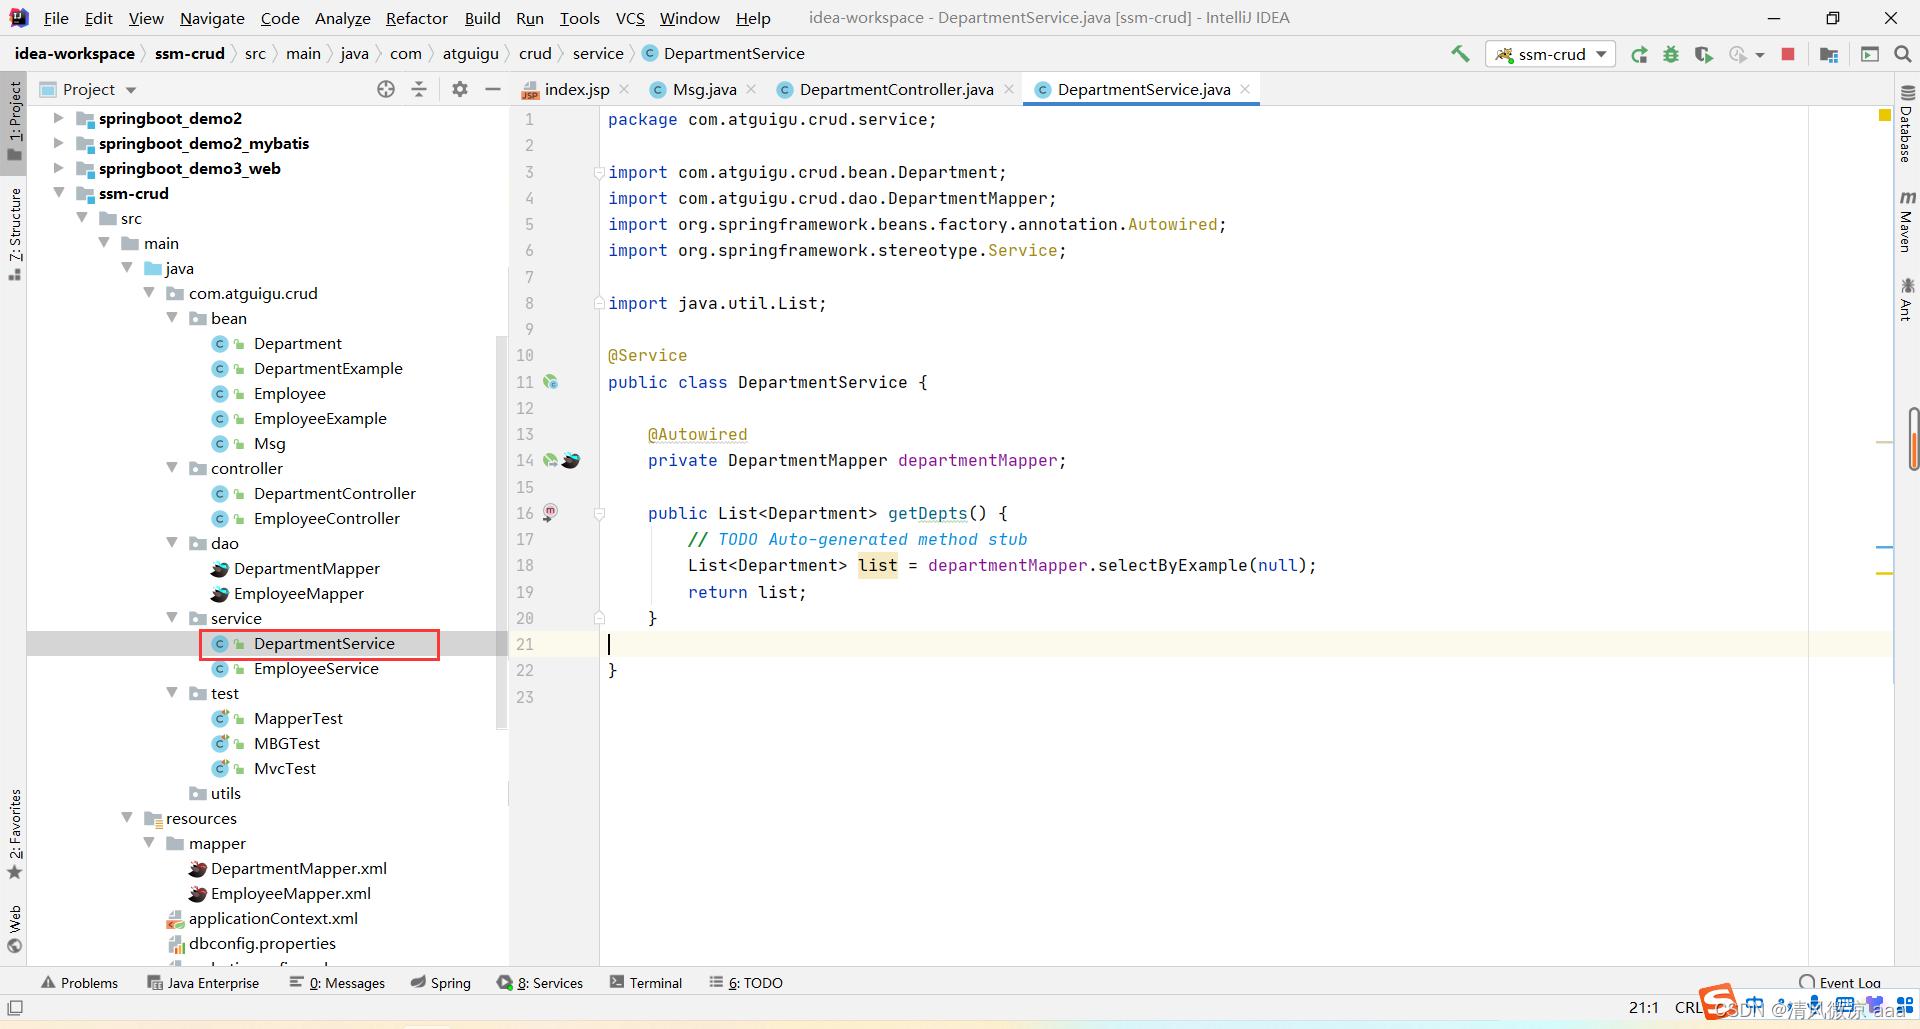
package com.atguigu.crud.service;import com.atguigu.crud.bean.Department;
import com.atguigu.crud.dao.DepartmentMapper;
import org.springframework.beans.factory.annotation.Autowired;
import org.springframework.stereotype.Service;import java.util.List;@Service
public class DepartmentService {@Autowiredprivate DepartmentMapper departmentMapper;public List getDepts() {// TODO Auto-generated method stubList list = departmentMapper.selectByExample(null);return list;}}
5.3.4、效果
5.4、保存新增的数据
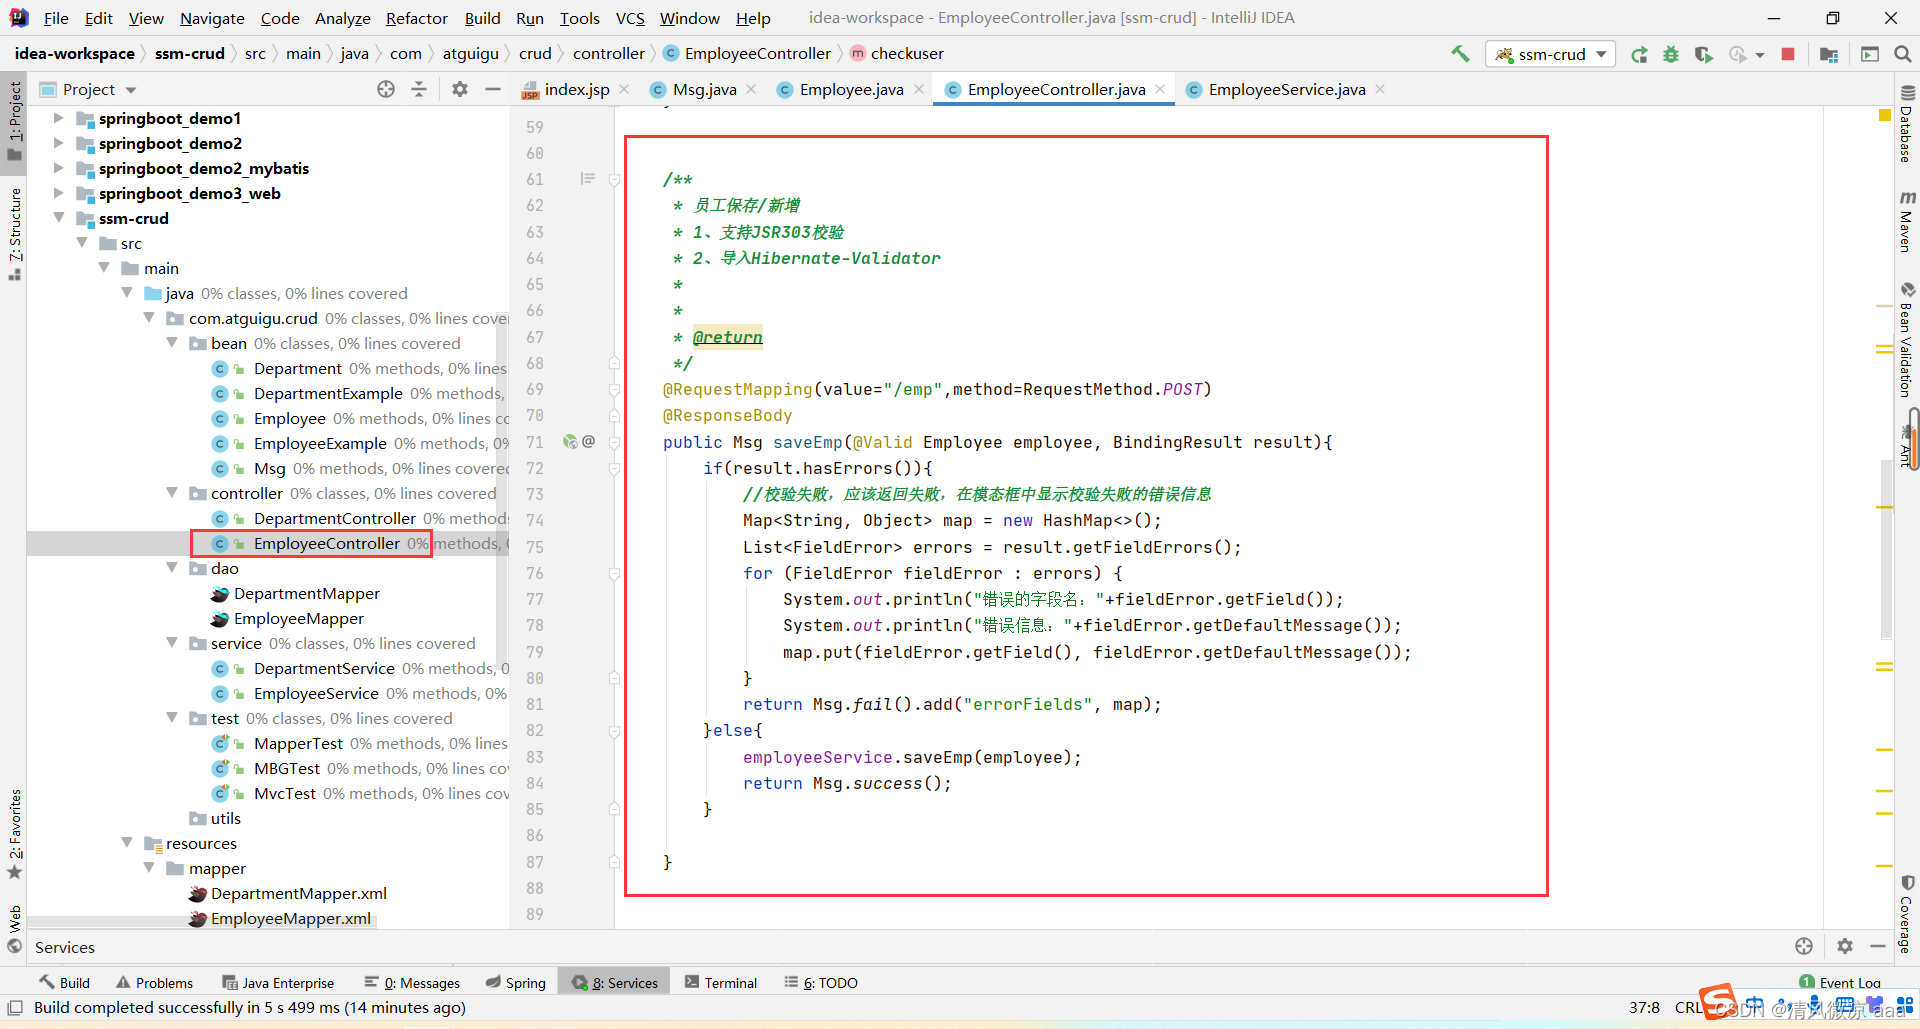
5.4.1、控制层方法
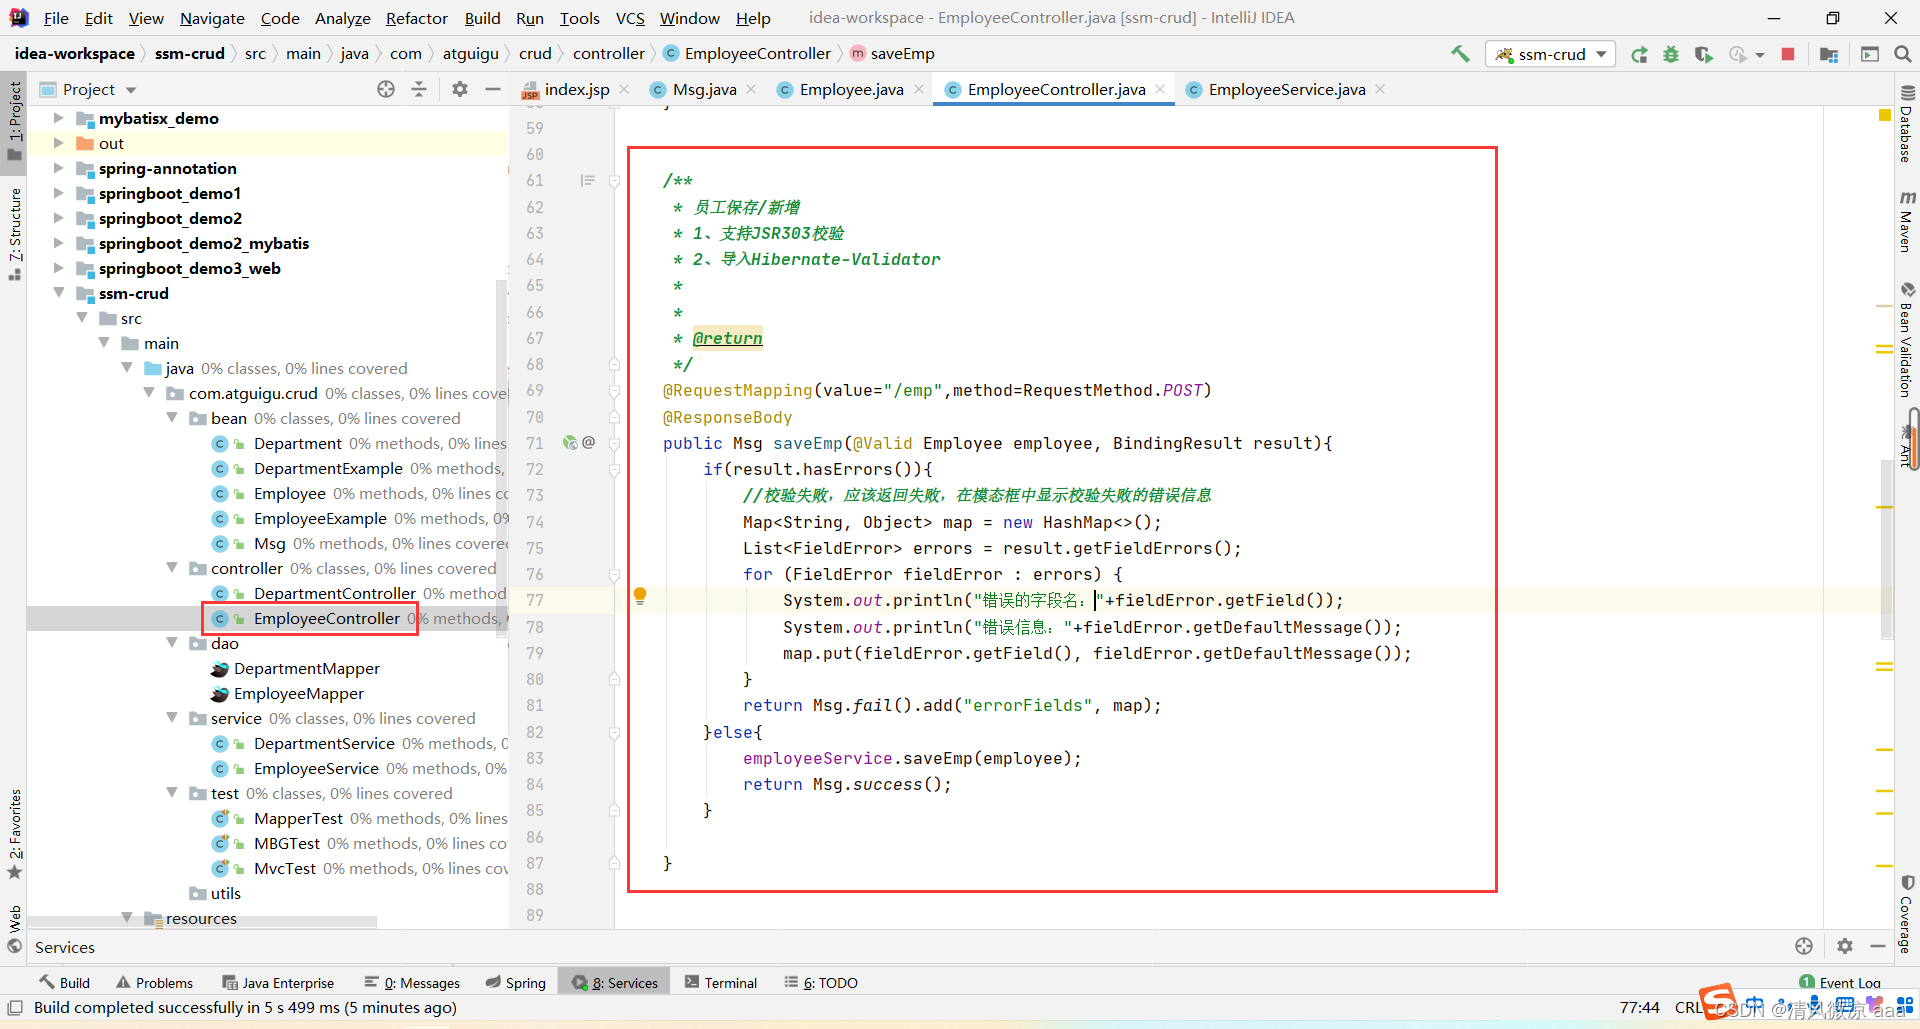
/*** 员工保存/新增* 1、支持JSR303校验* 2、导入Hibernate-Validator*** @return*/@RequestMapping(value="/emp",method=RequestMethod.POST)@ResponseBodypublic Msg saveEmp(@Valid Employee employee, BindingResult result){if(result.hasErrors()){//校验失败,应该返回失败,在模态框中显示校验失败的错误信息Map map = new HashMap<>();List errors = result.getFieldErrors();for (FieldError fieldError : errors) {System.out.println("错误的字段名:"+fieldError.getField());System.out.println("错误信息:"+fieldError.getDefaultMessage());map.put(fieldError.getField(), fieldError.getDefaultMessage());}return Msg.fail().add("errorFields", map);}else{employeeService.saveEmp(employee);return Msg.success();}}
5.4.2、业务层方法
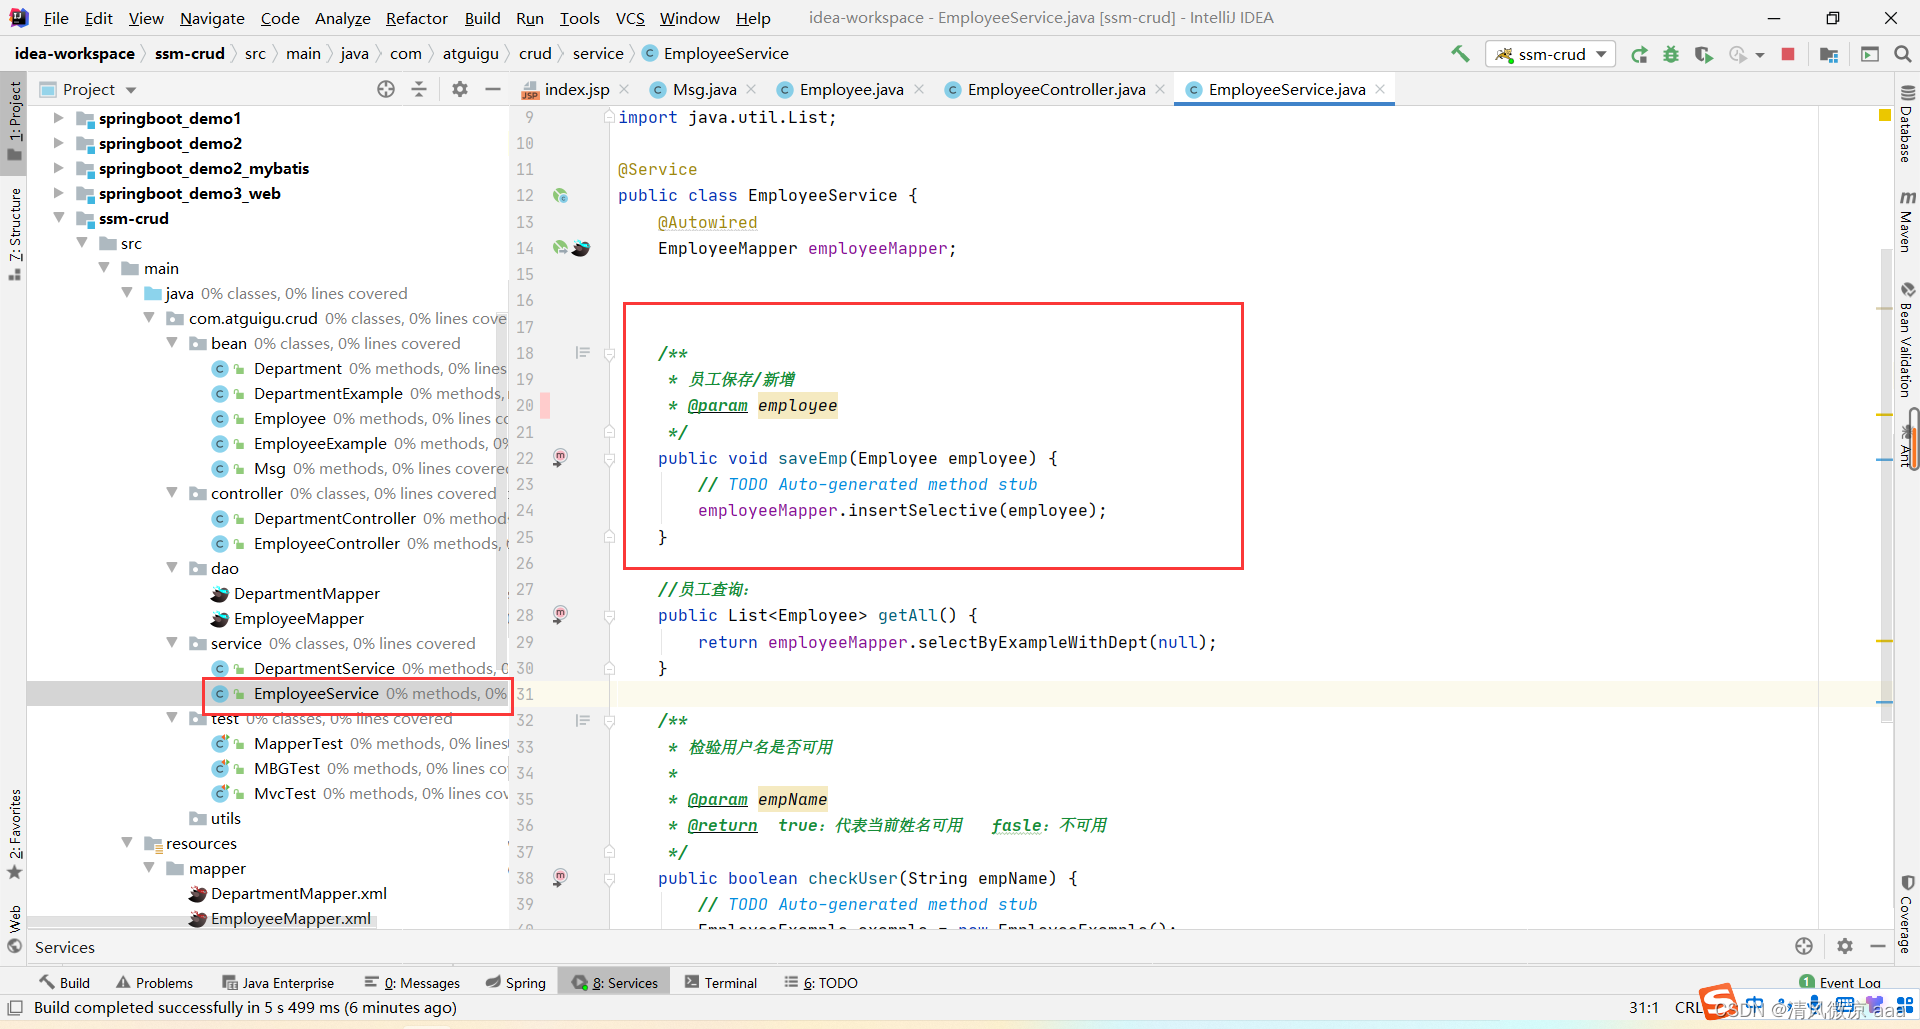
/*** 员工保存/新增* @param employee*/public void saveEmp(Employee employee) {// TODO Auto-generated method stubemployeeMapper.insertSelective(employee);}
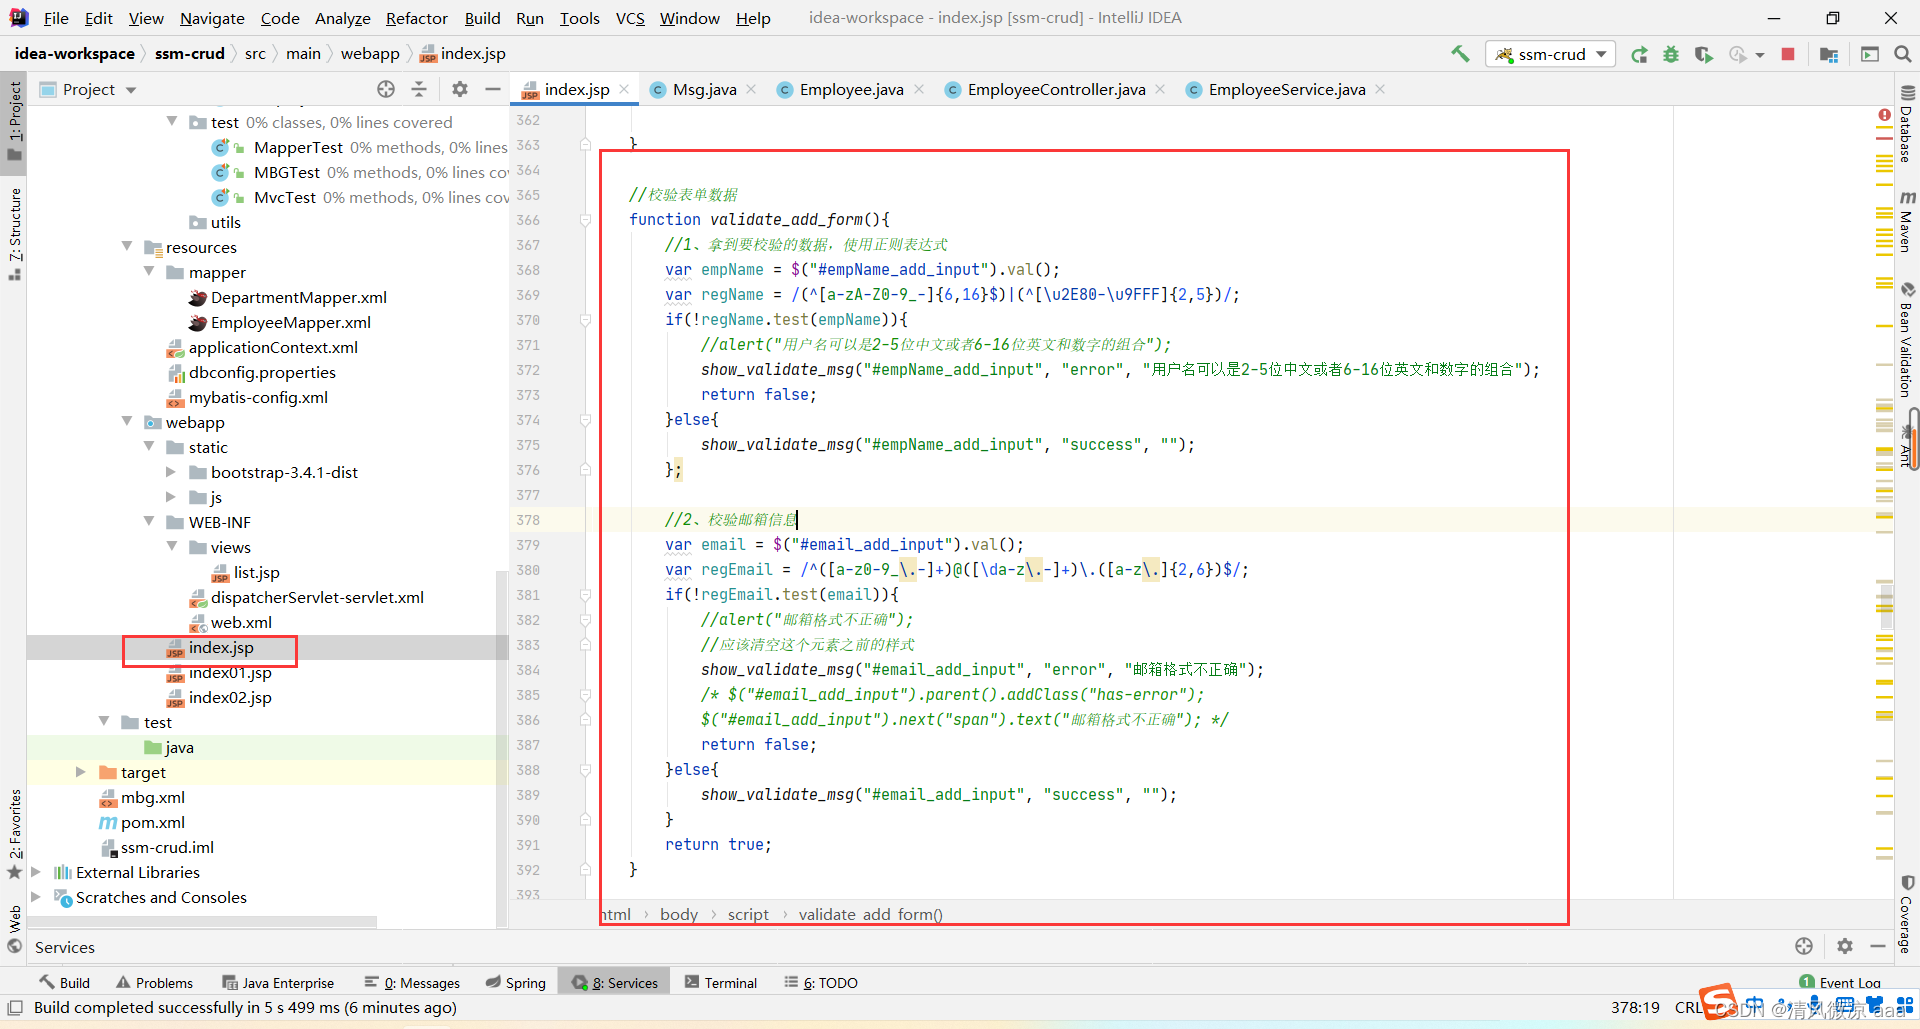
5.4.3、jquery前端进行校验
说明:在jquery前端进行校验用户名和邮箱的格式。
5.4.4、校验用户名是否重复:控制层方法
说明:通过前端发送请求到后台服务器,校验用户名是否重复。
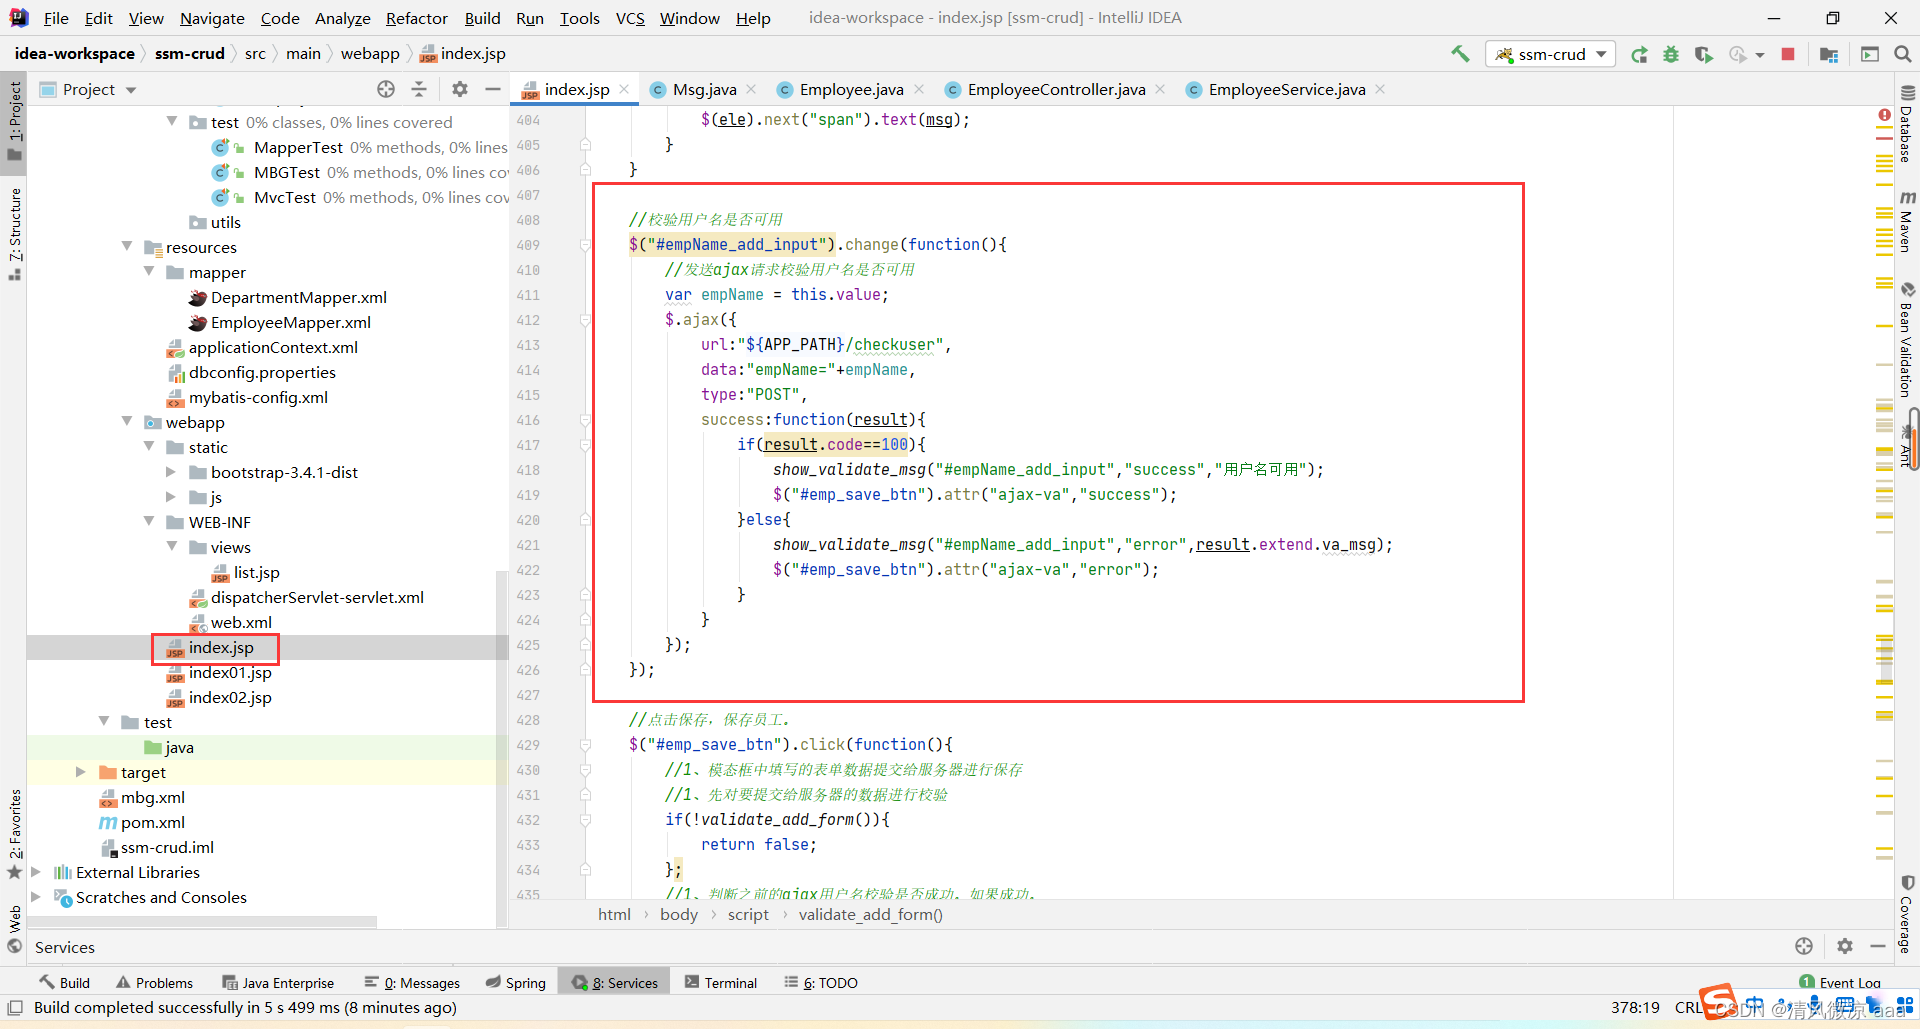

/*** 检查用户名是否可用* @param empName* @return*/@ResponseBody@RequestMapping("/checkuser")public Msg checkuser(@RequestParam("empName")String empName){//先判断用户名是否是合法的表达式;String regx = "(^[a-zA-Z0-9_-]{6,16}$)|(^[\u2E80-\u9FFF]{2,5})";if(!empName.matches(regx)){return Msg.fail().add("va_msg", "用户名必须是6-16位数字和字母的组合或者2-5位中文");}//数据库用户名重复校验boolean b = employeeService.checkUser(empName);if(b){return Msg.success();}else{return Msg.fail().add("va_msg", "用户名不可用");}}
5.4.5、校验用户名是否重复:业务层方法
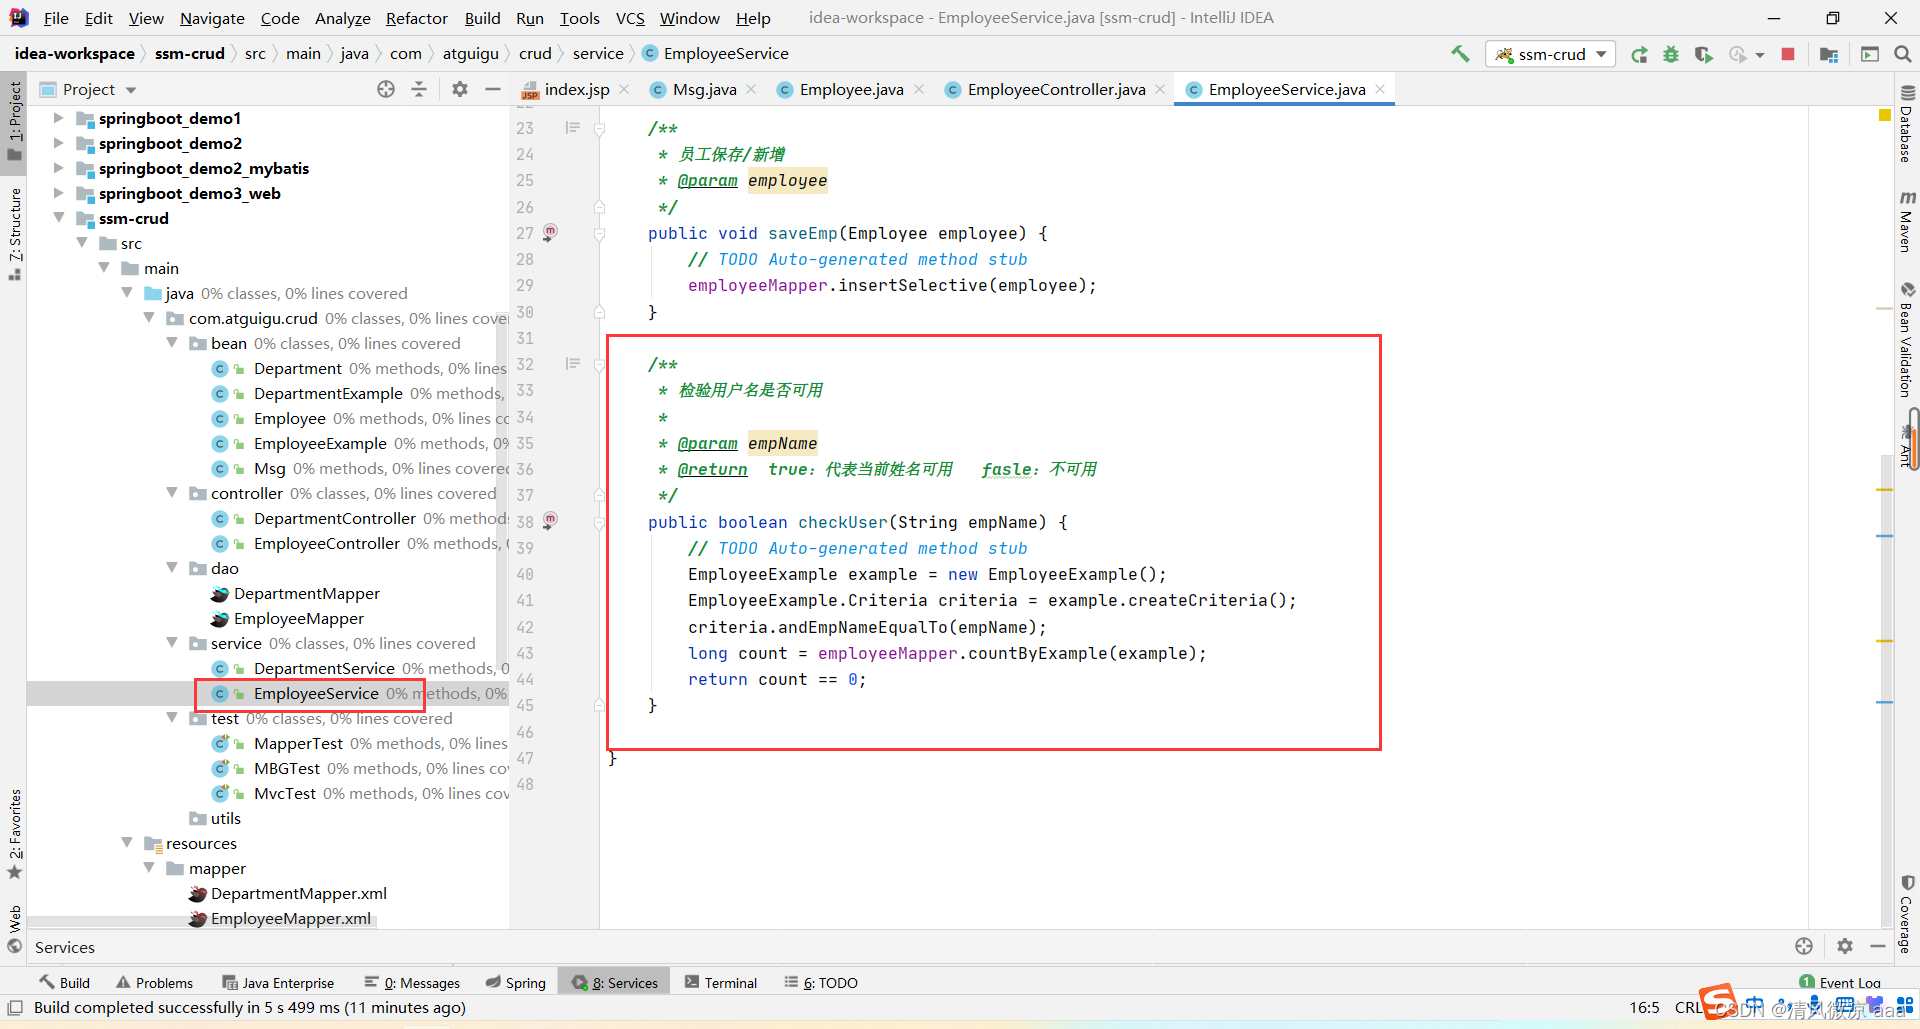
/*** 检验用户名是否可用** @param empName* @return true:代表当前姓名可用 fasle:不可用*/public boolean checkUser(String empName) {// TODO Auto-generated method stubEmployeeExample example = new EmployeeExample();EmployeeExample.Criteria criteria = example.createCriteria();criteria.andEmpNameEqualTo(empName);long count = employeeMapper.countByExample(example);return count == 0;}5.4.6、JSR303进行后端校验
说明:前端校验可以绕过,真正的校验流程,还要在后端、数据库层面都要进行校验。
导入依赖:
org.hibernate hibernate-validator 5.4.1.Final 在实体类上定义校验规则:
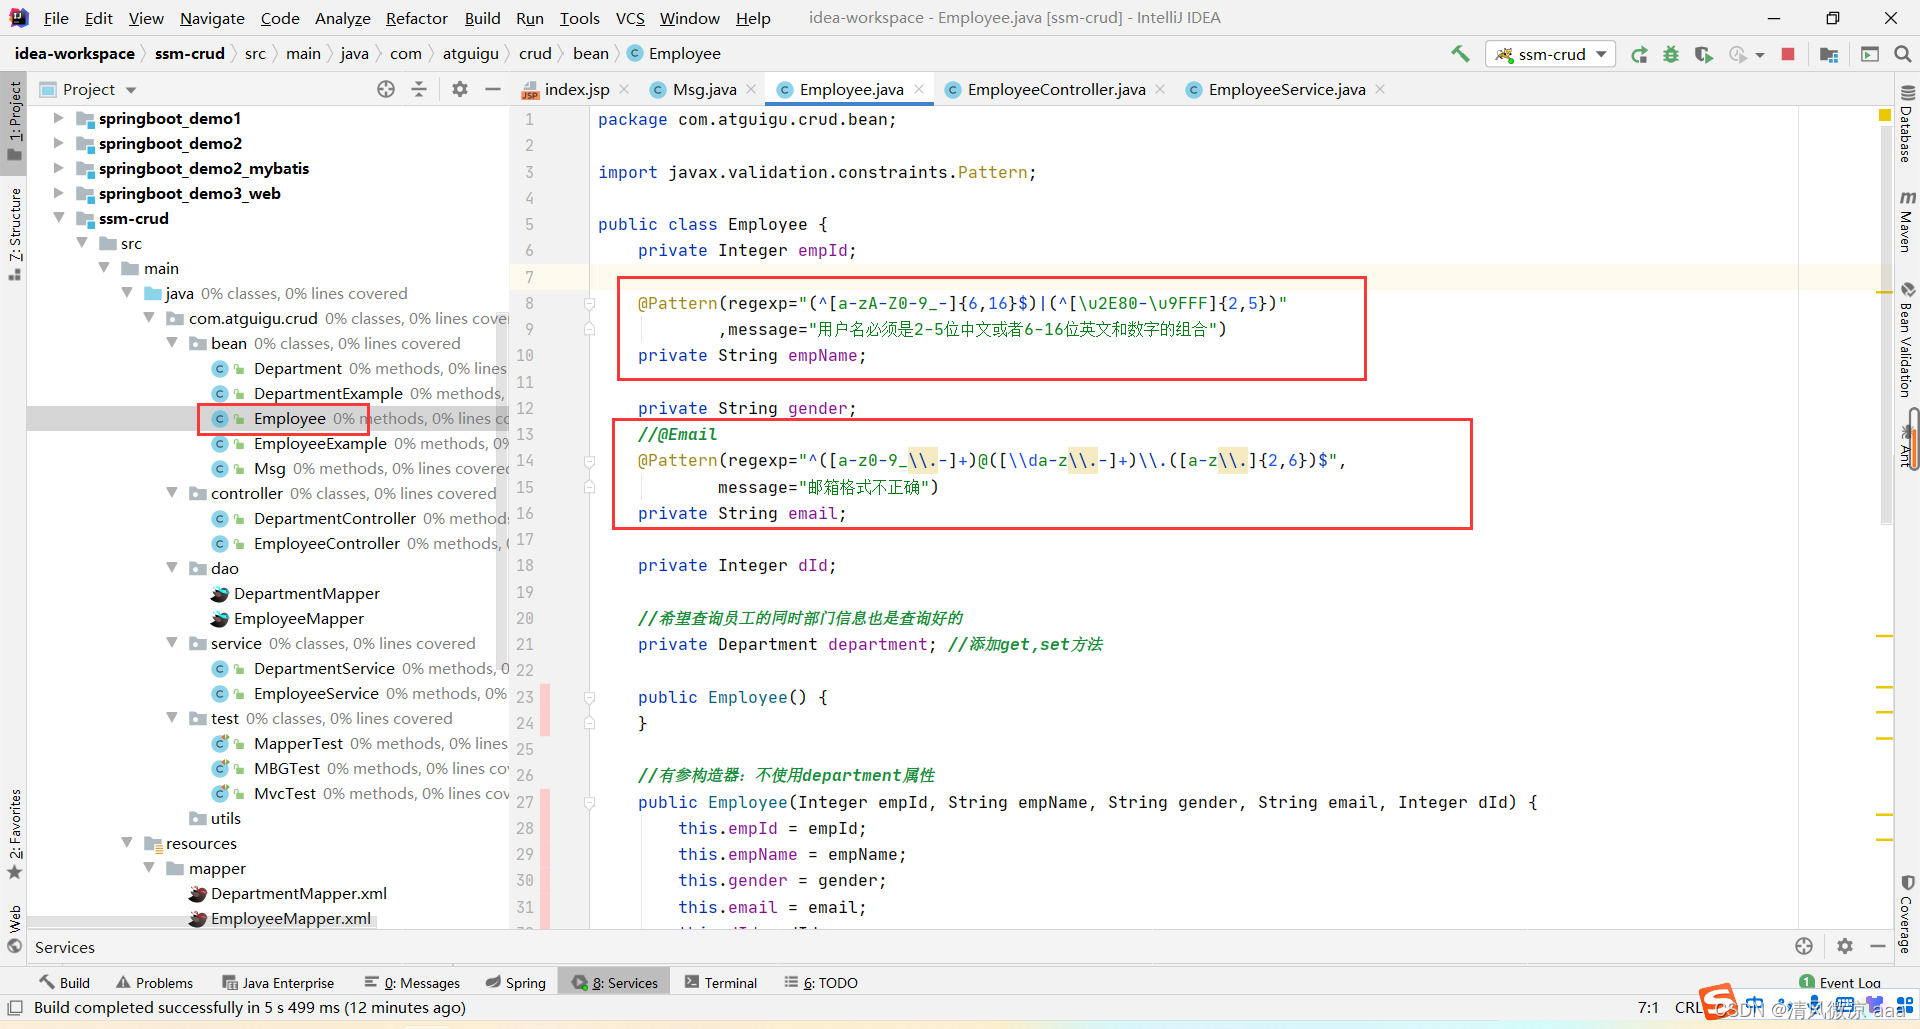
@Pattern(regexp="(^[a-zA-Z0-9_-]{6,16}$)|(^[\u2E80-\u9FFF]{2,5})",message="用户名必须是2-5位中文或者6-16位英文和数字的组合")private String empName;//@Email@Pattern(regexp="^([a-z0-9_\\.-]+)@([\\da-z\\.-]+)\\.([a-z\\.]{2,6})$",message="邮箱格式不正确")private String email;
后端代码:
6、修改
6.1、业务逻辑
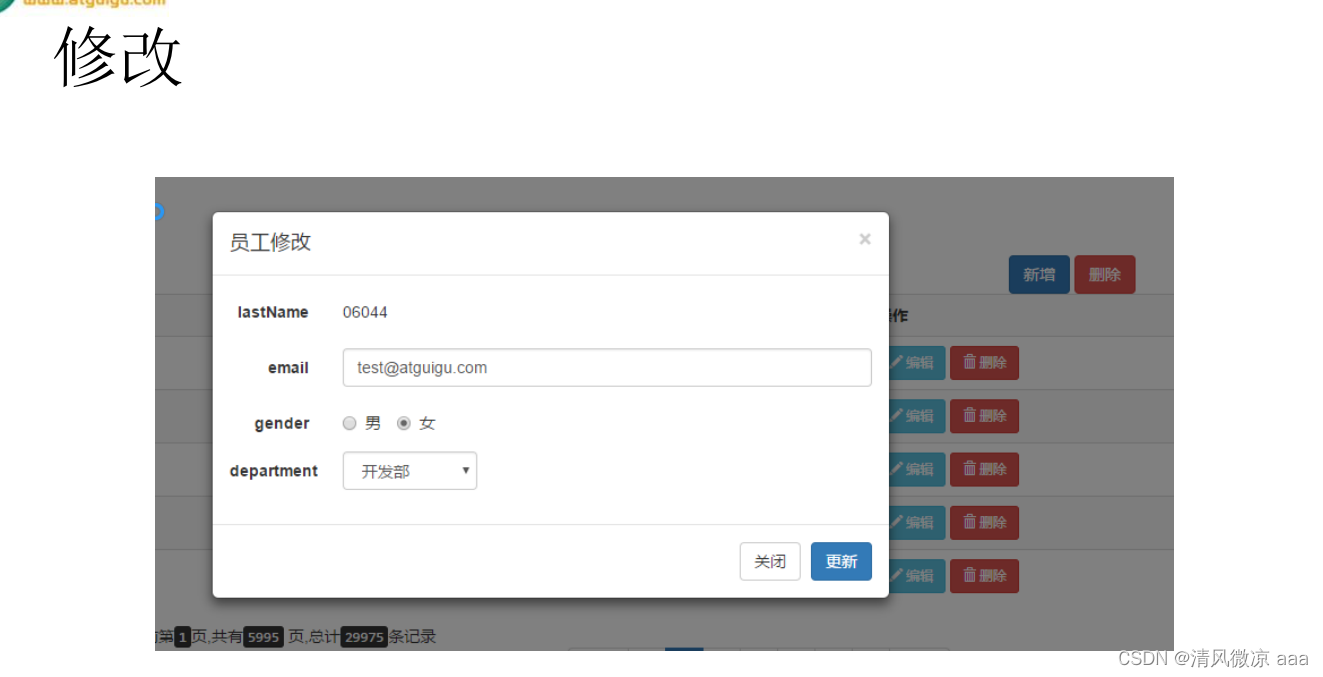

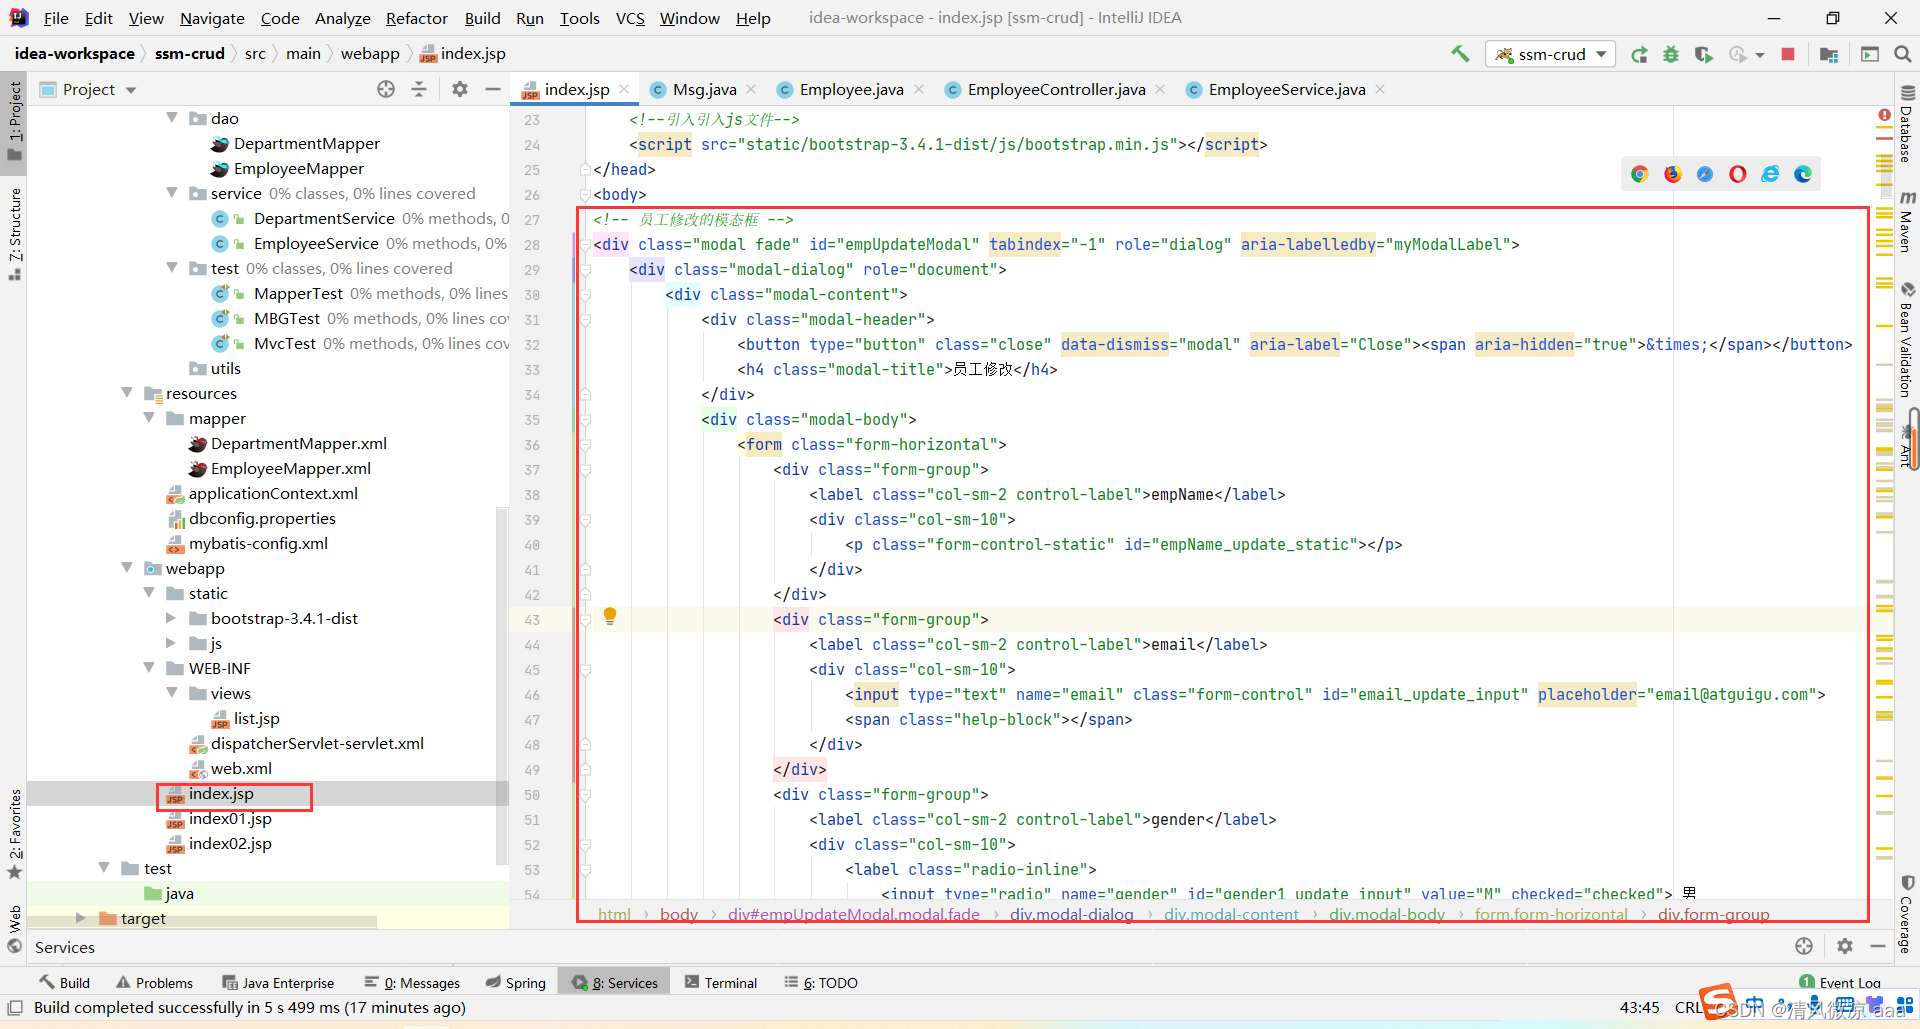
6.2、修改模态框
6.3、先根据id进行查询:js代码

6.4、先根据id进行查询:控制层

/*** 根据id查询员工* @param id* @return*/@RequestMapping(value="/emp/{id}",method=RequestMethod.GET)@ResponseBodypublic Msg getEmp(@PathVariable("id")Integer id){Employee employee = employeeService.getEmp(id);return Msg.success().add("emp", employee);}
6.5、先根据id进行查询:业务层
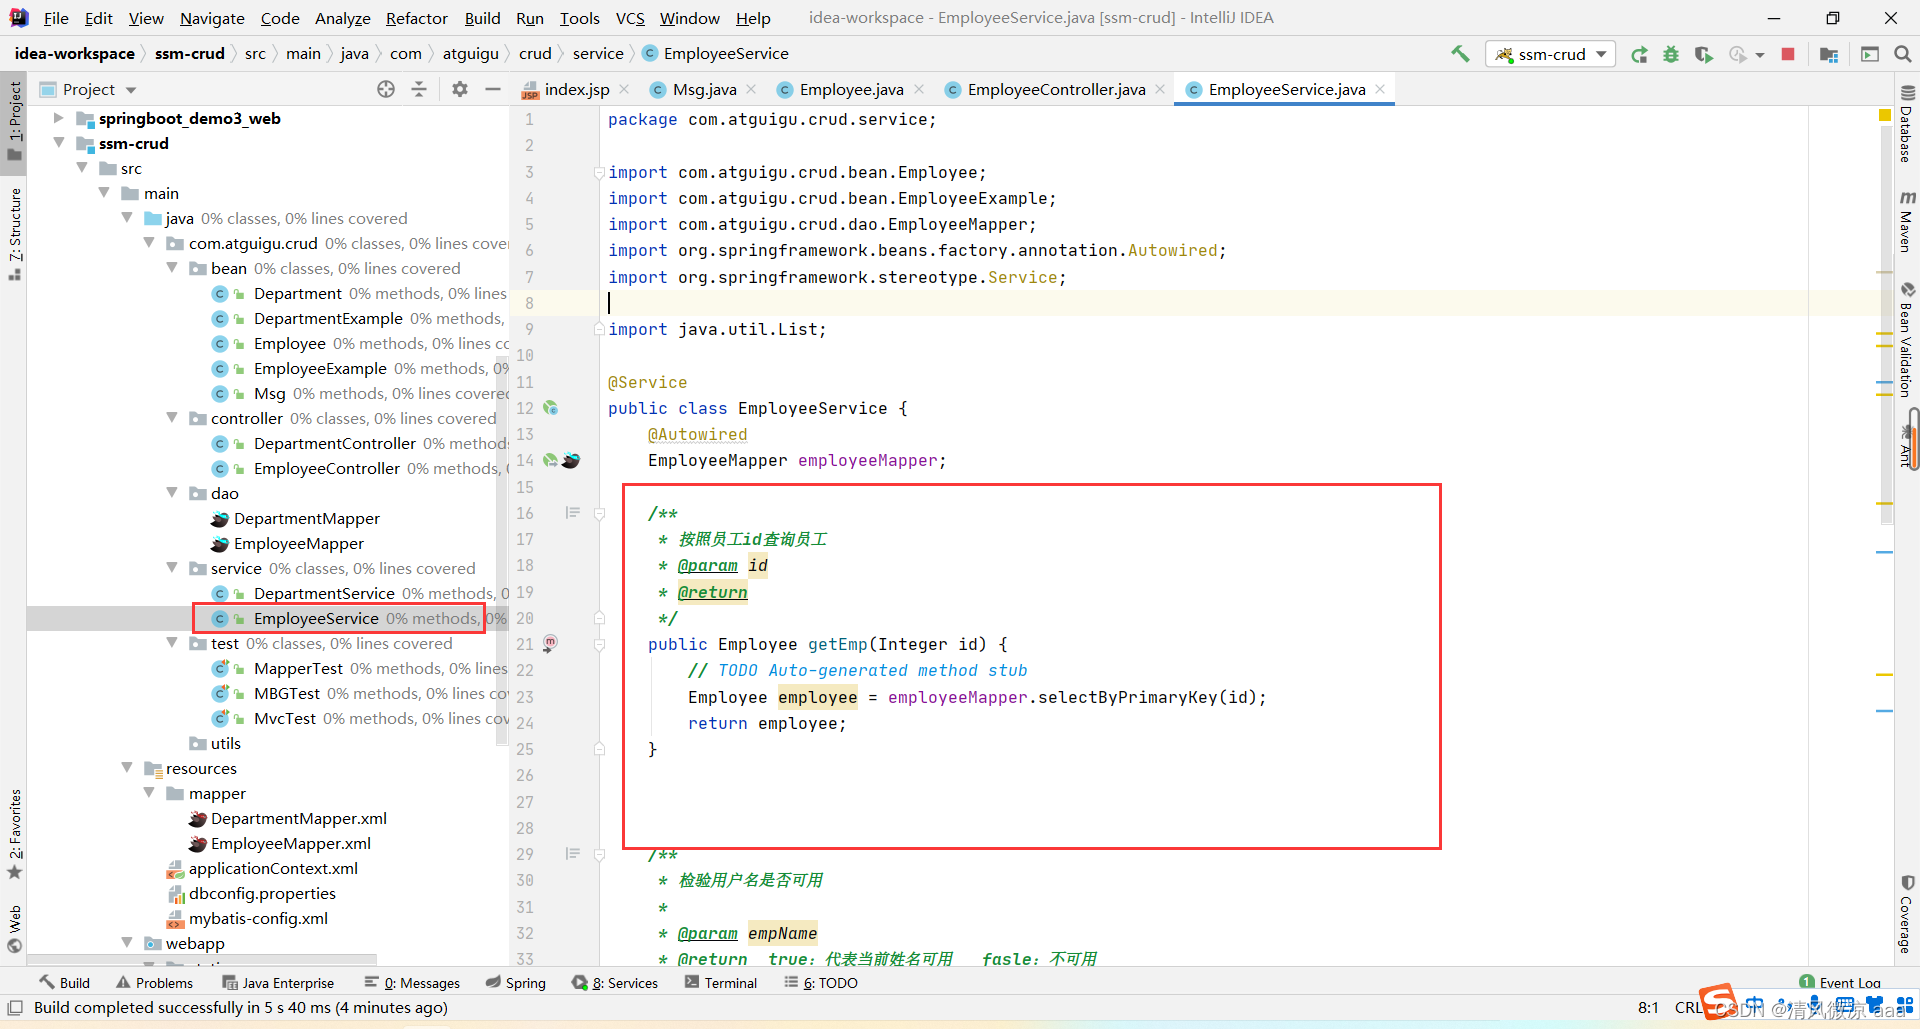
/*** 按照员工id查询员工* @param id* @return*/public Employee getEmp(Integer id) {// TODO Auto-generated method stubEmployee employee = employeeMapper.selectByPrimaryKey(id);return employee;}
6.6、更新:Ajax发送put请求引发的血案
6.6.1、配置过滤器
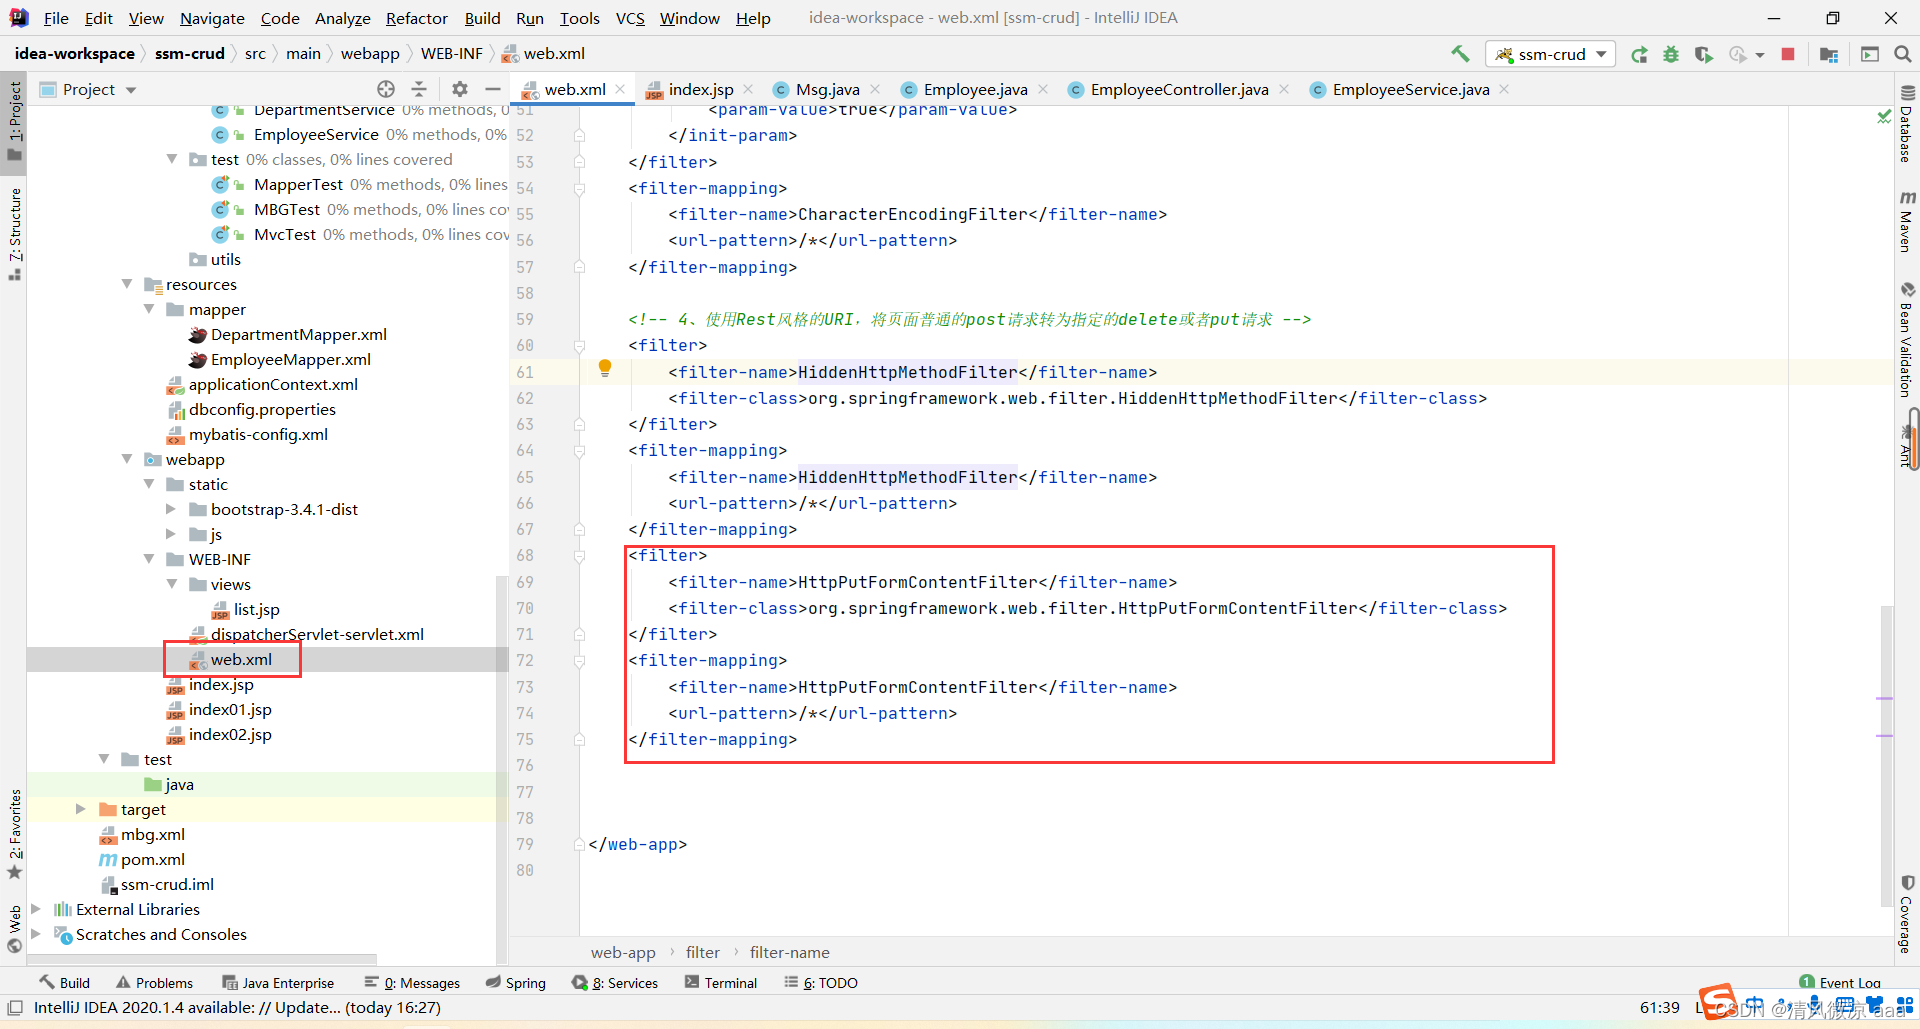
HttpPutFormContentFilter org.springframework.web.filter.HttpPutFormContentFilter HttpPutFormContentFilter /* 6.6.2、前端代码
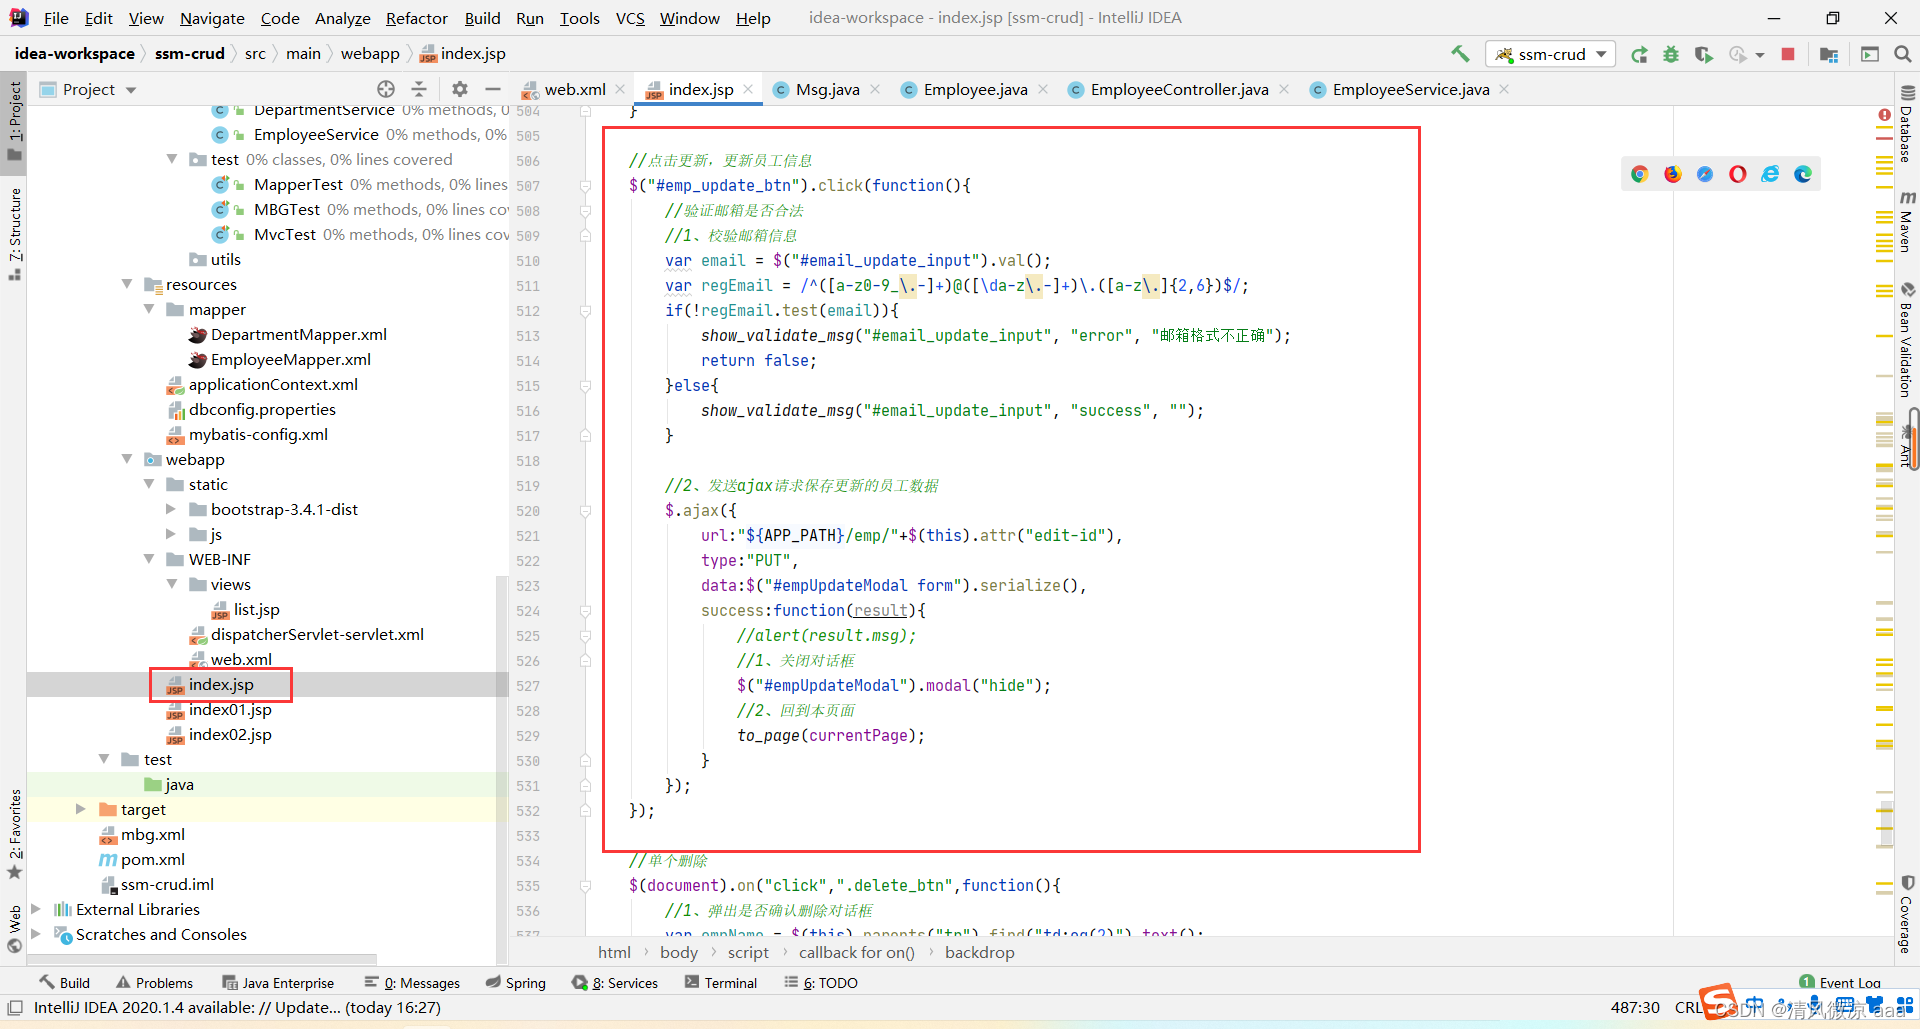
6.6.3、控制层
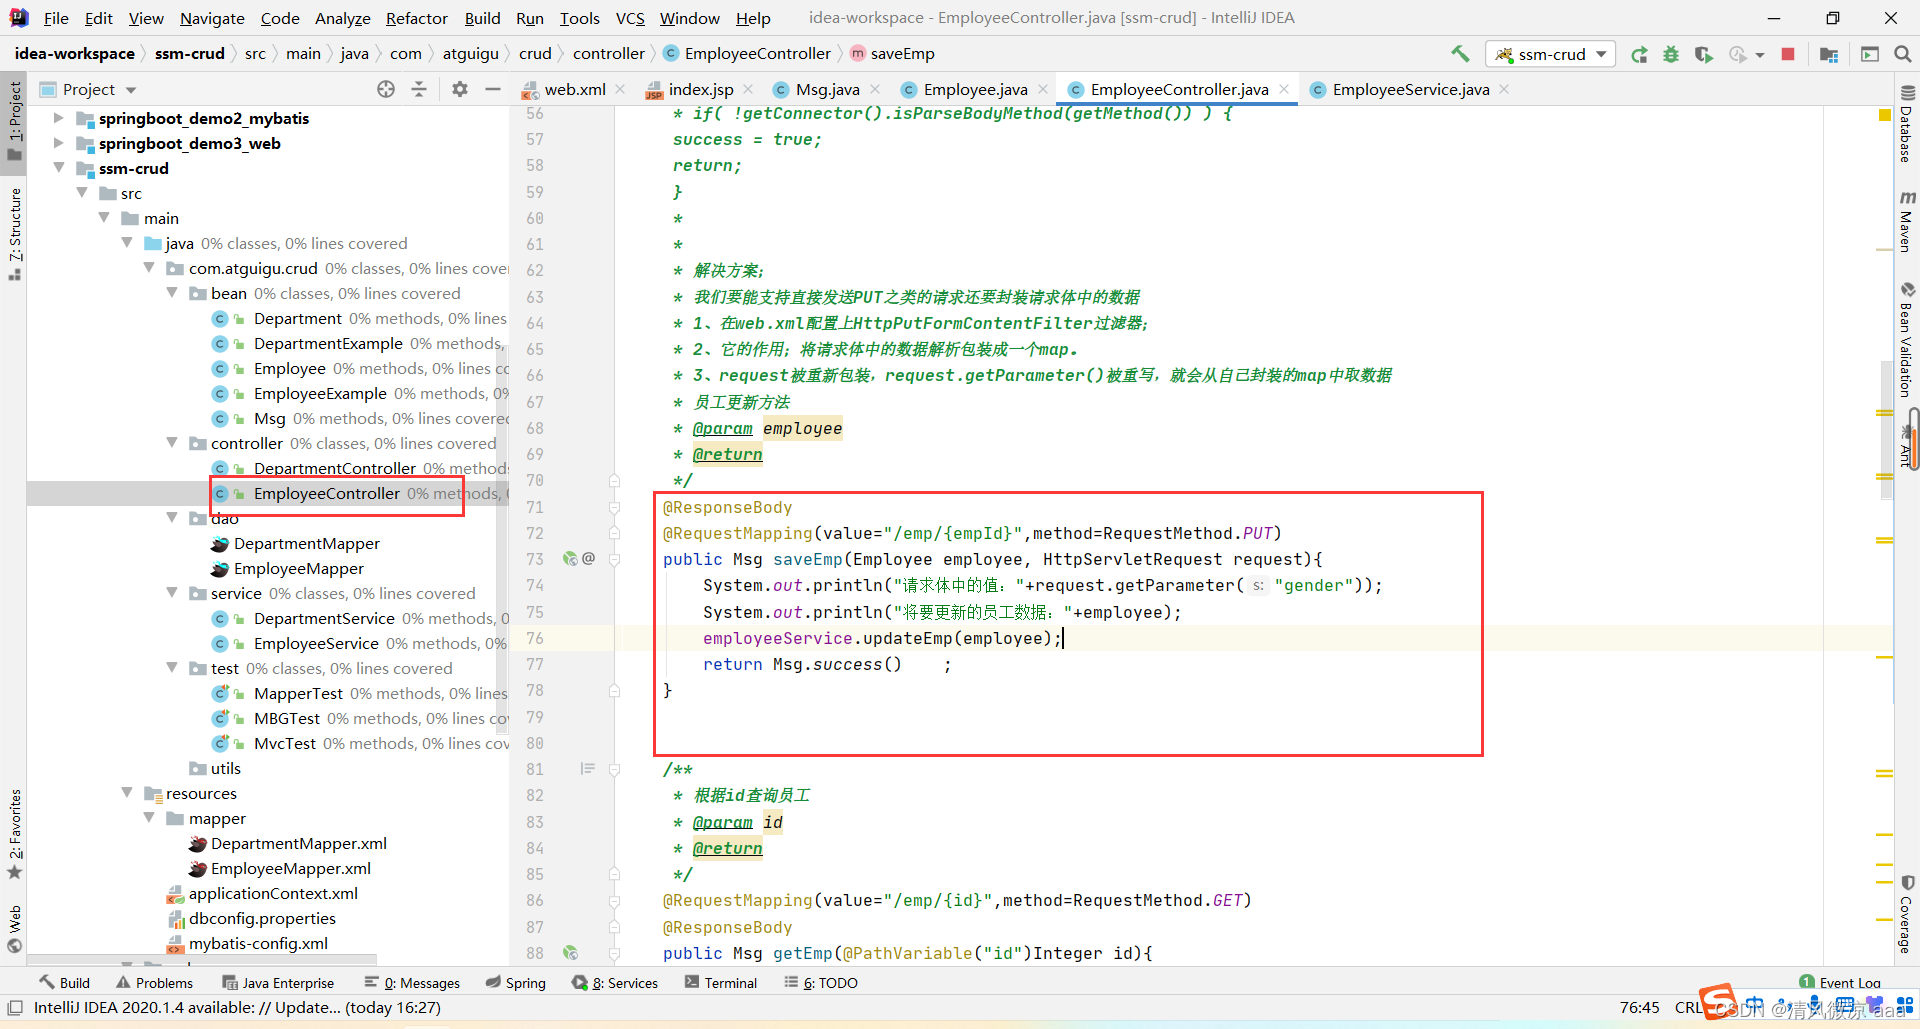
/*** 如果直接发送ajax=PUT形式的请求* 封装的数据* Employee* [empId=1014, empName=null, gender=null, email=null, dId=null]** 问题:* 请求体中有数据;* 但是Employee对象封装不上;* update tbl_emp where emp_id = 1014;** 原因:* Tomcat:* 1、将请求体中的数据,封装一个map。* 2、request.getParameter("empName")就会从这个map中取值。* 3、SpringMVC封装POJO对象的时候。* 会把POJO中每个属性的值,request.getParamter("email");* AJAX发送PUT请求引发的血案:* PUT请求,请求体中的数据,request.getParameter("empName")拿不到* Tomcat一看是PUT不会封装请求体中的数据为map,只有POST形式的请求才封装请求体为map* org.apache.catalina.connector.Request--parseParameters() (3111);** protected String parseBodyMethods = "POST";* if( !getConnector().isParseBodyMethod(getMethod()) ) {success = true;return;}*** 解决方案;* 我们要能支持直接发送PUT之类的请求还要封装请求体中的数据* 1、在web.xml配置上HttpPutFormContentFilter过滤器;* 2、它的作用;将请求体中的数据解析包装成一个map。* 3、request被重新包装,request.getParameter()被重写,就会从自己封装的map中取数据* 员工更新方法* @param employee* @return*/@ResponseBody@RequestMapping(value="/emp/{empId}",method=RequestMethod.PUT)public Msg saveEmp(Employee employee, HttpServletRequest request){System.out.println("请求体中的值:"+request.getParameter("gender"));System.out.println("将要更新的员工数据:"+employee);employeeService.updateEmp(employee);return Msg.success() ;}6.6.4、业务层
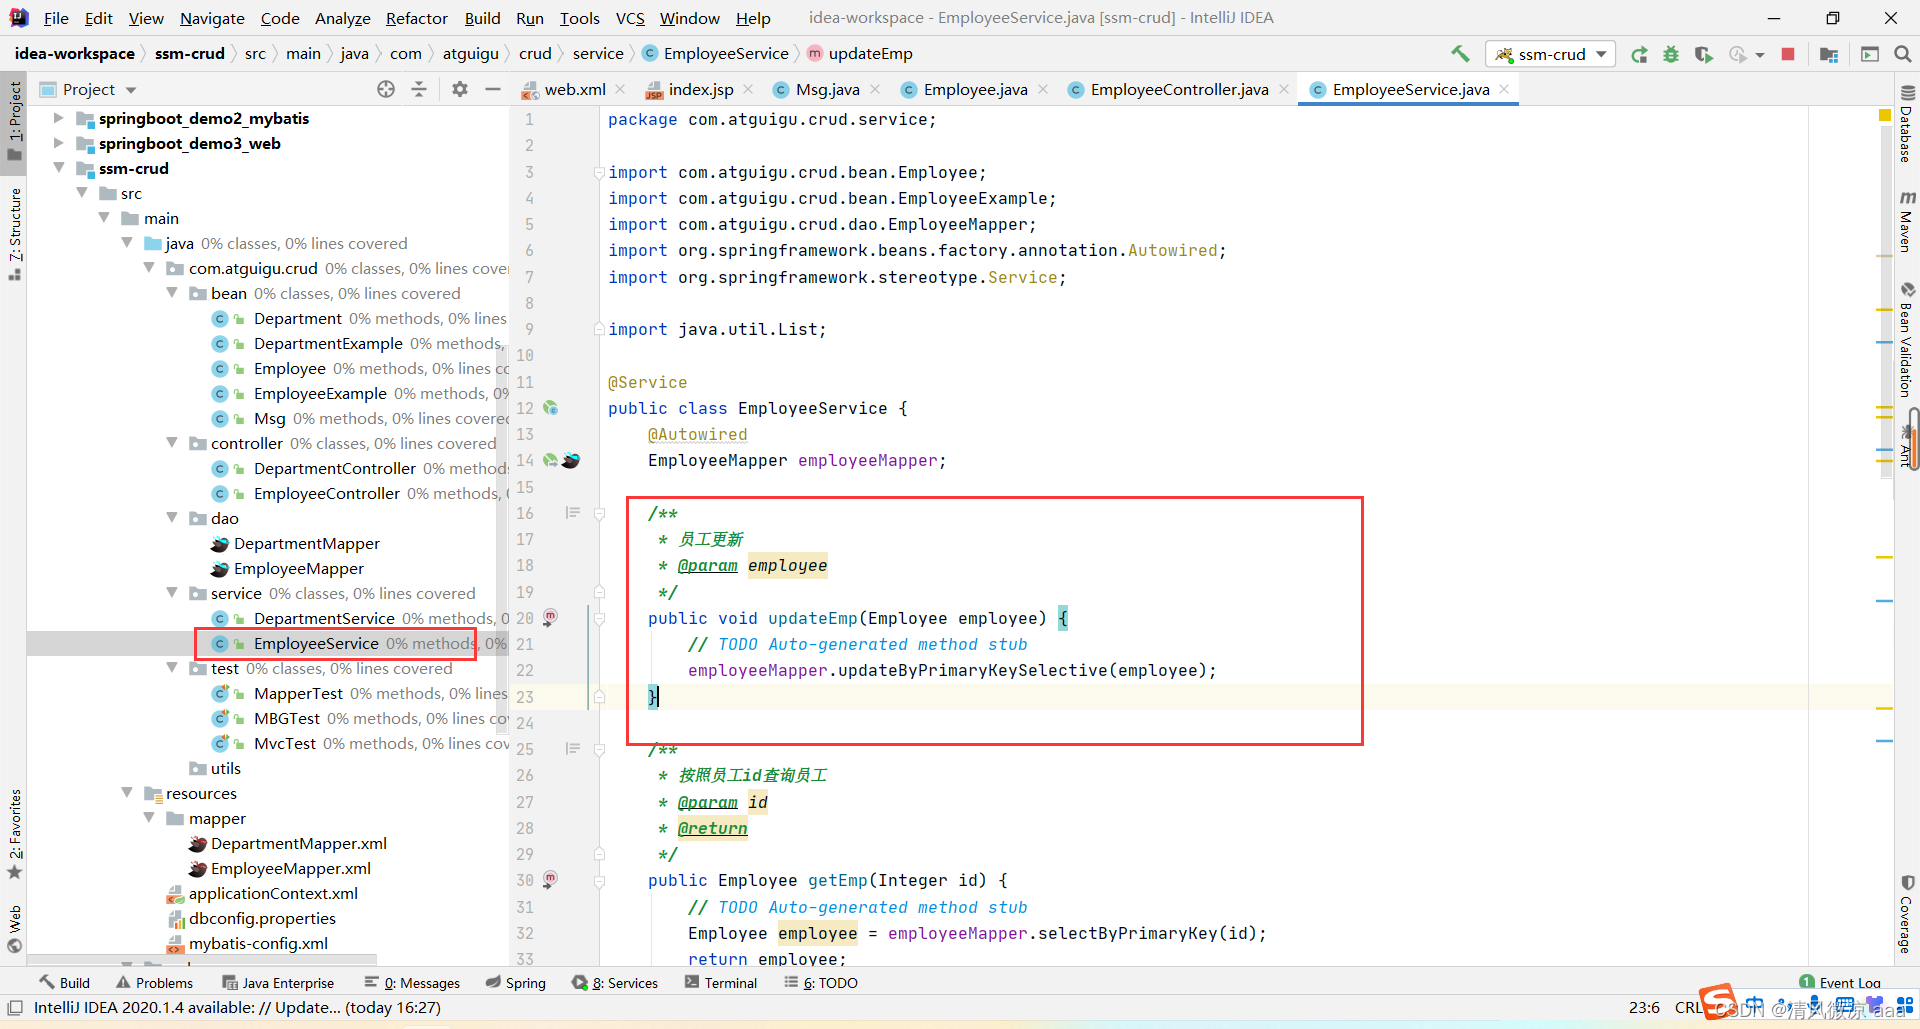
/*** 员工更新* @param employee*/public void updateEmp(Employee employee) {// TODO Auto-generated method stubemployeeMapper.updateByPrimaryKeySelective(employee);}
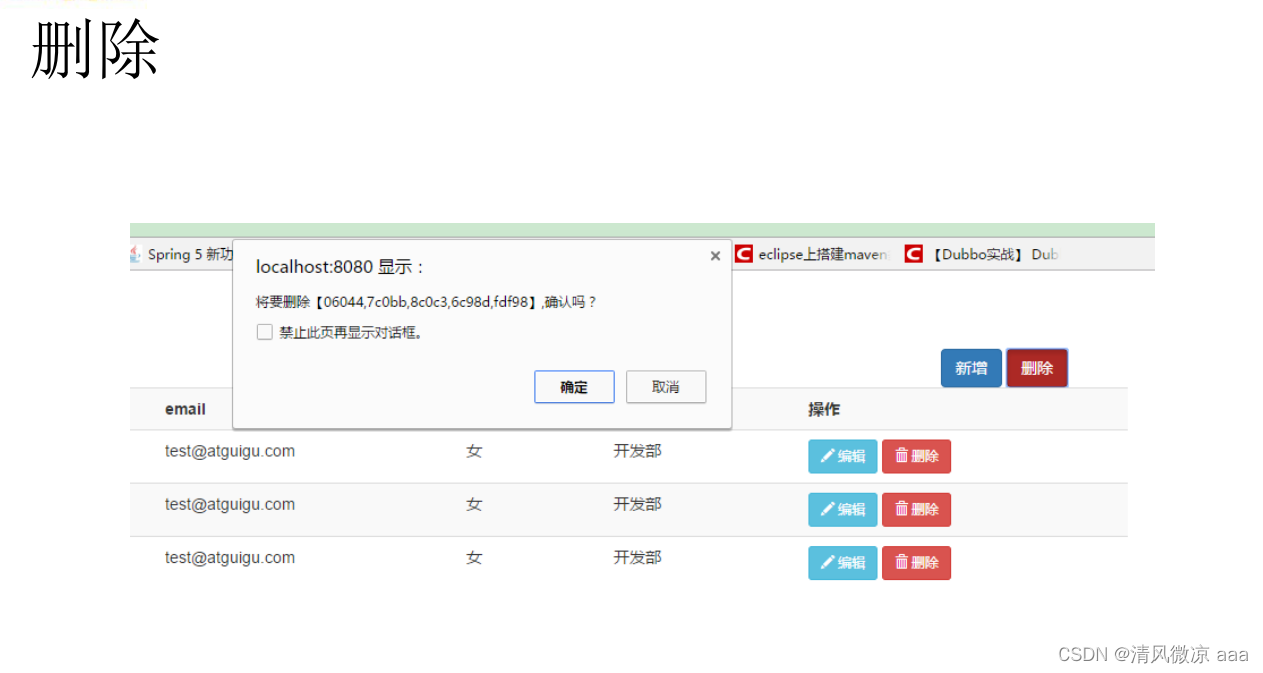
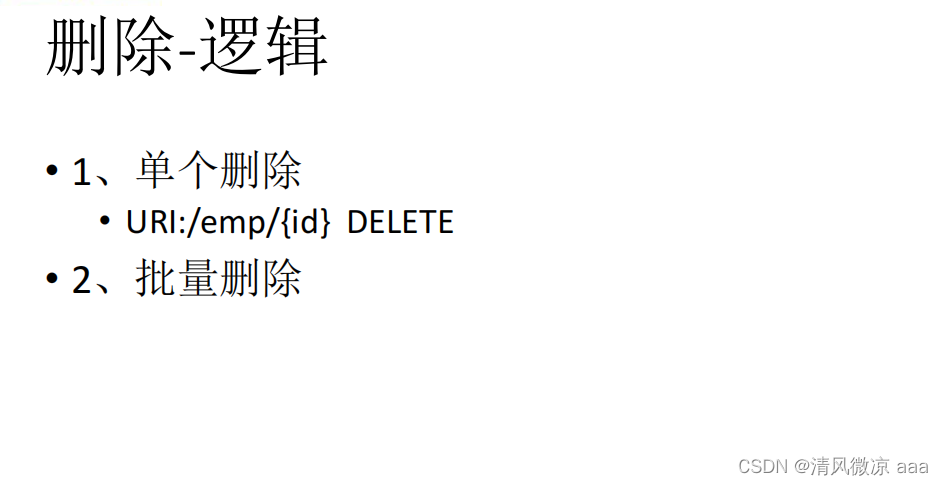
7、删除
7.1、业务逻辑
7.2、页面js
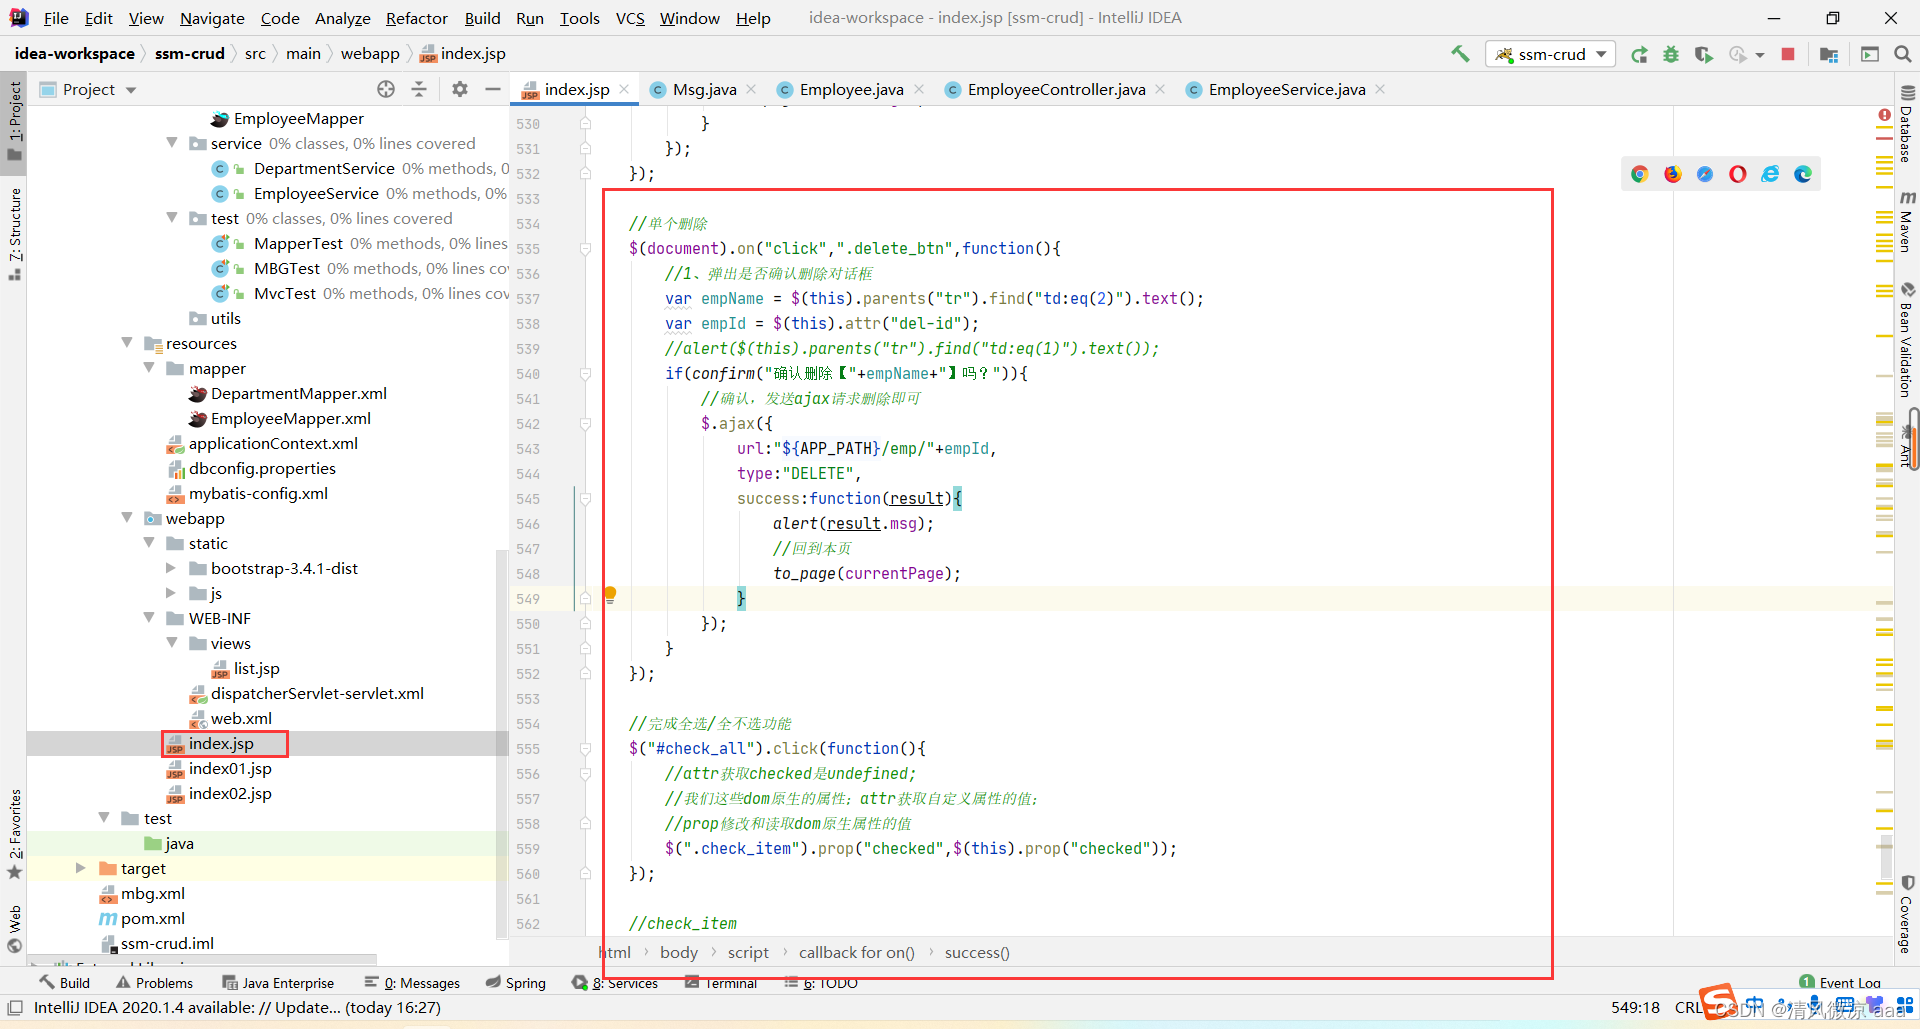
7.3、单个/ 批量删除
7.3.1 控制层
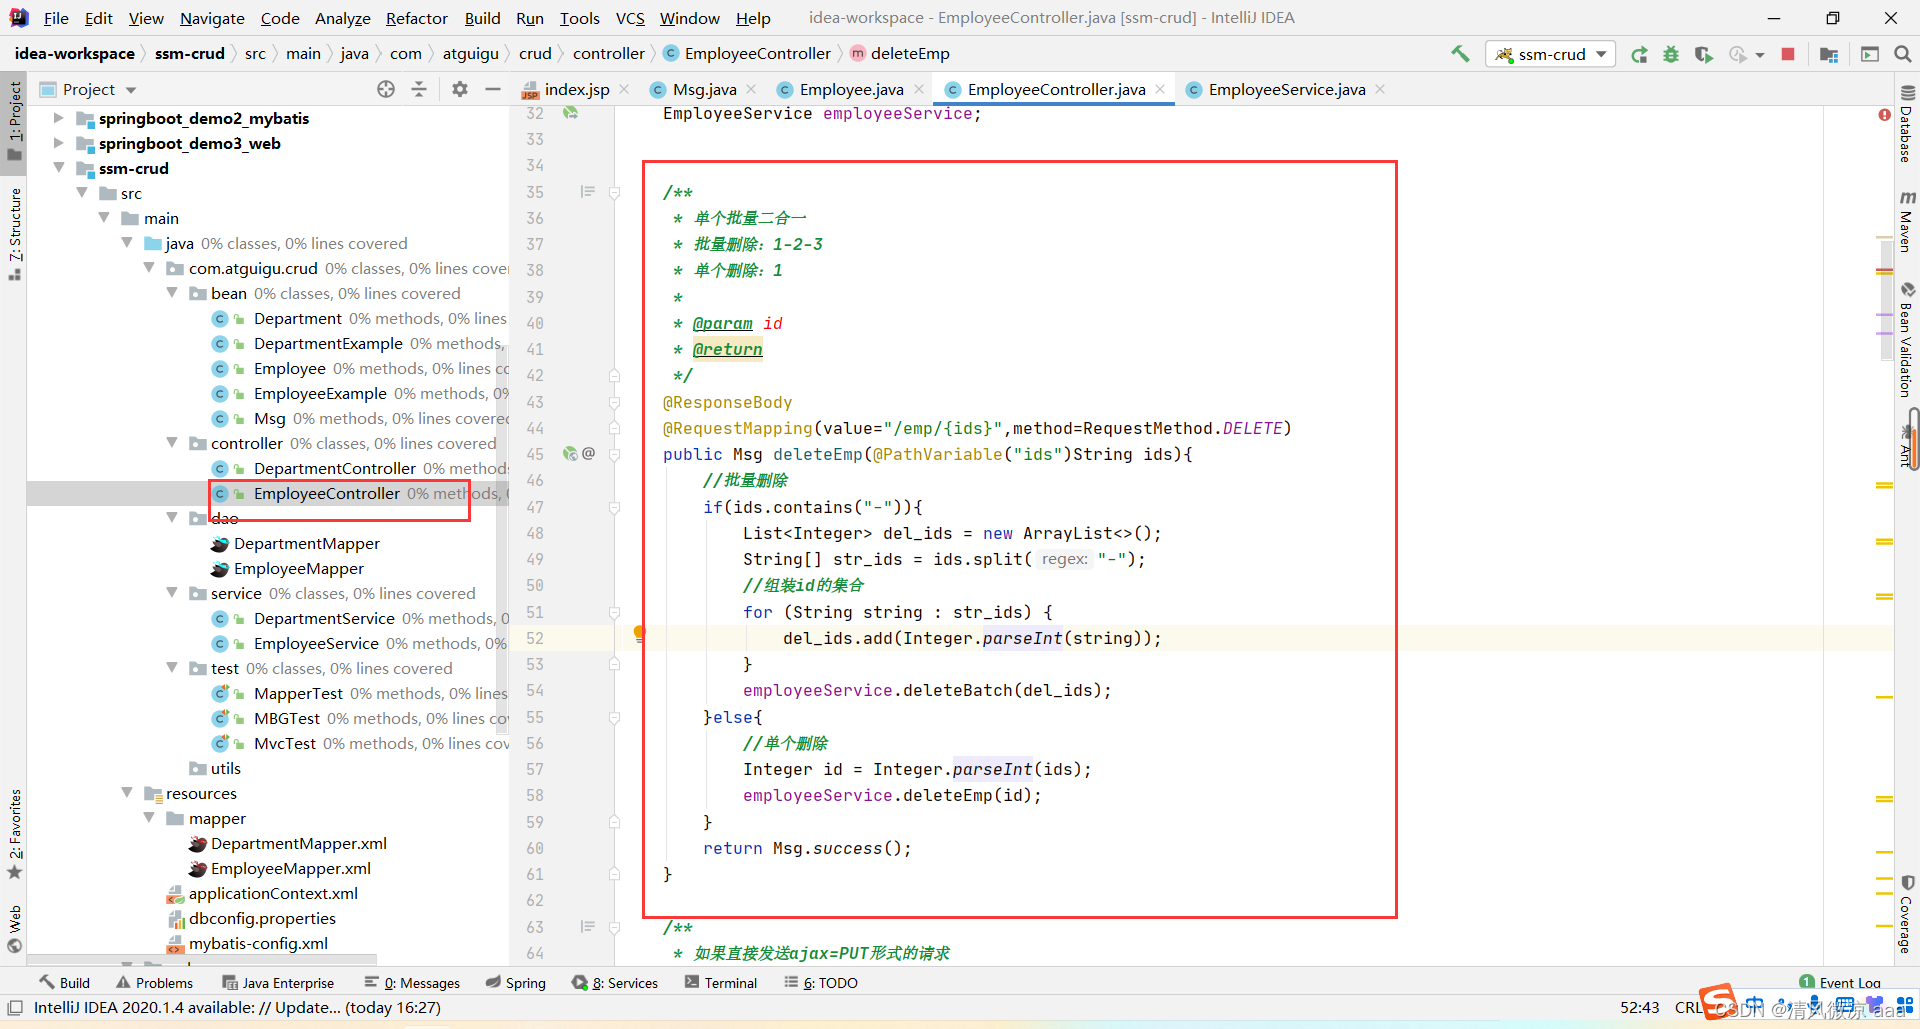
/*** 单个批量二合一* 批量删除:1-2-3* 单个删除:1** @param id* @return*/@ResponseBody@RequestMapping(value="/emp/{ids}",method=RequestMethod.DELETE)public Msg deleteEmp(@PathVariable("ids")String ids){//批量删除if(ids.contains("-")){List del_ids = new ArrayList<>();String[] str_ids = ids.split("-");//组装id的集合for (String string : str_ids) {del_ids.add(Integer.parseInt(string));}employeeService.deleteBatch(del_ids);}else{//单个删除Integer id = Integer.parseInt(ids);employeeService.deleteEmp(id);}return Msg.success();}
7.3.2 业务层
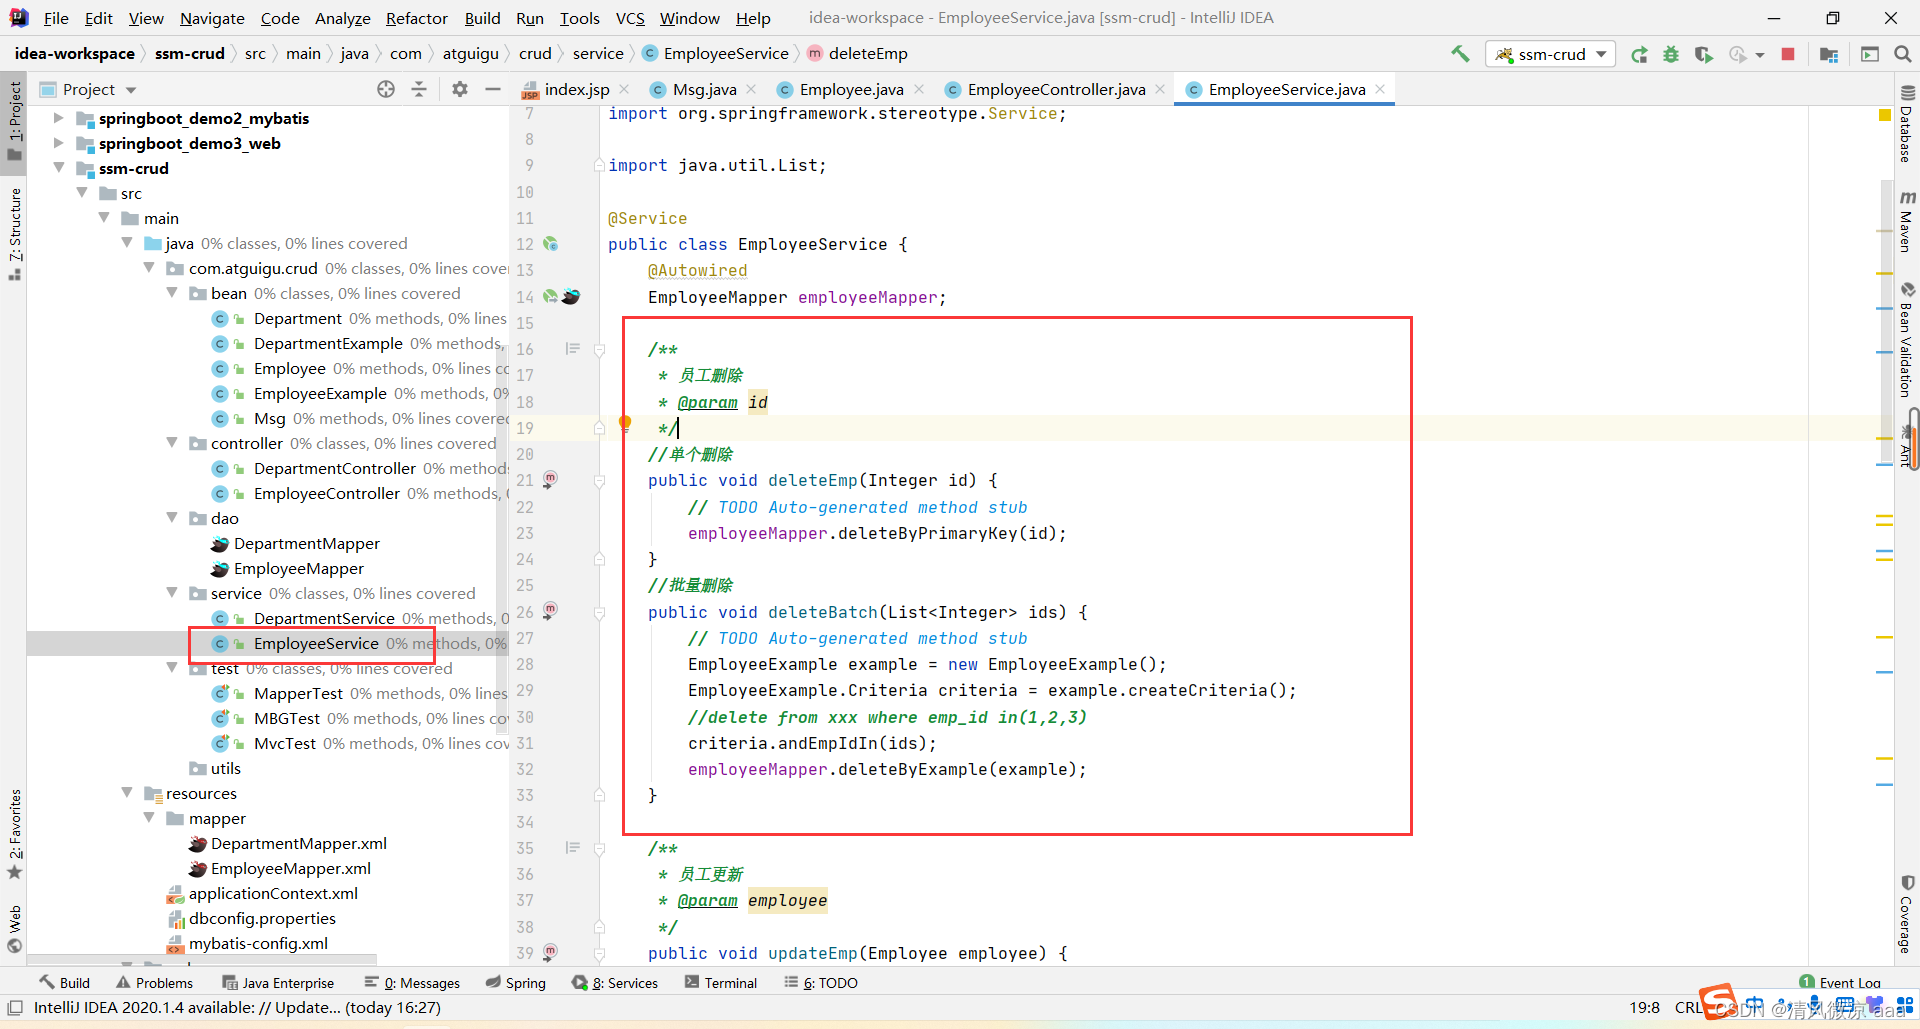
/*** 员工删除* @param id*///单个删除public void deleteEmp(Integer id) {// TODO Auto-generated method stubemployeeMapper.deleteByPrimaryKey(id);}//批量删除public void deleteBatch(List ids) {// TODO Auto-generated method stubEmployeeExample example = new EmployeeExample();EmployeeExample.Criteria criteria = example.createCriteria();//delete from xxx where emp_id in(1,2,3)criteria.andEmpIdIn(ids);employeeMapper.deleteByExample(example);}
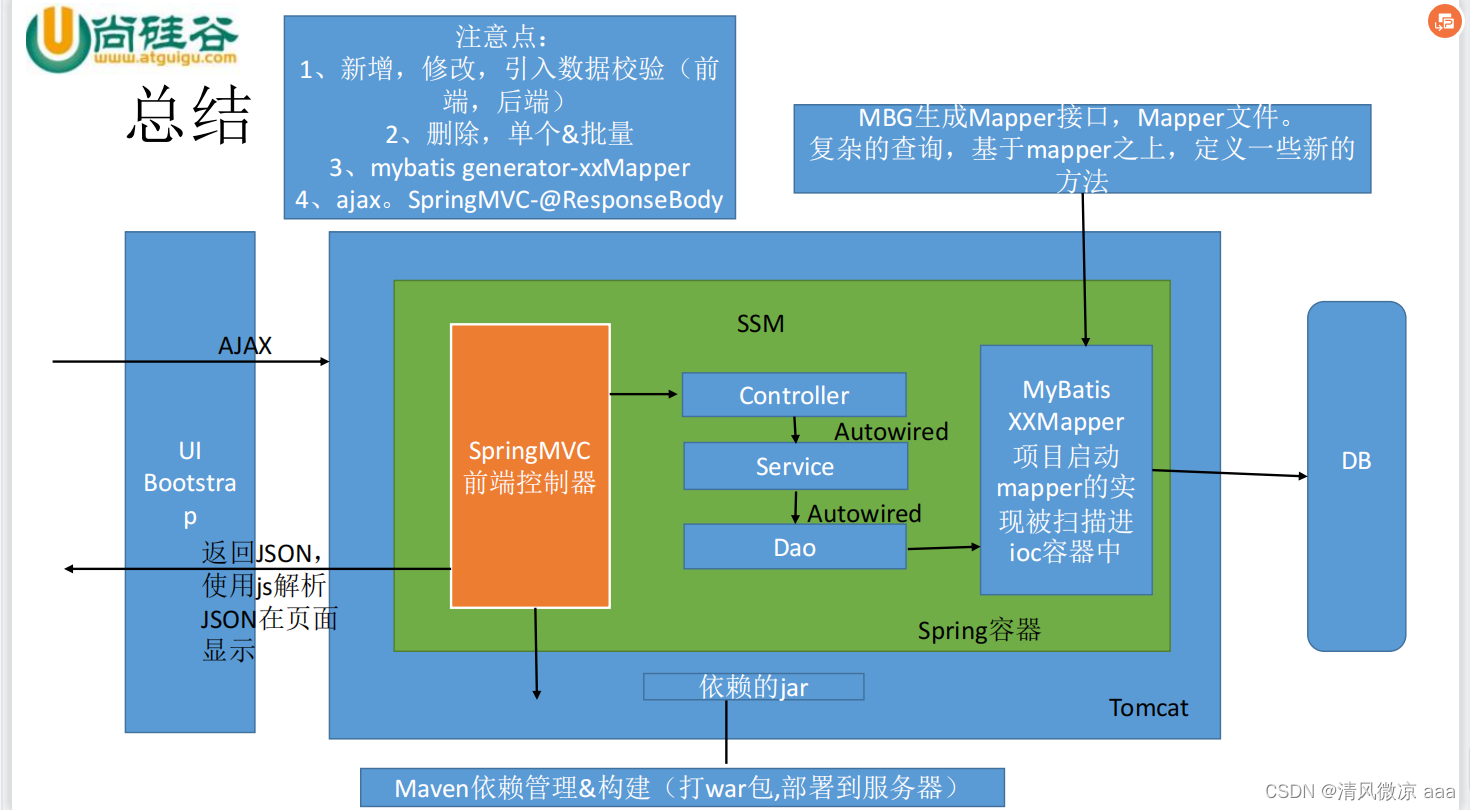
8、总结