
Qt demo——修改用户资料窗口
创始人
2025-05-30 15:40:15
0次
一、效果展示
基本信息界面

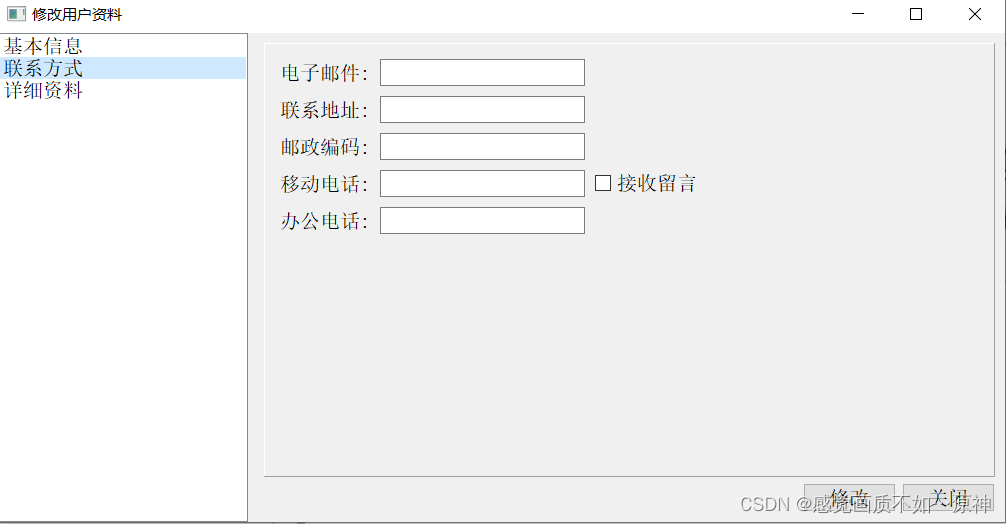
联系方式界面
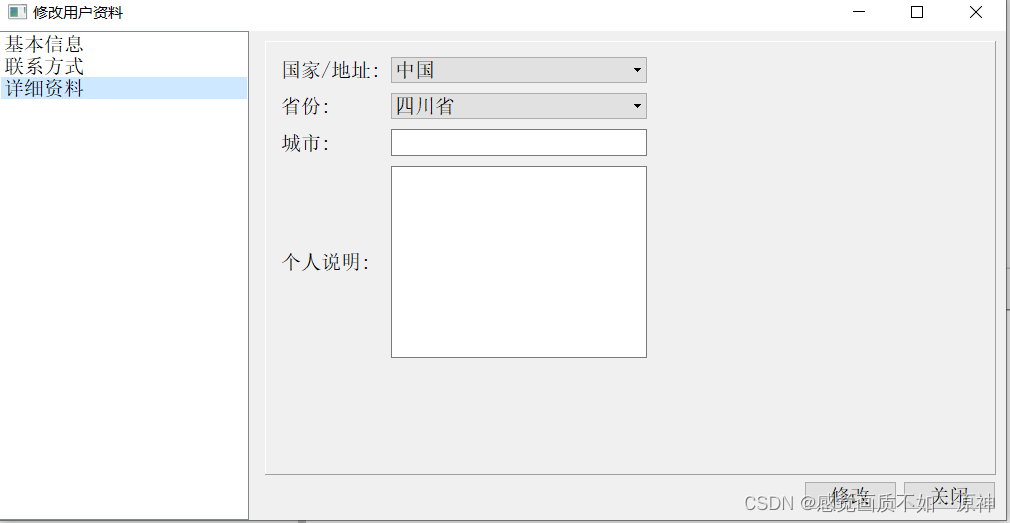
详细资料界面
二、实现
1.窗口布局
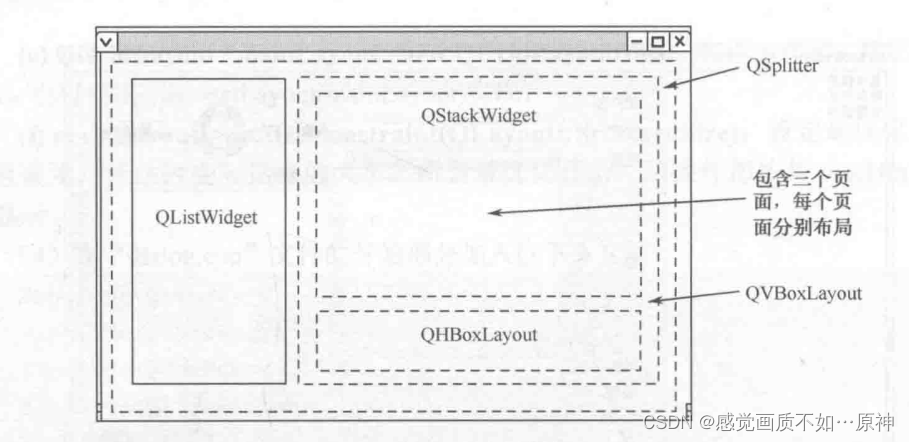
- 左边是一个
QListWidget,分别包含三个item。(基本信息,联系方式,详细资料) - 右边整体是一个
QVBoxLayout,即垂直布局。 -
- 上面是一个
QStackWidget,包含三个不同的页面(baseInfo,contact,detail),每个页面都有自己的布局。
- 上面是一个
-
- 上面是一个
QHBoxLayout,即水平布局。里面包含两个按钮(修改按钮modifyBtn和 关闭按钮closeBtn)。
- 上面是一个
- 最外层是一个分割窗口
QSplitter,将窗口分为左右两边。
2.实现步骤与代码
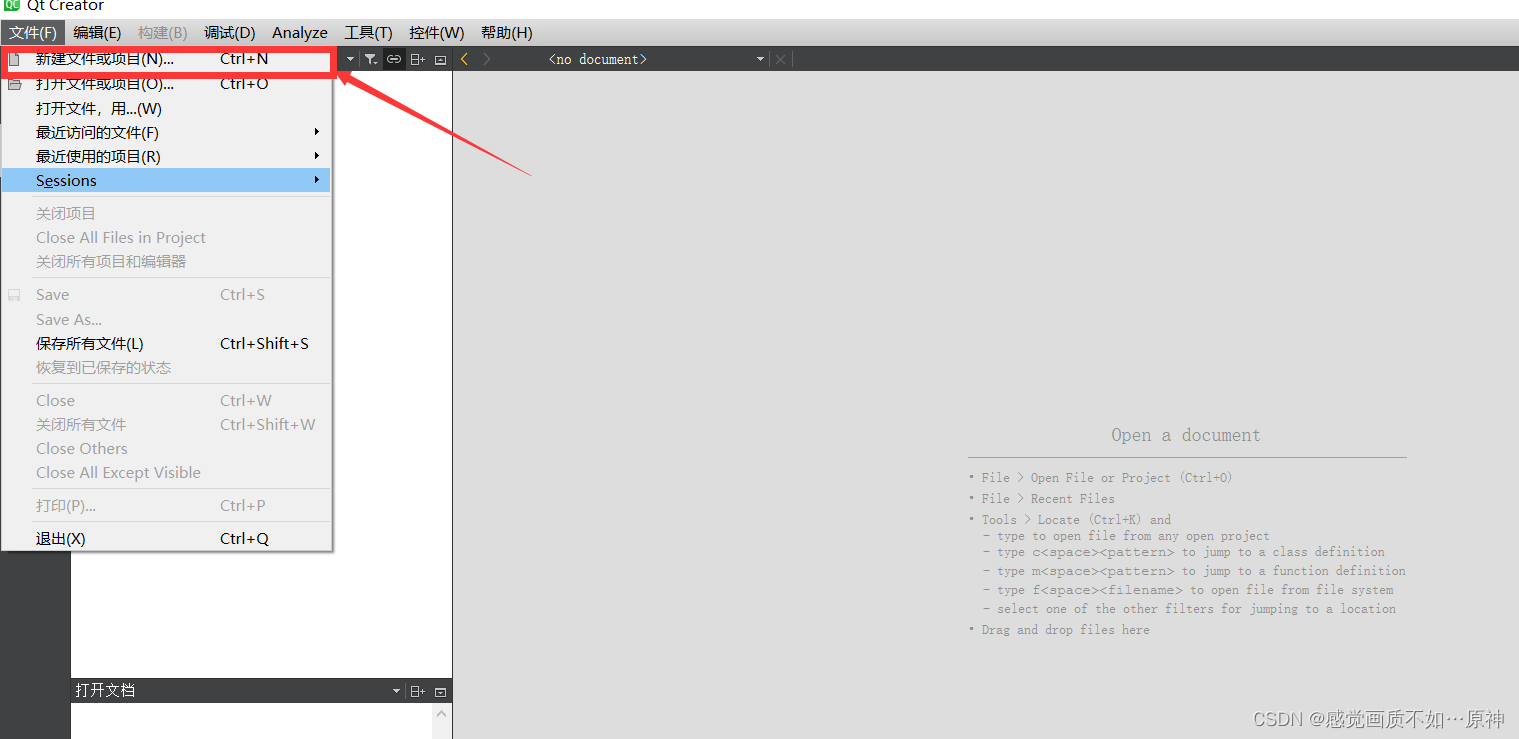
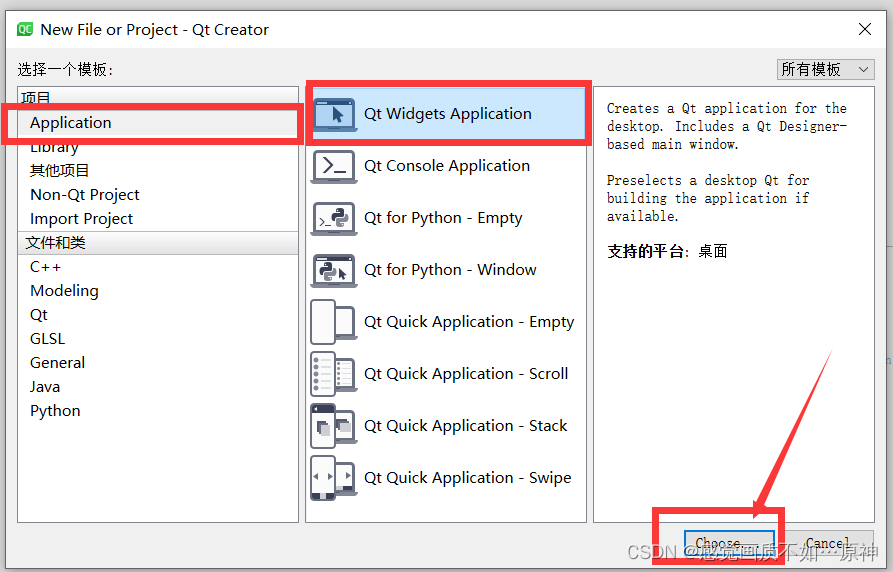
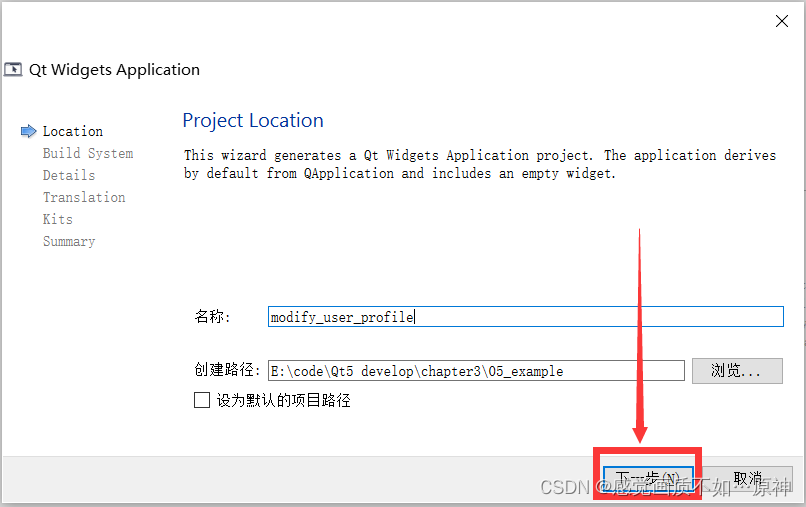
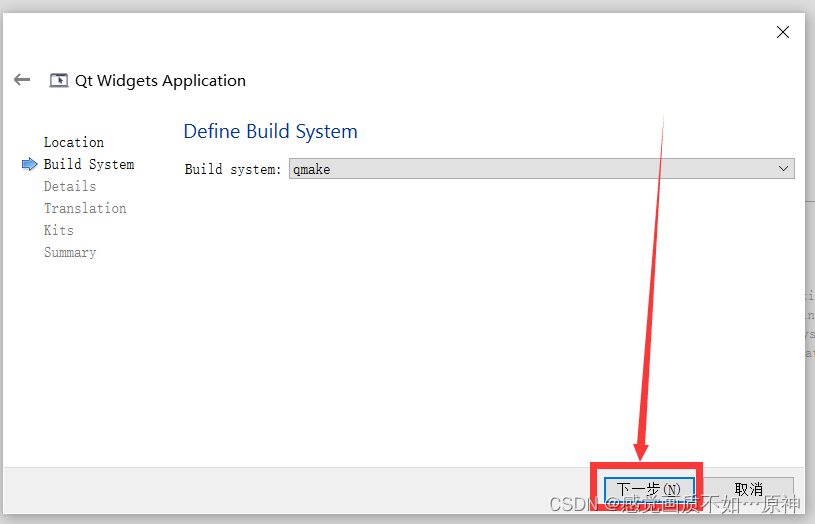
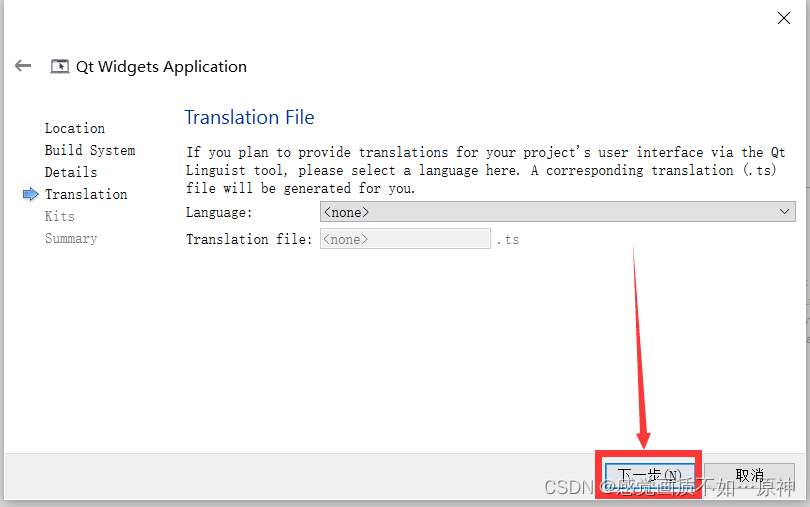
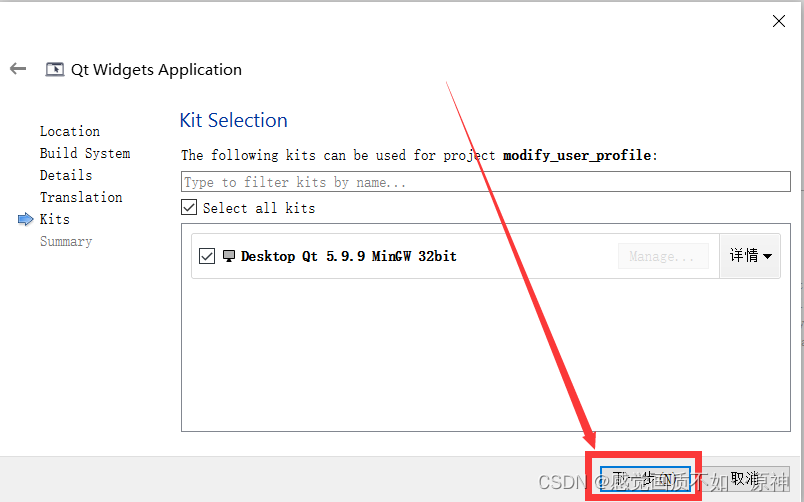
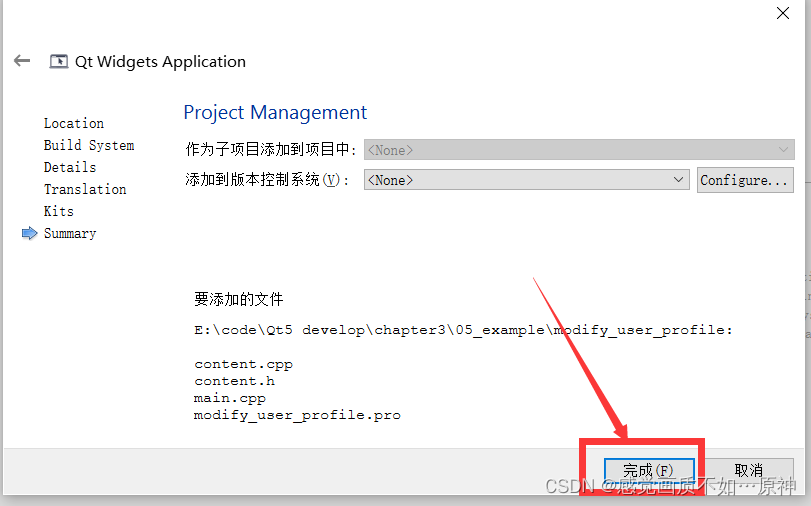
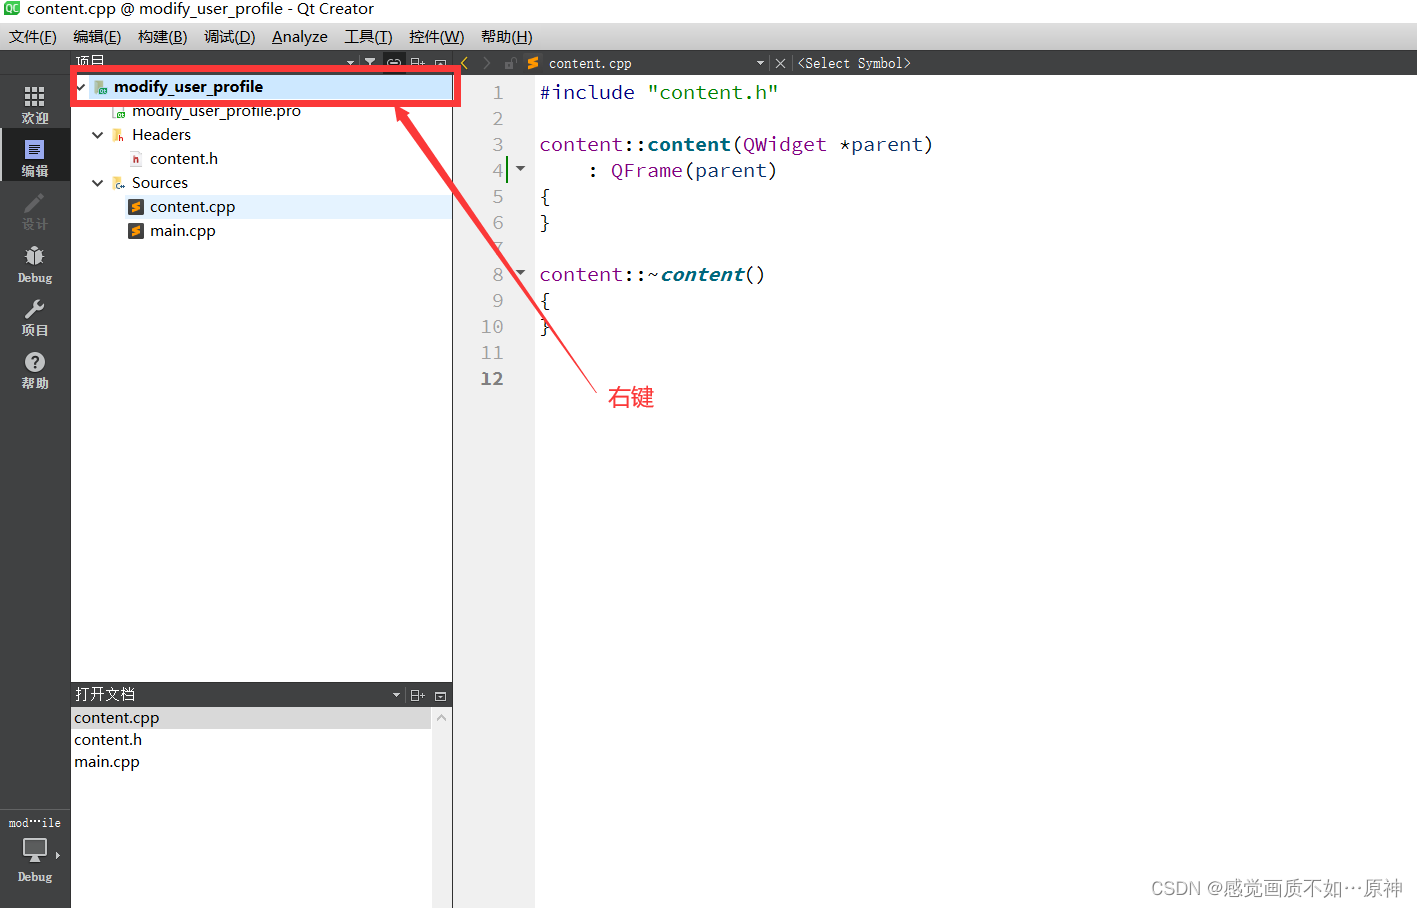
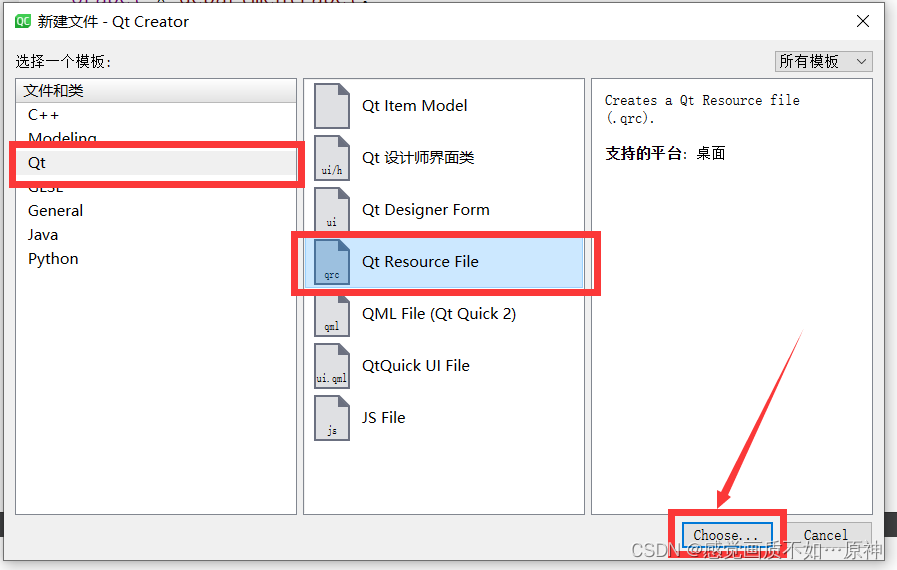
第一步:创建项目

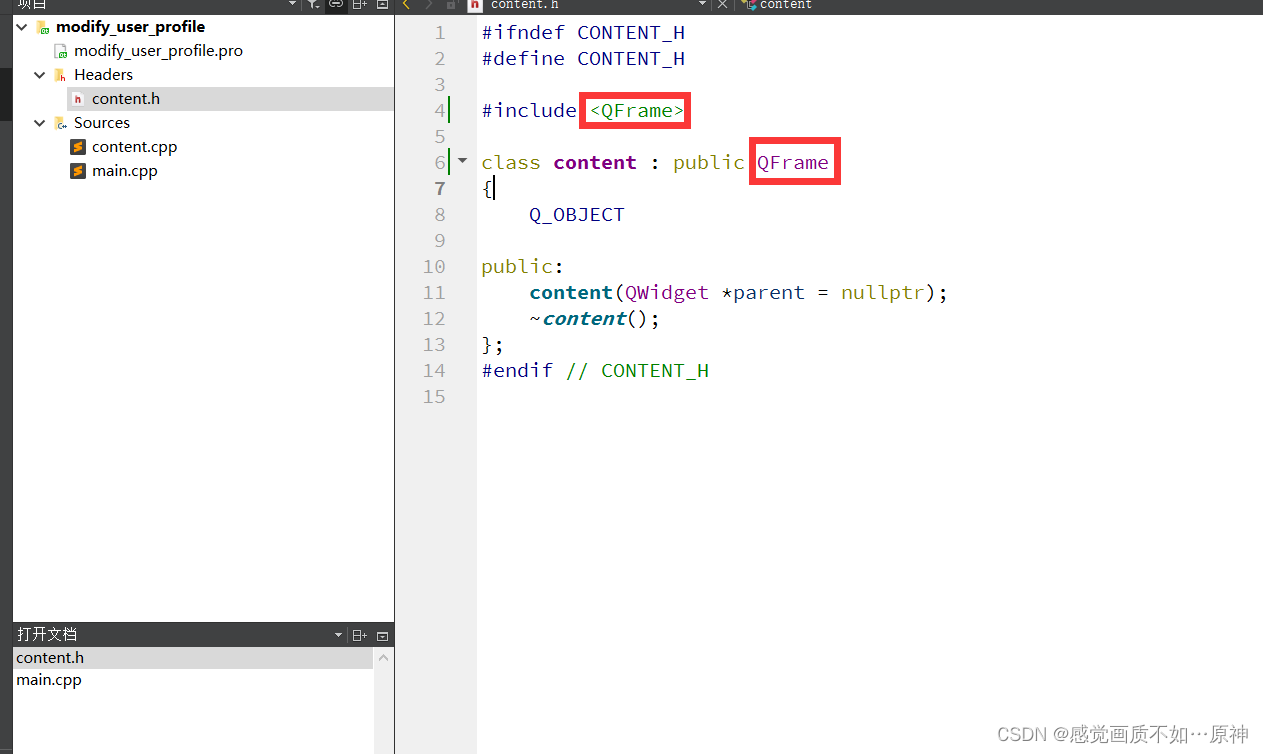
将 content.h中继承的父类改为 QFrame,头文件也改成 #include 。
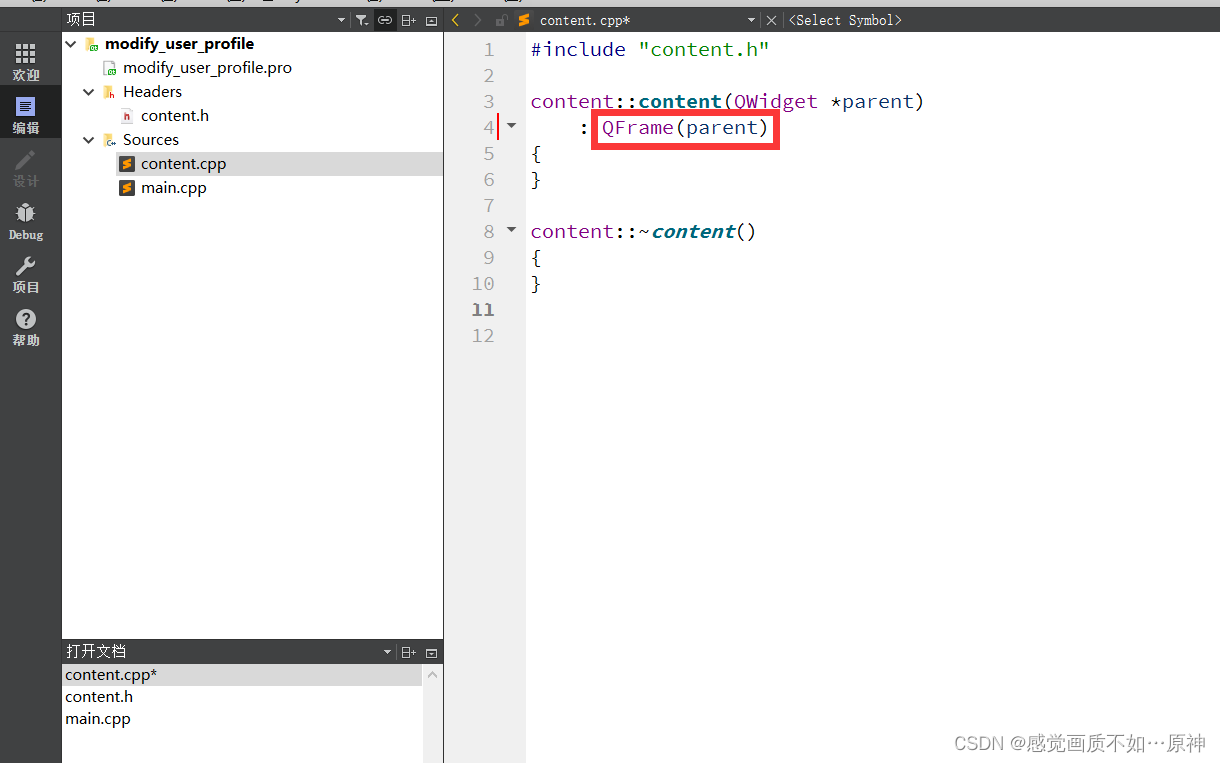
将 conten.cpp里面的 QDialog也改成 QFrame。
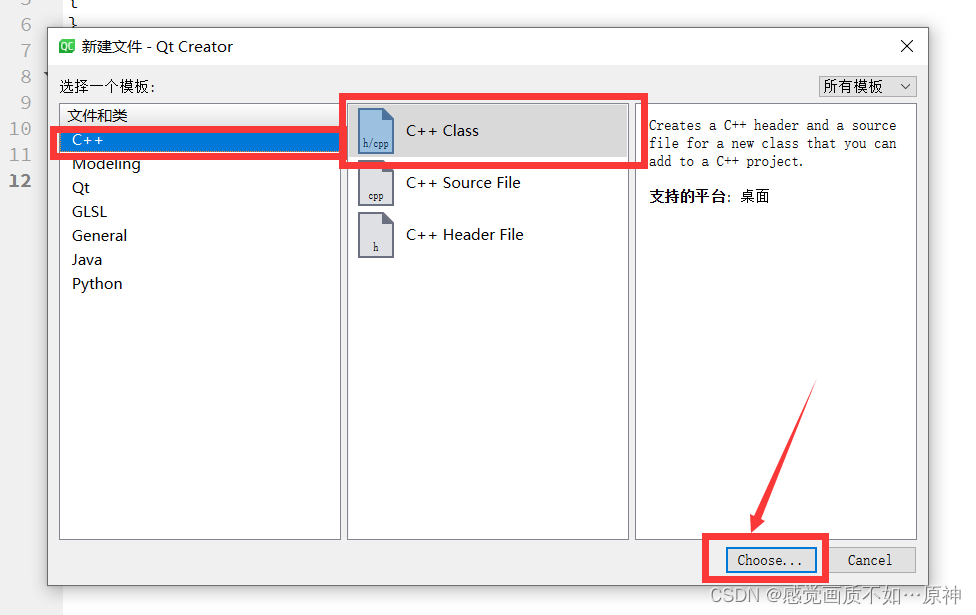
第二步:添加三个页面类 BaseInfo,Contact和Detail
添加 BaseInfo类
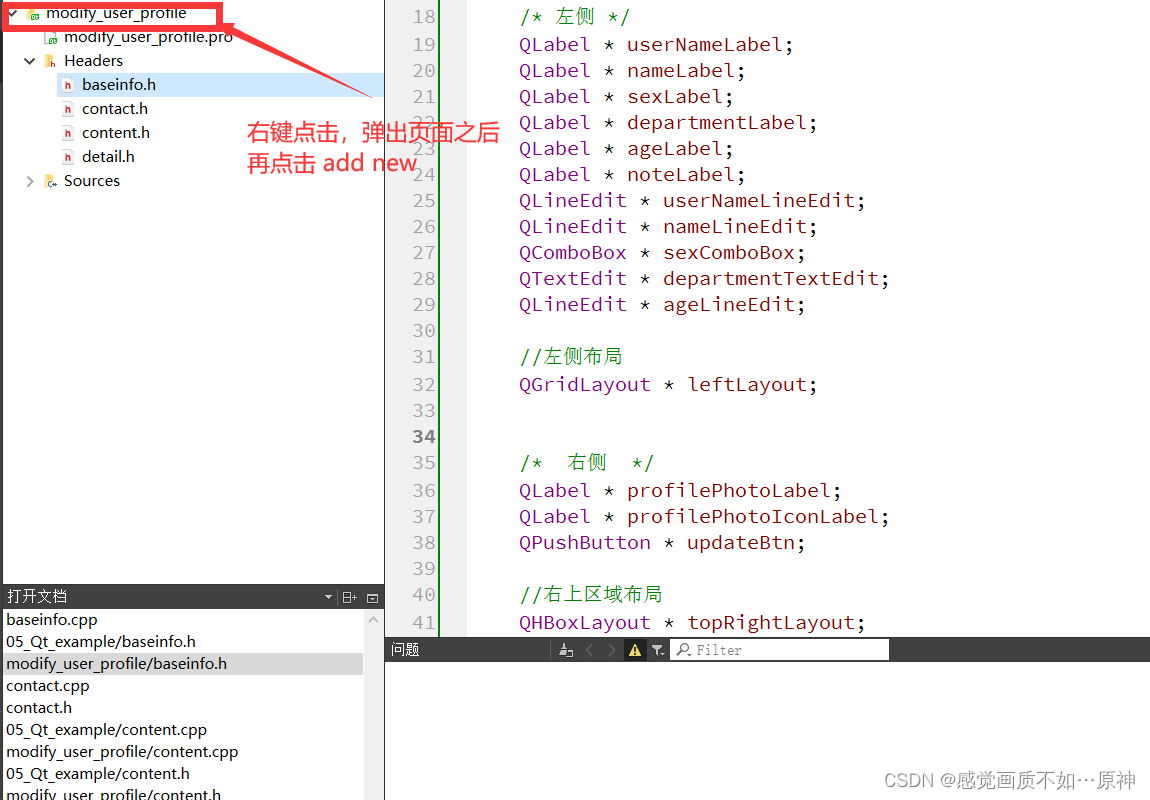
点击 add new添加新文件。
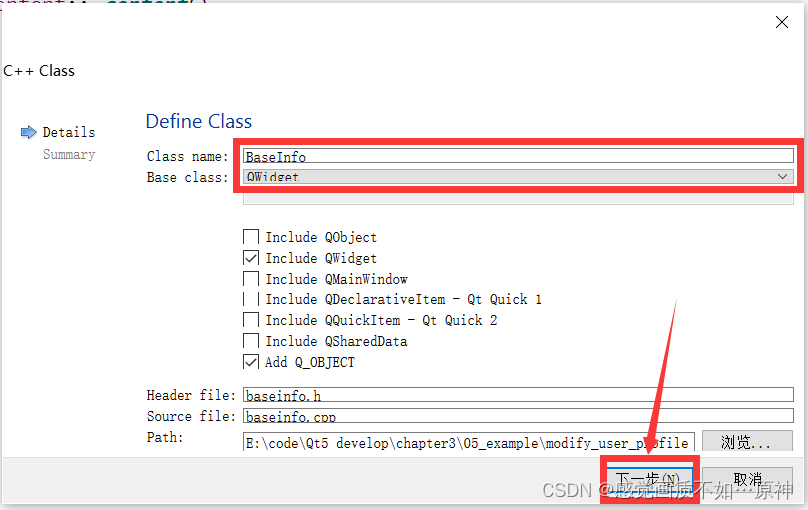

再依次添加 Contact和 Detail类。
第三步:导航页实现
打开 content.h,类声明中包含三个自定义页面对象 ,两个按钮对象 和 一个堆栈窗体对象。
#ifndef CONTENT_H
#define CONTENT_H#include
#include
#include #include "baseinfo.h"
#include "contact.h"
#include "detail.h"class Content : public QFrame
{Q_OBJECTpublic:Content(QWidget *parent = nullptr);~Content();//堆栈窗体QStackedWidget * stkWidget;//基本信息页面BaseInfo * baseInfo;//联系方式页面Contact * contact;//详情页面Detail * detail;//修改按钮 和 关闭按钮QPushButton * modifyBtn;QPushButton * closeBtn;};
#endif // CONTENT_H
打开 content.cpp添加如下代码。
#include "content.h"
#include Content::Content(QWidget *parent): QFrame(parent)
{stkWidget = new QStackedWidget(this);stkWidget->setFrameStyle(QFrame::Panel | QFrame::Raised);//插入三个页面baseInfo = new BaseInfo();contact = new Contact();detail = new Detail();stkWidget->addWidget(baseInfo);stkWidget->addWidget(contact);stkWidget->addWidget(detail);//对两个按钮进行布局modifyBtn = new QPushButton(tr("修改"));closeBtn = new QPushButton(tr("关闭"));QHBoxLayout * btnLayout = new QHBoxLayout();btnLayout->addStretch(1);btnLayout->addWidget(modifyBtn);btnLayout->addWidget(closeBtn);//对右边整体进行布局QVBoxLayout * rightLayout = new QVBoxLayout(this);rightLayout->setMargin(10);rightLayout->setSpacing(6);rightLayout->addWidget(stkWidget);rightLayout->addLayout(btnLayout);}Content::~Content()
{
}
第四步:用户基本信息界面实现
打开 baseinfo.h头文件,添加如下代码。
#ifndef BASEINFO_H
#define BASEINFO_H#include
#include
#include
#include
#include
#include
#include class BaseInfo : public QWidget
{Q_OBJECT
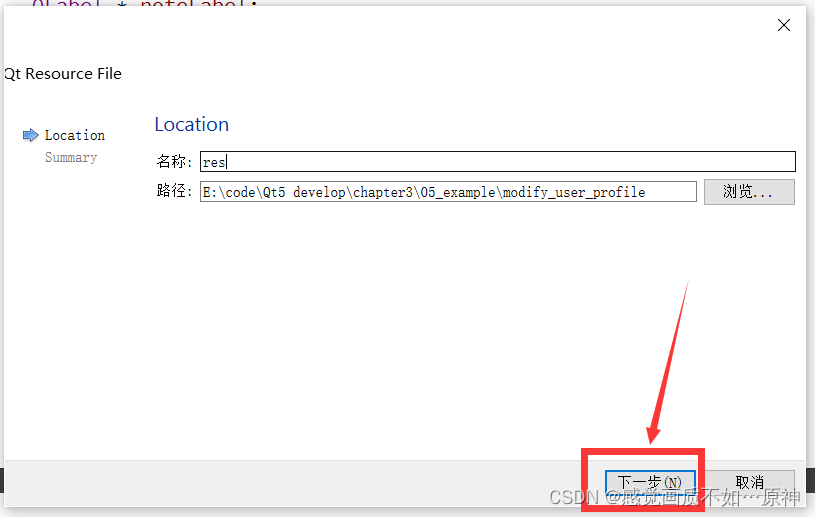
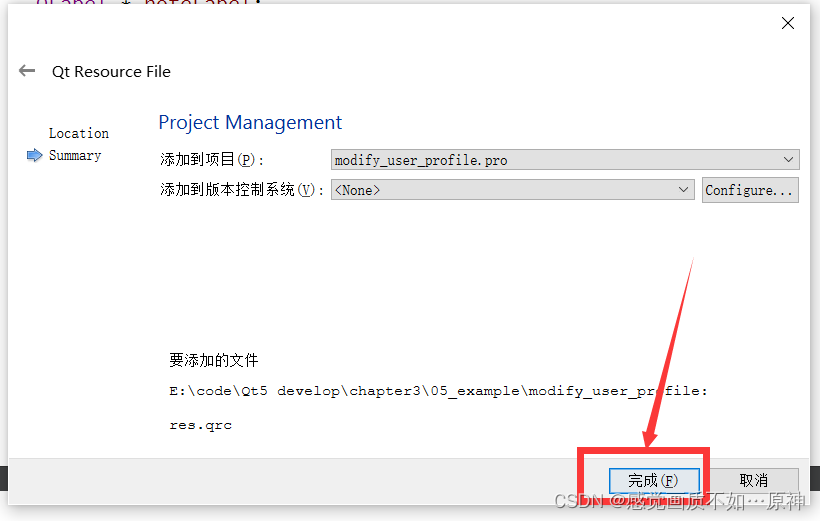
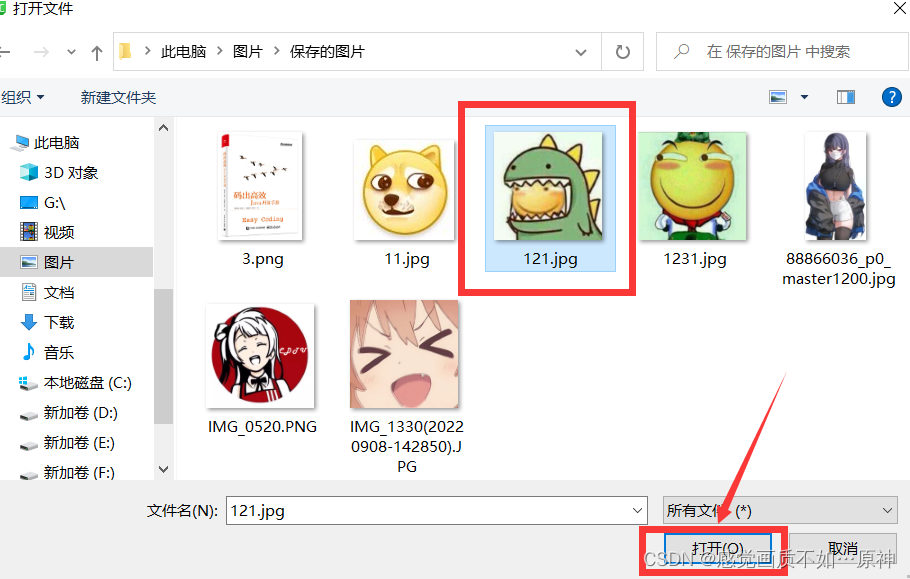
public:explicit BaseInfo(QWidget *parent = nullptr);/* 左侧 */QLabel * userNameLabel;QLabel * nameLabel;QLabel * sexLabel;QLabel * departmentLabel;QLabel * ageLabel;QLabel * noteLabel;QLineEdit * userNameLineEdit;QLineEdit * nameLineEdit;QComboBox * sexComboBox;QTextEdit * departmentTextEdit;QLineEdit * ageLineEdit;//左侧布局QGridLayout * leftLayout;/* 右侧 */QLabel * profilePhotoLabel;QLabel * profilePhotoIconLabel;QPushButton * updateBtn;//右上区域布局QHBoxLayout * topRightLayout;QLabel * profileLabel;QTextEdit * profileTextEdit;//右侧布局QVBoxLayout * rightLayout;signals:};#endif // BASEINFO_H 添加头像资源文件。
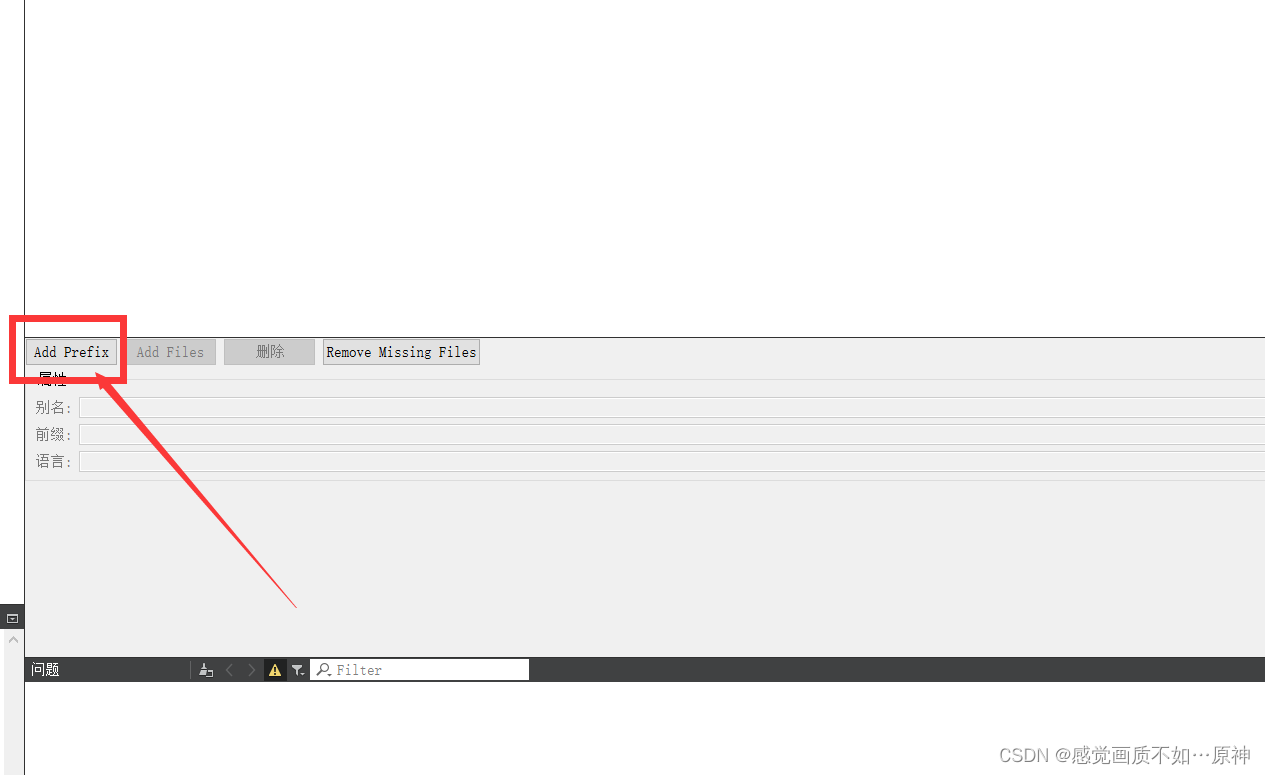
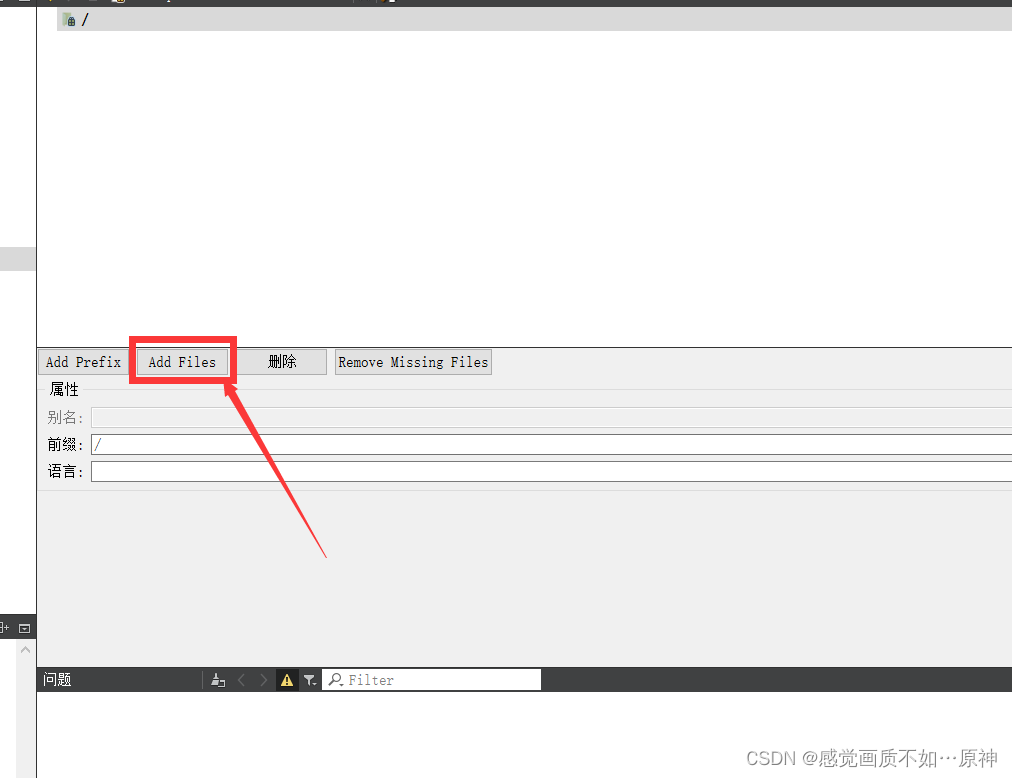
随便选择一张头像。
再打开 baseinfo.cpp,添加如下代码。
#include "baseinfo.h"
#include BaseInfo::BaseInfo(QWidget *parent) : QWidget(parent)
{/*   左侧  */userNameLabel = new QLabel(tr("用户名:"));userNameLineEdit = new QLineEdit;nameLabel = new QLabel(tr("姓名:"));nameLineEdit = new QLineEdit;sexLabel = new QLabel(tr("性别:"));sexComboBox = new QComboBox;sexComboBox->addItem(tr("男"));sexComboBox->addItem(tr("女"));departmentLabel = new QLabel(tr("部门:"));departmentTextEdit = new QTextEdit;ageLabel = new QLabel(tr("年龄:"));noteLabel = new QLabel(tr("备注:"));//设置备注样式noteLabel->setFrameStyle(QFrame::Panel | QFrame::Sunken);//设置左侧布局leftLayout = new QGridLayout();leftLayout->addWidget(userNameLabel,0,0);leftLayout->addWidget(userNameLineEdit,0,1);leftLayout->addWidget(nameLabel,1,0);leftLayout->addWidget(nameLineEdit,1,1);leftLayout->addWidget(sexLabel,2,0);leftLayout->addWidget(sexComboBox,2,1);leftLayout->addWidget(departmentLabel,3,0);leftLayout->addWidget(departmentTextEdit,3,1);leftLayout->addWidget(ageLabel,4,0);leftLayout->addWidget(ageLineEdit,4,1);leftLayout->addWidget(noteLabel,5,0,1,2);//设置两列的比例为 1 : 3leftLayout->setColumnStretch(0,1);leftLayout->setColumnStretch(1,3);/*  右侧  */profilePhotoLabel = new QLabel(tr("头像:"));profilePhotoIconLabel = new QLabel();QPixmap profileIcon(":/C:/Users/hp/Pictures/Saved Pictures/121.jpg");profilePhotoIconLabel->setPixmap(profileIcon);profilePhotoIconLabel->resize(profileIcon.width(),profileIcon.height());updateBtn = new QPushButton(tr("更新"));//右上区域布局topRightLayout = new QHBoxLayout();topRightLayout->setSpacing(20);topRightLayout->addWidget(profilePhotoLabel);topRightLayout->addWidget(profilePhotoIconLabel);topRightLayout->addWidget(updateBtn);profileLabel = new QLabel(tr("个人说明:"));profileTextEdit = new QTextEdit;//右侧布局rightLayout = new QVBoxLayout();rightLayout->setMargin(10);rightLayout->addLayout(topRightLayout);rightLayout->addWidget(profileLabel);rightLayout->addWidget(profileTextEdit);/*  主布局  */QGridLayout * mainLayout = new QGridLayout(this);mainLayout->setMargin(15);mainLayout->setSpacing(10);mainLayout->addLayout(leftLayout,0,0);mainLayout->addLayout(rightLayout,0,1);mainLayout->setSizeConstraint(QLayout::SetFixedSize);}
第五步:联系方式页面实现
打开 contact.h头文件,添加如下代码。
#ifndef CONTACT_H
#define CONTACT_H#include
#include
#include
#include
#include class Contact : public QWidget
{Q_OBJECT
public:explicit Contact(QWidget *parent = nullptr);QLabel * emailLabel;QLabel * addressLabel;QLabel * postalCodeLabel;QLabel * mobilePhoneLabel;QCheckBox * messageCheckBox;QLabel * bussinessPhoneLabel;QLineEdit * emailLineEdit;QLineEdit * addressLineEdit;QLineEdit * postalCodeLineEdit;QLineEdit * mobilePhoneLineEdit;QLineEdit * bussinessPhoneLineEdit;QGridLayout * mainLayout;signals:};#endif // CONTACT_H
打开 contact.cpp,添加如下代码。
#include "contact.h"Contact::Contact(QWidget *parent) : QWidget(parent)
{emailLabel = new QLabel(tr("电子邮件:"));emailLineEdit = new QLineEdit;addressLabel = new QLabel(tr("联系地址:"));addressLineEdit = new QLineEdit;postalCodeLabel = new QLabel(tr("邮政编码:"));postalCodeLineEdit = new QLineEdit;mobilePhoneLabel = new QLabel(tr("移动电话:"));mobilePhoneLineEdit = new QLineEdit;messageCheckBox = new QCheckBox(tr("接收留言"));bussinessPhoneLabel = new QLabel(tr("办公电话:"));bussinessPhoneLineEdit = new QLineEdit;mainLayout = new QGridLayout(this);//布局mainLayout->setMargin(15);mainLayout->setSpacing(10);mainLayout->addWidget(emailLabel,0,0);mainLayout->addWidget(emailLineEdit,0,1);mainLayout->addWidget(addressLabel,1,0);mainLayout->addWidget(addressLineEdit,1,1);mainLayout->addWidget(postalCodeLabel,2,0);mainLayout->addWidget(postalCodeLineEdit,2,1);mainLayout->addWidget(mobilePhoneLabel,3,0);mainLayout->addWidget(mobilePhoneLineEdit,3,1);mainLayout->addWidget(messageCheckBox,3,2);mainLayout->addWidget(bussinessPhoneLabel,4,0);mainLayout->addWidget(bussinessPhoneLineEdit,4,1);mainLayout->setSizeConstraint(QLayout::SetFixedSize);
}
第六步:详细资料页面实现
打开 detail.h头文件,添加如下代码。
#ifndef DETAIL_H
#define DETAIL_H#include
#include
#include
#include
#include
#include class Detail : public QWidget
{Q_OBJECT
public:explicit Detail(QWidget *parent = nullptr);QLabel * nationLabel;QLabel * provinceLabel;QLabel * cityLabel;QLabel * profileLabel;QComboBox * nationComboBox;QComboBox * provinceComboBox;QLineEdit * cityLineEdit;QTextEdit * profileEdit;QGridLayout * mainLayout;signals:};#endif // DETAIL_H
打开 detail.cpp文件,添加如下代码。
#include "detail.h"Detail::Detail(QWidget *parent) : QWidget(parent)
{nationLabel = new QLabel(tr("国家/地址:"));nationComboBox = new QComboBox();nationComboBox->addItem(tr("中国"));nationComboBox->addItem(tr("日本"));nationComboBox->addItem(tr("俄罗斯"));nationComboBox->addItem(tr("美国"));nationComboBox->addItem(tr("英国"));provinceLabel = new QLabel(tr("省份:"));provinceComboBox = new QComboBox();provinceComboBox->addItem(tr("四川省"));provinceComboBox->addItem(tr("贵州省"));provinceComboBox->addItem(tr("山西省"));provinceComboBox->addItem(tr("湖南省"));provinceComboBox->addItem(tr("广东省"));provinceComboBox->addItem(tr("江苏省"));cityLabel = new QLabel(tr("城市:"));cityLineEdit = new QLineEdit();profileLabel = new QLabel(tr("个人说明:"));profileEdit = new QTextEdit();//布局mainLayout = new QGridLayout(this);mainLayout->setMargin(15);mainLayout->setSpacing(10);mainLayout->addWidget(nationLabel,0,0);mainLayout->addWidget(nationComboBox,0,1);mainLayout->addWidget(provinceLabel,1,0);mainLayout->addWidget(provinceComboBox,1,1);mainLayout->addWidget(cityLabel,2,0);mainLayout->addWidget(cityLineEdit,2,1);mainLayout->addWidget(profileLabel,3,0);mainLayout->addWidget(profileEdit,3,1);mainLayout->setSizeConstraint(QLayout::SetFixedSize);
}
第七步:编写主函数
#include "content.h"#include
#include
#include
#include int main(int argc, char *argv[])
{QApplication a(argc, argv);//设置字体 和 字号QFont font("AR PL KaitiM GB",12);a.setFont(font);//新建一个水平分割窗口对象,作为主布局框QSplitter * splitterMain = new QSplitter(Qt::Horizontal,0);splitterMain->setOpaqueResize(true);QListWidget * list = new QListWidget(splitterMain);list->insertItem(0,QObject::tr("基本信息"));list->insertItem(1,QObject::tr("联系方式"));list->insertItem(2,QObject::tr("详细资料"));Content * content = new Content(splitterMain);QObject::connect(list,&QListWidget::currentRowChanged,content->stkWidget,&QStackedWidget::setCurrentIndex);//设置主布局框 即 水平分割窗口的标题splitterMain->setWindowTitle(QObject::tr("修改用户资料"));//设置主布局框 即 水平分割窗口的最小尺寸splitterMain->setMinimumSize(splitterMain->minimumSize());//设置主布局框 即 水平分割窗口的最大尺寸splitterMain->setMaximumSize(splitterMain->maximumSize());//显示主布局框 上面的控件也会一同显示splitterMain->show();//Content w;//w.show();return a.exec();
} 相关内容
热门资讯
电视安卓系统哪个品牌好,哪家品...
你有没有想过,家里的电视是不是该升级换代了呢?现在市面上电视品牌琳琅满目,各种操作系统也是让人眼花缭...
安卓会员管理系统怎么用,提升服...
你有没有想过,手机里那些你爱不释手的APP,背后其实有个强大的会员管理系统在默默支持呢?没错,就是那...
安卓系统软件使用技巧,解锁软件...
你有没有发现,用安卓手机的时候,总有一些小技巧能让你玩得更溜?别小看了这些小细节,它们可是能让你的手...
安卓系统提示音替换
你知道吗?手机里那个时不时响起的提示音,有时候真的能让人心情大好,有时候又让人抓狂不已。今天,就让我...
安卓开机不了系统更新
手机突然开不了机,系统更新还卡在那里,这可真是让人头疼的问题啊!你是不是也遇到了这种情况?别急,今天...
安卓系统中微信视频,安卓系统下...
你有没有发现,现在用手机聊天,视频通话简直成了标配!尤其是咱们安卓系统的小伙伴们,微信视频功能更是用...
安卓系统是服务器,服务器端的智...
你知道吗?在科技的世界里,安卓系统可是个超级明星呢!它不仅仅是个手机操作系统,竟然还能成为服务器的得...
pc电脑安卓系统下载软件,轻松...
你有没有想过,你的PC电脑上安装了安卓系统,是不是瞬间觉得世界都大不一样了呢?没错,就是那种“一机在...
电影院购票系统安卓,便捷观影新...
你有没有想过,在繁忙的生活中,一部好电影就像是一剂强心针,能瞬间让你放松心情?而我今天要和你分享的,...
安卓系统可以写程序?
你有没有想过,安卓系统竟然也能写程序呢?没错,你没听错!这个我们日常使用的智能手机操作系统,竟然有着...
安卓系统架构书籍推荐,权威书籍...
你有没有想过,想要深入了解安卓系统架构,却不知道从何下手?别急,今天我就要给你推荐几本超级实用的书籍...
安卓系统看到的炸弹,技术解析与...
安卓系统看到的炸弹——揭秘手机中的隐形威胁在数字化时代,智能手机已经成为我们生活中不可或缺的一部分。...
鸿蒙系统有安卓文件,畅享多平台...
你知道吗?最近在科技圈里,有个大新闻可是闹得沸沸扬扬的,那就是鸿蒙系统竟然有了安卓文件!是不是觉得有...
宝马安卓车机系统切换,驾驭未来...
你有没有发现,现在的汽车越来越智能了?尤其是那些豪华品牌,比如宝马,它们的内饰里那个大屏幕,简直就像...
p30退回安卓系统
你有没有听说最近P30的用户们都在忙活一件大事?没错,就是他们的手机要退回安卓系统啦!这可不是一个简...
oppoa57安卓原生系统,原...
你有没有发现,最近OPPO A57这款手机在安卓原生系统上的表现真是让人眼前一亮呢?今天,就让我带你...
安卓系统输入法联想,安卓系统输...
你有没有发现,手机上的输入法真的是个神奇的小助手呢?尤其是安卓系统的输入法,简直就是智能生活的点睛之...
怎么进入安卓刷机系统,安卓刷机...
亲爱的手机控们,你是否曾对安卓手机的刷机系统充满好奇?想要解锁手机潜能,体验全新的系统魅力?别急,今...
安卓系统程序有病毒
你知道吗?在这个数字化时代,手机已经成了我们生活中不可或缺的好伙伴。但是,你知道吗?即使是安卓系统,...
奥迪中控安卓系统下载,畅享智能...
你有没有发现,现在汽车的中控系统越来越智能了?尤其是奥迪这种豪华品牌,他们的中控系统简直就是科技与艺...