
【RabbitMQ】安装、启动、配置、测试一条龙
创始人
2024-05-09 20:27:40
0次
一、基本环境安装配置
1.英文RabbitMQ是基于erlang开发的所以需要erlang环境,点击以下链接下载安装
Downloads - Erlang/OTP
![]()
2.官网下载RabbitMQ安装包并安装
Installing on Windows — RabbitMQ
![]()
3.配置erlang本地环境变量(和JAVAHOME类似)

4.cmd查看erlang版本
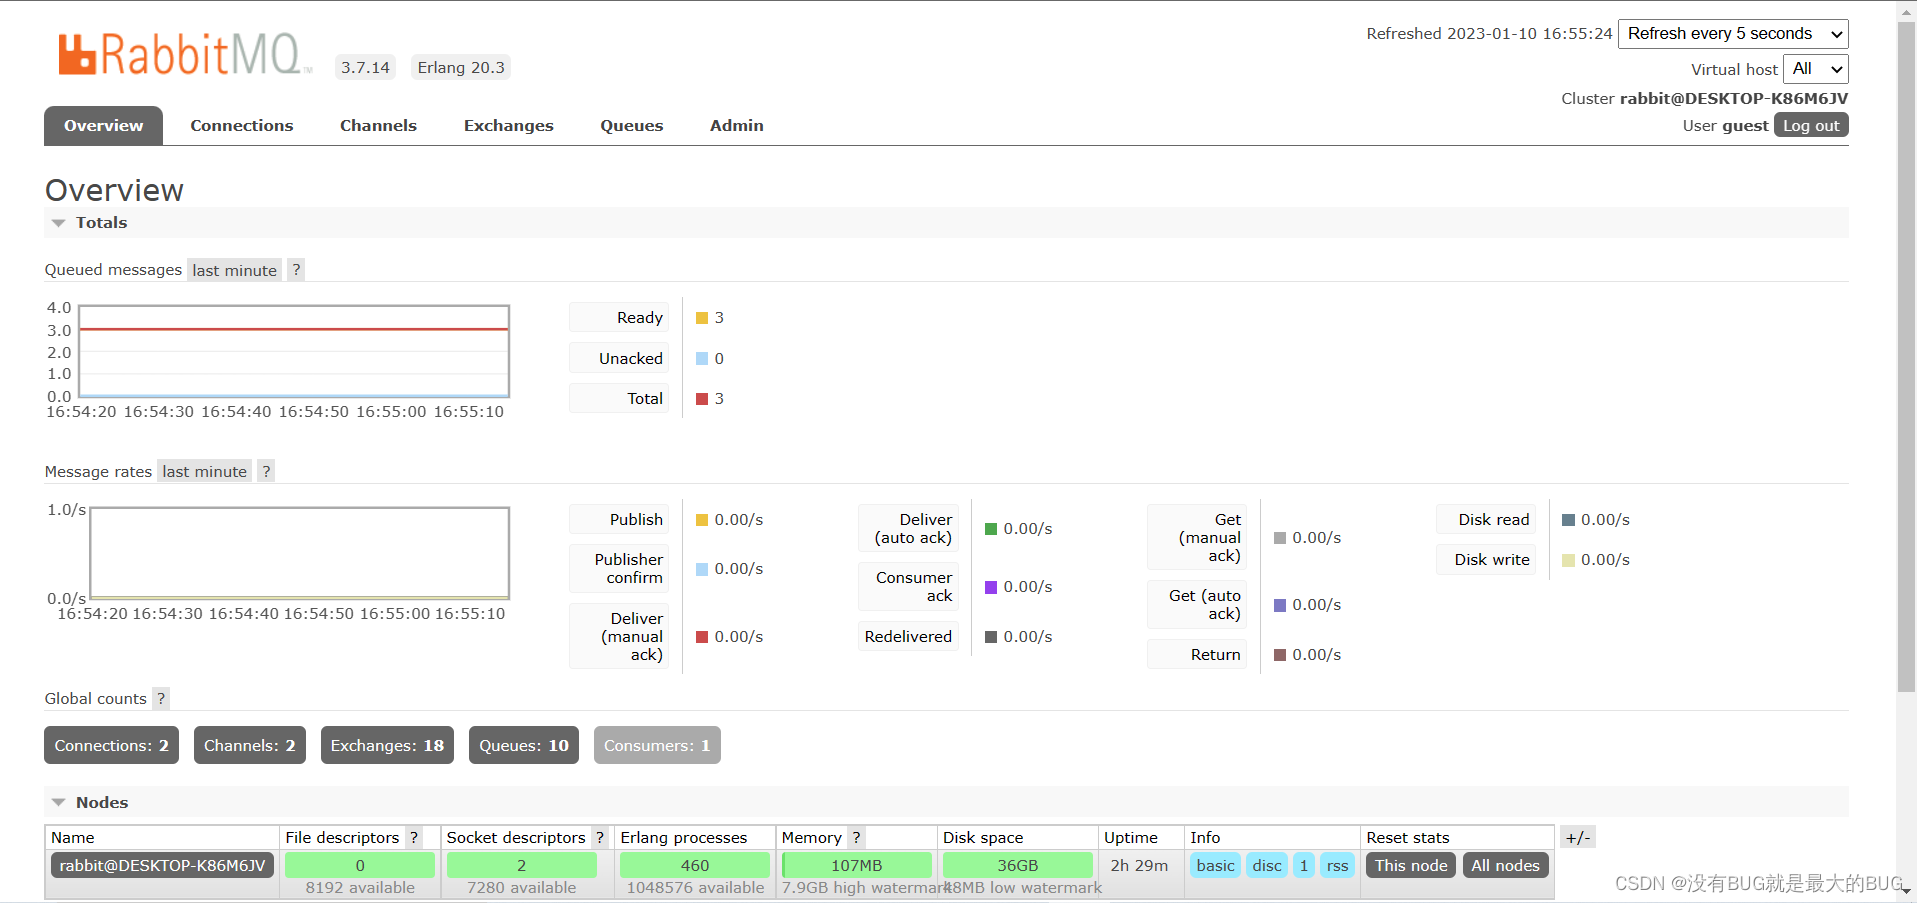
 5.点击以下链接进入RabbitMQ控制台
http://localhost:15672/#/

6.账号密码初始都是guest,进行登录
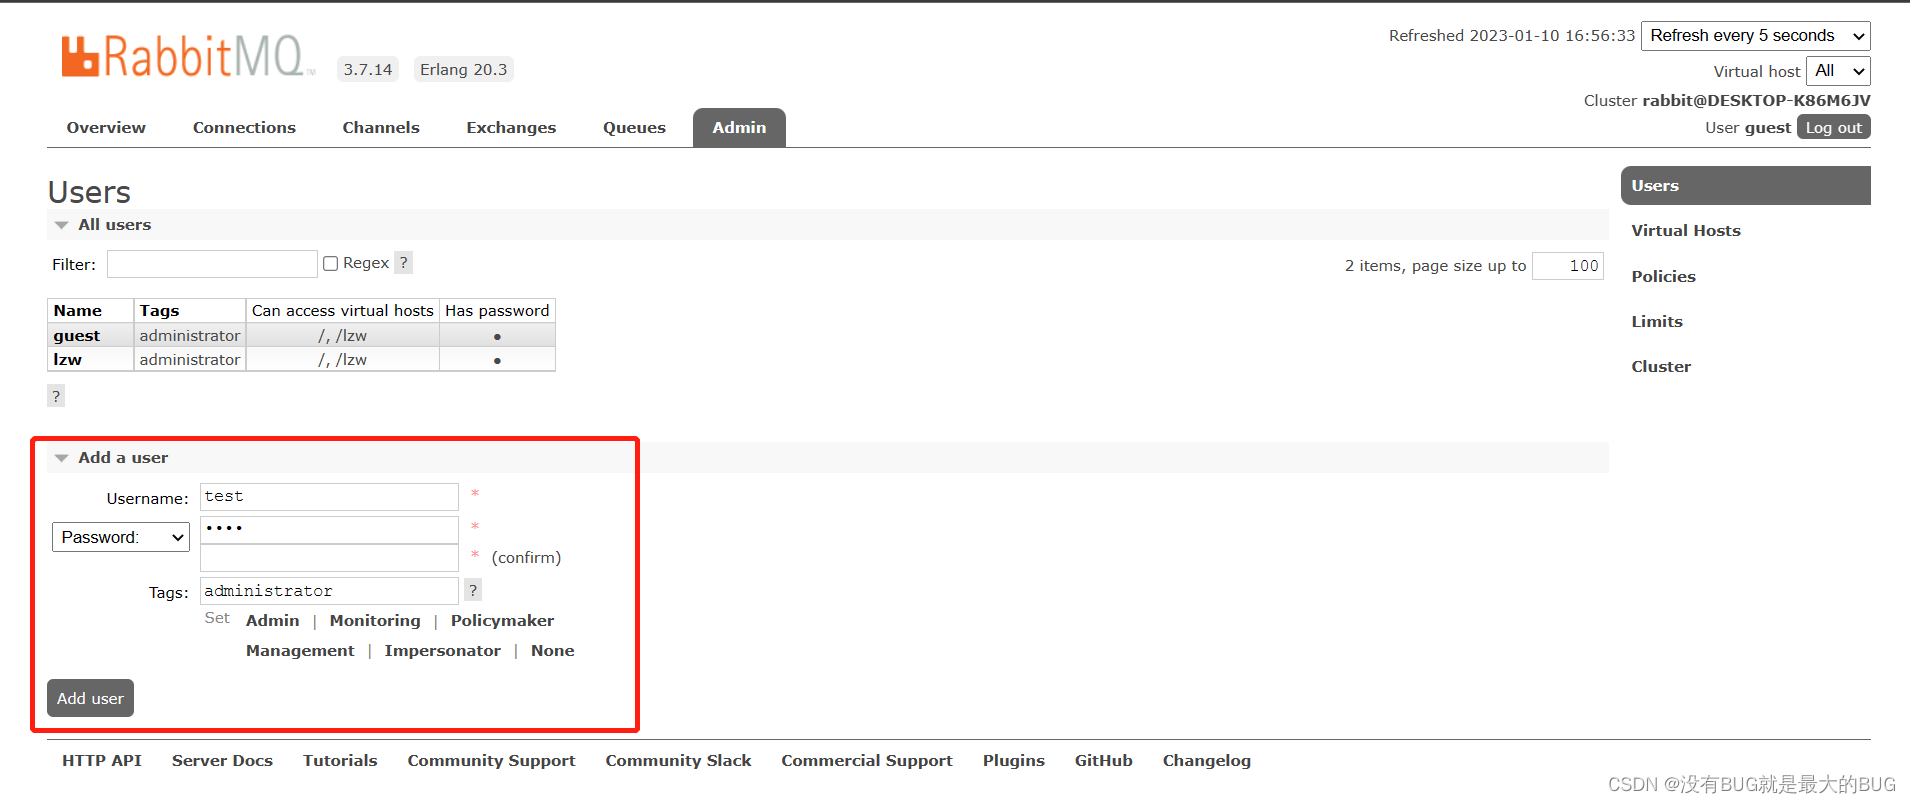
7.可以自定义用户 test
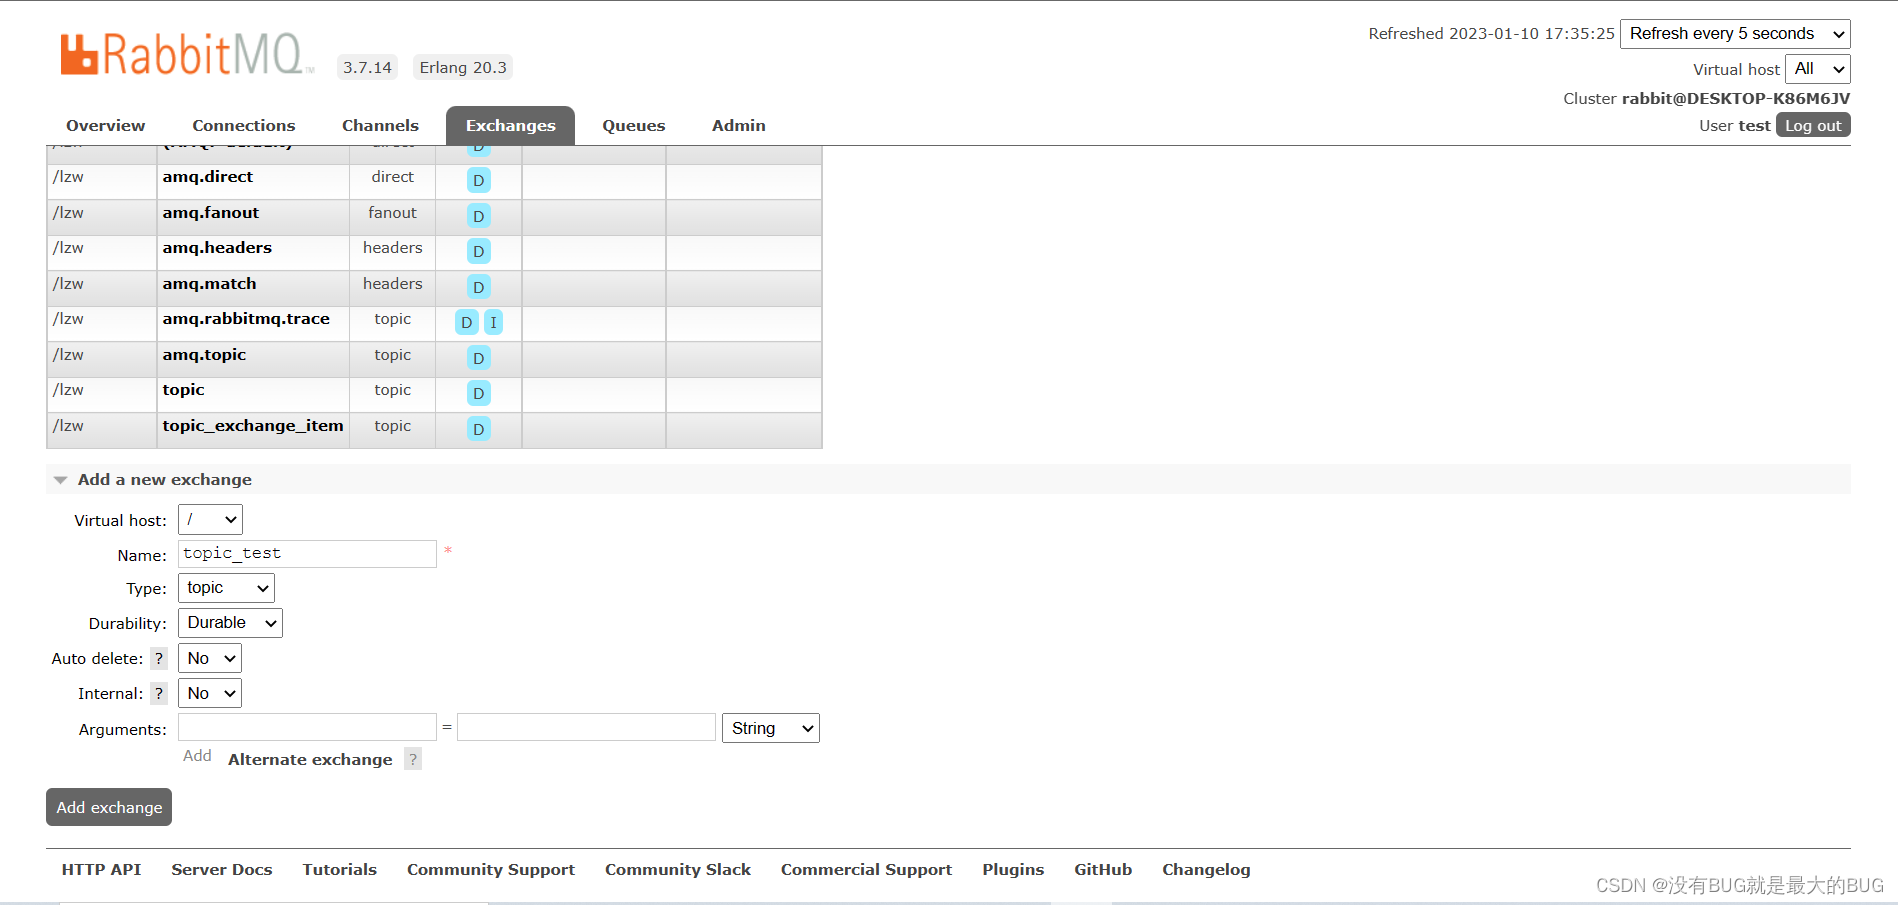
8.创建交换机 topic_test
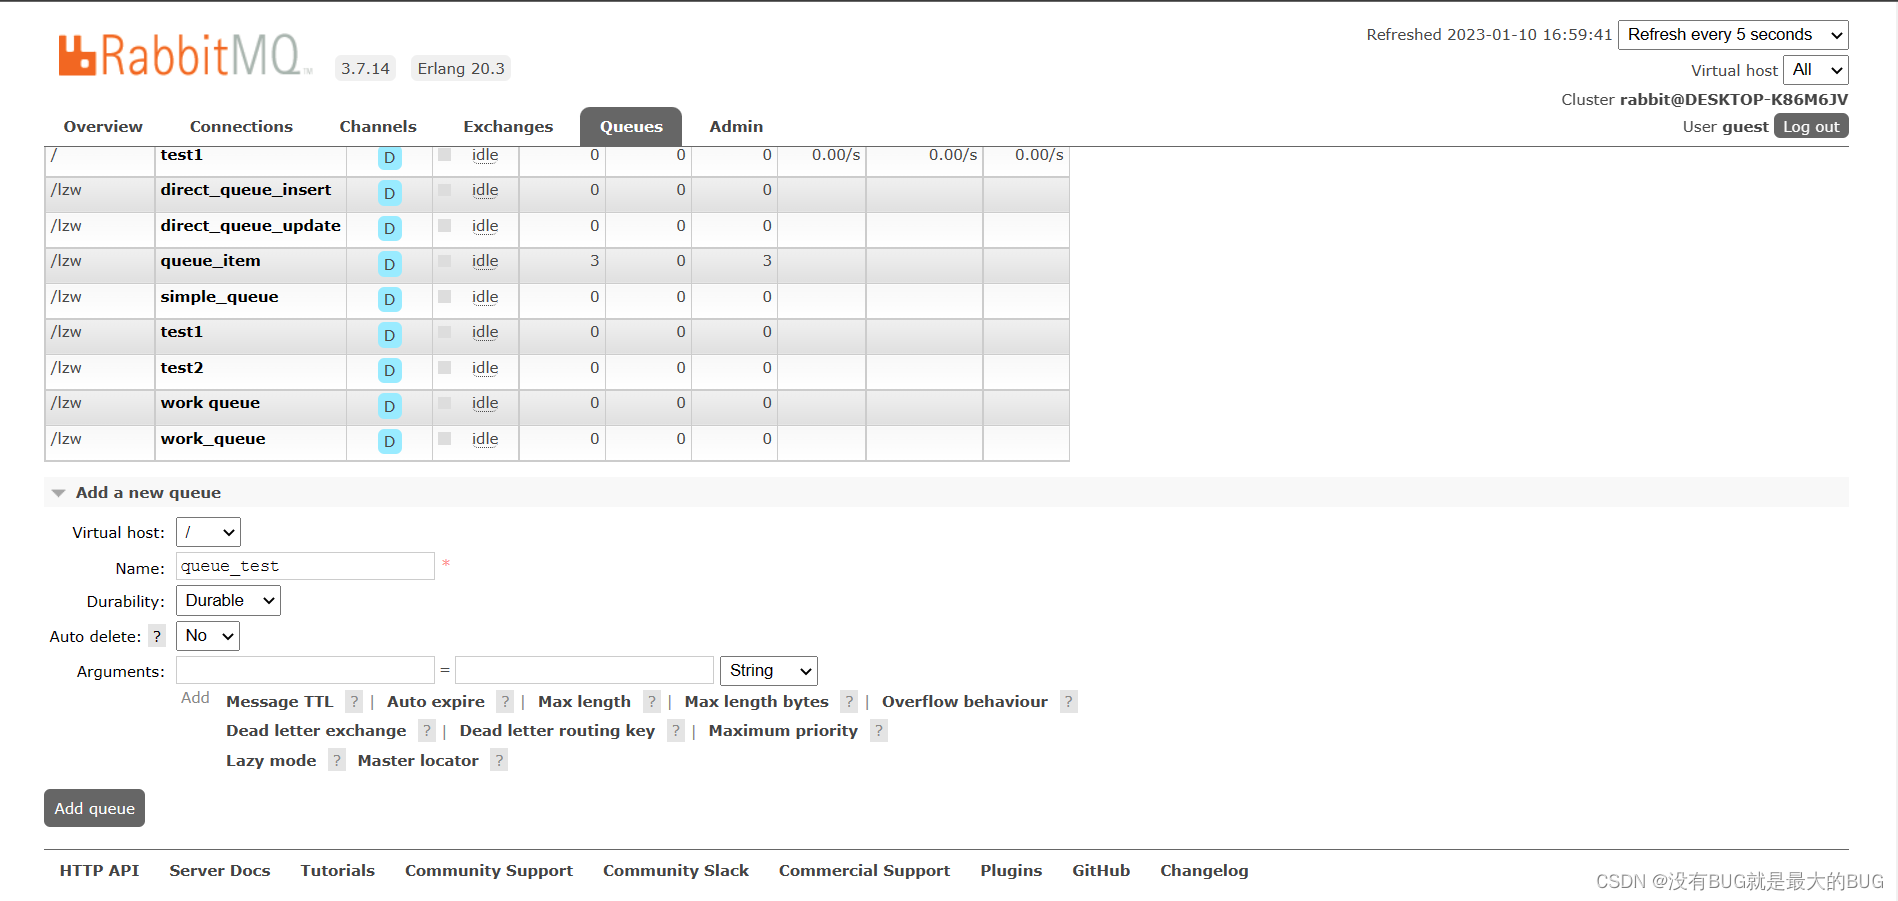
9.创建队列 queue_test
二、创建生产者
1.引入相关依赖
org.springframework.boot spring-boot-starter-parent 2.1.1.RELEASE org.springframework.boot spring-boot-starter-web org.projectlombok lombok provided org.apache.commons commons-lang3 org.springframework.boot spring-boot-starter-amqp 2.yml配置
server:port: 8081spring:rabbitmq:host: 127.0.0.1port: 5672username: testpassword: test
3.编写RabbitMQ配置类
package cn.sdata.config;import org.springframework.amqp.core.*;
import org.springframework.beans.factory.annotation.Qualifier;
import org.springframework.context.annotation.Bean;
import org.springframework.context.annotation.Configuration;/*** @author lzw* @create 2021-09-07-14:21* RabbitMQ配置类* 交换机* 队列* 队列绑定交换机*/
@Configuration
public class RabbitMQConfig {//定义交换机名称public static String TOPIC_EXCHANGE_ITEM = "topic_test";//定义队列名称public static String QUEUE_ITEM ="queue_test";//定义交换机@Bean("topicExchange")public Exchange topicExchange(){return ExchangeBuilder.topicExchange(TOPIC_EXCHANGE_ITEM).durable(true).build();}//定义队列@Bean("itemQueue")public Queue itemQueue(){return QueueBuilder.durable(QUEUE_ITEM).build();}//队列绑定到交换机@Beanpublic Binding itemQueueExchange(@Qualifier("itemQueue") Queue queue,@Qualifier("topicExchange") Exchange exchange){return BindingBuilder.bind(queue).to(exchange).with("item.*").noargs();}
}
4.模拟生产者发送消息(此处提供serviceImpl代码,剩余service、controller代码自行补齐即可)
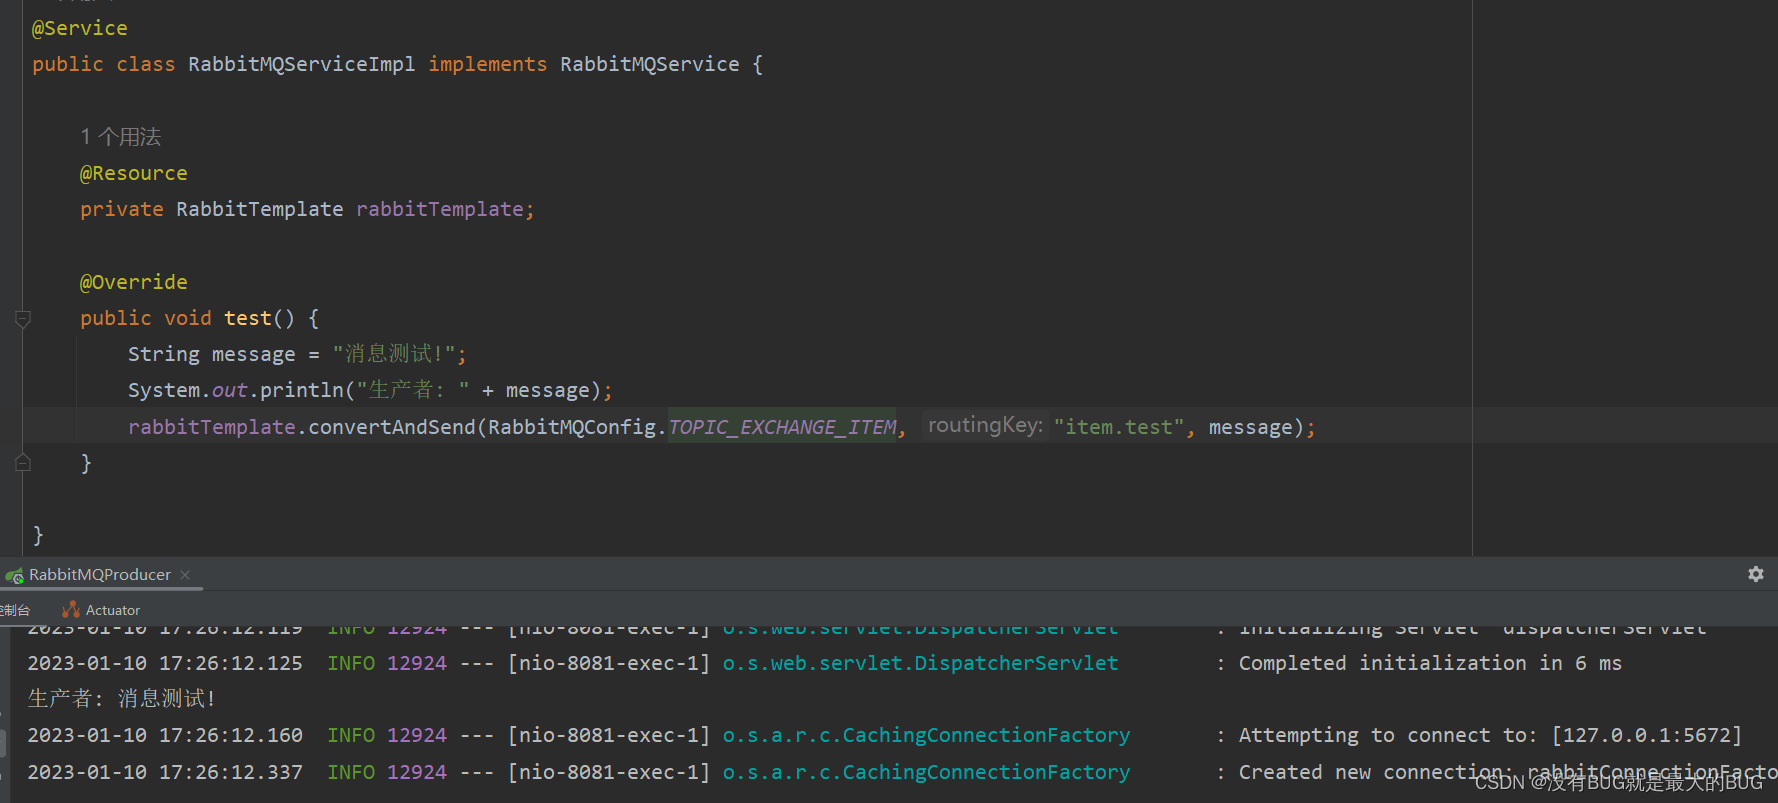
@Service
public class RabbitMQServiceImpl implements RabbitMQService {@Resourceprivate RabbitTemplate rabbitTemplate;@Overridepublic void test() {rabbitTemplate.convertAndSend(RabbitMQConfig.TOPIC_EXCHANGE_ITEM,"item.test","生产了一条消息!");}
}
三、创建消费者
1.引入相关依赖同上
2.yml配置
server:port: 8082spring:rabbitmq:host: 127.0.0.1port: 5672username: testpassword: test
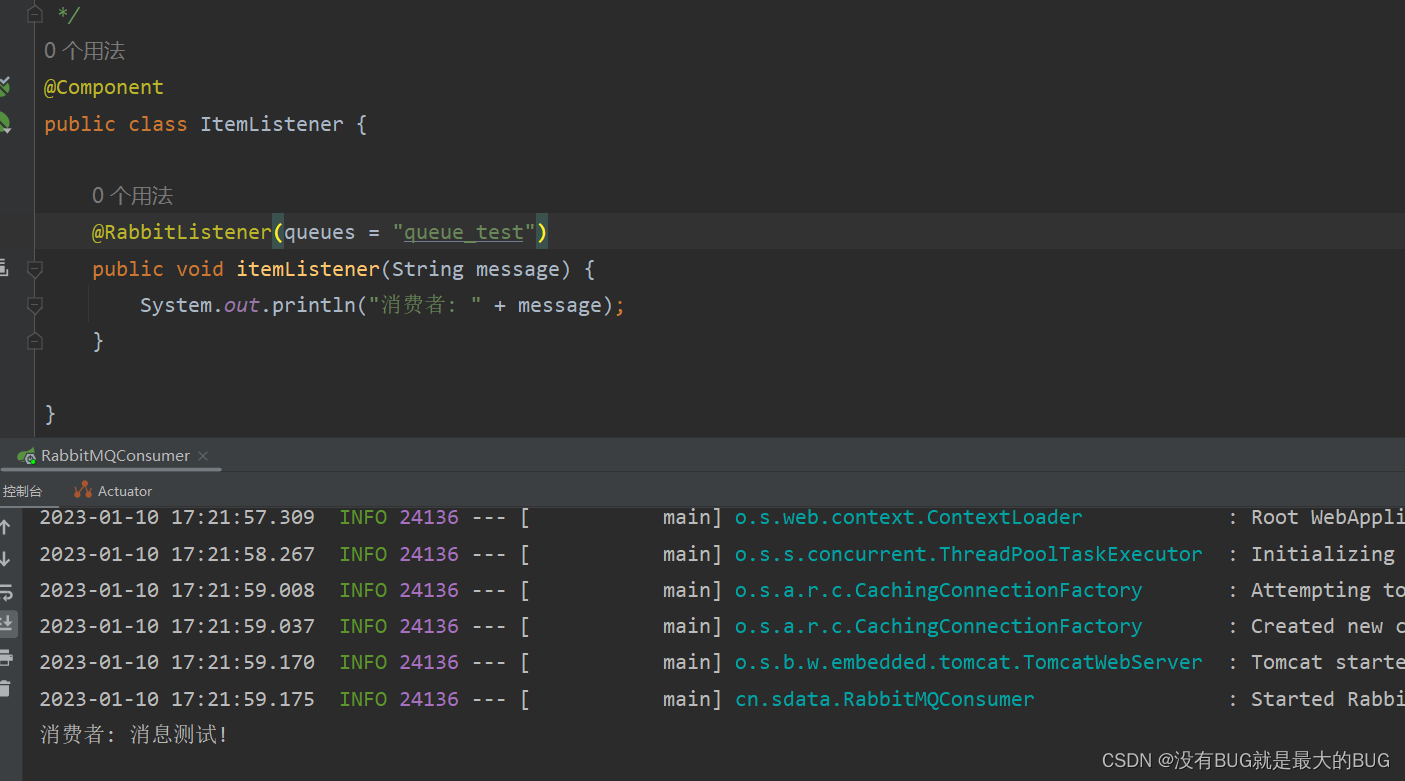
3.创建一个类用来监听消息
package cn.sdata.listener;import org.springframework.amqp.rabbit.annotation.RabbitListener;
import org.springframework.stereotype.Component;/*** @author lzw* @create 2021-09-07-14:47*/
@Component
public class ItemListener {@RabbitListener(queues = "test1")public void itemListener(String message){System.out.println("接收到的消息"+message);}}
四、测试
1.依次启动生产者、消费者
2.生产者输出
3.消费者输出
RabbitMQ发送消息有六种模式,简易模式、工作模式、广播模式、路由模式、主题模式、6RPC模式(基本不用),我这边用的是主题模式(Topic)
相关内容
热门资讯
安卓系统计划软件推荐,精选计划...
你有没有发现,手机里的安卓系统越来越智能了?这不,最近我可是挖到了一些超棒的安卓计划软件,它们不仅能...
收钱吧安卓系统插件,便捷支付新...
你有没有发现,现在的生活越来越离不开手机了?手机里装满了各种应用,而今天我要跟你聊聊一个特别实用的工...
鸿蒙系统是否还属于安卓,独立于...
你有没有想过,那个在我们手机上默默无闻的鸿蒙系统,它到底是不是安卓的“亲戚”呢?这个问题,估计不少手...
安卓系统手机用什么钱包,轻松管...
你有没有想过,你的安卓系统手机里装了那么多应用,但最离不开的,可能就是那个小小的钱包了。没错,就是那...
安卓系统能玩部落冲突吗,部落冲...
你有没有想过,安卓系统上的手机,是不是也能玩那款风靡全球的《部落冲突》呢?这款游戏自从推出以来,就吸...
智能机器人安卓系统,引领未来智...
你知道吗?在科技飞速发展的今天,智能机器人已经不再是科幻电影里的专属了。它们正悄悄地走进我们的生活,...
华为win10系统改装安卓系统...
你有没有想过,你的华为笔记本电脑里的Windows 10系统,能不能来个华丽变身,变成安卓系统呢?这...
旧电脑上安什么安卓系统,适配不...
你那台旧电脑是不是已经闲置好久了?别让它默默无闻地躺在角落里,给它来个华丽变身吧!今天,就让我来告诉...
安卓app语言跟随系统,随系统...
你知道吗?在手机世界里,有一个神奇的小功能,它就像你的贴身翻译官,无论你走到哪里,都能帮你轻松应对各...
惠城安卓系统降级在哪,揭秘降级...
你有没有遇到过手机系统升级后,发现新系统让你头疼不已,想回到那个熟悉的安卓系统呢?别急,今天就来告诉...
阿里云系统转安卓,揭秘安卓平台...
你知道吗?最近有个大动作在互联网圈里引起了不小的波澜,那就是阿里云系统竟然要转战安卓阵营了!这可不是...
安卓系统有最美壁纸么,探寻最美...
哦,亲爱的安卓用户,你是否曾在某个午后,百无聊赖地翻看着手机,突然被那一张张壁纸惊艳了眼眸?是的,我...
安卓系统采用Linux操作系统...
你知道吗?安卓系统,这个在我们手机上无处不在的小家伙,它的心脏竟然是Linux操作系统内核!是不是觉...
安卓原生平板通用系统,探索安卓...
你有没有发现,现在市面上平板电脑的品牌和型号真是五花八门,让人挑花了眼?不过,你知道吗?在众多安卓平...
小米1系统是安卓几,搭载安卓几...
你有没有想过,你的小米手机里那个熟悉的系统,其实是基于安卓的哦!没错,就是那个全球最流行的手机操作系...
可以安装安卓系统的相机,智能摄...
你有没有想过,一台相机不仅能拍出美美的照片,还能像智能手机一样,玩转各种应用?没错,现在市面上就有这...
安卓系统gps定位不准,安卓G...
你是不是也遇到过这种情况?手机里的安卓系统GPS定位总是不准,让人头疼不已。有时候,你明明就在家附近...
电信机顶盒装安卓系统,开启智能...
你有没有想过,家里的电信机顶盒其实也可以装上安卓系统呢?听起来是不是有点不可思议?别急,让我带你一步...
安卓系统可以做苹果桌面,打造个...
你知道吗?现在科技的发展真是让人眼花缭乱,竟然有人想出了安卓系统可以做苹果桌面的神奇想法!是不是觉得...
安卓系统自带的网页,功能与特色...
你有没有发现,每次打开安卓手机,那熟悉的系统界面里总有一个默默无闻的小家伙——安卓系统自带的网页浏览...