
kodbox安装向导
创始人
2024-06-02 19:45:45
0次
kodbox安装向导
1、环境准备
| 主机名 | ip地址 | 用途 |
|---|---|---|
| kodbox | 10.0.0.79 | 相当于web |
| kodbox-mysql | 10.0.0.80 | 存放网站或者用户信息 |
2、kodbox-mysql–>部署redis和mysql
2.1 部署redis
2.2.1 安装redis并开启服务
yum install -y redis
2.2.2 修改redis远程访问权限并开启服务
grep -wn bind /etc/redis.conf
61:bind 127.0.0.1 172.16.1.80systemctl enable redis
systemctl start redis
2.2 部署Mysql
2.2.1 安装mysql并启动服务
yum install -y mariadb-server
systemctl enable mariadb && systemctl start mariadb
2.2.2 初始化数据库
$ mysql_secure_installation NOTE: RUNNING ALL PARTS OF THIS SCRIPT IS RECOMMENDED FOR ALL MariaDBSERVERS IN PRODUCTION USE!  PLEASE READ EACH STEP CAREFULLY!In order to log into MariaDB to secure it, we'll need the current
password for the root user.  If you've just installed MariaDB, and
you haven't set the root password yet, the password will be blank,
so you should just press enter here.Enter current password for root (enter for none):
OK, successfully used password, moving on...Setting the root password ensures that nobody can log into the MariaDB
root user without the proper authorisation.Set root password? [Y/n] y
New password:
Re-enter new password:
Password updated successfully!
Reloading privilege tables..... Success!By default, a MariaDB installation has an anonymous user, allowing anyone
to log into MariaDB without having to have a user account created for
them.  This is intended only for testing, and to make the installation
go a bit smoother.  You should remove them before moving into a
production environment.Remove anonymous users? [Y/n] y... Success!Normally, root should only be allowed to connect from 'localhost'.  This
ensures that someone cannot guess at the root password from the network.Disallow root login remotely? [Y/n] y... Success!By default, MariaDB comes with a database named 'test' that anyone can
access.  This is also intended only for testing, and should be removed
before moving into a production environment.Remove test database and access to it? [Y/n] y- Dropping test database...... Success!- Removing privileges on test database...... Success!Reloading the privilege tables will ensure that all changes made so far
will take effect immediately.Reload privilege tables now? [Y/n] y... Success!Cleaning up...All done!  If you've completed all of the above steps, your MariaDB
installation should now be secure.Thanks for using MariaDB!
2.2.3 创建kodbox数据库及用户,并进行授权
1.进入数据库
mysql -uroot -p1232.创建kodbox使用的数据库
CREATE DATABASE IF NOT EXISTS kodbox CHARACTER SET utf8mb4 COLLATE utf8mb4_general_ci;3.创建用户并进行远程授权
grant all on kodbox.* to 'admin'@'localhost' identified by '123456';
grant all on kodbox.* to 'admin'@'172.16.1.%' identified by '123456';4.刷新权限
FLUSH PRIVILEGES;
3、kodbox–>部署nginx/php/kodbox
3.1 部署nginx
3.1.1 配置nginx的yum源,安装nginx
$cat /etc/yum.repos.d/nginx.reponame=nginx stable repo
baseurl=http://nginx.org/packages/centos/$releasever/$basearch/
gpgcheck=1
enabled=1
gpgkey=https://nginx.org/keys/nginx_signing.key
module_hotfixes=trueyum install -y nginx
systemctl enable nginx
3.1.2 配置nginx中的kodx.conf文件
server {listen 80;server_name lwx.kodx.cn;root /app/code/kodbox;location / {index index.php;}location ~ [^/]\.php(/|$) {try_files $uri =404;fastcgi_pass unix:/var/run/php-fpm.sock;fastcgi_index index.php;set $path_info $fastcgi_path_info;set $real_script_name $fastcgi_script_name;if ($fastcgi_script_name ~ "^(.+?\.php)(/.+)$") {set $real_script_name $1;set $path_info $2;}fastcgi_param SCRIPT_FILENAME $document_root$real_script_name;fastcgi_param SCRIPT_NAME $real_script_name;fastcgi_param PATH_INFO $path_info;include fastcgi_params;}
}nginx -t   #检查语法
3.2 安装php-fpm
3.2.1 上传php压缩包,安装php
tar -xvf php72w-all.tar.gz
yum localinstall -y *.rpmchown -R root:nginx /var/lib/php
systemctl enable php-fpm && systemctl start php-fpm
3.2.2 配置参数文件
PHP_INI=/etc/php.ini
PHP_FPM=/etc/php-fpm.d/www.confsed -i \-e "s/max_execution_time = 30/max_execution_time = 3600/g" \-e "s/max_input_time = 60/max_input_time = 3600/g" \-e "s/memory_limit = 128M/memory_limit = 512M/g" \-e "s/post_max_size = 8M/post_max_size = 512M/g" \-e "s/upload_max_filesize = 2M/upload_max_filesize = 512M/g" \${PHP_INI}sed -i \-e "s/pm.max_children = 50/pm.max_children = 100/g" \-e "s/pm.start_servers = 5/pm.start_servers = 10/g" \-e "s/pm.min_spare_servers = 5/pm.min_spare_servers = 10/g" \-e "s/pm.max_spare_servers = 35/pm.max_spare_servers = 50/g" \-e "s/;pm.max_requests = 500/pm.max_requests = 500/g" \-e "s/user = apache/user = nginx/g" \-e "s/group = apache/group = nginx/g" \-e "s/;listen.mode = 0660/listen.mode = 0666/g" \-e "s/;listen.owner = nobody/listen.owner = nginx/g" \-e "s/;listen.group = nobody/listen.group = nginx/g" \-e "s/listen = 127.0.0.1:9000/listen = \/var\/run\/php-fpm.sock/g" \${PHP_FPM}systemctl restart php-fpm
3.3 安装kodbox
1.创建站点目录
mkdir -p /app/code/kodbox/
cd /app/code/kodbox/2.下载有道云压缩包并解压
curl -L "https://api.kodcloud.com/?app/version&download=server.link" -o kodbox.zip
unzip kodbox.zip && rm -f kodbox.zip3.站点目录进行授权
chown -R nginx:nginx /app/code/kodbox/
chmod -R 755 /app/code/kodbox/4.重启nginx
systemctl restart nginx
4、kodbox网页配置
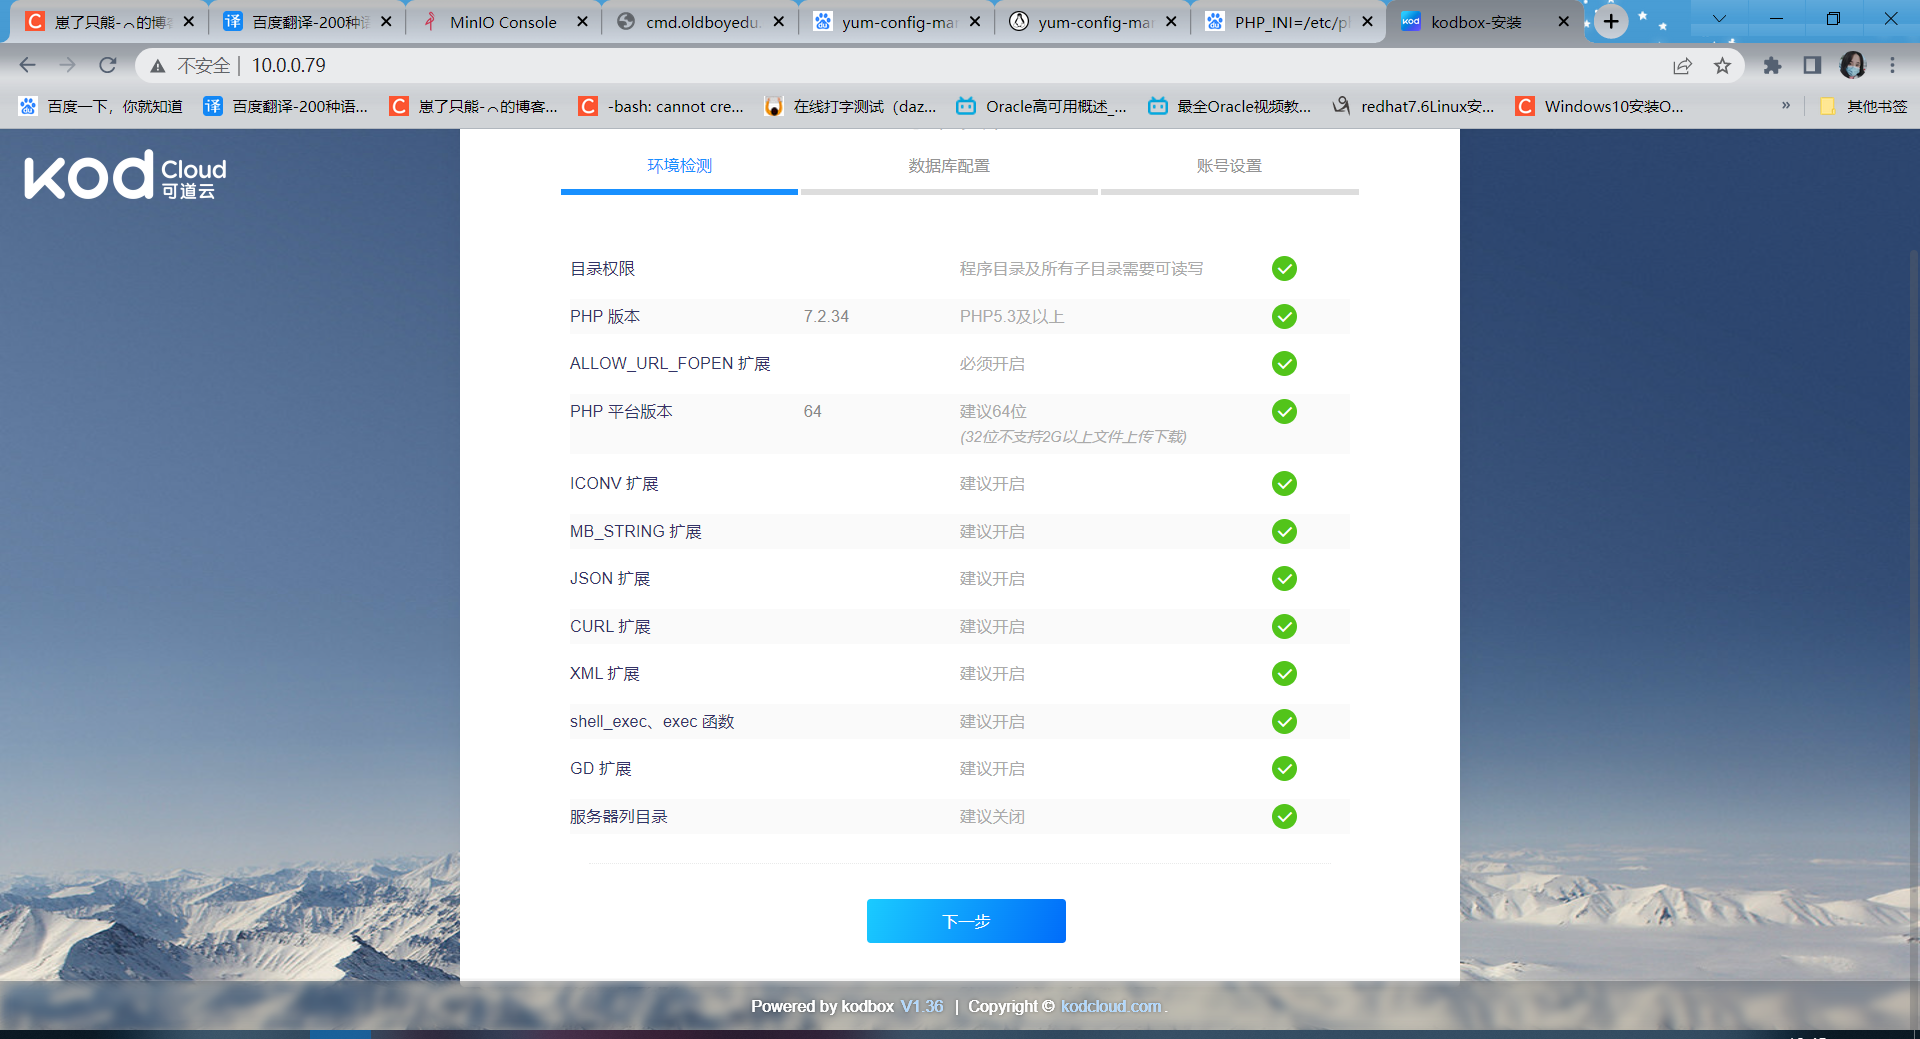
4.1 网站访问 http://10.0.0.79
环境监测成功后点击下一步
4.2 数据库配置
因为这里用的是单独的数据库服务器,所以要在kodbox服务端上安装mariadb客户端
yum install -y mariadb
存储引擎选择MyISAM,否则这个页面会报错
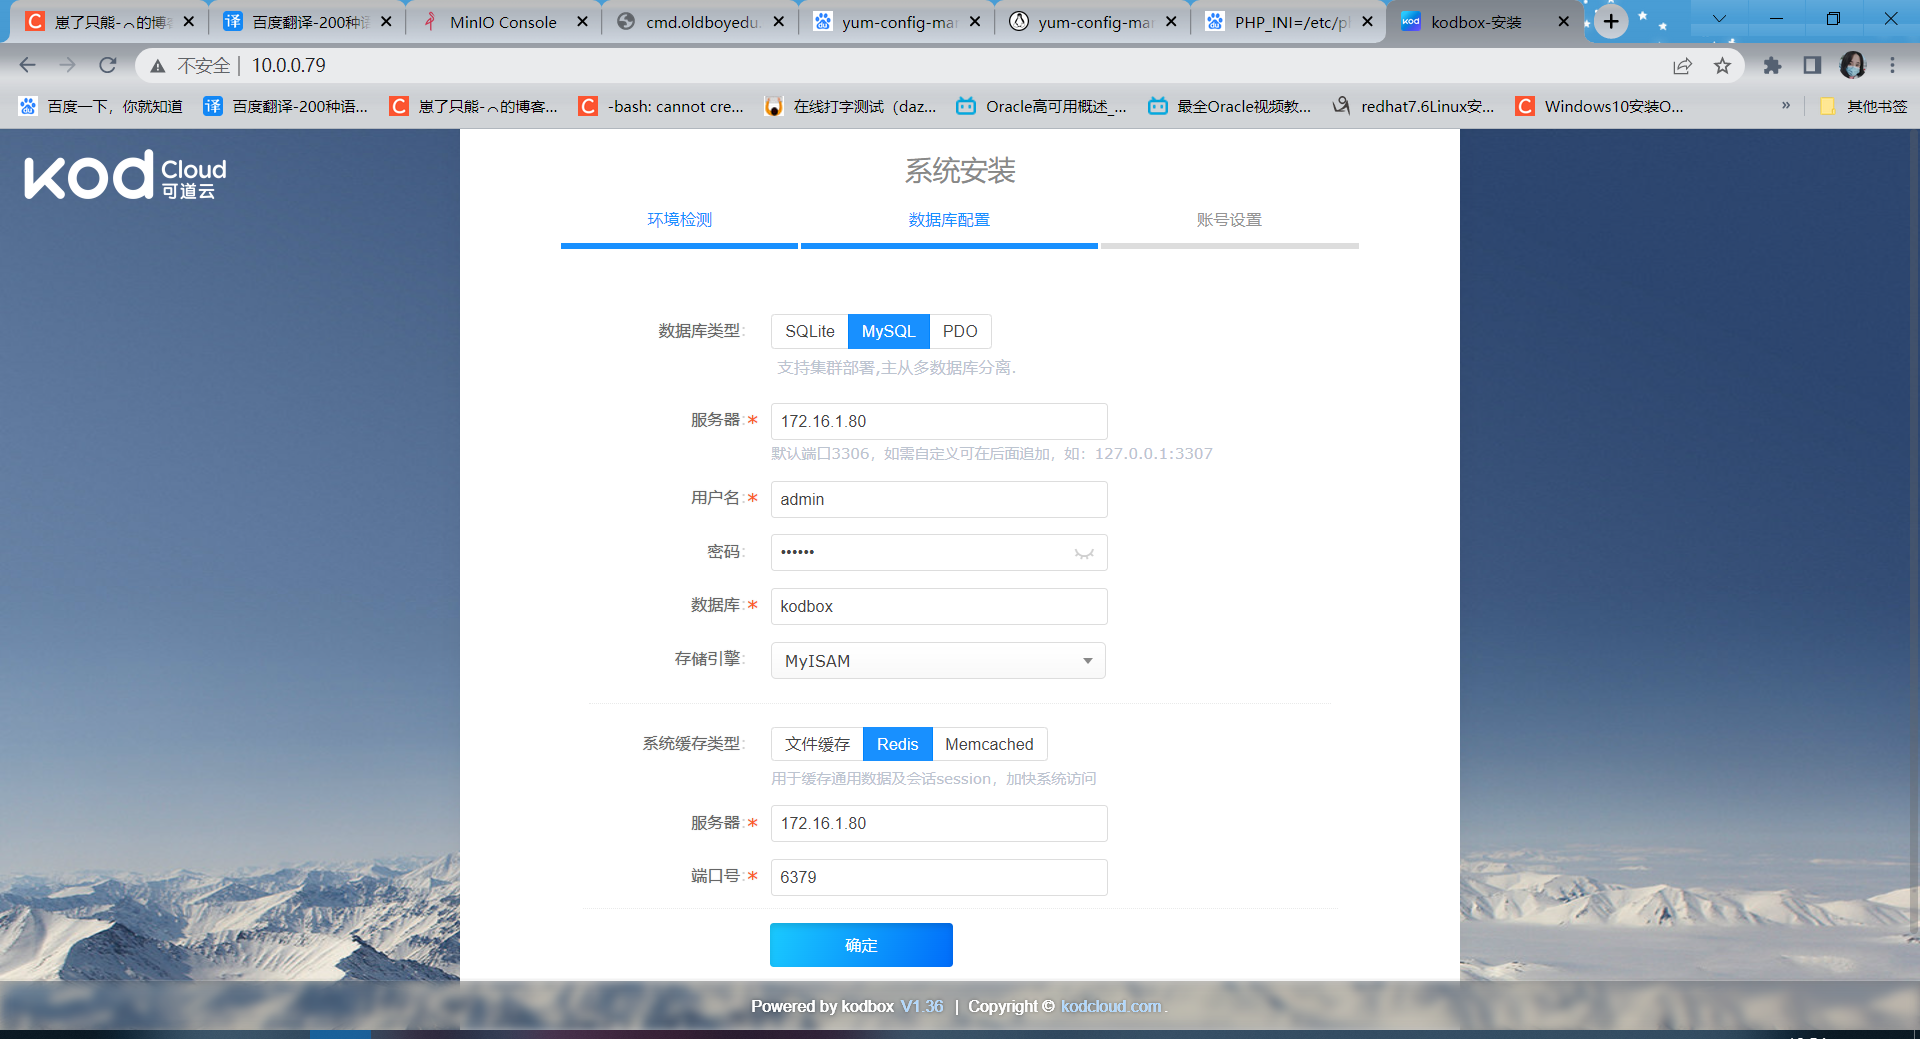

点击确定,进行下一步
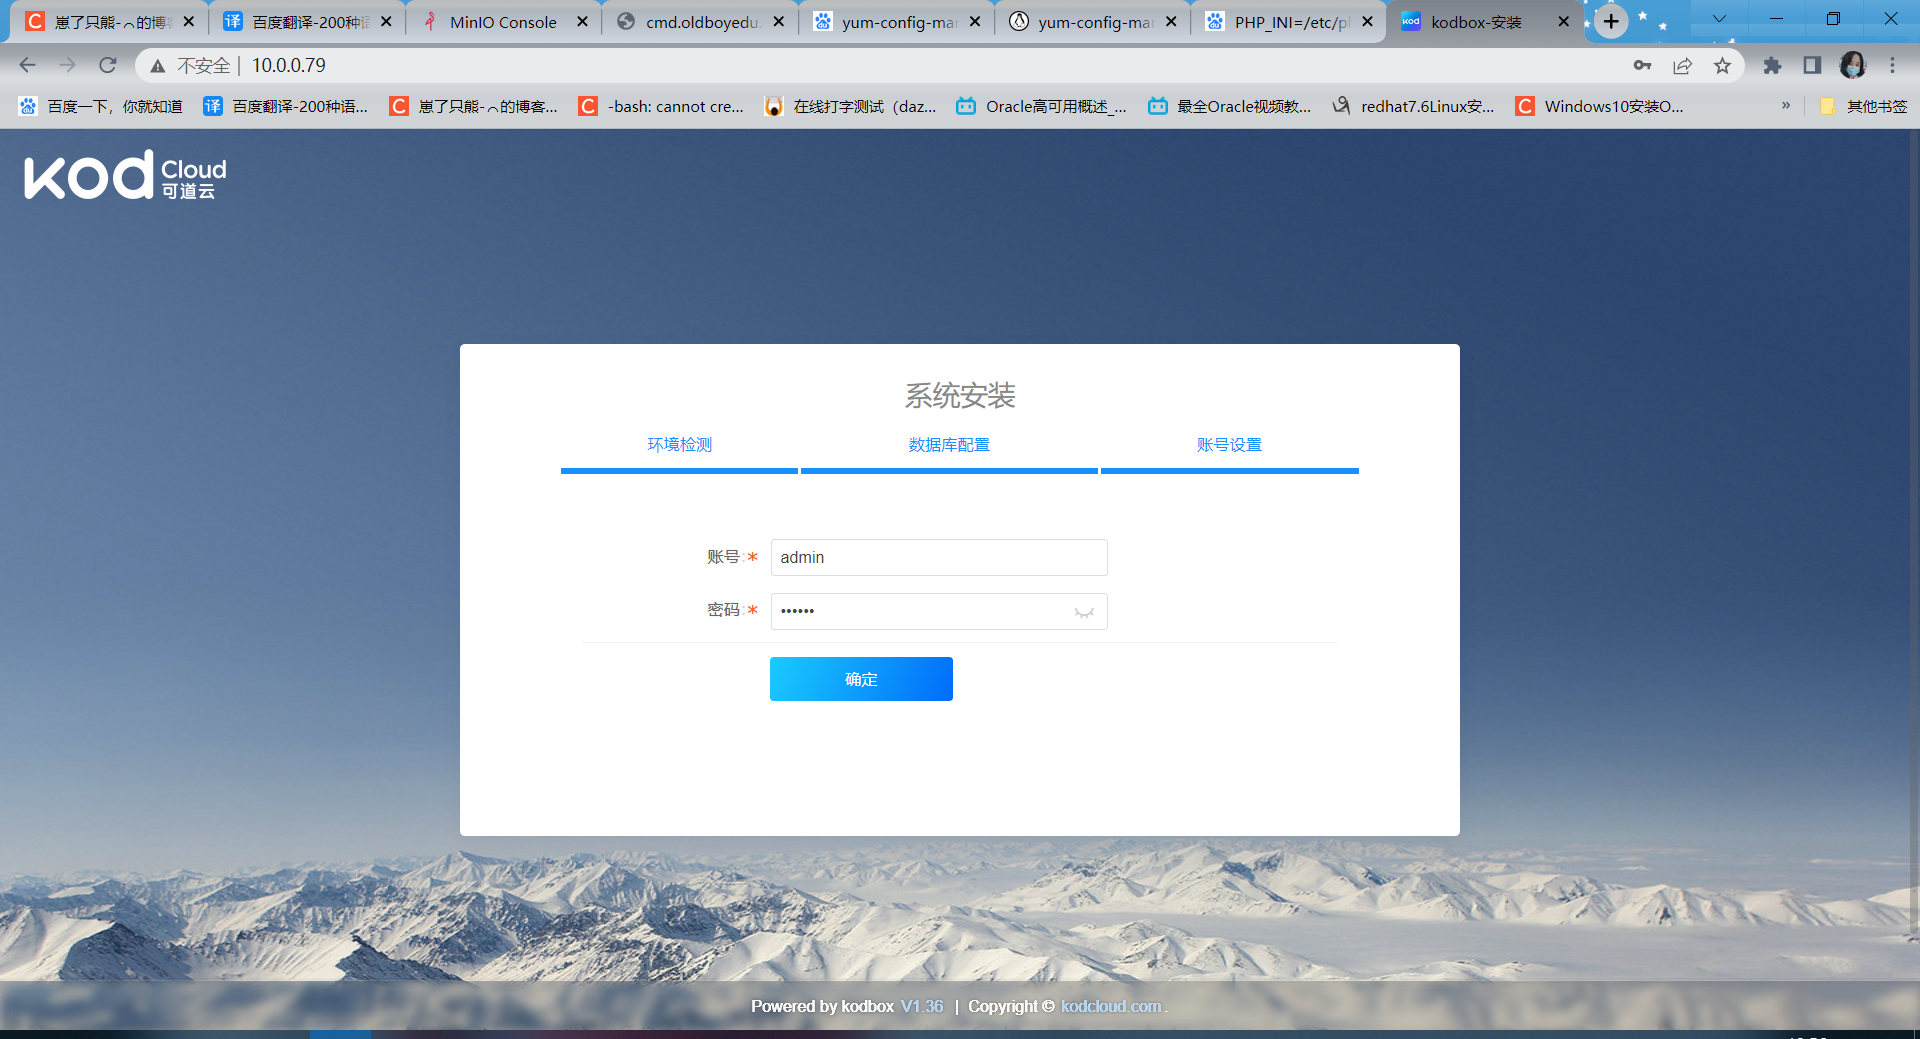
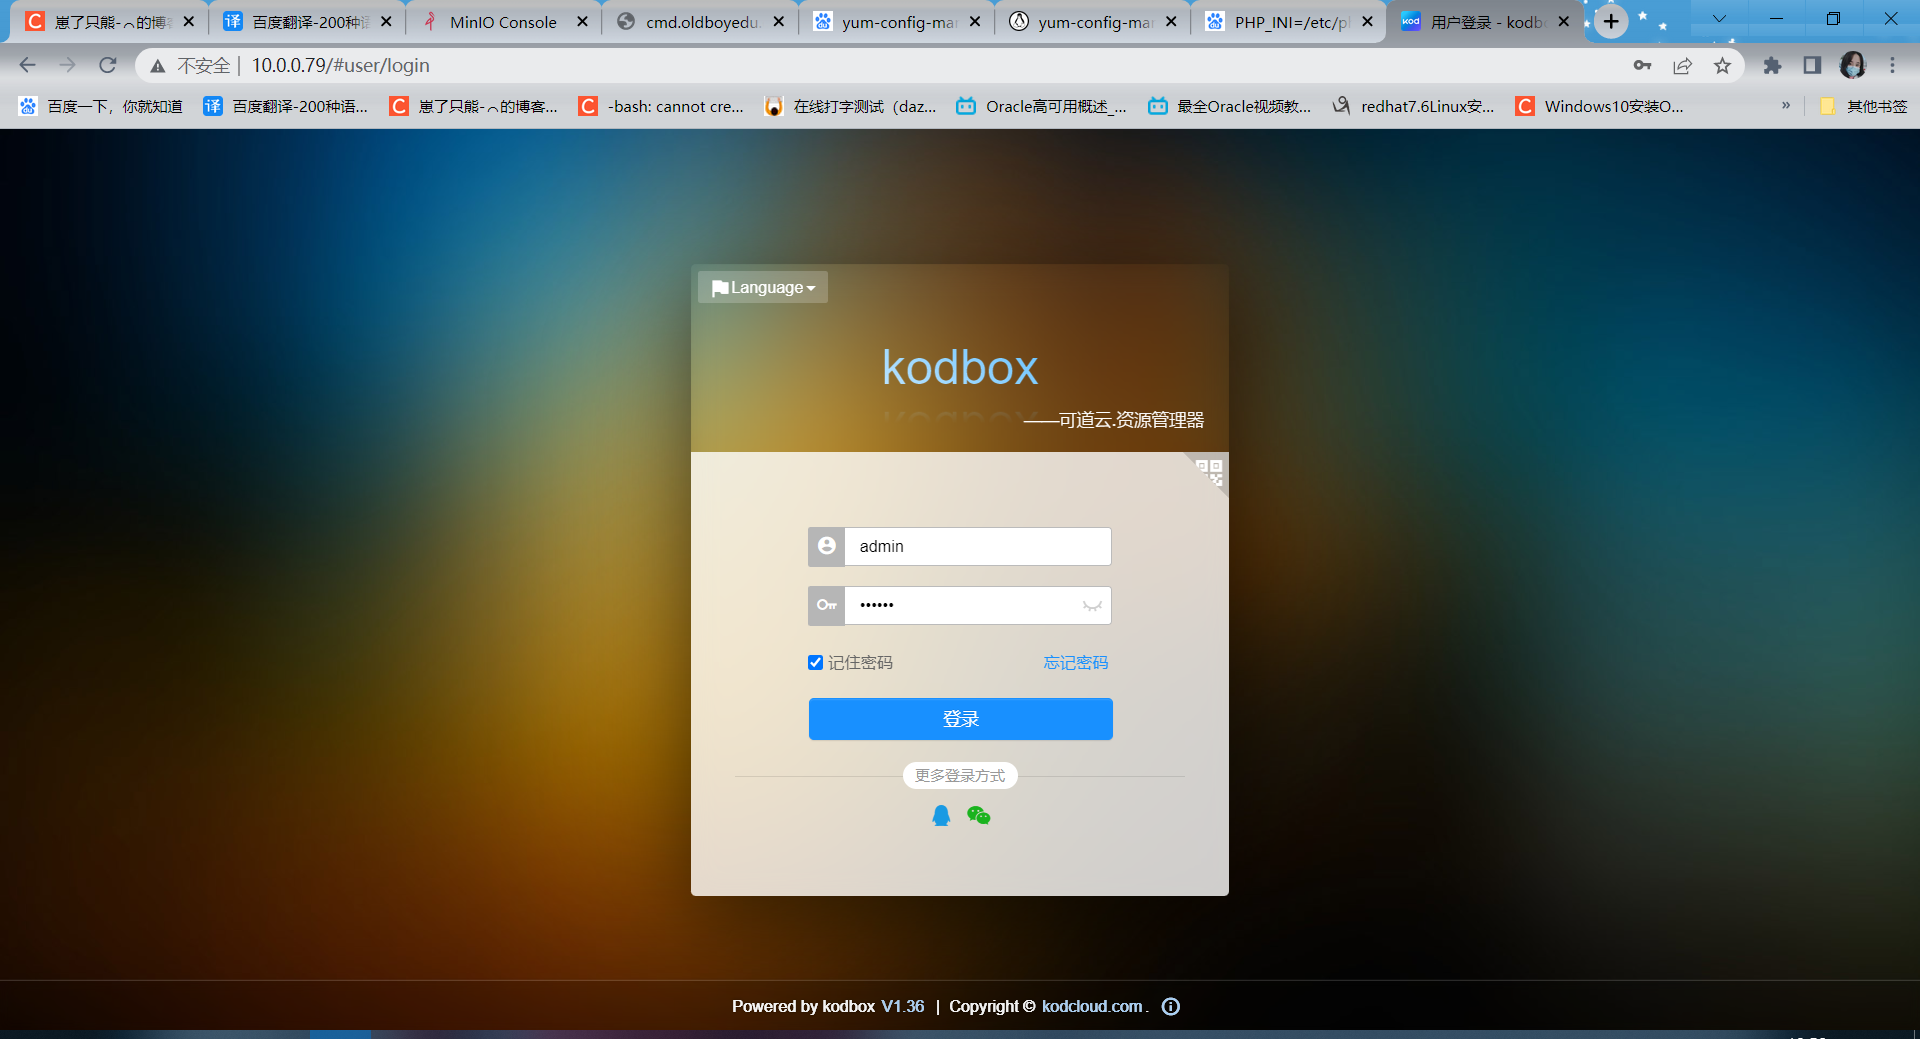
4.3 账号配置
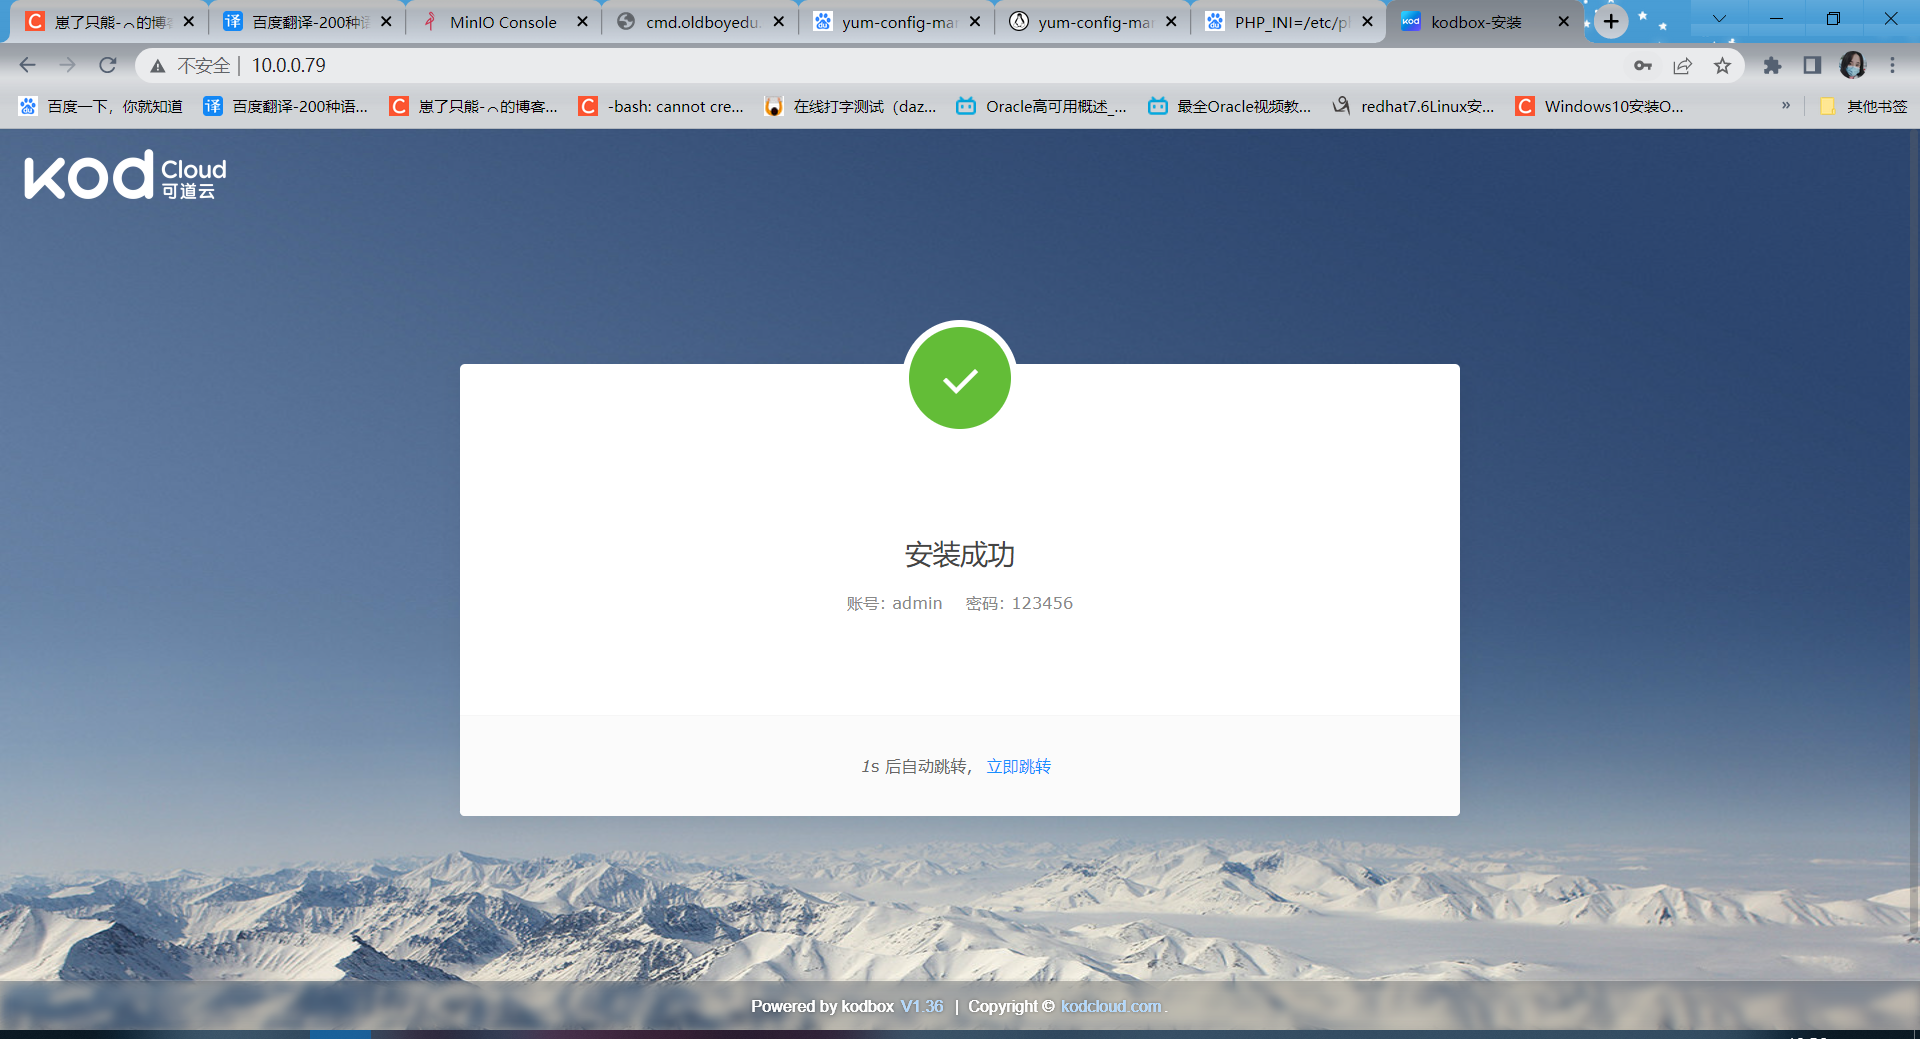
4.4 登录页面

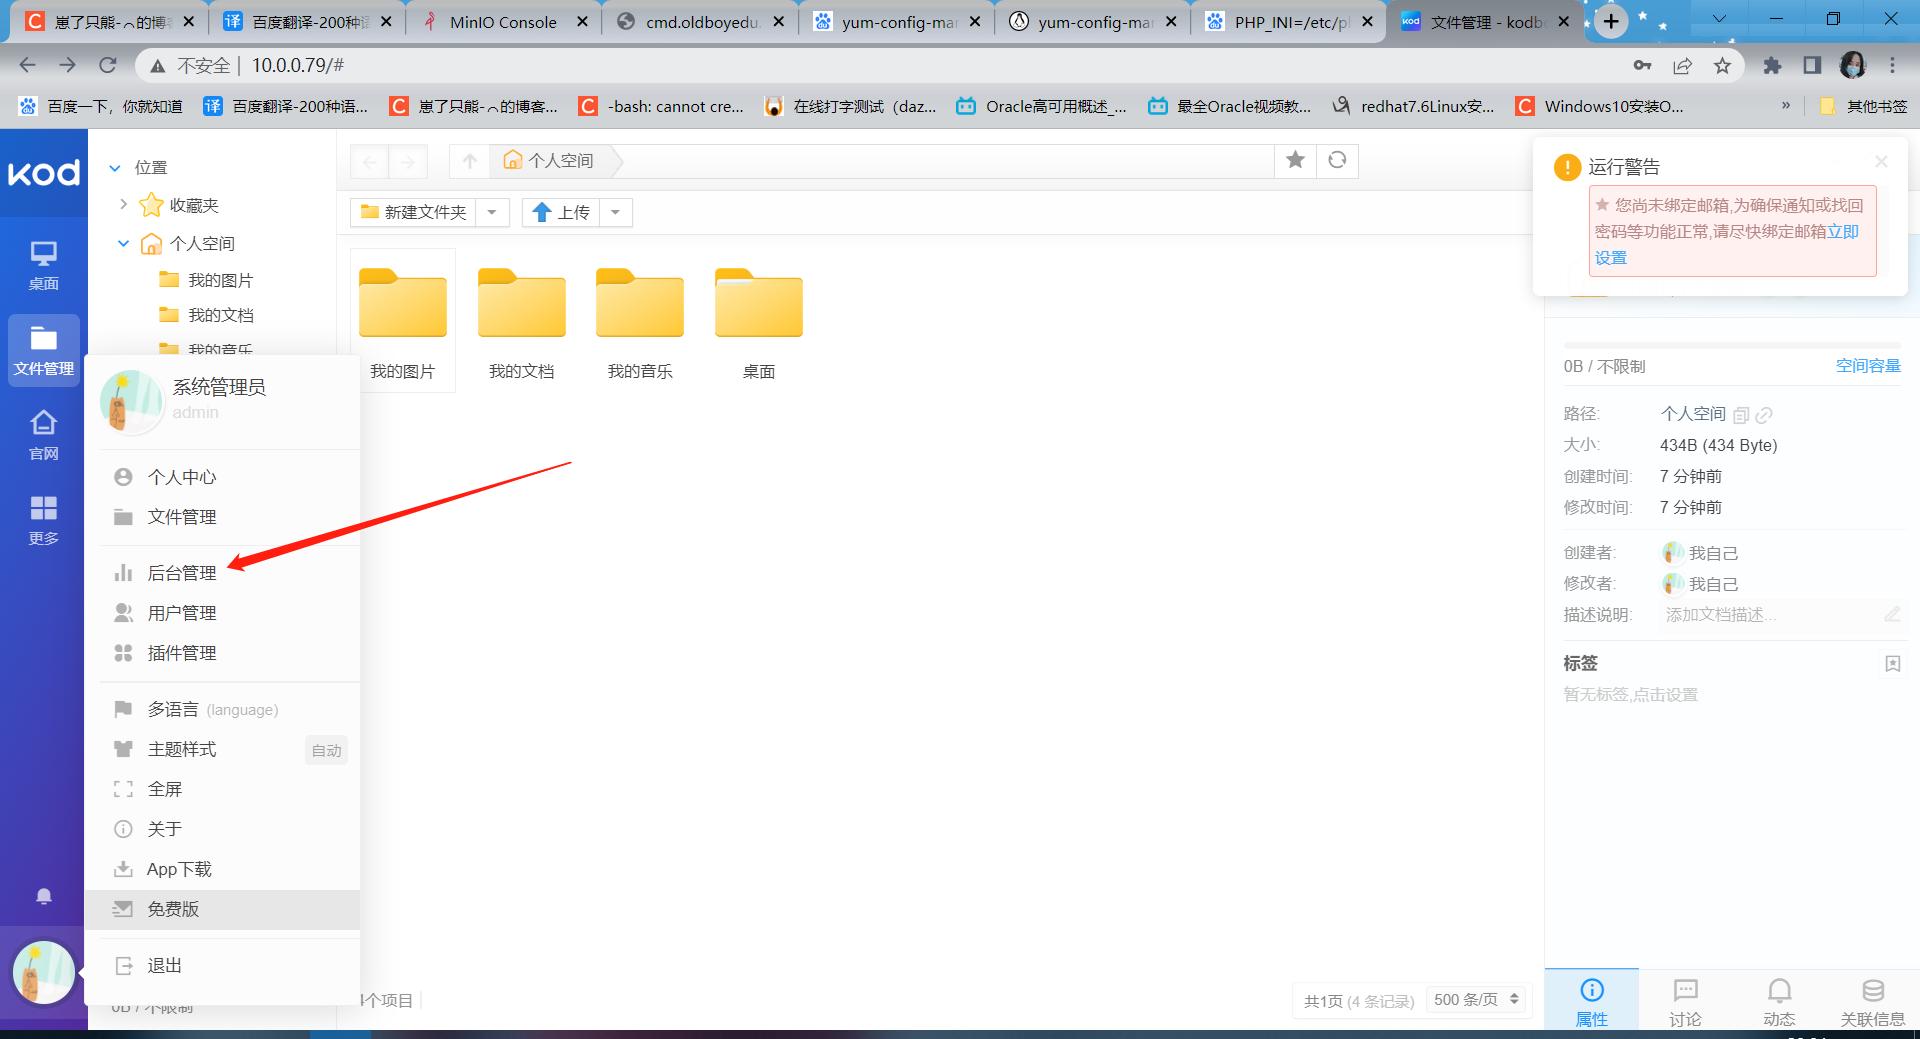
5、kodbox配置Minio对象存储
5.1 找到后台管理
5.2 选择存储文件中的存储管理
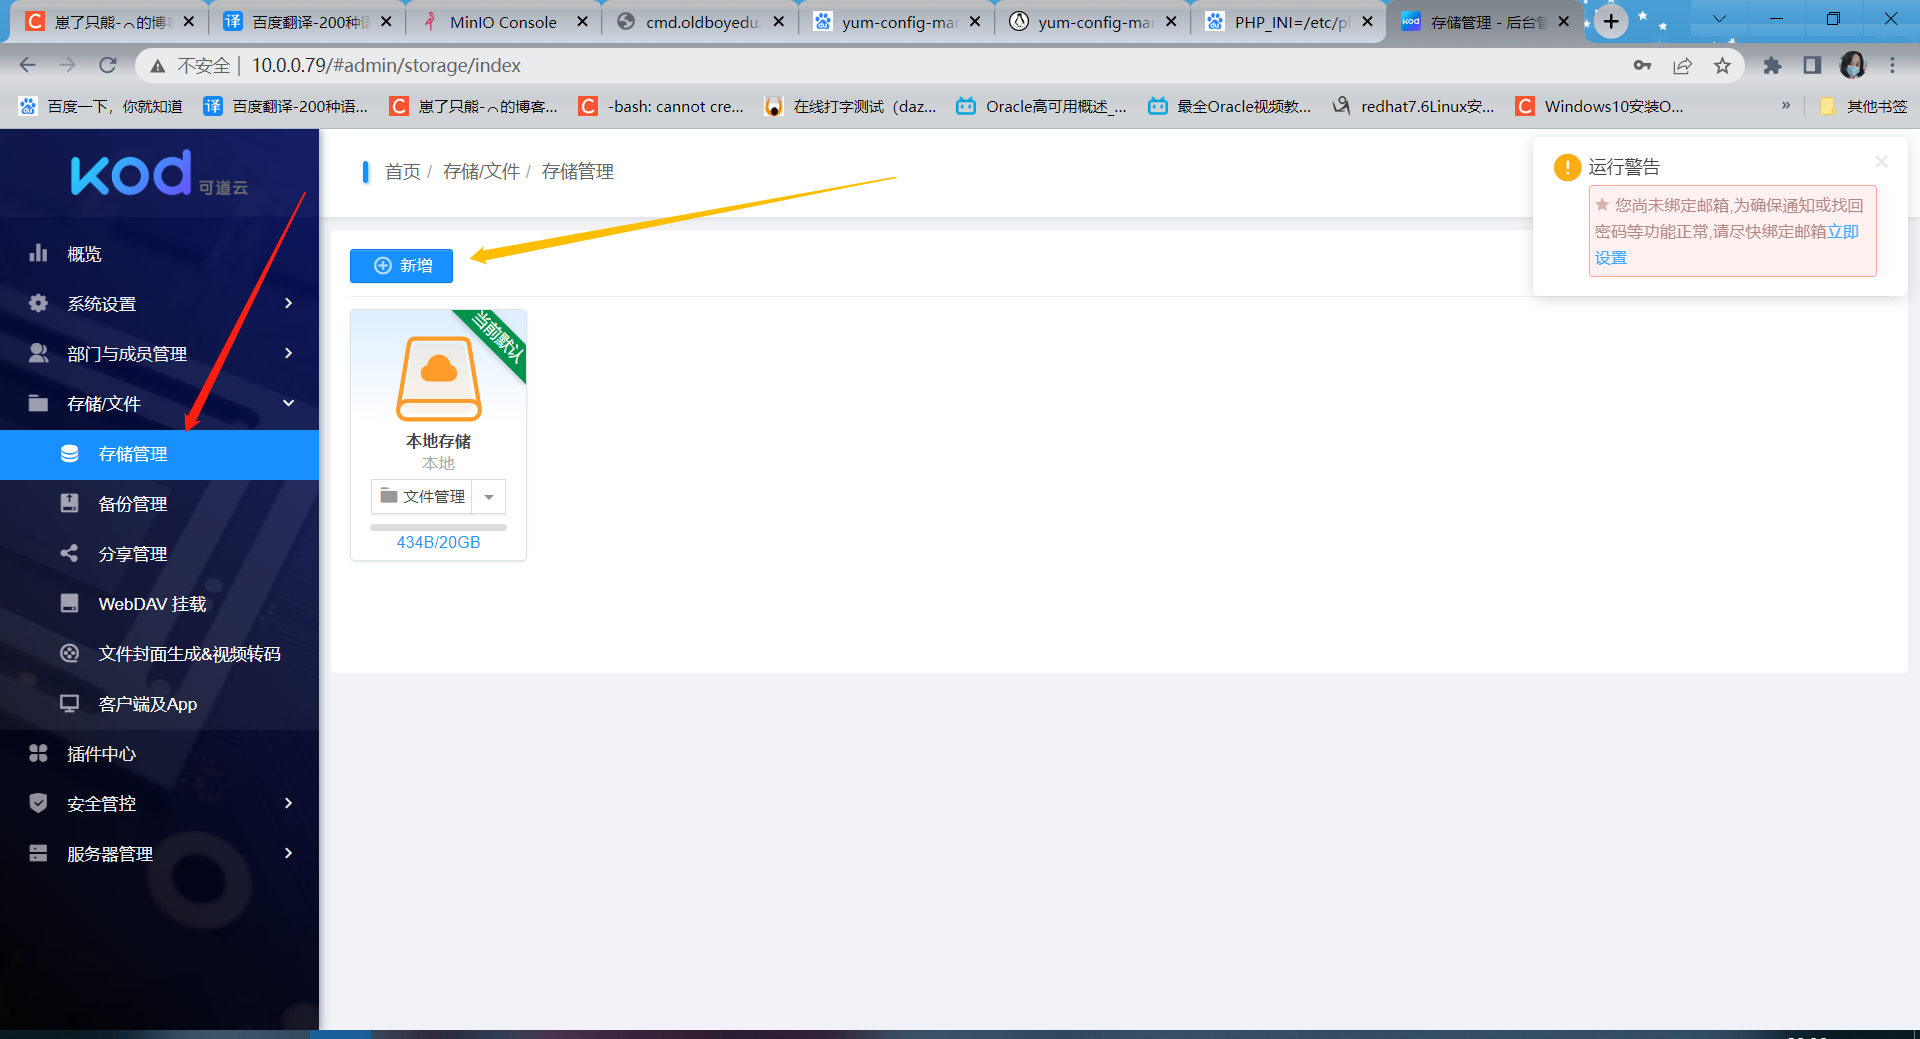
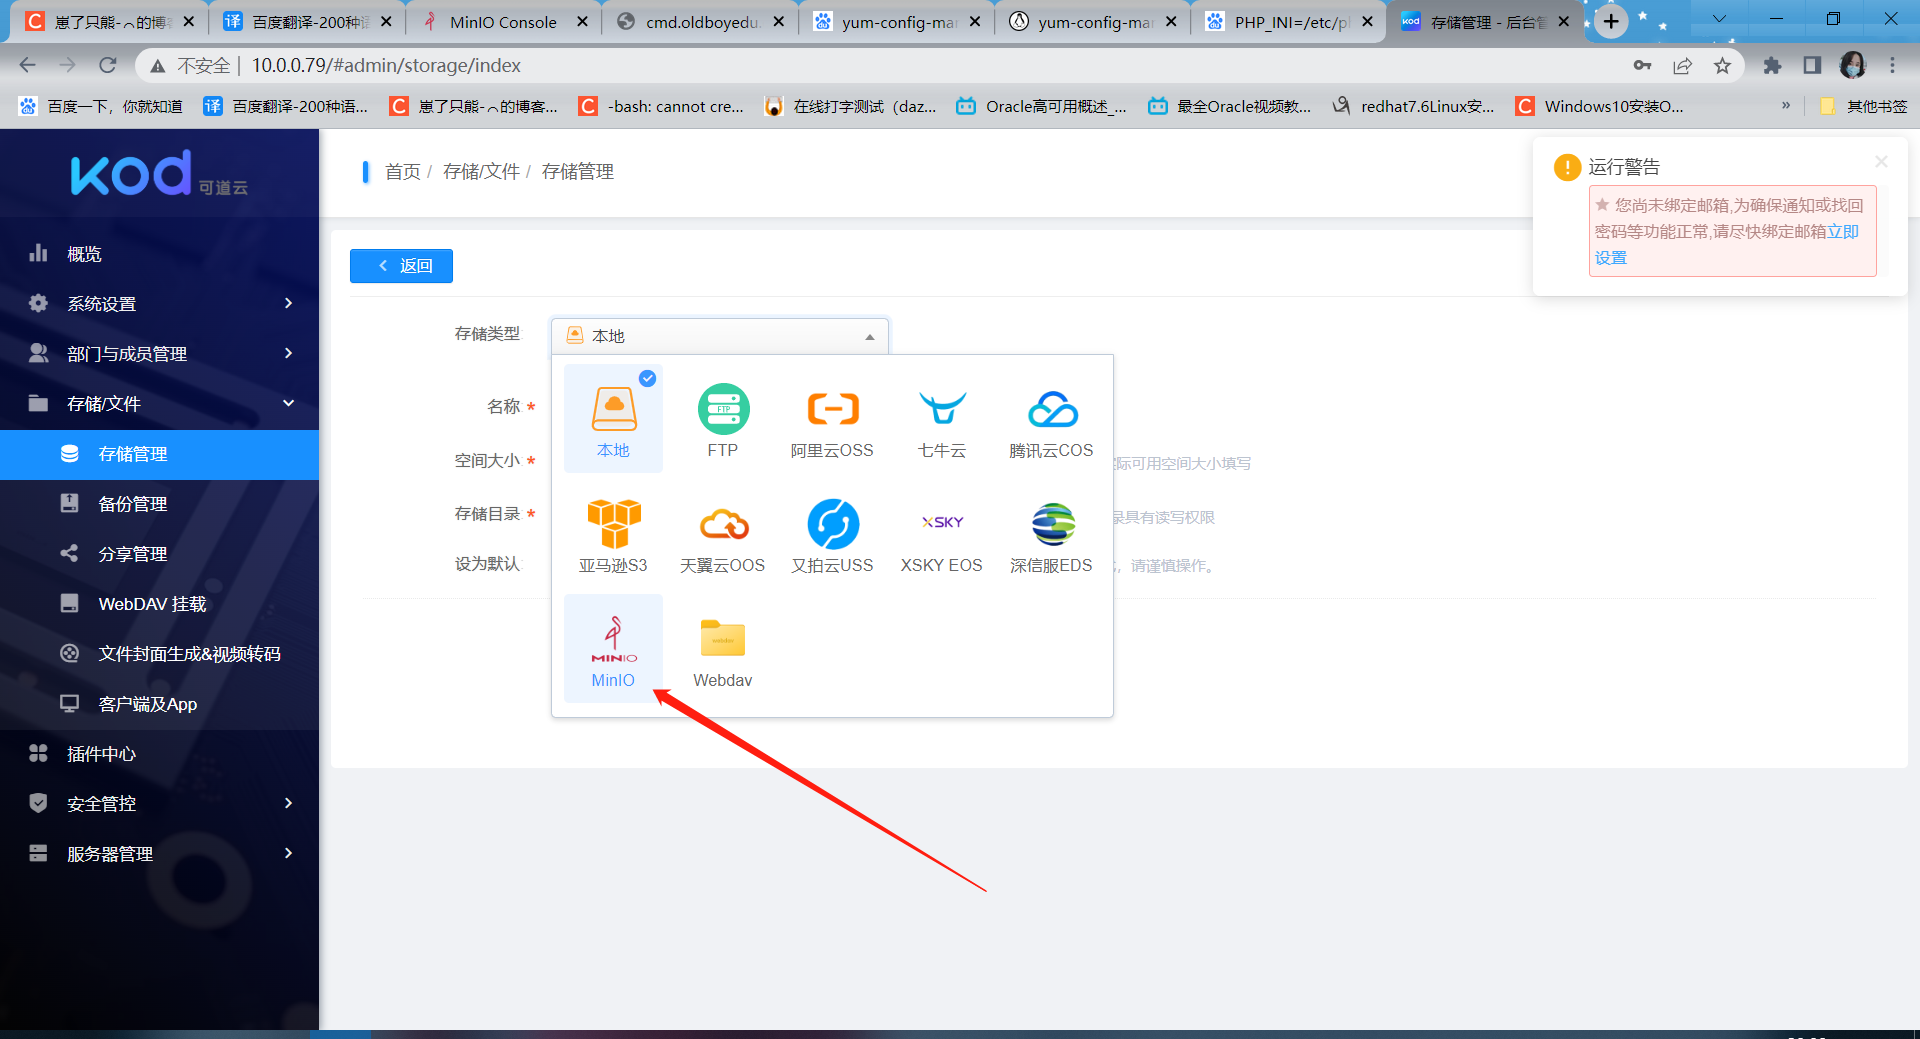
5.3 新增Minio对象存储
Minio安装参考
https://blog.csdn.net/m0_49562857/article/details/129484748?spm=1001.2014.3001.5501
5.4 Minio配置
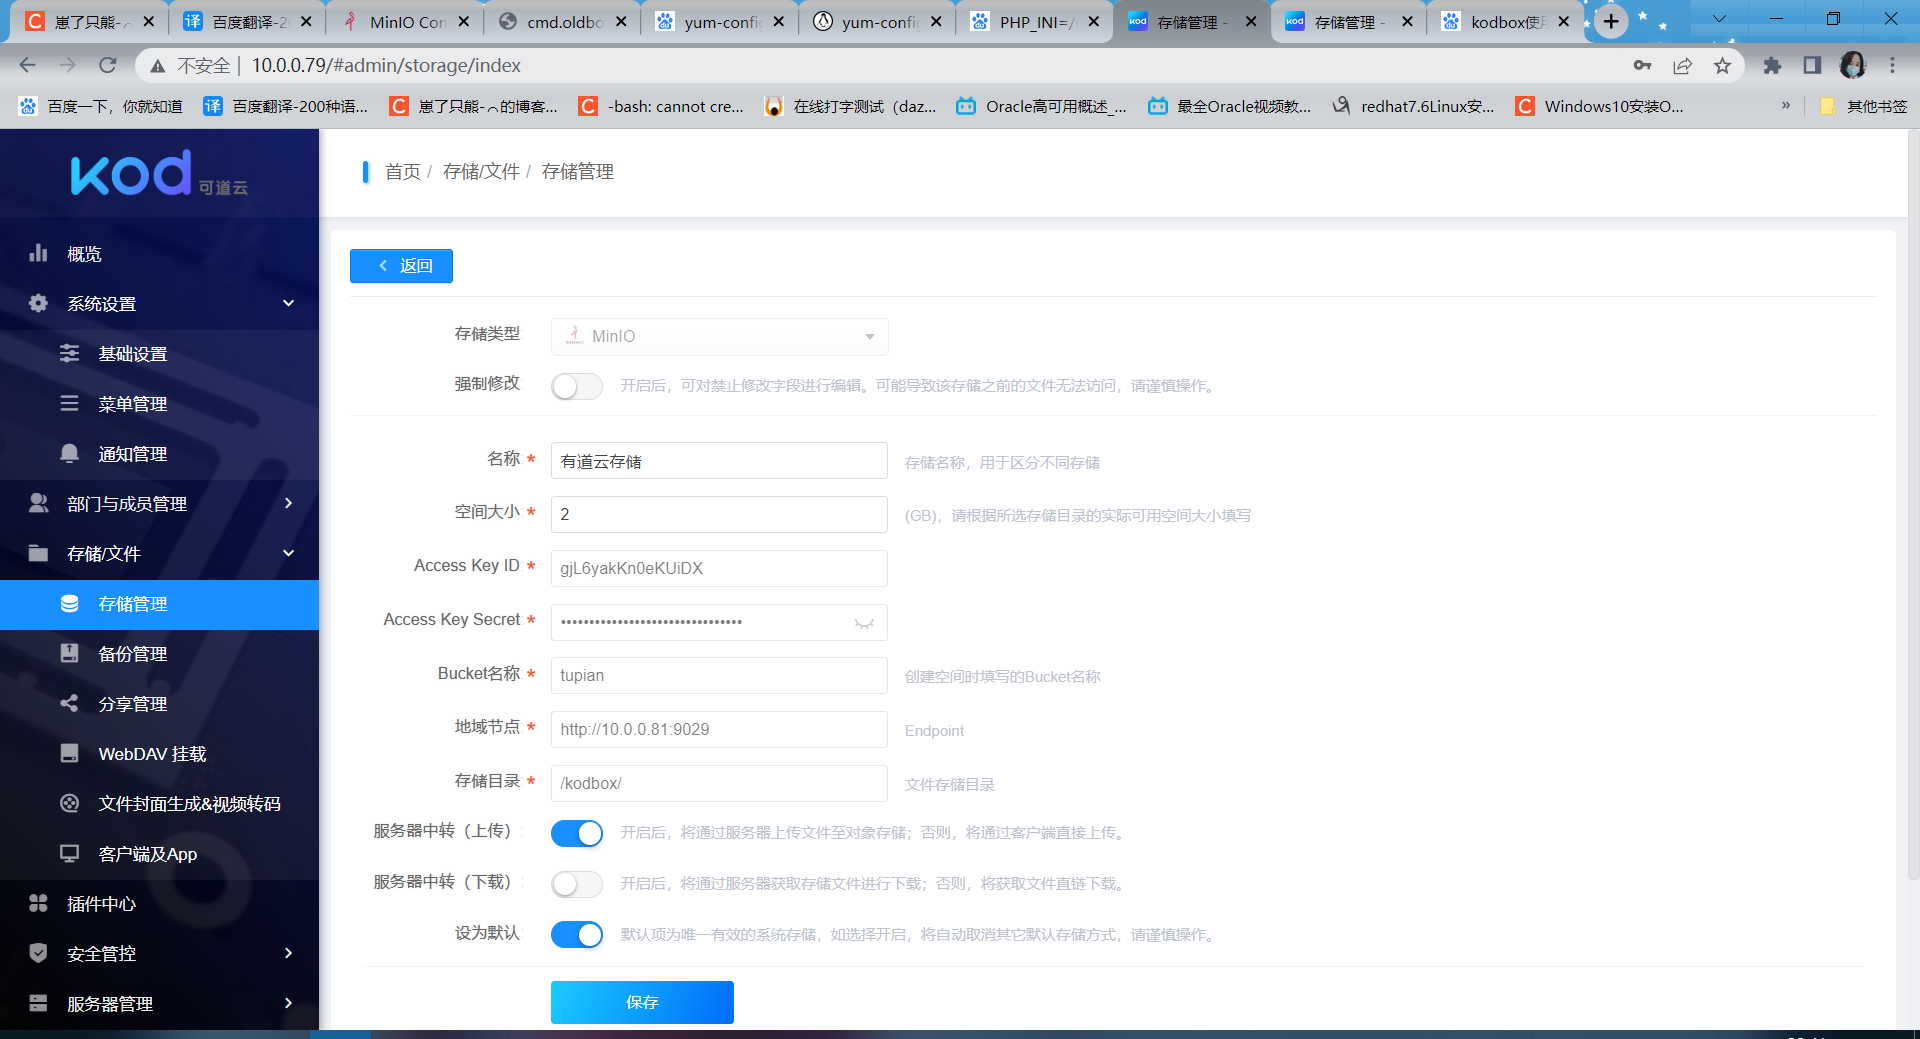
这里这个端口要注意下,Minio默认的9000端口是提供web服务的,9029是提供给其他设备进行访问的一个端口
这两个端口都可以在安装Minio的时候自定义
5.5 验证
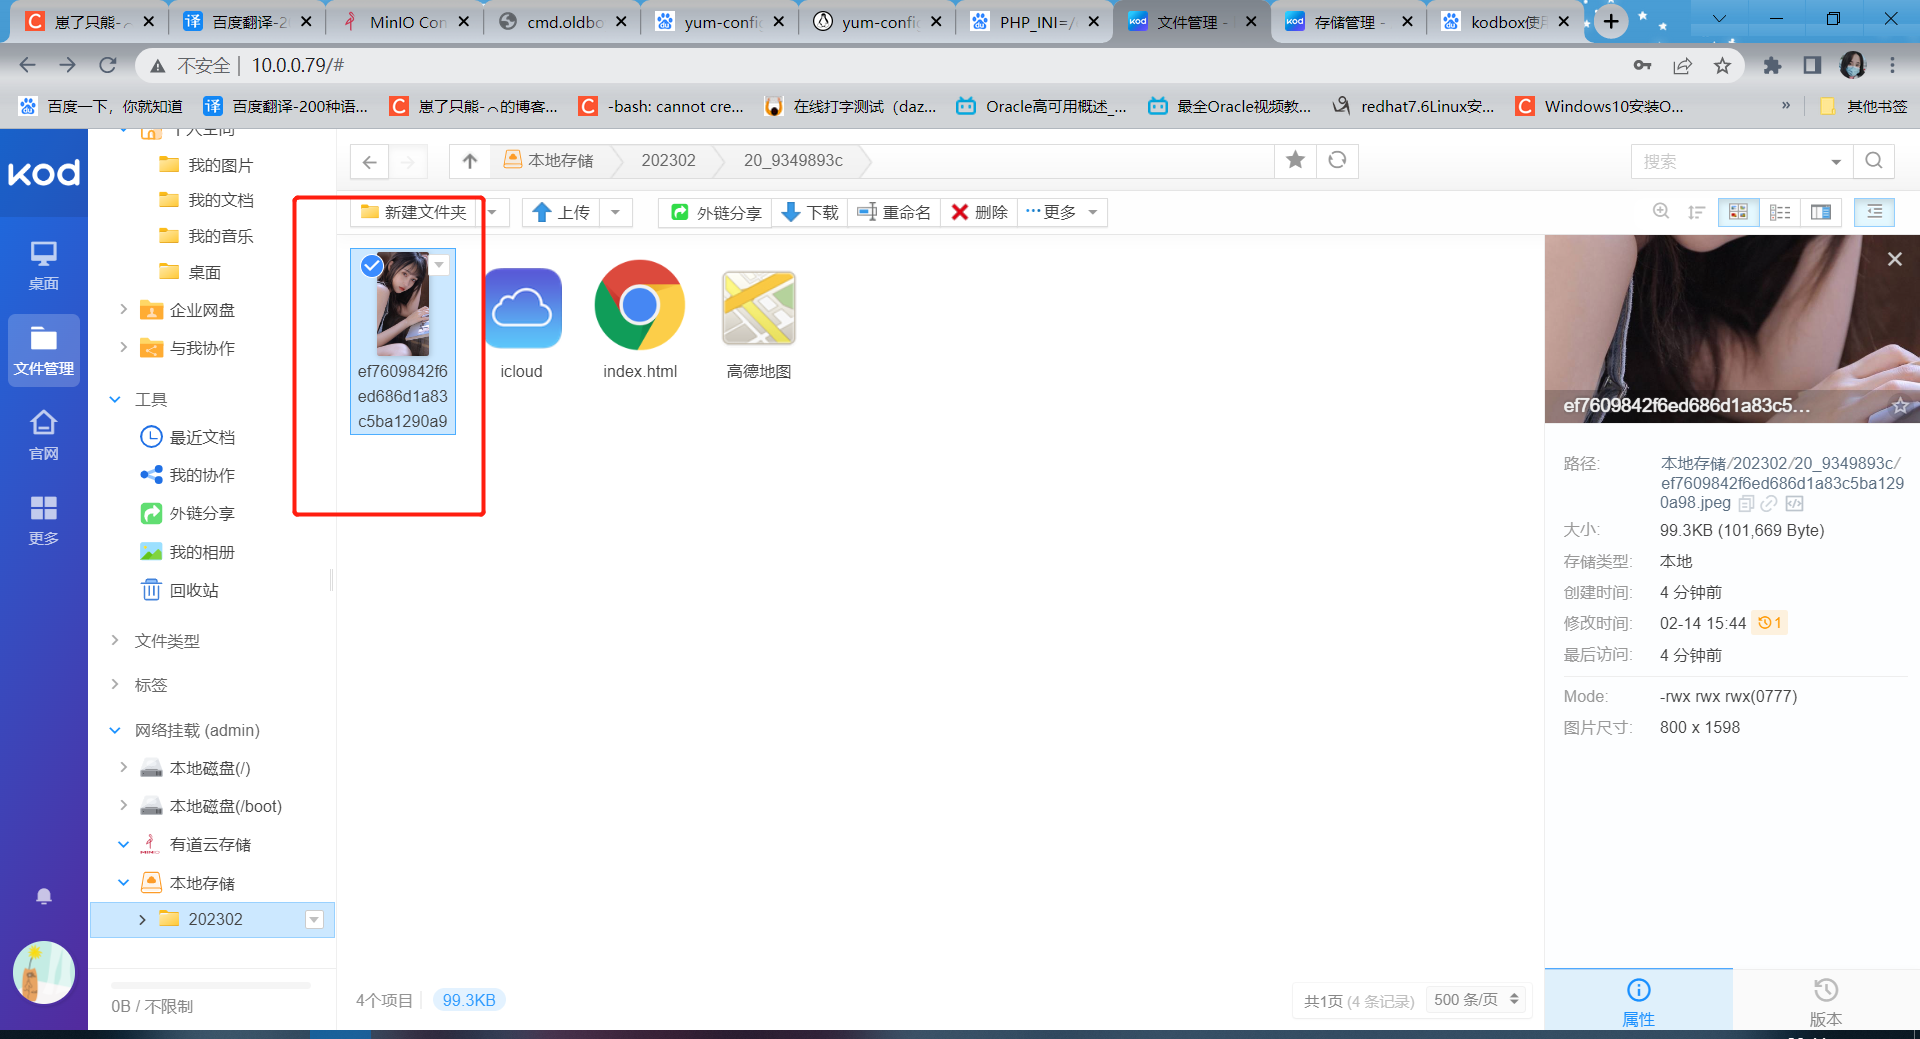
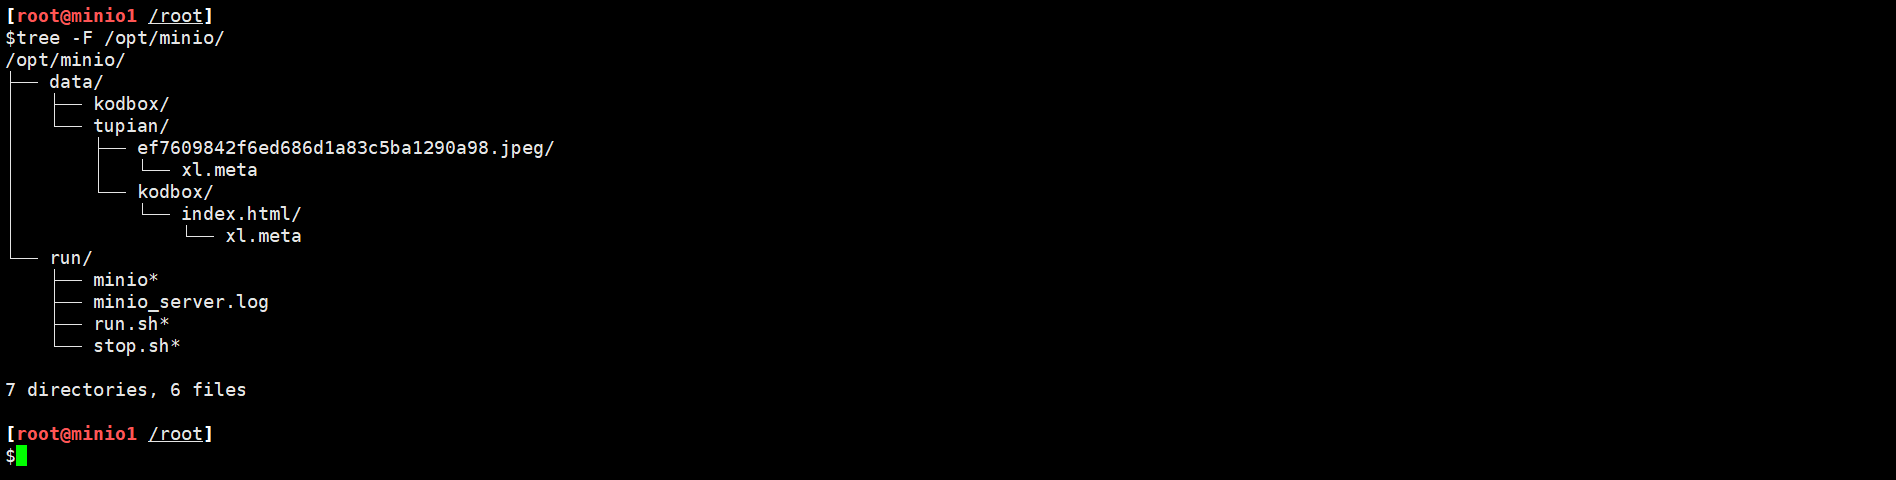
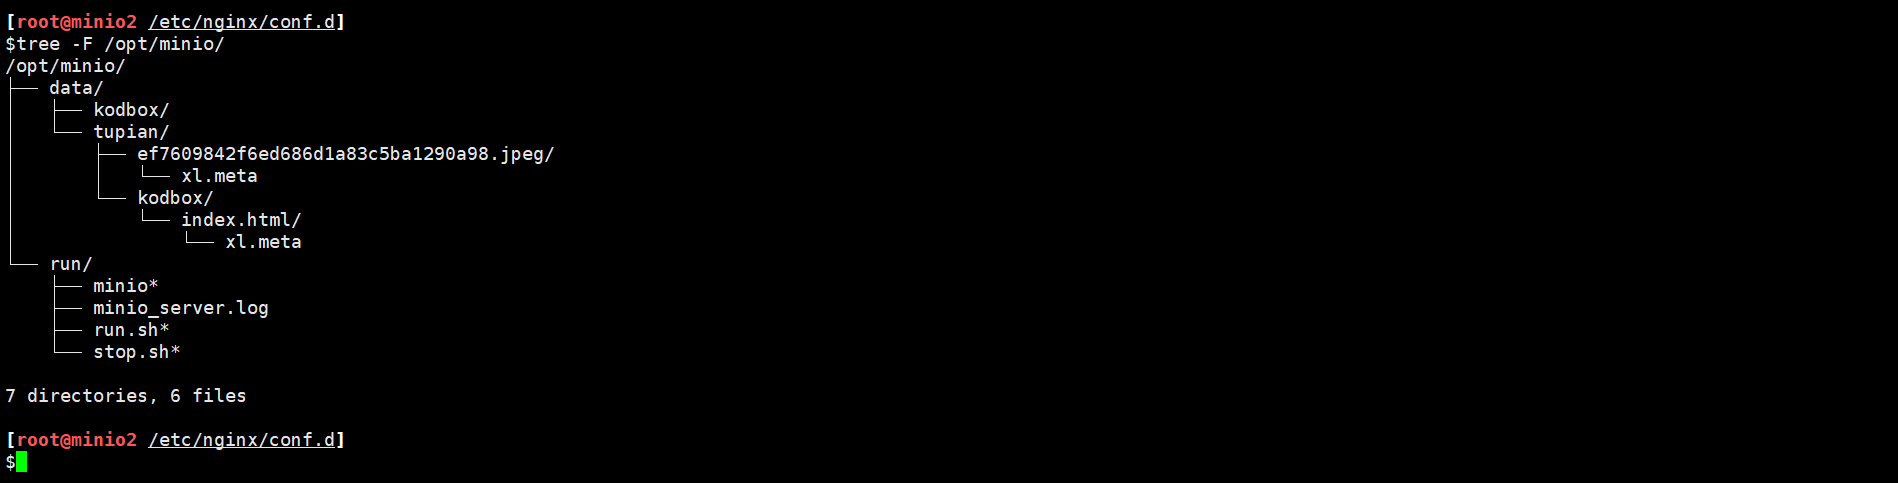
我上传了一张图片,可以看到这张图片在我的两台Minio分别进行了存储
相关内容
热门资讯
电视安卓系统哪个品牌好,哪家品...
你有没有想过,家里的电视是不是该升级换代了呢?现在市面上电视品牌琳琅满目,各种操作系统也是让人眼花缭...
安卓会员管理系统怎么用,提升服...
你有没有想过,手机里那些你爱不释手的APP,背后其实有个强大的会员管理系统在默默支持呢?没错,就是那...
安卓系统软件使用技巧,解锁软件...
你有没有发现,用安卓手机的时候,总有一些小技巧能让你玩得更溜?别小看了这些小细节,它们可是能让你的手...
安卓系统提示音替换
你知道吗?手机里那个时不时响起的提示音,有时候真的能让人心情大好,有时候又让人抓狂不已。今天,就让我...
安卓开机不了系统更新
手机突然开不了机,系统更新还卡在那里,这可真是让人头疼的问题啊!你是不是也遇到了这种情况?别急,今天...
安卓系统中微信视频,安卓系统下...
你有没有发现,现在用手机聊天,视频通话简直成了标配!尤其是咱们安卓系统的小伙伴们,微信视频功能更是用...
安卓系统是服务器,服务器端的智...
你知道吗?在科技的世界里,安卓系统可是个超级明星呢!它不仅仅是个手机操作系统,竟然还能成为服务器的得...
pc电脑安卓系统下载软件,轻松...
你有没有想过,你的PC电脑上安装了安卓系统,是不是瞬间觉得世界都大不一样了呢?没错,就是那种“一机在...
电影院购票系统安卓,便捷观影新...
你有没有想过,在繁忙的生活中,一部好电影就像是一剂强心针,能瞬间让你放松心情?而我今天要和你分享的,...
安卓系统可以写程序?
你有没有想过,安卓系统竟然也能写程序呢?没错,你没听错!这个我们日常使用的智能手机操作系统,竟然有着...
安卓系统架构书籍推荐,权威书籍...
你有没有想过,想要深入了解安卓系统架构,却不知道从何下手?别急,今天我就要给你推荐几本超级实用的书籍...
安卓系统看到的炸弹,技术解析与...
安卓系统看到的炸弹——揭秘手机中的隐形威胁在数字化时代,智能手机已经成为我们生活中不可或缺的一部分。...
鸿蒙系统有安卓文件,畅享多平台...
你知道吗?最近在科技圈里,有个大新闻可是闹得沸沸扬扬的,那就是鸿蒙系统竟然有了安卓文件!是不是觉得有...
宝马安卓车机系统切换,驾驭未来...
你有没有发现,现在的汽车越来越智能了?尤其是那些豪华品牌,比如宝马,它们的内饰里那个大屏幕,简直就像...
p30退回安卓系统
你有没有听说最近P30的用户们都在忙活一件大事?没错,就是他们的手机要退回安卓系统啦!这可不是一个简...
oppoa57安卓原生系统,原...
你有没有发现,最近OPPO A57这款手机在安卓原生系统上的表现真是让人眼前一亮呢?今天,就让我带你...
安卓系统输入法联想,安卓系统输...
你有没有发现,手机上的输入法真的是个神奇的小助手呢?尤其是安卓系统的输入法,简直就是智能生活的点睛之...
怎么进入安卓刷机系统,安卓刷机...
亲爱的手机控们,你是否曾对安卓手机的刷机系统充满好奇?想要解锁手机潜能,体验全新的系统魅力?别急,今...
安卓系统程序有病毒
你知道吗?在这个数字化时代,手机已经成了我们生活中不可或缺的好伙伴。但是,你知道吗?即使是安卓系统,...
奥迪中控安卓系统下载,畅享智能...
你有没有发现,现在汽车的中控系统越来越智能了?尤其是奥迪这种豪华品牌,他们的中控系统简直就是科技与艺...