【Arduino nano 33 ble sense rev2】学习历程1
从去年开始一直学习On Device Learning 为了更好的理解这一块的内容,所以买了一块开发板,
Arduino nano 33 ble sense rev2。
今天主要介绍2个部分
1. Arduino IDE的安装及使用
2. 编译一个Hello World
1.1 先讲第一部分Arduino IDE的安装。
下载地址:
Software | Arduino
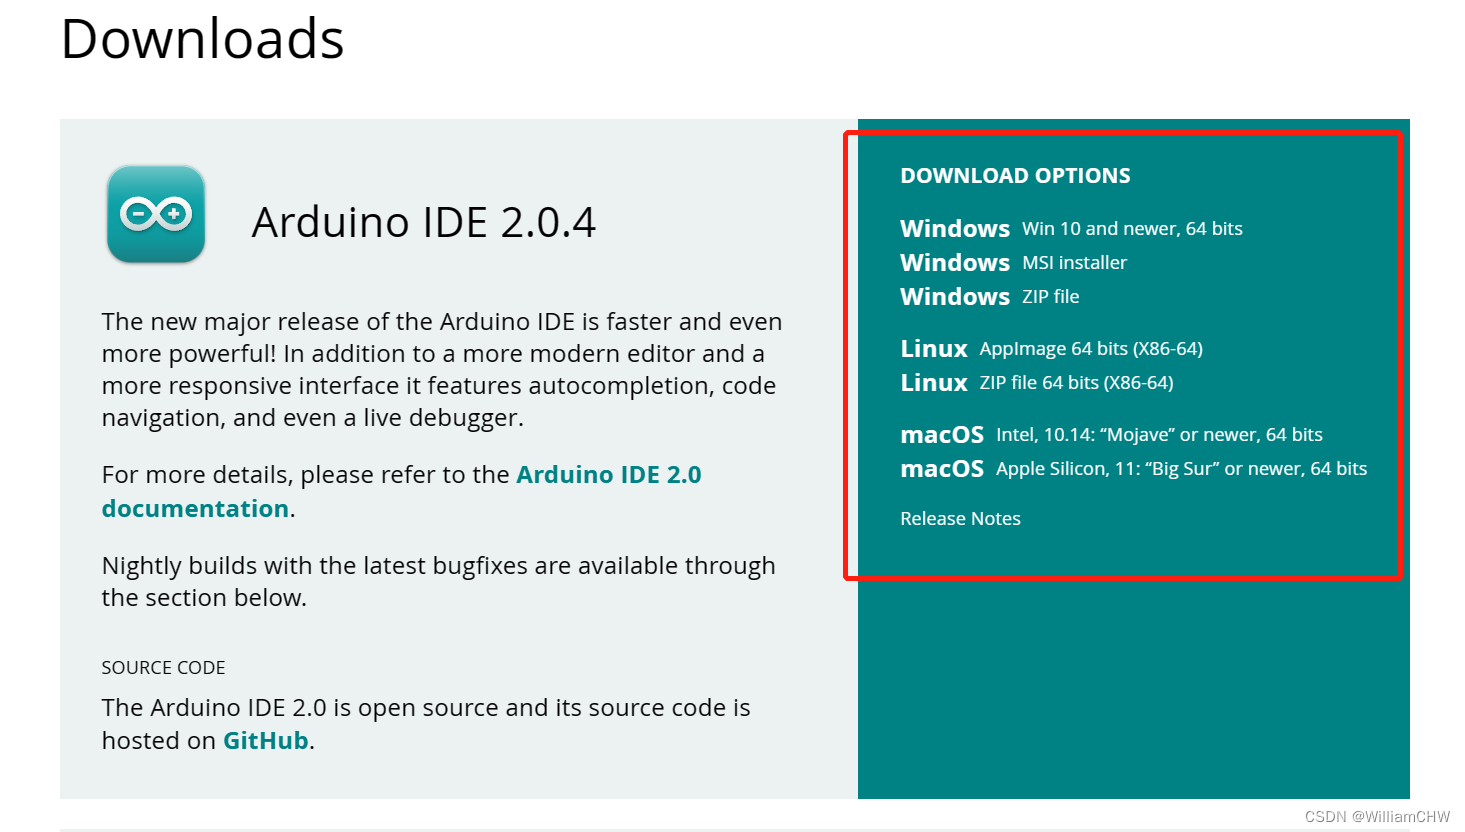
可以根据自己的电脑配置下载,下载后双击安装,整个过程就是全部安装包括驱动什么。这部分个人感觉没有什么坑,所以就不细讲了。
1.2 Arduino IDE的使用
这里需要讲以下几点:
a. 中文设置(个人不推荐)File>Perferences 里面设置
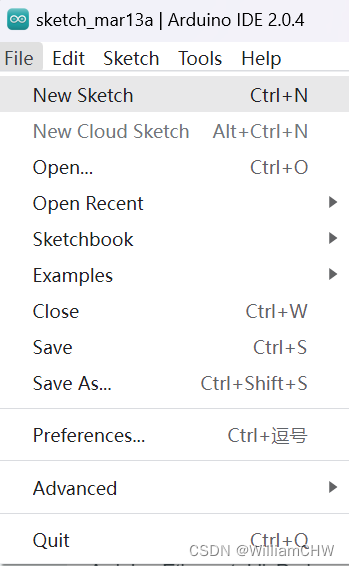
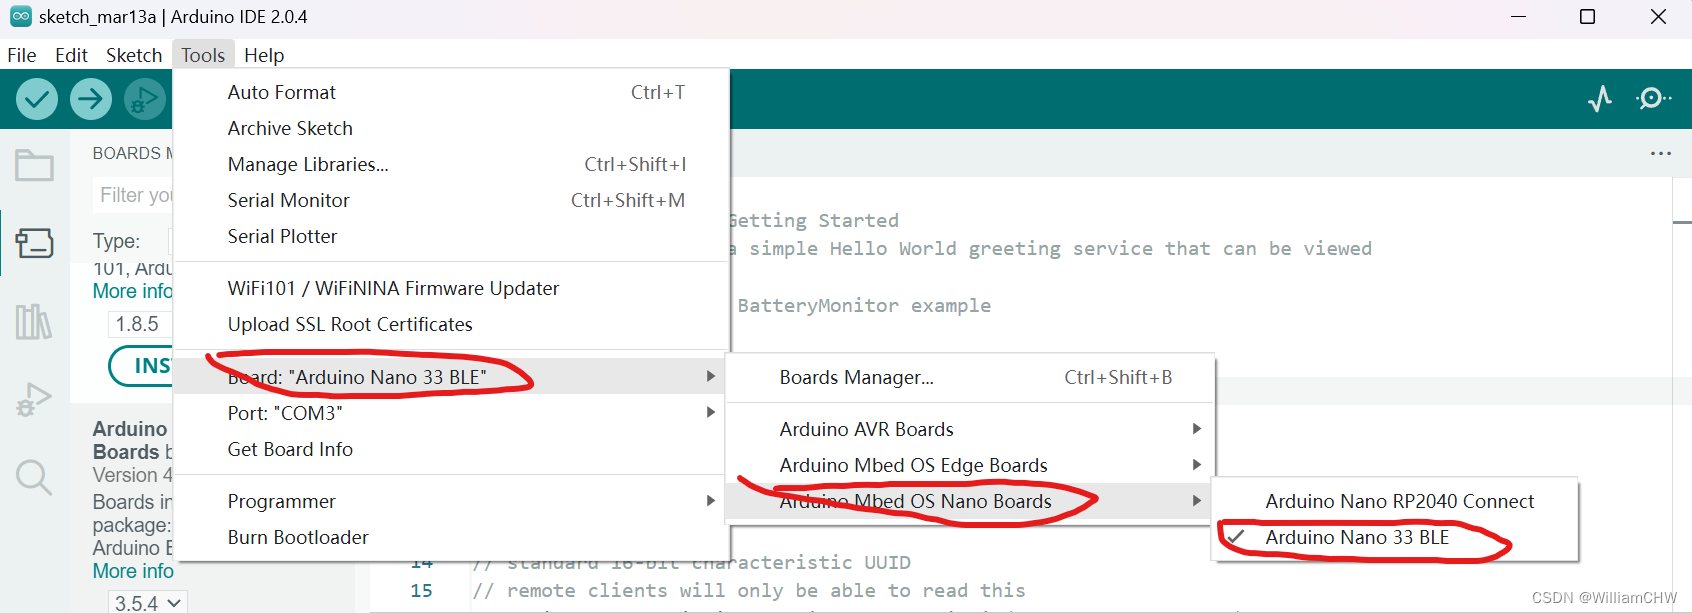
b. 选择开发板
Tools>Board 里面选择 正常一般情况下 只有Arduino AVR Boards 里面的选择。但是有些情况下,有些情况下,这样选择会造成编译后软硬件不匹配。比如我的板子是 Arduino nano 33 ble sense rev2,开始我以为选择Arduino Nano,就行了,但是后来编译时候才发现出错,具体情况一会儿再说。
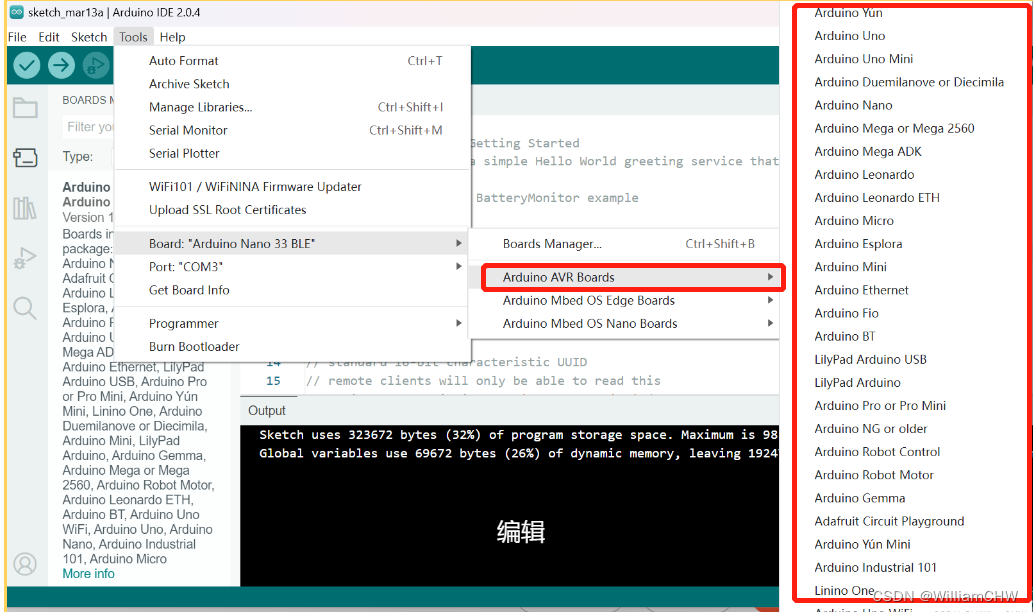
所以这个时候,我们需要自己下载,具体方法如下:
选择Tools > Boards Manager
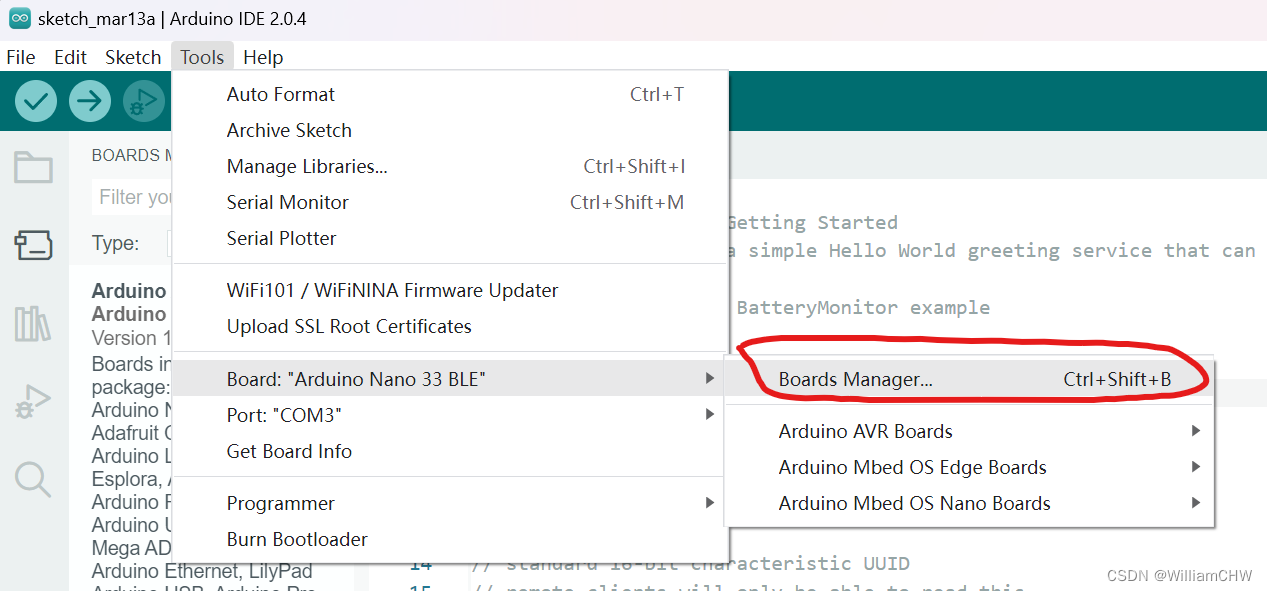
在输入需要的板子,比如我的 Arduino nano 33 ble sense rev2 需要的开发板是 Arduino Nano BLE 33

下载成功后,可以选择得出需要的开发板。
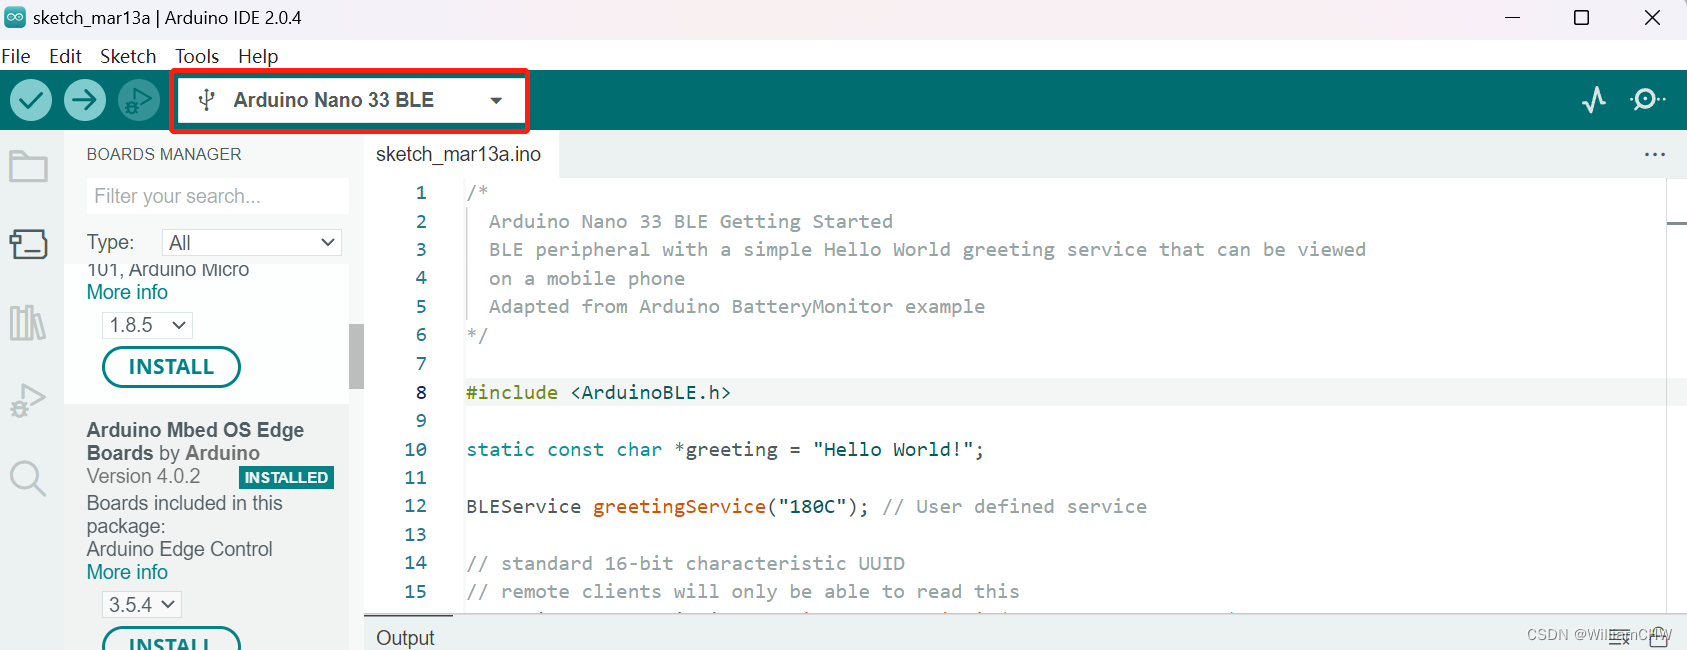
选择成功后,在IDE界面会出现 Arduino Nano 33 BLE
c. 选择端口:
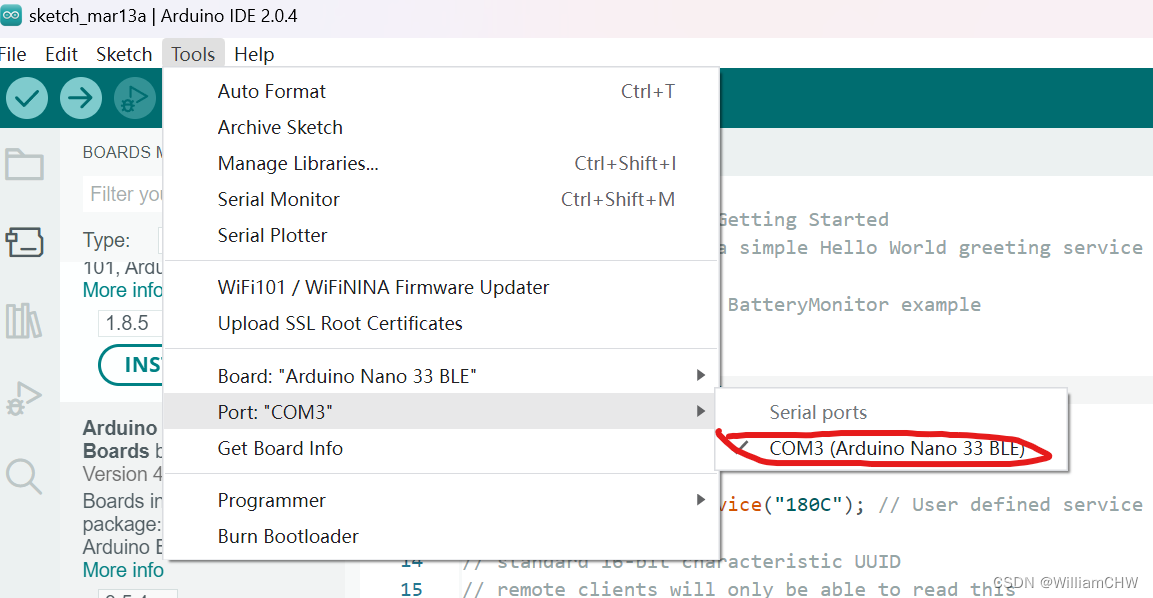
这里不用在乎COM3 还是其他的 只要板子型号对就可以。
注:这里面如果Port 那个位置是灰色选不了,可能有以下几个原因
(1)就是驱动没有装好,这样就是把IDE删了,重新装,就可以了
(2)数据线的问题,我开始就是随便找了一根安卓的线,后来发现这个线只是充电线,不是数据线,所以重新上网买了一根数据线,这个买的时候一定问一下。
(3)板子有问题,这里就要联系买板子的商家具体询问了。
如果一切设置好,从界面中应该可以看到
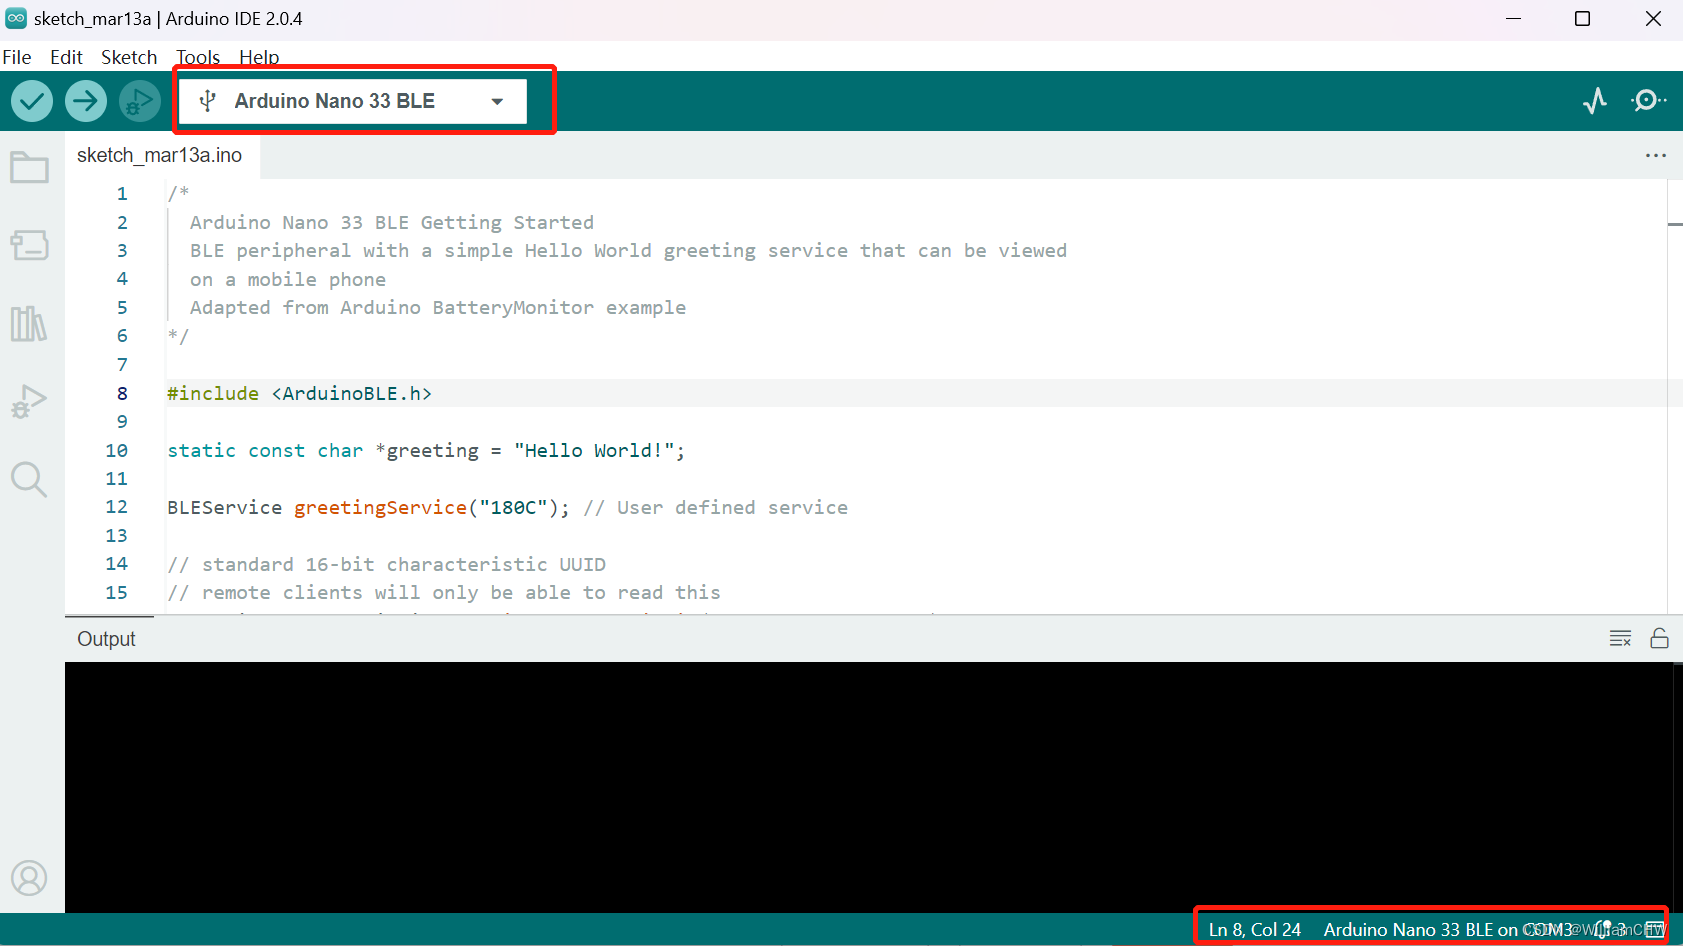
2. 编译一个Hello World
这里面就一个重点如何下载library ,
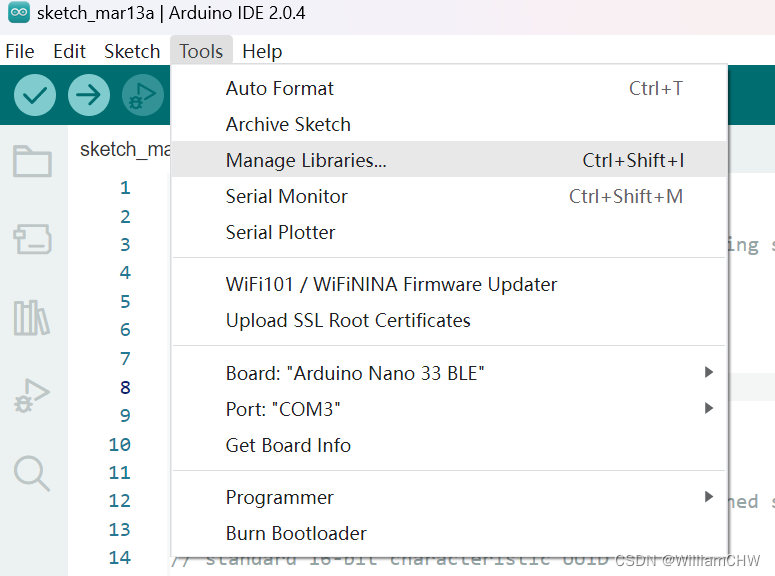
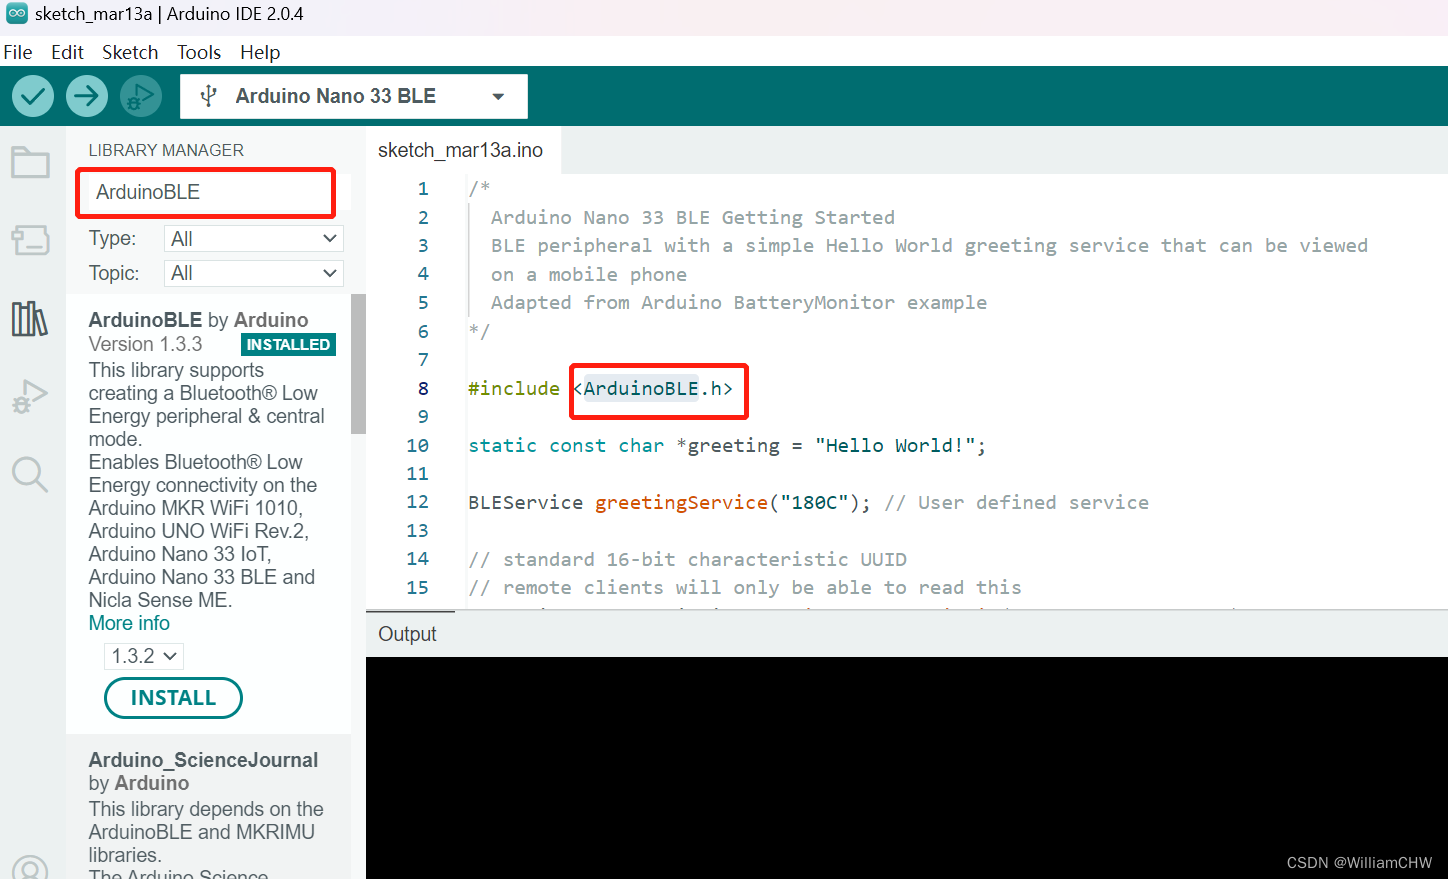
这里需要说一个问题就是编译失败,
WARNING: library ArduinoBLE claims to run on samd, megaavr, mbed, apollo3, mbed_nano, mbed_portenta, mbed_nicla, esp32, mbed_giga architecture(s) and may be incompatible with your current board which runs on avr architecture(s).
d:\ArduinoProject\libraries\ArduinoBLE\src\utility\HCIUartTransport.cpp:33:2: error: #error "Unsupported board selected!"
#error "Unsupported board selected!"
^~~~~
d:\ArduinoProject\libraries\ArduinoBLE\src\utility\HCIUartTransport.cpp:99:40: error: 'SerialHCI' was not declared in this scope
HCIUartTransportClass HCIUartTransport(SerialHCI, 912600);
^~~~~~~~~
d:\ArduinoProject\libraries\ArduinoBLE\src\utility\HCIUartTransport.cpp:99:40: note: suggested alternative: 'Serial'
HCIUartTransportClass HCIUartTransport(SerialHCI, 912600);
^~~~~~~~~
Serial
exit status 1
Compilation error: exit status 1

这里其实是因为板子选择不对 比如我这里选择的是 Arduino Nano不是 Arduino Nano BLE 33
所以报错了。 如下图所示:

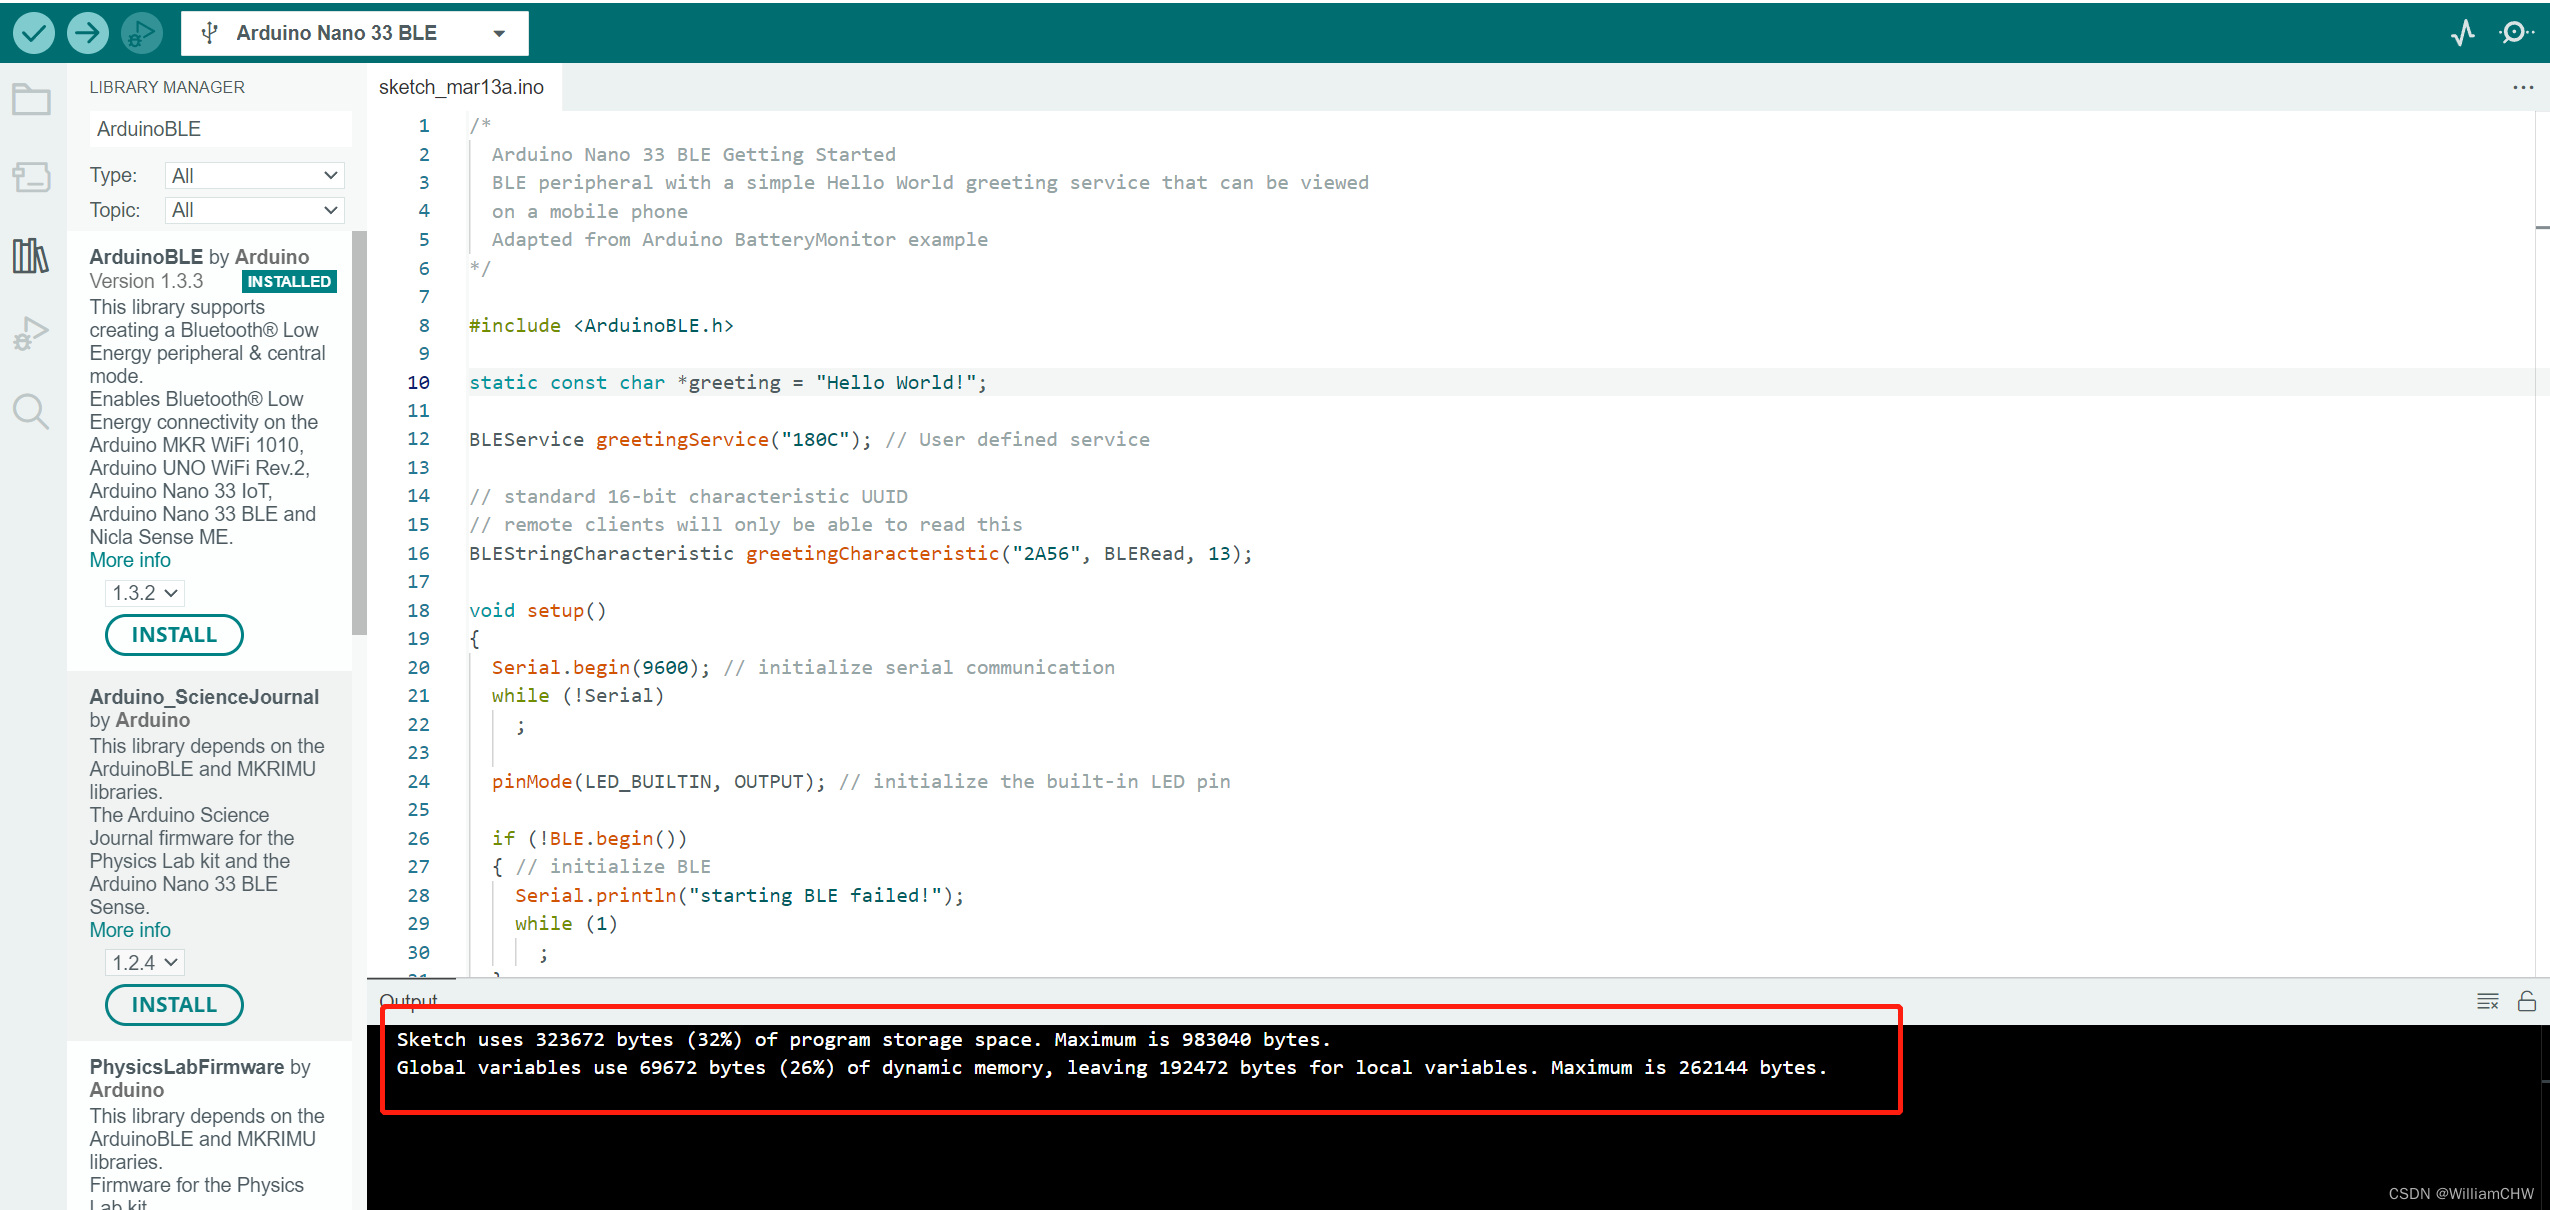
当我把Arduino Nano改为 Arduino Nano BLE 33 时,编译就可以通过了

编译就是那个对勾。
编译通过显示如下:
Hello World 的代码如下
/*Arduino Nano 33 BLE Getting StartedBLE peripheral with a simple Hello World greeting service that can be viewedon a mobile phoneAdapted from Arduino BatteryMonitor example
*/#include static const char *greeting = "Hello World!";BLEService greetingService("180C"); // User defined service// standard 16-bit characteristic UUID
// remote clients will only be able to read this
BLEStringCharacteristic greetingCharacteristic("2A56", BLERead, 13);void setup()
{Serial.begin(9600); // initialize serial communicationwhile (!Serial);pinMode(LED_BUILTIN, OUTPUT); // initialize the built-in LED pinif (!BLE.begin()){ // initialize BLESerial.println("starting BLE failed!");while (1);}BLE.setLocalName("Nano33BLE");                             // Set name for connectionBLE.setAdvertisedService(greetingService);                 // Advertise servicegreetingService.addCharacteristic(greetingCharacteristic); // Add characteristic to serviceBLE.addService(greetingService);                           // Add servicegreetingCharacteristic.setValue(greeting);                 // Set greeting stringBLE.advertise(); // Start advertisingSerial.print("Peripheral device MAC: ");Serial.println(BLE.address());Serial.println("Waiting for connections...");
}void loop()
{BLEDevice central = BLE.central(); // Wait for a BLE central to connect// if a central is connected to the peripheral:if (central){Serial.print("Connected to central MAC: ");// print the central's BT address:Serial.println(central.address());// turn on the LED to indicate the connection:digitalWrite(LED_BUILTIN, HIGH);while (central.connected()){} // keep looping while connected// when the central disconnects, turn off the LED:digitalWrite(LED_BUILTIN, LOW);Serial.print("Disconnected from central MAC: ");Serial.println(central.address());}
}
